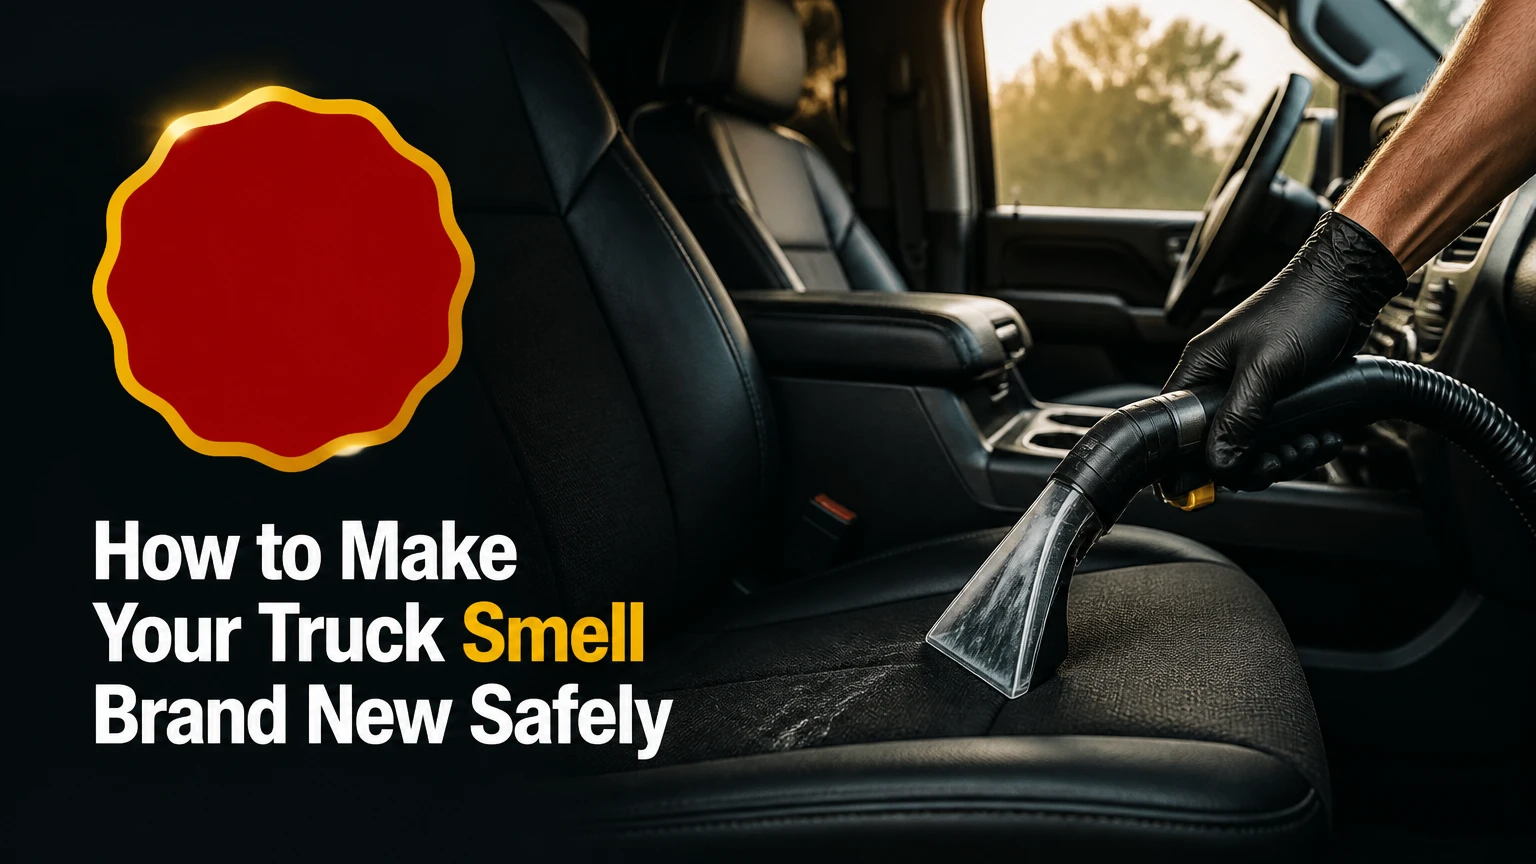
To make your truck smell brand new, remove the odor source, clean and fully dry every absorbent surface, refresh the HVAC intake, replace the cabin filter, and add a restrained new-car fragrance. A clean, neutral interior creates a more convincing factory-fresh result than spraying perfume over dirt, mildew, smoke, or spilled drinks.
Key Facts
A new-truck smell comes mainly from material off-gassing, including plastics, polyurethane foam, adhesives, carpet, and synthetic leather.
The most reliable DIY sequence is vacuuming, surface cleaning, fabric extraction, HVAC maintenance, complete drying, and light fragrance application.
Typical DIY cost is $25-$90, excluding an extractor, and the process takes 2-5 hours plus 8-24 hours of drying.
Ozone and chlorine dioxide are not routine interior fresheners; they can irritate lungs and damage rubber, wiring insulation, foam, and trim.
A damp smell that appears when the A/C starts usually requires HVAC or water-leak diagnosis, not another air freshener.
New-car fragrance typically lasts 3 days to 6 weeks, depending on the product, temperature, ventilation, and cabin size.
What Creates a New-Truck Smell?
A new-truck smell is a temporary blend of volatile organic compounds released by fresh interior materials, plus the absence of accumulated biological and environmental odors. Polyurethane seat foam, vinyl, plastics, carpet backing, adhesives, coatings, and synthetic leather can all contribute, although the exact mixture varies by manufacturer, trim package, temperature, and vehicle age.
The smell changes quickly because heat accelerates off-gassing. A truck parked in direct sun can smell stronger than the same truck in a cool garage, but stronger does not mean better or healthier. The U.S. Environmental Protection Agency identifies vehicle interiors as potential VOC exposure environments and recommends ventilation when odors or emissions are a concern.
The practical goal is not to recreate an identical chemical fingerprint. A used truck cannot reliably reproduce the precise material blend of a new factory cabin. The realistic target is a dry, residue-free, low-odor interior with a mild synthetic “new car” note.
Why does a used truck lose its factory scent?
A used truck loses its factory scent as VOC emissions decline and competing odors accumulate. Body oils, food, mud, diesel residue, cigarette smoke, pet dander, wet clothing, and dust lodge in fabric, carpet backing, seat foam, door pockets, and HVAC components.
Leather and vinyl can hold odors through their grain coating and stitching, while cloth absorbs liquid more deeply. Pickup trucks also collect unusual contaminants, including hydraulic oil, fertilizer dust, sawdust, concrete powder, hunting gear odors, and damp work boots. Identifying the dominant source prevents an expensive fragrance cycle that never solves the problem.
What Do You Need Before Starting?
The minimum kit for a truck interior includes a shop vacuum, five to eight microfiber towels, a soft interior brush, a pH-neutral cleaner, an upholstery cleaner, a stiff carpet brush, nitrile gloves, and a replacement cabin air filter when the old filter is dirty. An extractor is useful for cloth, but excessive water creates new odors if drying is poor.
| Item | Typical quantity or specification | Typical cost | Primary use |
|---|---|---|---|
| Shop vacuum | 5-12 gallon wet/dry model | $0 if owned, $35-$120 to buy | Debris and dry soil removal |
| Microfiber towels | 5-8 towels, 300-500 GSM | $8-$20 per pack | Dash, doors, console, trim |
| Interior cleaner | 16-24 fluid ounces, pH-neutral | $8-$18 | Plastic, vinyl, coated surfaces |
| Upholstery cleaner | 16-32 fluid ounces, fabric-safe | $8-$20 | Cloth seats and carpet |
| Drill brush or hand brush | Soft-to-medium nylon bristles | $8-$25 | Carpet agitation |
| Cabin air filter | Vehicle-specific paper or activated-carbon type | $12-$35 | HVAC dust and odor reduction |
| Extractor rental | 1 day, automotive or upholstery nozzle | $25-$60 | Embedded liquid and soil removal |
Before cleaning, move the truck outdoors or into a ventilated garage, remove child seats and tools, and check the owner’s manual for air-filter access and upholstery restrictions. Test every cleaner on a hidden area for five minutes, then inspect for dye transfer, whitening, swelling, or gloss change.
How to Make Your Truck Smell Brand New
The complete process has four cleaning stages and one fragrance stage. Allocate 90 minutes for a light refresh, 2-5 active hours for a contaminated interior, and 8-24 additional hours when fabric or carpet extraction is necessary; source removal determines success more than the fragrance brand.
Step 1: Remove debris and vacuum the entire cabin
Remove trash, floor mats, tools, seat covers, food containers, and loose cargo before applying any liquid. Vacuum the dashboard seams, center-console gaps, door pockets, seat rails, seat-belt anchors, carpet edges, under-seat storage, rear-seat folds, and the area beneath the rear bench.
Use the vacuum crevice tool around seat stitching and a soft brush on vents and instrument bezels. Do not force grit deeper into perforated leather or spray liquid into switches, speakers, USB ports, or gauge clusters.
You’ll know it worked when: the vacuum collects no visible dust from a second pass over the driver’s seat, floor edges, and console.
Common mistake: cleaning the visible dashboard first while leaving odor-holding debris under the seats. Remove the hidden material before wiping surfaces.
Step 2: Clean hard surfaces without adding residue
Spray a small amount of interior cleaner onto a microfiber towel, not directly onto the dashboard or electronics. Wipe the steering wheel, shifter, door pulls, armrests, console lid, dashboard, cup holders, and seat-side plastics, then buff each area with a dry towel.
Use a separate towel for greasy surfaces. A slightly damp towel is usually safer than a glossy protectant because silicone-heavy dressings can create a strong artificial smell, slippery steering-wheel surfaces, and dust-attracting residue.
For coated leather, use a leather-safe cleaner and a water-based conditioner only if the manufacturer permits it. Never use household degreaser, acetone, bleach, or undiluted alcohol on leather, vinyl, touchscreen coatings, or soft-touch trim.
You’ll know it worked when: the steering wheel feels clean rather than oily, and the dash has a uniform matte finish without streaks.
Common mistake: saturating vents and switch panels. Moisture can migrate behind controls and produce electrical faults or trapped odors.
Step 3: Extract cloth seats and carpet, or clean leather correctly
For cloth seats, pre-vacuum, apply a fabric cleaner according to its label, agitate lightly with a soft brush, and extract with the minimum water needed to lift the soil. Work in sections of approximately 2 square feet so the solution does not dry unevenly.
A typical light-cleaning mix uses 2-4 ounces of ready-to-use upholstery solution per seat section, but concentrated products vary. Follow the label rather than copying a universal dilution. Make two slow extraction passes, followed by one dry pass, and avoid soaking seat cushions.
For carpet, remove the mats and clean them outside the truck. Spend extra time on the driver’s heel pad, rear footwell, under-seat edges, and the carpet directly below cup holders. Enzyme products can help with food, milk, urine, and other biological residue, but they do not remove diesel, petroleum, or solvent contamination.
For leather, vacuum seams, wipe with a leather-safe cleaner, and dry immediately. Do not steam perforated leather or inject liquid into seat cushions unless a professional knows the airbag, heating element, and ventilation layout.
You’ll know it worked when: the fabric feels cool but not wet after one hour, produces no sour smell when warmed, and shows no dark moisture line at the seat edge.
Common mistake: closing the truck while upholstery is damp. Use open doors or windows, a fan, and airflow beneath mats until the cabin and foam are completely dry.
Step 4: Replace the cabin filter and inspect HVAC odor sources
Replace the cabin air filter if it is visibly gray, clogged, damp, contaminated by leaves, or older than the interval specified in the owner’s manual. A vehicle-specific activated-carbon filter can reduce some gaseous odors, while a standard particulate filter may provide better airflow depending on its design and condition.
Inspect the cowl intake for leaves, standing water, rodent nesting, and decomposing material. Run the blower after cleaning with the windows open, then check whether the smell appears only when the A/C, heat, or recirculation mode operates.
A musty odor that returns within seconds of switching on the A/C often points toward the evaporator case, drain system, wet cabin filter, or microbial growth on damp surfaces. HVAC foam cleaners can be useful when the product is designed for the vehicle and applied through the specified access point, but blindly spraying into cowl vents can damage components or fail to reach the evaporator.
You’ll know it worked when: the airflow smells neutral in fresh-air and recirculation modes, and no damp odor returns after a 10-minute A/C test.
Common mistake: assuming a charcoal filter repairs an HVAC leak or mold source. Filtration reduces incoming odor; it does not dry the evaporator case or remove contaminated foam.
Step 5: Add a restrained factory-fresh fragrance
Wait until the cabin is dry and neutral before adding scent. Apply one or two light sprays of a water-based interior fragrance to a removable floor mat or an inconspicuous fabric test area, or use a vent clip at its lowest setting.
Place a passive gel or fragrance card under a seat only if it cannot slide beneath pedals, interfere with wiring, contact heated surfaces, or spill. Avoid concentrated essential oils on leather, plastic, seat foam, and carpet because oily carriers can stain, soften coatings, or leave a permanent residue.
A truck cabin usually needs less product than expected. Start below the label’s maximum recommendation, close the doors for 30-60 minutes, and reassess outdoors before adding more.
You’ll know it worked when: the cabin smells clean at low intensity after sitting closed for 30 minutes, without causing eye, throat, or headache irritation.
Common mistake: using a fogger, oil, spray, and vent clip together. Multiple overlapping fragrances produce a solvent-heavy smell and make the original odor harder to diagnose.
Which Truck Scent Product Should You Choose?
The best product format depends on whether you want immediate coverage, low residue, long duration, or precise control. A light water-based spray is the safest starting point after cleaning, while passive vent or under-seat products provide longer fragrance with less labor.
| Product format | Typical reach | Typical duration | Typical cost | Main limitation |
|---|---|---|---|---|
| Water-based spray | Mat and nearby fabric | 2-7 days | $8-$20 | Requires careful reapplication |
| Vent clip | Air stream and front cabin | 2-6 weeks | $4-$12 | Can become overpowering in heat |
| Under-seat gel or card | Whole cabin, gradual diffusion | 2-8 weeks | $5-$18 | Less adjustable after placement |
| Whole-cabin fogger | Cabin and HVAC airflow | 1-4 weeks | $8-$18 | High initial intensity and residue risk |
| Concentrated oil | Small targeted area | 3-8 weeks | $10-$25 | Staining and coating damage |
| Professional odor treatment | Source-specific, variable | 1-12 months | $100-$400 | Cost and uncertain results without repairs |
Product claims such as “destroys odors permanently” should be treated cautiously. A fogger can distribute fragrance and deodorizing chemicals, but it cannot permanently remove a leaking heater core, wet carpet pad, mold-contaminated evaporator case, or smoke-soaked headliner.
Is a fogger better than a spray?
A fogger reaches more cabin surfaces quickly, while a spray gives better control and creates less risk of overloading a small truck interior. Choose a fogger only when the truck is empty, the label explicitly permits vehicle use, and the treatment area can be ventilated afterward.
Follow the product instructions exactly. Do not combine products, place a total-release canister near heat, or leave people and animals inside the vehicle during treatment. A fogger is a finishing tool, not a substitute for extraction.
Should you use a concentrated oil?
Concentrated oil is a poor first choice for most truck interiors because a small spill can stain carpet, soften vinyl, or permanently perfume seat foam. Use a purpose-made passive product with a sealed reservoir instead of placing raw oil drops beneath a seat.
Are Ozone Generators Safe for a Truck Interior?
Ozone generators are not a routine DIY substitute for cleaning, and no person, pet, or plant should be inside a vehicle while ozone is being produced. The U.S. Environmental Protection Agency and California Air Resources Board warn that ozone can irritate the respiratory system, react with indoor chemicals, and damage rubber, fabrics, and other materials at elevated concentrations.
The supplied recommendation to run the engine with the A/C on while an ozone generator or chlorine dioxide product operates is unsafe. Never run an engine in an enclosed garage, and do not improvise chemical gas treatments inside a passenger cabin. Ozone also cannot prove that embedded smoke residue, mold, or biological contamination has been removed.
Professional detailers may use controlled ozone treatment after source removal, with calibrated equipment, an unoccupied vehicle, ventilation, and a post-treatment inspection. For a home user, extraction, filter replacement, leak repair, and controlled fragrance are the lower-risk sequence.
Why Does the New Smell Keep Disappearing?
A returning odor means the source remains active or the fragrance is evaporating faster than expected. Heat, humidity, wet carpet padding, seat foam, HVAC residue, and porous headliners can release odor again even after the visible surface appears clean.
| Returning smell pattern | Most likely source | First diagnostic | Corrective action |
|---|---|---|---|
| Sour smell after hot parking | Sweat, food, or seat foam | Warm the cabin, then inspect seat seams | Enzyme treatment and controlled extraction |
| Musty smell when A/C starts | Evaporator case or wet filter | Compare A/C, heat, fresh-air modes | Replace filter and inspect HVAC drain |
| Cigarette smell in headliner | Smoke particles and tar residue | Smell roof, visor, and belt fabric | Clean headliner carefully; professional treatment may be needed |
| Sweet chemical smell | Coolant leak or fresh adhesive | Check coolant level and damp carpet | Stop fragrance use and inspect for mechanical leak |
| Diesel or solvent odor | Cargo contamination or seal failure | Inspect rear cab and tool storage | Remove contaminated items and repair seals |
| Wet-dog or pet odor | Hair, dander, and cushion contamination | Inspect under seat and rear footwell | Vacuum, enzyme-clean, extract, and dry |
A sweet smell with fogging windows or unexplained coolant loss is a mechanical warning, not a detailing problem. A persistent damp smell after rain suggests door, windshield, rear-window, sunroof, or cab-seal leakage; repair the water path before cleaning again.
How do you remove smoke odor?
Smoke odor requires cleaning the headliner, glass, plastics, upholstery, carpet, seat belts, and HVAC intake because smoke residue spreads beyond the seats. Use minimal moisture on the headliner to avoid adhesive failure, and replace a contaminated cabin filter after the surfaces are cleaned.
Activated carbon can reduce residual odor, but it does not remove tar deposited on trim. Severe smoke exposure often needs professional upholstery extraction and multiple controlled treatments.
What Does the Process Cost and How Long Does It Take?
A light refresh typically costs $25-$60 and takes 60-90 minutes. A contaminated cloth interior usually costs $60-$150 in supplies or rental equipment and requires 2-5 active hours plus 8-24 hours of drying; professional odor remediation commonly costs $100-$400, depending on vehicle size and source.
| Project level | Active time | Drying time | Typical DIY cost | Suitable condition |
|---|---|---|---|---|
| Quick refresh | 45-90 minutes | 0-2 hours | $10-$35 | Dust, light food, fading fragrance |
| Standard reset | 2-3 hours | 8-12 hours | $35-$90 | Sweat, dirt, mild pet odor |
| Deep extraction | 3-5 hours | 12-24 hours | $60-$150 | Spills, work-truck grime, heavy fabric soil |
| Professional remediation | 1-2 visits | 12-48 hours | $100-$400 | Smoke, mold suspicion, severe contamination |
Do not rush drying to meet a same-day deadline. A truck that smells fresh at 4 p.m. but remains damp under the rear carpet can develop a stronger odor within several days.
Which Method Fits Your Situation?
Different truck uses create different odor loads, so the maintenance plan should match the source rather than the fragrance preference.
For a construction or farm truck
Vacuum after each dirty shift, remove wet boots and gloves, clean floor mats weekly, and extract cloth seats every 1-3 months. Use a sealed passive fragrance only after the cabin is dry, because sawdust, soil, diesel residue, and damp clothing overwhelm light sprays.
For a daily commuter
Wipe high-contact surfaces every two weeks, empty food containers daily, inspect the cabin filter at each oil change, and use a low-output vent product if desired. A charcoal filter is useful when outside traffic, exhaust, or mild food smells enter through the HVAC system.
For a used-truck seller
Remove personal items, repair water leaks, clean the cabin neutrally, and avoid an intense fragrance immediately before showing the truck. Buyers often interpret heavy perfume as an attempt to hide smoke, mildew, or mechanical leaks.
For leather seats
Use a leather-safe cleaner, soft brush, and dry towel. Avoid saturation, household disinfectants, raw oils, steam around perforations, and fragrance sprayed directly onto the seat surface.
For cloth seats and carpets
Use measured fabric cleaner, low-moisture agitation, extraction, and forced airflow. The drying checkpoint matters more than the amount of fragrance applied.
Common Mistakes and How to Fix Them
- Masking before cleaning: Remove the source, extract fabric, and allow drying before adding scent. If the smell becomes “perfumed garbage,” stop adding fragrance and repeat the contaminated area.
- Overwetting seat foam: Extract excess water, lift mats, open doors, and run fans. If the cushion remains damp after 24 hours, professional drying or cushion removal may be necessary.
- Using household cleaners: Rinse residue where the material allows, then use a vehicle-safe product. Bleach and ammonia can damage surfaces and create irritating vapors.
- Ignoring the headliner: Clean with a barely damp microfiber towel and small sections. Saturation can loosen the headliner adhesive.
- Replacing only the filter: Diagnose leaks, wet carpet, evaporator odor, and cargo contamination. A fresh filter cannot cure a source inside the cabin.
- Overloading the fragrance: Remove one product, ventilate for an hour, and reintroduce a single low-output scent after the cabin becomes neutral.
How Do You Keep a Truck Smelling New?
Maintain a factory-fresh cabin by preventing odor accumulation rather than repeatedly fogging it. Remove food and wet gear the same day, vacuum weekly, wipe steering-wheel and door-pull surfaces every 2-4 weeks, inspect mats after rain, and replace the cabin filter at the vehicle manufacturer’s interval.
After using the A/C, run the fan on fresh-air mode for several minutes before parking when the owner’s manual and climate system permit it. This can reduce retained moisture, but it does not replace a proper drain inspection when a musty smell persists.
Use one fragrance format at a time and keep the output low. The best result is a clean cabin that smells faintly fresh, not a sealed cabin saturated with chemicals.
FAQ
Can I make an old truck smell exactly like a new truck?
You can create a similar impression, but an old truck will not reproduce the exact VOC mixture of a new vehicle. Material emissions decline with age, while absorbed smoke, sweat, and cargo odors remain. Deep cleaning, complete drying, HVAC maintenance, and a mild new-car fragrance provide the closest practical result.
Is baking soda safe for truck carpets?
Baking soda is generally compatible with many dry carpet surfaces, but it is not a complete odor treatment. Use a thin layer for several hours, vacuum thoroughly, and avoid leaving powder in seat tracks, vents, switches, or carpet seams. Baking soda cannot remove oil, smoke tar, or contamination inside foam.
Can I spray new-car scent directly on leather seats?
Do not spray fragrance directly on leather unless the product label specifically approves leather application. Apply a compatible product to a removable mat or use a sealed passive diffuser instead, because solvent or oil carriers can stain the finish, alter gloss, and leave a concentrated odor in the seat coating.
How often should I replace a truck cabin air filter?
Follow the truck manufacturer’s interval, commonly 12,000-30,000 miles or once every 12-24 months, with shorter intervals for dusty roads, construction use, wildfire smoke, or heavy traffic. Replace the filter sooner if it is damp, visibly dirty, pest-contaminated, or causing reduced airflow.
Why does my truck smell worse after cleaning?
A worse smell after cleaning usually means fabric remains damp, contamination was agitated without extraction, or the cleaner left residue. Increase airflow, remove mats, inspect beneath the carpet, and wait until the interior is fully dry. If the odor is sweet, fuel-like, or moldy, investigate mechanical and water sources.
Can an air freshener remove cigarette smoke?
An air freshener can cover cigarette smoke briefly, but it cannot remove smoke residue from the headliner, glass, plastics, carpet, HVAC system, and seat foam. Clean those surfaces, replace the cabin filter, ventilate the truck, and seek professional remediation when the smoke odor remains strong after two cleaning cycles.
The Bottom Line
To make your truck smell brand new, establish a neutral baseline first: remove debris, vacuum hidden areas, clean hard surfaces, extract or carefully clean upholstery, replace the cabin filter, and diagnose HVAC or water-leak odors. Dry the cabin completely, then use one restrained fragrance product.
The safest and most convincing result comes from source removal, not chemical saturation. Ozone and chlorine dioxide are specialist treatments with meaningful safety and material risks, while a clean, dry interior plus a low-output new-car scent can restore the factory-fresh impression without hiding a deeper problem.


