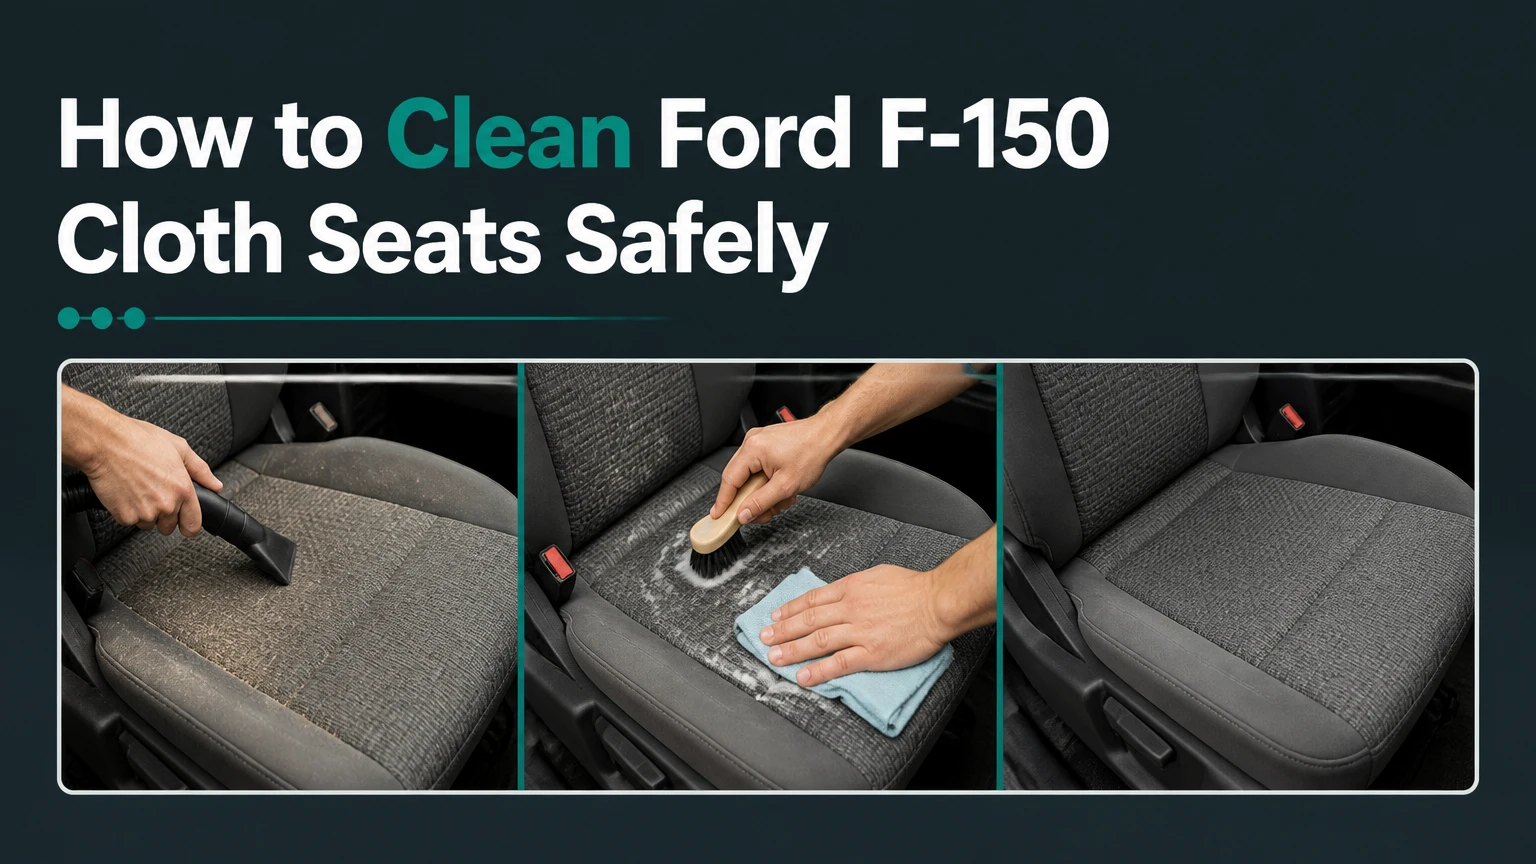
To clean Ford F-150 cloth seats, vacuum the dry fabric thoroughly, apply a small amount of automotive upholstery cleaner, gently agitate one section at a time, extract the dirty moisture, and dry the cushions completely. The safest method takes about 60-120 minutes of work plus 4-8 hours of drying, with low moisture controlling the result.
Key facts at a glance
Ford F-150 cloth upholstery is generally a woven synthetic fabric, while ActiveX is a vinyl seating material and requires vinyl care products.
A typical DIY clean costs $15-$45 when you already own a vacuum and microfiber towels.
Vacuuming before liquid cleaner prevents dry soil from becoming abrasive mud inside the weave.
Use a lightly dampened cloth or controlled extractor pass, not a saturated cushion.
Test every cleaner on a hidden area for color transfer, texture change, and ring formation.
A seat is ready for use when the surface and seams feel dry and no cool dampness remains after pressing a towel against the cushion.
Before You Start
A basic Ford F-150 cloth-seat cleaning session requires 60-120 minutes of active work, $15-$45 in supplies, and 4-8 hours of drying in typical indoor or shaded conditions. The difficulty is low to moderate; the main risk is forcing water and detergent into the foam beneath the fabric.
Park under cover or in bright shade, remove personal items, and open the doors before cleaning. Avoid cleaning a cold, wet interior because slow evaporation increases odor and mildew risk.
Tools and materials
| Item | Typical quantity | Purpose | Typical US cost |
|---|---|---|---|
| Interior vacuum with crevice tool | 1 unit | Remove crumbs, dust, hair | $0 if owned, $50-$150 new |
| Automotive fabric cleaner | 8-16 fl oz | Loosen oily and particulate soil | $8-$18 |
| Soft or medium nylon brush | 1 brush | Lift soil from the weave | $6-$12 |
| White microfiber towels | 6-10 towels | Blot, rinse, and extract residue | $8-$15 |
| Portable fan | 1 unit | Increase cabin airflow | $20-$50 |
| Nitrile gloves | 1 pair | Protect hands from cleaner | $5-$10 per box |
| Fabric protectant | 8-16 fl oz | Reduce future liquid absorption | $10-$20 |
Use white towels because dyed towels can transfer color when damp. A shop vacuum can remove some moisture, but a wet-dry vacuum with an upholstery nozzle works more effectively than a household vacuum that is not rated for liquids.
Identify the seating material first
Ford F-150 cabins may contain cloth, vinyl, leather, or combinations of these materials depending on model year and trim. ActiveX is Ford’s synthetic vinyl upholstery, not woven cloth, so do not treat ActiveX with a cloth extraction routine or a fabric protectant intended for absorbent fibers.
Check the owner’s manual or window-sticker trim description if the material is unclear. Heated seats, power-seat controls, seat-mounted wiring, and occupancy sensors also justify a conservative moisture approach. Do not remove a seat or disturb electrical connectors for ordinary surface cleaning.
How to Clean Ford F-150 Cloth Seats
The complete process has six steps: remove dry soil, inspect and test, pretreat, agitate, extract residue, and dry. A controlled sequence prevents the most common failure, which is turning loose grit into wet sludge and pushing it into the cushion.
Work on one seat section at a time. Divide a seat into the backrest, front edge, center cushion, outer bolster, and seams so the cleaner never dries before you remove it.
Step 1: Remove loose dirt and debris
Vacuum every cloth surface before applying moisture. Use the crevice tool along the seat-back gap, stitching, belt receptacle area, seat rails, and the transition between the cushion and plastic trim, then use a brush attachment across the fabric.
Spend about 3-5 minutes per heavily soiled seat and 1-2 minutes on a lightly dirty seat. The five-minute figure in many cleaning guides is a useful target for work-truck grime, not a mandatory specification for every F-150.
You will know it worked when the vacuum collects little additional dust after two slow passes and no visible grit remains in the seams.
Common mistake: Spraying first because the seat looks dusty. Wet soil can form a paste that is harder to remove and may spread into clean fabric.
Step 2: Inspect stains and test the cleaner
Identify each stain before treating the whole cushion. Blot liquid spills with a dry white towel, scrape dried mud with a plastic card, and remove solid food residue with a vacuum or soft brush.
Apply one teaspoon of the selected upholstery cleaner to a hidden fabric area, such as the lower rear edge of the seat. Wait 5-10 minutes, blot it dry, and inspect for dye transfer, lightening, roughness, or a visible ring.
Ford owner-manual guidance varies by model year and upholstery package, so the product label and the manual for the specific truck take priority over a generic recipe. Do not assume that a cleaner safe for carpet, ActiveX vinyl, or leather is safe for every F-150 fabric.
You will know it worked when the test patch has the same color and texture as the surrounding material after drying.
Common mistake: Testing only for color and ignoring texture. A harsh alkaline product may leave the color unchanged while making the fabric stiff or chalky.
Step 3: Apply a small amount of fabric cleaner
Spray the cleaner onto a microfiber towel or brush for small stains, and apply a light mist directly to a larger section only when the label permits it. A practical starting quantity is 2-4 sprays for a 12-by-12-inch section, followed by more product only if the fabric remains visibly dry and soil does not release.
Allow 2-5 minutes of dwell time, unless the manufacturer specifies another period. Dwell time lets surfactants loosen oily soil before mechanical agitation; allowing a product to dry on the fabric creates residue and can produce a tide mark.
Avoid household glass cleaner, bleach, ammonia, undiluted degreaser, and laundry detergent. These products can leave residues, alter dye, or damage adjacent plastic and vinyl.
You will know it worked when the fabric feels evenly damp rather than wet, and the cleaner begins lifting gray or brown soil without running into the cushion.
Common mistake: Applying enough foam to make the seat look white. Foam volume does not measure cleaning power, and excess detergent increases rinsing and drying problems.
Step 4: Agitate the fabric gently
Use a soft or medium-stiff nylon upholstery brush in short overlapping strokes. Brush with the weave and then across it lightly, using approximately 15-20 seconds of agitation per 12-by-12-inch section.
A circular motion can release soil, but aggressive circles can create a visible nap change or fuzzing on older fabric. Keep the brush away from seat-belt webbing, electrical controls, exposed stitching damage, and the gap around the seat-mounted airbag label.
The International Institute of Cleaning and Restoration Certification describes agitation as a way to distribute cleaning chemistry and release soil, not as a replacement for extraction. That distinction matters because scrubbing harder often moves contamination deeper instead of removing it.
You will know it worked when the fabric looks uniformly damp and the soil appears suspended at the surface rather than packed into the weave.
Common mistake: Using a drill brush or wire brush. High-speed or metal bristles can pill woven polyester and create a permanently lighter patch.
Step 5: Extract dirty moisture and detergent
Remove the loosened soil immediately with a wet-dry vacuum, extractor, or absorbent towel. With a towel-only method, press and lift repeatedly rather than rubbing; with an extractor, use a slow wet pass followed by 2-4 dry passes without spraying additional water.
Use clean, warm water for a light rinse when the cleaner label allows rinsing. Do not flood the cushion to chase a stain, because seat foam can retain moisture long after the surface appears dry.
For a shop vacuum without an extractor head, press a damp white towel over the treated section, then vacuum the lifted moisture through the towel or blot with dry towels. This method is slower and less thorough than a dedicated extractor, but it limits water better than pouring rinse water onto the seat.
You will know it worked when the towel picks up little color, the fabric no longer feels slippery, and a firmly pressed dry towel remains mostly dry.
Common mistake: Making only one extraction pass. Detergent left behind can attract new soil and form white or dark rings as the seat dries.
Step 6: Dry the seats completely
Open the doors or windows, position a fan to move air across the cushions, and leave the truck ventilated for 4-8 hours in typical moderate humidity. Thick foam, cold weather, high humidity, and heavy extraction can extend drying to 12-24 hours.
Press a dry towel into the seams and front edge after four hours. If the towel feels cool or shows moisture, continue drying. Do not sit on the cushion, install a tight seat cover, or park with the windows closed until the fabric and underlying foam are dry.
Ford seat electronics and heating elements make controlled drying preferable to high heat. Do not run a heater unattended inside the truck, and do not direct a heat gun at the upholstery.
You will know it worked when the seat matches the surrounding dry fabric in temperature, has no damp odor, and produces no moisture on a pressed towel.
Common mistake: Judging dryness by the surface alone. Upholstery foam can remain wet below a dry-looking fabric layer.
Which Cleaner and Tools Should You Use?
Automotive fabric cleaner plus a nylon brush is the best starting combination for ordinary dirt and isolated stains. A portable extractor becomes worthwhile for repeated mud, milk, pet accidents, or smoke odor, but excessive water can create a larger problem than the original stain.
| Method | Best use | Active work time | Drying risk | Typical cost |
|---|---|---|---|---|
| Towel and fabric cleaner | Fresh spills and light soil | 20-45 minutes | Low | $8-$20 |
| Foam upholstery cleaner | Surface grime and mild odor | 30-60 minutes | Low to medium | $10-$25 |
| Wet-dry vacuum | Moderate stains and rinse recovery | 45-90 minutes | Medium | $60-$180 if purchased |
| Portable extractor | Repeated deep contamination | 60-150 minutes | Medium to high | $100-$300, or $30-$70 rental |
| Professional upholstery service | Severe odor or multiple seats | 1-3 hours onsite | Medium | $100-$250 typical |
Foam cleaner is convenient because it limits moisture, but residue is more likely when the operator applies too much product. Extraction removes more dissolved contamination when used correctly, yet it requires disciplined dry passes and stronger airflow.
A household steam cleaner is not a default solution. Steam can soften adhesives, drive moisture into foam, affect seat wiring, and leave heat marks when the operator holds the nozzle too close.
Are vinegar and dish soap safe?
A dilute vinegar solution is not the preferred cleaner for Ford F-150 cloth seats, and dish soap is particularly easy to overuse. Vinegar may reduce some alkaline odors, but it does not reliably remove oily soil, while dish soap can leave a sticky surfactant film that attracts dust.
If no automotive product is available, use a small amount of mild, fragrance-free detergent diluted according to its label, test it first, and rinse by controlled blotting. Never mix vinegar with bleach, ammonia, or unknown cleaners.
How Do You Treat Specific Stains?
Fresh stains respond best to immediate blotting, while old stains usually require several controlled treatments rather than one aggressive chemical application. Always remove the contaminant type first, then choose chemistry that matches the stain.
| Stain or contamination | First action | Suitable treatment | Avoid |
|---|---|---|---|
| Coffee, soda, or juice | Blot from edge toward center | Fabric cleaner, then light water rinse | Rubbing outward |
| Grease or sunscreen | Lift excess with a dry towel | Automotive fabric degreaser used sparingly | Saturating the cushion |
| Mud | Let dry, then vacuum | Fabric cleaner after dry removal | Wet-scrubbing fresh mud |
| Ink | Blot immediately | Manufacturer-approved solvent tested first | Spreading with alcohol-soaked cloth |
| Milk or vomit | Remove solids and blot | Enzyme upholstery product, followed by extraction | Fragrance-only deodorizer |
| Pet urine | Blot and remove seat cover | Enzyme cleaner with controlled application | Masking odor with perfume |
| Road salt | Vacuum dry crystals | Light cleaner and distilled-water blot | Leaving dissolved salt behind |
For grease, place a small amount of product on a towel rather than spraying a broad area. Work from the outside of the mark toward the center, changing to a clean towel face as oil transfers.
Isopropyl alcohol can dissolve some inks and oily marks, but it is not universally safe for Ford upholstery. Use the lowest practical amount on a towel, never pour it onto the seat, and stop if color transfers during the hidden-area test. Citrus solvents can also damage adjacent vinyl and plastic.
What Changes for Heated, Power, or Older Seats?
Heated and power-operated Ford F-150 seats should be cleaned with less moisture and no disassembly. Keep liquid away from switches, harness paths, seat controls, belt receptacles, and the perimeter where side-airbag components may be located.
Older fabric can have weakened backing, loose stitching, or sun damage that becomes visible only after cleaning. Use less brushing on faded bolsters, and photograph pre-existing wear before starting if the truck is leased, being sold, or undergoing professional service.
Do not disconnect the battery or unplug yellow airbag connectors for routine upholstery cleaning. Seat removal introduces electrical and restraint-system risks that ordinary surface cleaning does not require.
What Are the Common Mistakes and Fixes?
The most damaging cleaning mistake is over-wetting the seat while trying to obtain a professional-looking result. Ford F-150 seat foam can retain moisture, and trapped water may produce musty odor, slow drying, or recurring rings.
| Problem | Likely cause | Recovery method | Expected time |
|---|---|---|---|
| White soap ring | Cleaner residue at the drying edge | Light distilled-water mist, blot, extract | 30-90 minutes |
| Dark water ring | Uneven wetting or soil wicking | Reclean the full panel edge-to-edge | 1-2 hours |
| Musty odor | Damp foam or organic contamination | Fan drying, enzyme treatment if appropriate | 12-48 hours |
| Stiff fabric | Dried detergent or harsh chemistry | Controlled rinse and extraction | 2-6 hours |
| Fuzzy or pilled patch | Excessive brush pressure | Stop brushing; trim only loose fuzz carefully | Permanent if fibers broke |
| Stain returns | Contamination migrated from foam | Repeat controlled extraction | 1-3 hours |
If the truck smells musty, stop adding cleaner. Run fans with the doors open, use a dehumidifier nearby, and allow the cushion to dry fully before deciding whether another treatment is needed.
Do not use a vehicle heater unattended to force drying. High cabin heat can dry the surface while leaving the foam wet and can create unnecessary stress for plastics, adhesives, and electronics.
How Much Time and Money Should You Expect?
A light clean of two front seats typically takes 45-75 minutes and costs $10-$25 in consumables. A full-cab cleaning with an extractor usually takes 2-4 active hours, costs $30-$70 for rental and supplies, and may require overnight drying.
| Cleaning scope | Active time | Drying time | Typical DIY cost |
|---|---|---|---|
| One fresh spill | 10-20 minutes | 1-3 hours | $2-$8 |
| Two front seats | 45-90 minutes | 4-8 hours | $10-$30 |
| Front and rear seats | 2-4 hours | 6-12 hours | $25-$70 |
| Severe odor treatment | 2-5 hours | 12-48 hours | $35-$100 |
| Professional interior service | 1-3 hours | 4-12 hours | $100-$250 |
Prices vary by region, product brand, and whether the truck has a SuperCrew rear bench. Professional cleaning becomes more economical when contamination affects every seat, the headliner, carpeting, and door panels rather than one cushion.
How Often Should You Clean F-150 Cloth Seats?
Most daily-driven Ford F-150 cloth seats benefit from vacuuming every 2-4 weeks, spot treatment immediately after spills, and a deeper clean every 6-12 months. Work trucks, vehicles carrying pets, and trucks exposed to muddy clothing may need deep cleaning every 3-6 months.
| Use pattern | Vacuum interval | Spot treatment | Deep-clean interval |
|---|---|---|---|
| Clean commuter | 2-4 weeks | Same day | 9-12 months |
| Family vehicle | 1-2 weeks | Immediately | 6-9 months |
| Work or off-road truck | Weekly | Immediately | 3-6 months |
| Pet-carrying truck | Weekly | Within 15 minutes | 3-6 months |
| Recently purchased used truck | Before regular use | As needed | One initial full clean |
Vacuuming is more valuable than frequent wet cleaning because embedded grit abrades fibers whenever occupants slide across the cushion. A fabric protectant can reduce absorption, but it does not make the seat stain-proof and must be applied only after the upholstery is clean and completely dry.
Which Method Fits Your Situation?
Choose towel cleaning for a fresh drink spill, foam for ordinary surface grime, and controlled extraction for contamination that has reached the cushion. Select professional service when odor persists after complete drying or when multiple interior materials require coordinated treatment.
Daily commuter or family F-150
Use a vacuum, white towels, and a low-moisture fabric cleaner every few weeks. Keep a small towel in the truck so milk, juice, and coffee are blotted before they wick through the fabric.
Work truck or off-road F-150
Remove dry mud before adding water, then clean one seat panel at a time. Heavy canvas seat covers can reduce contamination, but install them only after the factory upholstery is fully dry and verify that the cover does not interfere with seat-mounted airbags.
Recently purchased used F-150
Inspect for smoke, pet, milk, and moisture odors before applying fragrance. Clean the seats, carpet, seatbelt webbing, and door-panel fabric as a system because odor often remains in adjacent porous materials after the seat surface looks clean.
Frequently Asked Questions
Can I use a carpet cleaner on Ford F-150 cloth seats?
You can use a carpet extractor if the machine has an upholstery attachment and the cleaner is labeled safe for automotive fabric. Use a light spray, slow extraction pass, and several dry passes. Avoid high-pressure flooding because seat cushions contain foam and may include heating elements, wiring, and occupancy-related components.
How do I clean a Ford F-150 seat without a wet vacuum?
Apply cleaner to a towel or brush, agitate a small section, and blot repeatedly with clean white microfiber towels. Use only enough moisture to release the soil. Change towels frequently and ventilate the cabin. The method works for surface dirt, but deep odor and liquid contamination may remain in the foam.
Why do stains come back after cleaning?
A returning stain usually results from soil or liquid wicking upward from the cushion foam as the fabric dries. A detergent ring can create the same appearance. Reclean the entire affected panel with controlled moisture, rinse lightly, extract thoroughly, and dry with strong airflow rather than treating only the visible center.
Can I use Scotchgard on F-150 cloth seats?
A fabric protectant can be used when its label specifically allows automotive upholstery and the Ford seat material passes a hidden-area test. Apply it only to clean, dry fabric, maintain ventilation, and keep the product away from vinyl ActiveX, controls, belts, and trim. Protection reduces absorption; it does not prevent every stain.
How do I remove smoke odor from F-150 seats?
Start with vacuuming, then clean the seats and surrounding porous surfaces with controlled moisture. Dry everything completely before evaluating the smell. Smoke odor can persist in carpet, headliner, seatbelt webbing, and cabin filters, so seat cleaning alone may not solve a whole-cabin contamination problem.
The Bottom Line
The safest answer to how to clean Ford F-150 cloth seats is to remove dry soil first, use a tested automotive fabric cleaner sparingly, agitate gently, extract the residue, and dry the foam completely before driving. The method works best when moisture stays controlled, stain chemistry matches the contaminant, and ActiveX vinyl is treated separately from woven cloth.


