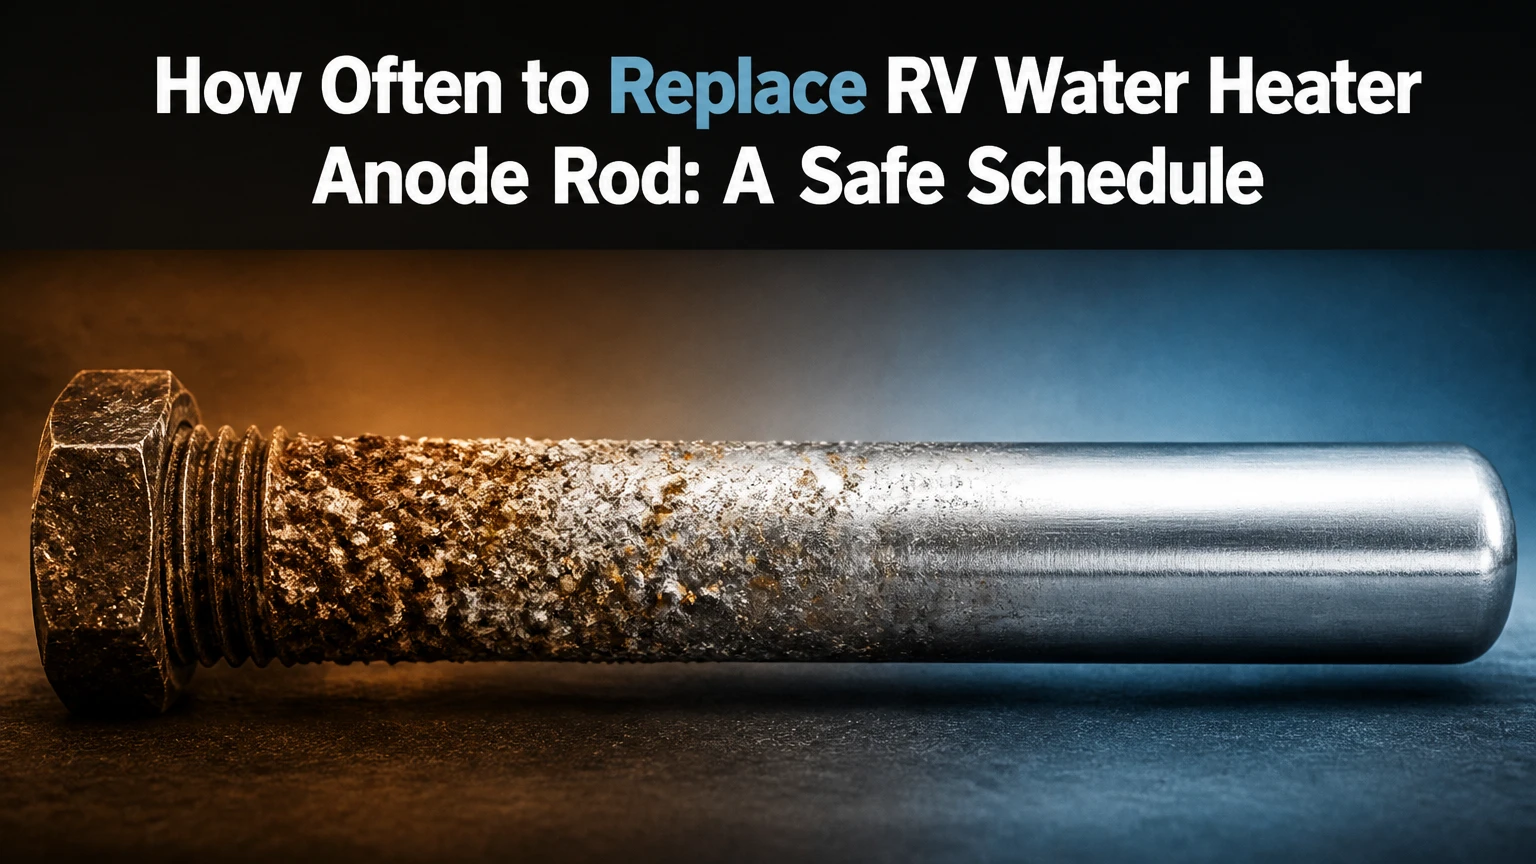
Replace an RV water heater anode rod when inspection shows about 75% of its sacrificial metal has corroded, or the steel core wire is exposed, whichever occurs first. Inspect a Suburban anode at least every 12 months, and every six months for full-time use, hard water, sulfur-rich well water, or heavy hot-water demand.
Key Facts at a Glance
- A Suburban porcelain-lined steel water heater normally uses a replaceable sacrificial anode rod.
- Most Atwood and Dometic aluminum-tank water heaters do not require a conventional anode rod.
- A practical replacement threshold is approximately 75% metal loss, a visible core wire, severe thinning, or broken sections.
- Typical inspection intervals range from six months to one year, depending on water chemistry and usage.
- A replacement rod commonly costs $12-$25, while a socket, breaker bar, flush wand, and sealant can add $25-$70.
- A 1-1/16-inch socket fits many Suburban anode rods, but the heater model and manufacturer instructions determine the correct part.
How Often Should You Inspect an RV Water Heater Anode Rod?
Inspect an RV water heater anode rod every 12 months as a minimum maintenance interval. Inspect it every six months when the RV is occupied full-time, receives hard or sulfurous well water, or supplies unusually high volumes of hot water.
Annual inspection is a schedule, not a guaranteed replacement interval. A weekend camper using treated municipal water might get two or three years from one rod, while a full-time RVer in mineral-heavy well water may consume a magnesium rod within six to twelve months.
Winterization and spring commissioning are useful inspection opportunities. The tank is already being drained, and removing the rod allows sediment to leave through the drain opening. Do not wait for odor, rusty water, or a tank leak because those symptoms can appear after corrosion protection has already been lost.
What Determines the Replacement Interval?
Water chemistry and water throughput determine anode consumption more strongly than calendar age. Magnesium reacts quickly in many water supplies, while aluminum-based rods usually last longer but provide a different protection profile.
| Operating condition | Inspection interval | Typical magnesium life | Maintenance priority |
|---|---|---|---|
| Weekend use, treated city water | 12 months | 18-36 months | Inspect during winterization |
| Full-time RV living | 6 months | 6-18 months | Record wear percentage |
| Hard municipal water | 6-12 months | 6-18 months | Flush scale every 6-12 months |
| Sulfurous well water | 6 months | 3-12 months | Address bacteria and odor |
| Seasonal snowbird use | Before and after season | 12-24 months | Inspect before storage |
These are typical field ranges, not guarantees. The first inspection establishes your actual consumption rate. If a rod loses 40% of its diameter in one year, another annual interval may be too long.
How Long Does an RV Water Heater Anode Rod Last?
An RV water heater anode rod typically lasts one to three years, but the inspection result matters more than the age printed on a maintenance calendar. Magnesium rods often consume fastest, aluminum rods generally last longer, and aluminum-zinc rods occupy the middle ground for many applications.
Manufacturers and RV service departments commonly recommend inspecting the rod annually rather than promising a fixed service life. Suburban installation and service literature treats the anode as a replaceable maintenance component, while Atwood and Dometic documentation identifies many tanks as aluminum and therefore different from Suburban steel tanks.
A rod can look intact from the outside while being deeply hollowed or separated internally. Inspect the full length after removal, and do not judge condition from the threaded hex head alone.
When Should You Replace It?
Replace an RV anode rod when approximately three-quarters of the original sacrificial material has disappeared. Replace it sooner if the central steel wire is visible along a significant portion, the rod has broken into pieces, or remaining metal is thin, soft, and structurally unstable.
The 75% threshold is a practical maintenance rule. It protects against waiting until the rod is completely consumed, when the steel tank becomes the next available surface for corrosive electrochemical reactions.
Use these visual criteria:
- More than 50% material remains: Clean the rod, record its condition, and reinstall it if the threads and body remain sound.
- About 25% remains: Plan replacement soon, especially with hard water or full-time use.
- Core wire exposed or metal nearly gone: Replace immediately.
- Rod fractured or detached: Replace it and flush the tank before refilling.
- Heavy calcium coating: Remove scale carefully before estimating remaining metal.
A thick white crust does not automatically mean the rod is finished. Scale can hide usable metal, although aggressive scraping can remove the sacrificial coating and distort your assessment.
Does Every RV Water Heater Have an Anode Rod?
No, every RV water heater does not have an anode rod. Suburban water heaters commonly use porcelain-lined steel tanks with replaceable anodes, whereas many Atwood and Dometic water heaters use aluminum tanks that do not require a conventional sacrificial rod.
| Heater manufacturer or design | Common tank material | Conventional anode required? | Identification clue |
|---|---|---|---|
| Suburban SW series | Porcelain-lined steel | Yes | Large threaded drain plug with anode |
| Atwood 6-gallon models | Aluminum alloy | Usually no | Separate plastic or metal drain plug |
| Dometic replacement Atwood models | Aluminum alloy | Usually no | Model label and aluminum tank documentation |
| Aftermarket steel replacement tank | Steel, lining varies | Usually yes | Manufacturer parts manual |
Do not install a Suburban anode in an Atwood or Dometic heater simply because the plug diameter looks similar. Some owners use aftermarket aluminum-zinc devices in aluminum tanks for odor management, but that is not equivalent to a required steel-tank anode and may affect warranty or manufacturer guidance.
Check the data plate before ordering. Record the manufacturer, model number, gallon capacity, and serial number, then use the relevant parts diagram.
Which Anode Material Should You Choose?
Choose magnesium for maximum sacrificial activity in a compatible Suburban steel tank, aluminum for longer service and reduced odor risk, or aluminum-zinc for a compromise when sulfur odor is a recurring problem. Material choice should follow tank compatibility and water chemistry, not price alone.
| Anode material | Typical life | Typical price | Main advantage | Main limitation |
|---|---|---|---|---|
| Magnesium | 1-2 years | $15-$25 | Highest protective activity | Can worsen sulfur odor |
| Aluminum | 2-3 years | $12-$20 | Longer life and lower odor risk | Lower protective activity in some water |
| Aluminum-zinc | 2-3 years | $15-$30 | Helps manage sulfur-related odor | May sacrifice more slowly |
| Flexible segmented type | 1-3 years | $25-$45 | Fits restricted removal spaces | More expensive per rod |
Magnesium is a sensible default for many Suburban steel tanks when the water has no persistent rotten-egg smell. Aluminum or aluminum-zinc is often more practical when magnesium reacts with sulfide-producing bacteria, although flushing the tank remains necessary.
An aluminum-zinc rod is not a universal odor cure. Sulfur odor can originate in the campground supply, freshwater tank, water lines, or hot and cold plumbing, so changing the anode without sanitizing the system may produce disappointing results.
Which Rod Is Best for Your RV Use?
| RVer situation | Preferred material | Inspection schedule | Reasoned choice |
|---|---|---|---|
| Weekend traveler, city water | Magnesium | Every 12 months | Strong protection with moderate use |
| Full-time traveler, no odor | Magnesium | Every 6 months | High throughput consumes material faster |
| Well-water user with rotten-egg odor | Aluminum-zinc | Every 6 months | Lower odor risk than magnesium |
| Hard water with frequent scale | Aluminum or zinc-aluminum | Every 6 months | Longer interval between replacements |
| Tight access behind components | Flexible segmented rod | Every 12 months | Easier removal and installation |
An anode rod is not good for repairing a tank that already leaks. It also cannot compensate for an incorrectly sized replacement, an unfilled tank heated dry, or a pressure-relief valve that discharges repeatedly.
What Tools and Materials Do You Need?
A typical Suburban anode replacement requires a 1-1/16-inch deep socket, a ratchet or breaker bar, a hose or flush wand, thread sealant approved for potable-water plumbing, and protective equipment. Allow 30-60 minutes for a routine replacement, excluding a stuck plug or extensive scale removal.
Before You Start
- Difficulty: Moderate for an accessible heater
- Working time: 30-60 minutes
- Rod cost: Typically $12-$30
- Tools: 1-1/16-inch deep socket, 1/2-inch drive ratchet, breaker bar, adjustable wrench
- Cleaning supplies: RV water-heater flush wand, potable-water hose, bucket, flashlight
- Safety prerequisites: Power and propane off, tank cool, water pressure relieved
- Replacement part: Correct model-specific rod with compatible thread and length
A 1-1/16-inch socket fits many Suburban drain-anode plugs, but socket size is not a substitute for model verification. Some replacement heaters and plugs differ.
How Do You Replace an RV Water Heater Anode Rod Safely?
Replace the rod only after the water heater is cool, unpowered, isolated from the water supply, and depressurized. The work consists of draining the tank, removing the old rod, flushing sediment, installing a compatible replacement, refilling completely, and checking for leaks before heating.
Step 1: Turn Off Every Heat Source
Switch off the 120-volt electric element and LP-gas burner at the RV controls. Turn off the water heater circuit breaker if the RV has one, and wait until the tank cools completely.
Success checkpoint: The burner is not cycling, the electric element is disabled, and the tank exterior is cool.
Common mistake: Removing the drain plug while the electric element remains energized can destroy the element if the tank drains.
Step 2: Isolate and Depressurize the Tank
Disconnect city water, switch off the freshwater pump, and open a hot-water faucet briefly to reduce pressure. Confirm the tank is cool, then carefully lift the pressure-relief valve handle only if the manufacturer’s procedure permits it.
Success checkpoint: No pressurized spray exits the drain opening or relief valve.
Common mistake: Opening the relief valve on a hot tank can cause scalding. Cooling the tank comes first.
Step 3: Remove the Old Anode Rod
Place a bucket below the drain opening. Fit the deep socket squarely over the plug, turn counter-clockwise, and support the rod as it comes free because a depleted rod may break apart.
Success checkpoint: The plug loosens without cocking the socket against the tank fitting.
Common mistake: Using an undersized socket rounds the hex head and turns a routine service job into an extraction problem.
Step 4: Flush Sediment From the Tank
Allow the tank to drain, then insert an RV water-heater flush wand through the opening. Direct short bursts of water around the tank bottom until the discharge contains substantially less sediment.
Success checkpoint: Water exits with minimal grit, flakes, or rust-colored debris.
Common mistake: A garden hose without a wand often leaves sediment in the corners, especially in six- and ten-gallon tanks.
Step 5: Evaluate the Removed Rod
Compare the remaining sacrificial metal with the original diameter. Replace the rod if approximately 75% has disappeared, the steel core is visible, or the rod is broken and heavily depleted.
Success checkpoint: The replacement decision is based on exposed metal and remaining diameter, not only on rod age.
Common mistake: Mistaking white mineral scale for intact sacrificial metal can cause premature reinstallation.
Step 6: Seal and Install the Replacement
Apply the sealant specified by the heater manufacturer. If thread tape is permitted, wrap approximately three to five turns clockwise when viewed from the threaded end, leaving the first thread clear, then start the rod by hand.
Success checkpoint: The rod turns several threads smoothly without cross-threading.
Common mistake: Forcing a rod with a wrench at an angle can damage the tank fitting or porcelain lining.
Step 7: Tighten Without Excessive Force
Tighten the plug firmly with the socket, but do not use maximum breaker-bar force. The correct torque depends on the model and thread specification, so follow the service manual rather than applying a universal number.
Success checkpoint: The plug seats securely and the sealant does not extrude excessively.
Common mistake: Overtightening can damage threads, distort a gasket, or crack nearby porcelain coating.
Step 8: Refill, Purge Air, and Check Leaks
Reconnect the water supply and open a hot-water faucet until air stops sputtering and water flows steadily. Inspect the new plug for leakage, then confirm the tank is full before restoring electric or gas heat.
Success checkpoint: Water flows steadily from a hot faucet and the drain-plug area remains dry.
Common mistake: Energizing an empty tank can burn out an electric heating element within minutes.
Why Does the Hot Water Smell Like Rotten Eggs?
An RV water heater often develops a rotten-egg odor when sulfate-reducing bacteria interact with dissolved sulfur compounds and a magnesium anode. Switching to aluminum-zinc may reduce the reaction, but tank sanitation and water-source testing are necessary when odor persists.
First flush and sanitize the water heater according to the heater and RV manufacturer’s instructions. Hydrogen peroxide is commonly used by RV technicians for odor treatment, but concentration and contact time should follow an approved RV sanitation procedure; do not mix cleaning chemicals.
A persistent smell from both hot and cold faucets points toward the freshwater tank, hose, campground supply, or plumbing rather than the anode alone. A smell limited to hot water makes the heater and its anode more likely sources.
Can You Use Aluminum Instead of Magnesium?
Yes, a compatible aluminum or aluminum-zinc rod can replace magnesium in many Suburban steel tanks, especially when odor is a repeated problem. Aluminum usually sacrifices more slowly, but the manufacturer’s parts guidance and the tank’s thread dimensions still control compatibility.
Aluminum is not automatically better for every water supply. Magnesium may provide stronger protection in some conditions, while aluminum can form flakes and may not deliver the same electrochemical potential.
What Do White Flakes or Rusty Water Mean?
White flakes usually indicate calcium or magnesium scale, while rusty water can indicate accumulated sediment, corroded fittings, plumbing deposits, or a tank whose protective lining has been compromised. Neither symptom alone proves that the anode rod is defective.
Flush the tank and inspect the removed rod before diagnosing the heater. Large quantities of scale reduce usable tank volume, restrict valves, and can create popping or rumbling sounds as the burner heats water trapped beneath deposits.
Rust-colored particles deserve closer attention when the anode is completely consumed. A tank leak, damp insulation, or rust streak at the drain opening signals a service problem rather than a simple rod replacement.
What If the Anode Rod Is Stuck?
A stuck RV anode rod usually requires a correctly sized deep socket, penetrating oil on exposed threads, and controlled leverage after the tank is fully cool and empty. Stop if the tank fitting begins to deform, because replacing a damaged fitting or tank is far more expensive than calling an RV technician.
Use a six-point socket and a breaker bar instead of an adjustable wrench. Keep the tool aligned with the drain opening, and avoid an impact wrench unless the heater manufacturer or technician approves it, since impact force can damage the tank connection.
A segmented replacement rod can solve clearance problems when the old solid rod cannot be withdrawn because of a nearby wall or cabinet. It does not solve damaged threads, a seized steel plug, or a leaking tank.
How Much Does Replacement Cost?
A do-it-yourself RV anode replacement typically costs $12-$30 for the rod and $25-$70 for basic tools or consumables if those tools are not already available. Professional service commonly costs more because labor, access, sediment removal, stuck-plug risk, and diagnostic time vary by RV.
| Cost item | DIY typical range | Professional service range | Main price variable |
|---|---|---|---|
| Magnesium anode rod | $15-$25 | Included or $20-$40 | Length and manufacturer |
| Aluminum-zinc rod | $15-$30 | Included or $25-$45 | Alloy and segmented design |
| Flush wand and hose supplies | $10-$30 | Included | Existing equipment |
| Labor and inspection | $0 | $75-$200 | Access and seized plug |
| Tank replacement after failure | Not a rod repair | $500-$1,500+ | Heater size and installation |
These are typical consumer and service ranges, not fixed national prices. A rod that costs less may have the wrong length, thread, or alloy for the heater.
How Should You Maintain the Heater During Storage?
Drain the RV water heater during winterization and leave the heat source disabled until the tank is refilled. Inspect the anode when the tank is drained, but do not leave the tank operating without water simply to test the new rod.
| Storage situation | Required action | Inspection timing | Restart condition |
|---|---|---|---|
| Freeze protection, 1-3 months | Drain tank and bypass heater | Before storage | Tank full and air purged |
| Winter storage, 4-6 months | Drain, flush, protect plumbing | At storage and spring startup | No leaks at plug |
| Snowbird seasonal use | Drain between seasons if freezing | Start and end of season | Stable water flow |
| Full-time use without storage | Flush and inspect | Every 6 months | Rod above replacement threshold |
An anode is consumed while the tank contains water, not because the RV is moving or parked. Long storage reduces water exposure but creates a separate risk from freezing and stagnant sediment.
The Bottom Line
The answer to “how often to replace RV water heater anode rod” is inspection-based: inspect a Suburban anode every 12 months, or every six months under heavy use or aggressive water conditions, and replace it at roughly 75% wear or when the steel core appears. Verify that the heater is a Suburban steel-tank model before buying a rod, because most Atwood and Dometic aluminum tanks do not need one.
Use magnesium when maximum sacrificial activity and normal water quality matter most. Choose aluminum or aluminum-zinc when recurring sulfur odor or faster magnesium consumption makes those trade-offs worthwhile. Safe replacement depends on a cool, depressurized tank, complete flushing, correct thread sealing, and confirmed refilling before heat is restored.
Frequently Asked Questions
Is a 10-year-old RV water heater too old for an anode rod?
A 10-year-old RV water heater can still use a replacement anode if the tank is structurally sound and the model requires one. Rod age is less important than remaining sacrificial metal, tank leakage, thread condition, and service history. A consumed rod cannot restore a tank that has already rusted through.
Can a bad anode rod cause an RV water heater leak?
A consumed anode rod can increase corrosion risk in a compatible steel tank, but the rod itself does not usually create an immediate leak. Leaks at the drain opening may come from damaged threads, a failed seal, a loose plug, or a perforated tank. Locate the exact leak before replacing parts.
Should you remove the anode rod when winterizing?
Remove and inspect the anode rod while winterizing a Suburban heater, then leave the tank drained and protected from freezing. Reinstall a serviceable rod or fit a new one before startup. Never turn on the electric element or gas burner until the tank is completely full.
Can a water-softener system shorten anode life?
A water-softener system can change anode consumption because softened water contains more sodium and has different conductivity and mineral balance than untreated water. The effect varies by source chemistry and heater model. Inspect the rod after six months of use with softened water, then adjust the interval from observed wear.
Do you need an anode rod for a 6-gallon RV water heater?
A six-gallon size does not determine whether an anode rod is required. Many six-gallon Suburban heaters use a replaceable anode, while many six-gallon Atwood and Dometic aluminum tanks do not. The manufacturer, model number, tank material, and parts diagram provide the correct answer.
Can you run an RV water heater without an anode rod temporarily?
A Suburban heater may operate briefly without an anode during service, but leaving the tank unprotected accelerates corrosion risk. Install the correct replacement before returning the heater to normal use. An anode is unnecessary only when the heater manufacturer specifies an aluminum tank design that does not use one.


