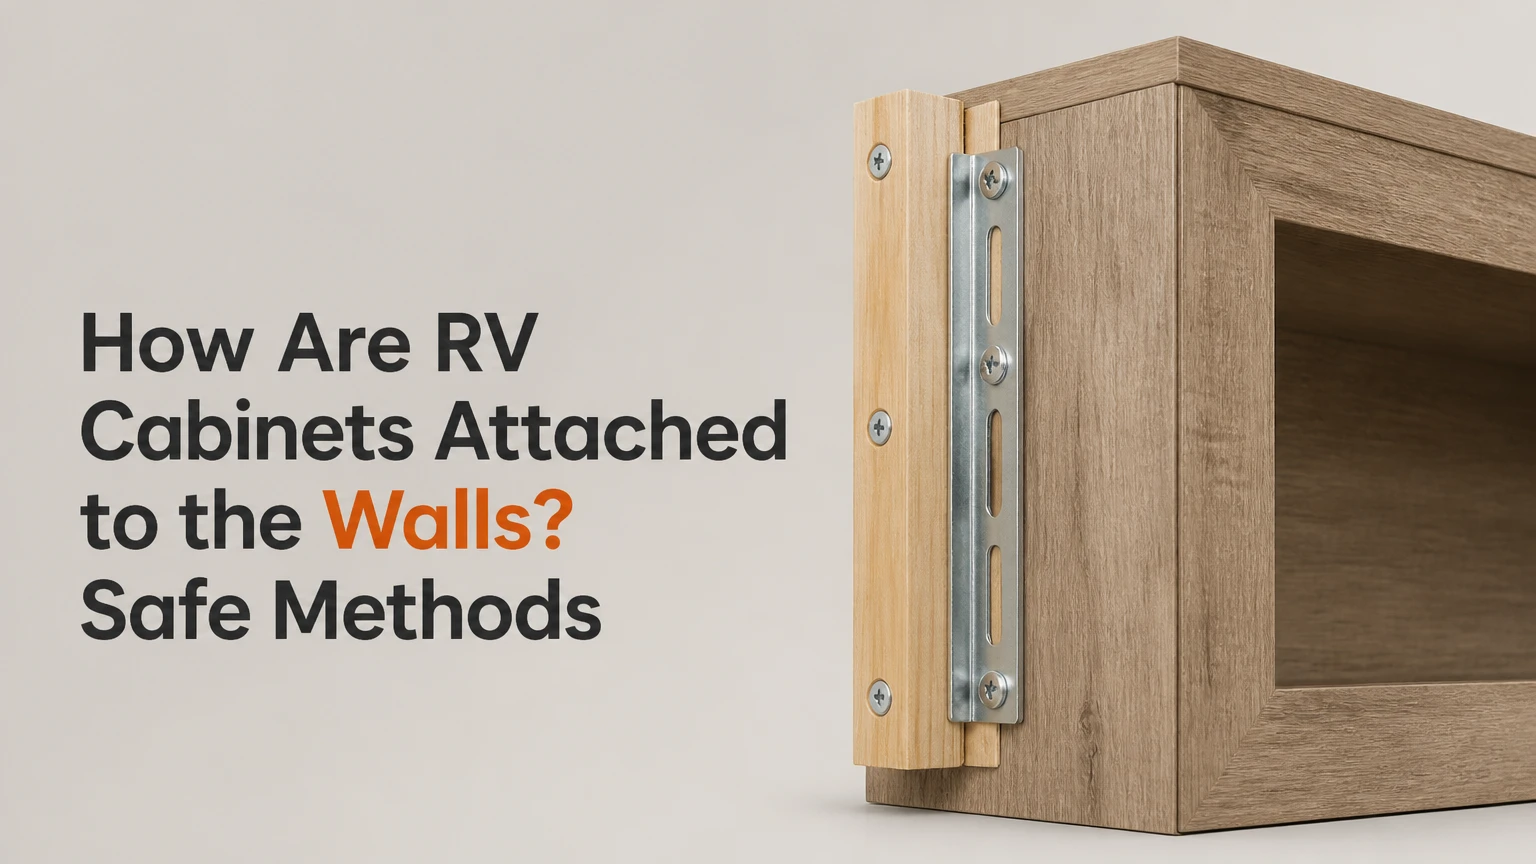
RV cabinets are attached through the interior wall skin into structural wood or aluminum framing, reinforced furring strips, ceiling battens, floors, or adjoining cabinet boxes. Installers use short cabinet or self-drilling fasteners, adhesive only where the substrate permits it, and multiple load paths because road vibration creates both downward shear and outward pull.
Key Facts at a Glance
- RV cabinet screws must engage structural framing or a reinforced backer, not decorative wall paneling alone.
- Overhead cabinets usually need wall fasteners plus a ceiling, roof-batten, side-panel, or neighboring-cabinet connection.
- A screw length that works in a 3/4-inch wood rail can puncture an exterior skin, wire, pipe, or vapor barrier in a thin RV wall.
- Thin aluminum studs hold less thread than solid wood, so hole location, screw diameter, washer use, and cabinet weight matter.
- Fiberglass cabinets can use bonded cleats or fiberglass tabbing, but surface preparation and cure time determine bond reliability.
- The manufacturer’s wall layout, service diagrams, and approved fasteners take priority over generic RV installation advice.
Why Do RV Cabinets Need Different Mounting?
RV cabinets need different mounting because an RV wall experiences vibration, flexing, braking forces, and repeated impact that a stationary household wall does not. A residential wall cabinet can rely on thick studs and gravity; an RV cabinet must resist downward shear, outward tensile pull, sideways movement, and fastener loosening.
The cabinet’s load travels through a sequence called the load path. Contents load the cabinet floor, cabinet joints transfer force into the back rail and side panels, fasteners transfer force into the wall framing, and the framing transfers force into the body structure. A failure at any link can loosen the entire cabinet.
Wall paneling is usually a finish layer. Common RV wall assemblies may include vinyl or decorative laminate, thin plywood, foam insulation, wood studs, aluminum tubing, and an exterior skin. A stud finder may detect a metal edge or fastener without proving that the member can carry a heavily loaded cabinet.
What forces act on an overhead cabinet?
An overhead cabinet experiences vertical shear when its own weight and contents pull downward, while braking and road jolts create outward pull at the top edge. A cabinet that weighs 30 pounds at rest can apply much higher short-duration forces when a vehicle hits a pothole, although the actual force depends on speed, suspension, cabinet geometry, and contents.
The upper mounting rail often carries the greatest pull-out force. The lower rail limits rotation and sliding. Ceiling and side connections reduce rocking, which is why a cabinet attached at only two points on a flexible wall is more vulnerable than a cabinet tied into several structural surfaces.
Which RV Cabinet Mounting Method Fits Your RV?
The correct RV cabinet mounting method depends on the wall structure, cabinet position, access to the framing, and whether the installation must remain removable. Screw-to-stud mounting is usually the first choice for factory-built wood or aluminum framing; reinforced cleats suit van conversions; bonded cleats and fiberglass tabbing suit some molded shells.
| Mounting method | Suitable substrate | Typical hardware or material | Main limitation |
|---|---|---|---|
| Screw into wood stud | Pine, fir, plywood framing | #8 or #10 cabinet screws, 1-1/4 to 2 inches after measuring | Wood can split or strip after repeated removal |
| Screw into aluminum tube | Thin-gauge aluminum framing | Self-drilling screw or machine screw with approved insert | Thin metal offers limited thread engagement |
| Furring-strip matrix | Van sheet metal or irregular ribs | 1/2- to 3/4-inch plywood, rivnuts, bolts, construction adhesive | Adds about 1/2-3/4 inch depth and extra weight |
| Bonded cleat | Fiberglass or composite shell | Marine-rated adhesive or epoxy, prepared fiberglass | Permanent and highly dependent on preparation |
| Fiberglass tabbing | Molded fiberglass interior | Epoxy or polyester resin with fiberglass cloth | Requires resin compatibility and ventilation |
| Floor and partition tie-in | Lower cabinets and benches | Wood screws, bolts, structural cleats | Requires access beneath or behind the floor |
Screw-to-stud mounting
Screw-to-stud mounting is the standard approach when the cabinet rail aligns with wood studs or aluminum wall tubes. The installer marks the framing, drills through a structural cabinet rail, and uses fasteners sized for the actual material rather than the nominal wall thickness.
Wood framing generally accepts coarse-thread cabinet or structural screws. Aluminum framing may require a self-drilling screw, a machine screw through a preinstalled insert, or a rivnut where the wall member is accessible and thick enough for the insert. A self-drilling screw is not automatically stronger than a machine screw with a correctly installed insert.
Furring strips and backer plates
Furring strips create a continuous mounting plane when factory framing does not align with the cabinet. Van builders commonly fasten plywood cleats to metal ribs with bolts, rivnuts, plus-nuts, or approved structural adhesive, then attach the cabinet to the plywood.
A 3/4-inch plywood backer spreads force across several ribs, but it increases weight and reduces interior clearance. The backer still needs a reliable connection to the vehicle structure; screwing a cabinet into plywood that is merely glued to a thin interior panel does not create a dependable load path.
Bonded fiberglass cleats
Bonded cleats can avoid drilling through a molded fiberglass shell, but adhesive is not a shortcut around structural design. The installer must remove wax, gloss, paint, dust, and release-agent residue, abrade the bonding area, clean it with the adhesive manufacturer’s approved solvent, and maintain pressure through the stated cure period.
Adhesive is a poor choice when the surface is damp, contaminated, poorly supported, or difficult to inspect later. A mechanical backup or fiberglass tab may be appropriate for a heavy overhead cabinet, subject to the shell manufacturer’s construction and repair guidance.
Before You Start
| Item | Typical requirement | Check before drilling |
|---|---|---|
| Time | 3-6 hours for one simple cabinet | Add 1-2 days for adhesive cure |
| Difficulty | Moderate for stud mounting; advanced for fiberglass tabbing | Get professional help for hidden damage or shell repair |
| DIY material cost | $40-$120 for fasteners, cleats, tape, and bits | Excludes a new cabinet or specialty scanner |
| Shop cost | About $350-$900 for a localized installation | Actual price depends on access and cabinetry |
| Cabinet weight | Weigh the empty box and planned contents | Do not assume residential cabinet ratings apply |
| Tools | Drill, clutch, level, square, bits, tape measure, inspection light | Avoid an impact driver for final tightening |
| Materials | Cabinet screws, washers, plywood cleat, foam tape, sealant | Match each item to wood, aluminum, or fiberglass |
Disconnect shore power and isolate the 12-volt battery before drilling near electrical systems. Turn off water pumps and identify plumbing routes because RV wiring and PEX often run through shallow wall cavities.
Step 1: Inspect and Reinforce the Cabinet
Remove doors, drawers, shelves, hinges, and loose contents before lifting the cabinet. A lighter cabinet is easier to align, and removing the doors prevents accidental hinge damage while the box is being held against the wall.
Check whether the cabinet has a solid mounting rail. Many lightweight boxes have a thin back panel that is suitable for alignment but not for carrying screw loads. Add a 3/4-inch plywood or solid-wood rail near the top, and add a lower rail when the cabinet can rotate away from the wall.
| Cabinet condition | Recommended preparation | Typical rail dimension |
|---|---|---|
| Solid factory back rail | Inspect for splits and crushed wood | 3/4 inch thick by 2-4 inches high |
| Thin hardboard back | Add structural upper and lower rails | 1/2-3/4 inch plywood |
| Frameless lightweight box | Add internal cleats at screw locations | 3/4 inch plywood blocks |
| Heavy hardwood box | Check total loaded mass and wall capacity | 3/4-1 inch structural rail |
You will know the cabinet is prepared when a fastener can pass through a substantial rail without crushing the cabinet back. The common mistake is driving long screws through a thin back panel and assuming the panel transfers force into the framing.
Step 2: Locate Structural Framing and Hidden Utilities
Map the wall framing before selecting screw positions. Use construction drawings, existing cabinet fasteners, trim patterns, an electronic scanner, a magnet, and carefully measured reference points, then confirm each proposed hole with a small inspection opening or a shallow probe where the finish can be repaired.
RV framing is not always spaced like residential studs. Aluminum tubes may be narrow, interrupted, or offset from visible seams, while wood members can vary around windows, doors, roof transitions, and appliance openings.
Mark confirmed framing lines inside the cabinet and on removable masking tape. Never rely on a stud finder alone near metal foil insulation, wiring, plumbing, or a curved fiberglass shell.
The success checkpoint is a confirmed structural member at every planned primary fastener location. The common mistake is treating a detected metal signal as proof of a wide, thick tube; the signal may come from an unrelated screw, corner trim, or foil layer.
Step 3: Install a Temporary Support Ledger
Fasten a temporary ledger beneath the cabinet’s planned lower edge so the ledger carries the box while you align the primary fasteners. Use a straight board, a level, and short screws placed only in confirmed framing or a known solid cleat.
A typical temporary ledger is a straight 1-by-3 or 1-by-4 board. Its screws only need to hold the empty cabinet during positioning, so they should not penetrate beyond the safe wall depth. Add protective tape or thin foam between the ledger and finished wall if the surface marks easily.
Place the cabinet on the ledger and clamp or brace it if the box can slide. Do not leave the ledger in place as a substitute for the cabinet’s permanent mounting system unless it was designed and fastened as a structural cleat.
You will know the support works when the cabinet stays level without hand pressure. The common mistake is using a narrow or bowed board that tilts the cabinet and forces the permanent screws to carry alignment loads.
Step 4: Fasten the Cabinet to the Wall Structure
Drive primary fasteners through the cabinet’s structural rails into confirmed wood studs, aluminum tubes, inserts, or plywood backers. Pre-drill where required, keep the drill perpendicular to the rail, and tighten with a standard drill clutch set low enough to stop before crushing the wall or stripping the substrate.
| Substrate | Typical starting fastener | Installation control | Important limitation |
|---|---|---|---|
| Solid wood stud | #8 or #10 coarse-thread cabinet screw | Pilot hole matched to screw core | Avoid splitting near rail ends |
| Plywood backer | #8 or #10 wood screw | Engage at least 1/2 inch of sound plywood | Backer must connect to vehicle ribs |
| Aluminum tube | Approved self-drilling screw or machine screw insert | Low clutch setting and washer head | Do not depend on a few stripped threads |
| Fiberglass cleat | Fastener into bonded cleat, if designed | Follow adhesive cure and pilot-hole method | Do not drill shell without checking utilities |
Fastener length must be calculated from the cabinet rail, wall finish, spacer, and required structural engagement. A universal 1-1/4-inch limit is unsafe because wall assemblies differ; a screw that is safe in one RV can pierce the exterior skin or contact a wire in another.
Place fasteners near the upper and lower rails rather than in the thin back panel. A practical starting layout may use fasteners at 4-8 inch intervals along a long rail, with spacing reduced near ends and increased only when the manufacturer’s design supports it.
You will know the attachment is sound when the screw head seats against the rail, the wall skin does not dimple, and the cabinet does not shift when pulled gently at its upper front edge. The common mistake is using an impact driver, which can strip aluminum threads before the operator feels resistance.
Step 5: Add Ceiling, Side, or Floor Connections
Tie an overhead cabinet into a ceiling batten, roof rib, side partition, adjacent cabinet, or approved floor structure when the design allows. These secondary connections reduce rocking and distribute forces beyond the flexible wall panel.
Do not drive screws into the roof merely because the cabinet is overhead. Roof framing locations, wiring, insulation, and exterior sealing must be confirmed first. In some RVs, a ceiling screw can create a leak path or contact a 120-volt cable.
Side connections work well when cabinets meet a substantial partition or another cabinet with a reinforced side panel. Use cabinet-to-cabinet screws only after confirming that both boxes have structural side rails. Lower cabinets usually gain their primary support from the floor, toe-kick cleats, partitions, and countertop structure rather than from the wall alone.
You will know the multi-point attachment works when the cabinet and neighboring structure move together without a visible gap opening at the wall. The common mistake is connecting to a thin decorative ceiling liner or cabinet end panel that has no structural member behind it.
Step 6: Refit Hardware and Secure the Contents
Reinstall doors, drawers, shelves, and latches only after the cabinet remains square under its permanent fasteners. Check door reveals, hinge alignment, drawer travel, and cabinet clearance while the RV sits on level ground.
Install positive latches on doors that can open during braking or vibration. Magnetic catches may help with light doors, but a mechanical travel latch is more dependable for heavy overhead contents. Add shelf lips or retaining bars where dishes, tools, or bottles could become projectiles.
Load the cabinet gradually. Begin with lightweight contents, drive a short test route, and inspect the fasteners, rails, wall skin, and door alignment before adding dense items such as canned food or tools.
The success checkpoint is no creaking, gap growth, screw movement, or door opening after inspection. The common mistake is testing an empty cabinet and then loading the highest-mass items into the upper shelf.
How Much Weight Can an RV Cabinet Hold?
An RV cabinet does not have one universal weight rating because capacity depends on the cabinet box, fastener pull-out strength, framing, wall skin, attachment geometry, and road conditions. A practical planning target for a small overhead box is often 25-45 pounds loaded, but that figure is a conservative design target, not a certified rating.
Weight should be measured at the cabinet’s center of gravity, not only at the scale. Dense contents placed near the front edge create more outward leverage than the same mass placed against the rear wall. A 30-pound toolbox can stress fasteners more severely than 30 pounds of clothing.
| Cabinet location | Typical cautious loaded target | Why capacity changes | Better reinforcement |
|---|---|---|---|
| Small overhead box | 25-45 lb | High leverage and road impact | Upper rail plus ceiling or side tie |
| Long overhead cabinet | 35-60 lb total | Longer span and uneven loading | Multiple framing points and center divider |
| Upper pantry | 30-50 lb | Dense contents increase pull-out force | Full-height side cleats and shelf lips |
| Lower base cabinet | 60-120 lb | Floor carries much of vertical load | Floor cleat, partition, and countertop tie |
| Van-conversion drawer unit | 75-150 lb | Vehicle ribs and floor track carry load | Plywood matrix plus bolts or rivnuts |
These ranges are typical planning values for lightweight recreational vehicles, not manufacturer approvals. Consult the RV builder when the cabinet is large, mounted near a slide-out, attached to a repaired wall, or intended to carry batteries, tools, water, or other dense equipment.
What Fasteners Should You Use?
Use fasteners matched to the structural substrate, not simply to the cabinet’s thickness. Coarse-thread screws usually suit solid wood, while thin aluminum may need a controlled self-drilling screw or a machine screw installed through a rivnut, plus-nut, or other verified insert.
Avoid brittle drywall screws. Their shape and material are intended for gypsum installation, not repeated vehicle vibration, and their small heads can crush lightweight cabinet rails.
| Fastener choice | Best application | Typical size range | Do not use when |
|---|---|---|---|
| #8 coarse-thread cabinet screw | Wood stud or plywood cleat | 1-1/4-2 inches after measuring | The rail is thinner than the head seating area |
| #10 structural cabinet screw | Heavier wood rail or long cabinet | 1-1/2-2-1/2 inches after measuring | The wall member cannot accept the required length |
| Self-drilling metal screw | Accessible aluminum tube | About 3/4-1-1/4 inches after measuring | The tube wall is too thin for stable threads |
| Machine screw and rivnut | Van rib or accessible metal structure | M5-M6 typical conversion hardware | The rib cannot support the insert installation |
| Through-bolt with washer | Exposed framing or backer | 1/4-inch typical custom work | The rear side is inaccessible or unsafe |
| Marine adhesive or epoxy | Prepared fiberglass cleat | Manufacturer-specific quantity | The surface is damp, glossy, contaminated, or unknown |
Washer-head or cabinet-head screws spread pressure across a rail better than narrow bugle-head screws. Use stainless steel only when its strength and compatibility suit the joint; stainless fasteners can gall, and dissimilar-metal contact can create corrosion in damp environments.
How Do Wood, Aluminum, Fiberglass, and Van Walls Compare?
Wood-framed RVs are usually the most forgiving because a properly sized screw can obtain meaningful thread engagement. Aluminum-framed RVs are lighter but less forgiving, since thin tubing may provide limited thread depth and can lose holding power after repeated screw removal.
Fiberglass shells require a different strategy. The shell may be strong in one direction and vulnerable to localized point loading, while a bonded cleat distributes force across a larger prepared area. Van sheet metal normally benefits from a plywood mounting matrix tied to ribs, floor tracks, or structural inserts.
| Wall construction | Preferred primary support | Installation risk | Inspection method |
|---|---|---|---|
| Wood-framed towable | Wood stud and reinforced cabinet rail | Split stud or stripped wood | Drawings, probing, pilot-hole resistance |
| Aluminum-cage motorhome | Tube, insert, or engineered backer | Pulled threads and tube distortion | Scanner, trim references, small inspection hole |
| Molded fiberglass trailer | Bonded cleat or fiberglass tab | Delamination and poor adhesion | Tap testing, visual shell inspection, moisture check |
| Sprinter or Transit conversion | Plywood matrix tied to ribs | Thin sheet metal and loose rivnuts | Rib map, fastener inspection, pull test |
| Composite overland body | Manufacturer-approved bonded structure | Core crush and skin delamination | Core inspection and engineering documentation |
No method is universally best. Mechanical screws are easier to remove and inspect; adhesive spreads load but hides the bond line and makes later cabinet replacement harder.
Common Mistakes and How to Fix Them
Screws spin without tightening
A spinning screw usually indicates stripped wood, a deformed aluminum tube, or a failed insert. Remove the screw, inspect the hole, and move to a verified structural location rather than repeatedly installing larger screws in the same damaged material.
For wood, a properly sized solid-wood plug or engineered repair may restore the rail. For aluminum, use an approved larger insert or a new backer plate if the tube has enough access. Do not fill a loose structural hole with ordinary wood filler.
The cabinet pulls away from the wall
A cabinet that pulls away usually lacks an upper structural rail, has too few attachment points, or is mounted only to paneling. Empty the cabinet, brace it, inspect for wall damage, and add a properly connected upper rail or secondary ceiling and side tie.
Adhesive foam tape can reduce rattling between surfaces, but it is not a replacement for structural fasteners. Silicone used as a primary bond is especially unsuitable for a heavily loaded overhead box.
The wall skin dimples around the screws
Dimpling means the fastener head is crushing a thin finish layer or the rail is not distributing pressure. Loosen the screw, inspect the cabinet rail, and use a washer-head fastener or a suitable washer under the head where clearance permits.
Overtightening can create a permanent weak spot. The fastener should clamp the rail firmly without deforming the wall assembly.
Doors open during travel
Doors that open usually need a positive latch rather than a stronger wall attachment. Install a mechanical catch rated for the door mass and verify that the latch remains engaged when the cabinet flexes.
Move heavy contents lower and toward the rear of the cabinet. A latch controls the door; it does not correct a loose cabinet box.
Fiberglass adhesive releases
Bond failure often results from gloss, wax, moisture, contamination, wrong resin compatibility, or insufficient cure time. Remove the cabinet, inspect both surfaces for delamination, abrade to a sound substrate, and follow the adhesive manufacturer’s preparation and temperature requirements.
Do not bond to a loose laminate layer and assume the laminate is attached to the shell. The weak laminate-to-shell interface can fail even when the adhesive itself remains intact.
How Do Installation Costs and Times Compare?
A simple screw-to-stud installation typically takes 3-6 hours and costs about $40-$120 in DIY materials. Professional pricing commonly reaches $350-$900 for one localized cabinet because technicians must remove trim, locate framing, repair old holes, align the box, and inspect hidden utilities.
| Project type | Typical labor time | Typical DIY material cost | Typical shop price |
|---|---|---|---|
| Replace one cabinet on confirmed wood studs | 3-4 hours | $40-$90 | $350-$600 |
| Install an overhead cabinet in aluminum framing | 4-6 hours | $60-$140 | $500-$900 |
| Build a van plywood backer matrix | 8-16 hours | $150-$450 | $900-$2,000 |
| Bond a fiberglass cleat and cabinet | 6-10 hours plus 24-72 hours cure | $100-$300 | $700-$1,500 |
| Repair stripped holes and damaged rail | 3-8 hours | $30-$180 | $350-$1,000 |
Prices vary by region, access, cabinet size, and whether wall or ceiling finishes need removal. A low quote that excludes utility checks, old-hole repair, or adhesive cure time may not represent the complete job.
Which Variations Need a Different Approach?
Installing a cabinet in a camper van
Use a plywood furring matrix tied to multiple metal ribs rather than fastening a heavy box to the van’s thin sheet metal. Rivnuts or plus-nuts can provide removable attachment points, but each insert must be installed in sound metal and checked for spin-out.
Tie tall cabinets into the floor and roof rib where practical. Leave service access around wiring, window trim, and insulation, because a perfectly rigid cabinet that blocks repairs creates a later maintenance problem.
Mounting a cabinet in a molded fiberglass trailer
Prefer a wide bonded cleat or fiberglass tabbing when the shell manufacturer permits it. Spread the load across a large area, avoid point-loading unsupported shell sections, and allow the full adhesive cure before loading the cabinet.
Inspect for previous repairs, cracks, soft spots, and delamination. A bond cannot restore a structurally compromised shell without repairing the shell first.
Installing lower cabinets
Lower cabinets should transfer most vertical load through the floor, toe-kick cleats, partitions, and countertop or adjacent structure. Wall screws still prevent tipping and movement, but they should not carry the entire loaded cabinet when the floor can provide a stronger path.
Check the floor for tanks, wiring, heating ducts, and underbody components before drilling. Use short fasteners or through-bolts only after measuring the complete floor assembly.
FAQ
Can RV cabinets be attached only to the wall panel?
No. Decorative wall paneling is usually a finish material with insufficient pull-out resistance for a loaded cabinet. The cabinet needs a connection to wood framing, aluminum tubing, a structural plywood backer, a bonded cleat, or another verified vehicle structure.
Are RV walls strong enough for kitchen cabinets?
RV walls can support kitchen cabinets when the cabinet load reaches structural framing and the box has reinforced rails. Thin panels alone are not adequate, and a long or heavily loaded cabinet may require ceiling, floor, partition, or adjacent-cabinet connections.
How can I find studs behind RV paneling?
Start with the RV manufacturer’s drawings and existing fastener patterns, then use a magnet, scanner, trim references, and small inspection points. Confirm the member’s location and width before drilling because metal signals can come from screws, foil insulation, or unrelated trim.
Can construction adhesive replace screws in an RV?
Construction adhesive can supplement or, in some engineered fiberglass installations, replace mechanical fasteners, but only when the substrate, adhesive, surface preparation, bond area, temperature, and cure time are controlled. Adhesive is not reliable over dusty paneling, damp surfaces, loose laminate, or unknown wall materials.
Should I remove a cabinet before driving the RV?
Yes. Remove or secure the cabinet before driving, especially after a new installation, repair, or suspected fastener failure. Inspect the rails, screw heads, wall skin, latches, and nearby trim after a short test drive before returning the cabinet to full load.
When should an RV shop inspect the installation?
Use an RV shop or qualified fabricator when the wall has delamination, water damage, cracked fiberglass, stripped aluminum framing, hidden electrical routes, or a cabinet intended to carry batteries, tools, or other dense equipment. Professional inspection is also appropriate when the manufacturer’s structural layout is unavailable.
The Bottom Line
How are RV cabinets attached to the walls? RV cabinets are attached through reinforced mounting rails into confirmed wood studs, aluminum framing, plywood backers, or bonded fiberglass cleats, then stabilized with ceiling, side, floor, or adjacent-cabinet connections when needed. Use substrate-matched fasteners, controlled torque, safe screw lengths, and a gradual load test. The strongest installation is the one with a verified load path from the cabinet into the RV structure, not merely the one with the most screws.


