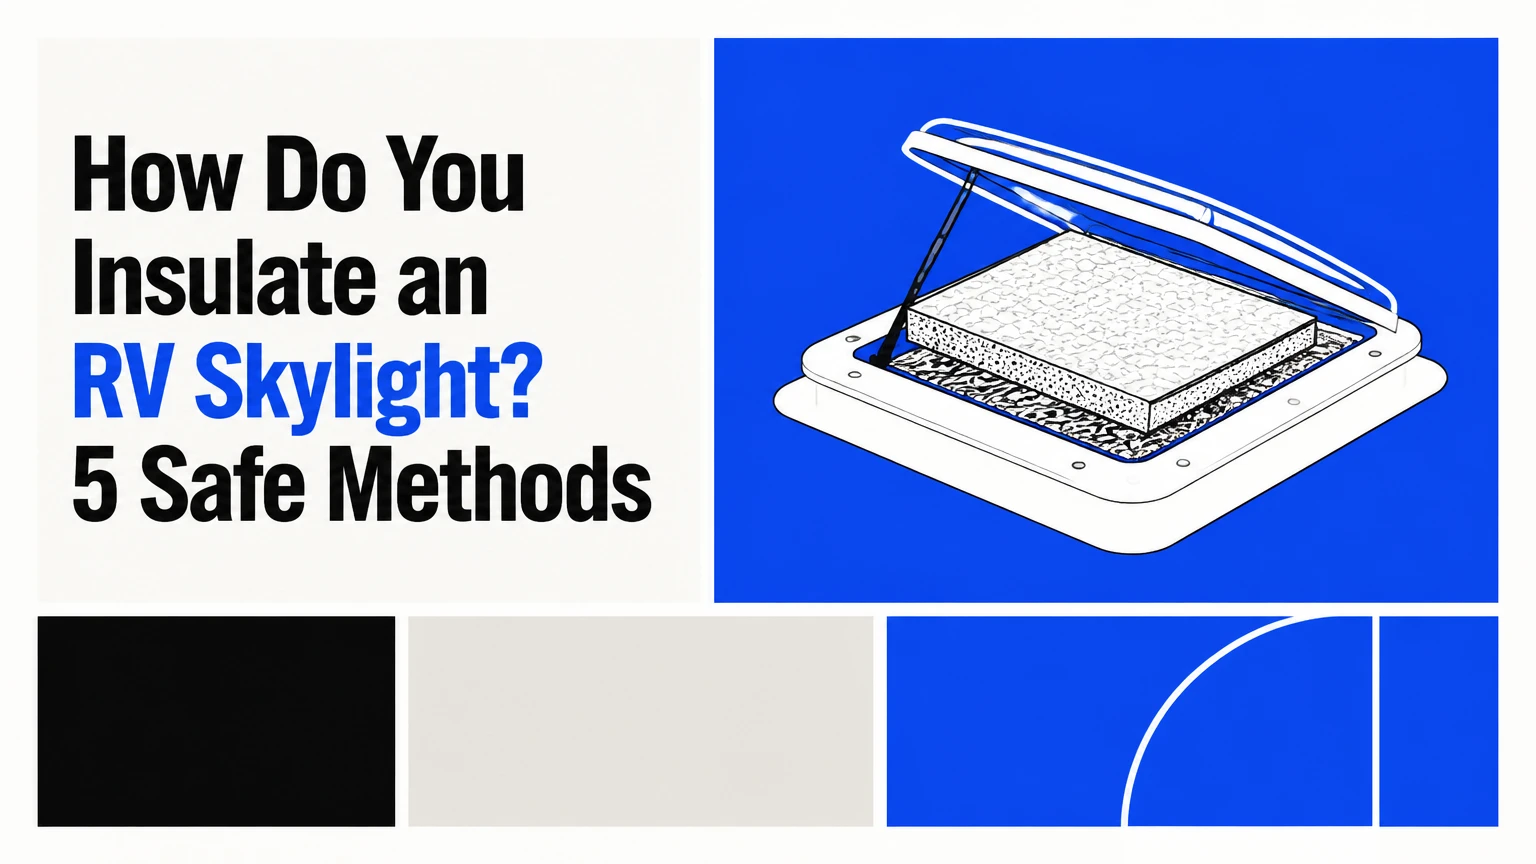
To insulate an RV skylight, make a removable interior panel from rigid foam or quilted insulation, or combine that panel with an exterior shade for intense sun. Measure the interior garnish, preserve a small air space, attach the panel securely, and control humidity so trapped condensation does not damage the ceiling or skylight frame.
Key Facts at a Glance
A removable interior foam panel usually costs $15-$45 and takes 30-60 minutes to make.
Reflective bubble foil needs an air space to function as a radiant barrier; pressed flat against plastic, it provides limited insulation.
Exterior shades reduce solar heating before sunlight reaches the acrylic dome, but roof installation creates fall, leak, and wind risks.
Dark or poorly selected window film can overheat, warp, or crack some acrylic skylights, especially double-pane units.
A panel should fit the interior garnish without bowing the dome, blocking a roof vent, or falling during road vibration.
Condensation control requires dry materials, moderate indoor humidity, and a removable design that can be inspected.
How Do You Insulate an RV Skylight Safely?
The safest general method is a removable interior foam insert fitted inside the skylight garnish. A 1-inch polyisocyanurate or expanded polystyrene panel blocks radiant exchange and slows conduction, while the tight perimeter reduces warm cabin air entering the cold cavity. Add an exterior shade when summer solar gain is the main problem.
RV skylights are commonly made from acrylic or polycarbonate, with an interior trim ring, often called a garnish, surrounding the opening. The garnish is the best attachment area because it is accessible from inside and does not require puncturing the roof membrane.
Insulation works through four mechanisms:
- Radiation: A reflective surface returns part of the infrared energy from sunlight.
- Conduction: Foam and trapped air slow heat movement through the panel.
- Convection: A close-fitting insert limits air circulation near the dome.
- Air leakage: A controlled perimeter fit reduces warm, humid air reaching cold surfaces.
A radiant barrier is not the same as a high-R-value insulation board. The U.S. Department of Energy explains that radiant barriers require an adjacent air space to work effectively, particularly in hot climates. A foil sheet pressed against acrylic has little room to reflect radiation and should not be assigned a guaranteed whole-assembly R-value.
What Should You Check Before Insulating?
Inspect the skylight before covering it, because a damaged seal, cracked dome, or wet garnish needs repair before insulation. Confirm the skylight type, opening size, available recess depth, and whether the unit is a single acrylic sheet or a sealed double-pane assembly.
Identify the skylight construction
Look from inside and outside in daylight. A single-pane dome normally shows one plastic layer, while a double-pane unit shows a second layer or sealed cavity. Do not wedge a thick insert against either layer.
Check for:
- Cracks, crazing, yellowing, or loose fasteners
- Water stains, soft ceiling board, or mold near the garnish
- Existing blinds, screens, fans, or emergency exits
- A roof membrane that is brittle, lifted, or poorly sealed
- Manufacturer labels and installation instructions
Measure the correct surfaces
Measure the clear opening at the top, middle, and bottom, then measure again from side to side. Record the smallest dimension. Measure the recess depth from the interior garnish to the nearest skylight surface.
For a friction-fit insert, make the finished panel approximately 1/8 inch smaller than the smallest opening dimension. Flexible edging can tolerate a tighter fit, but rigid foam that bows outward can press against the skylight.
Do not assume a nominal opening such as 14 by 14 inches is exact. RV production tolerances, replacement skylights, and decorative trim can change the usable dimensions.
Before-you-start checklist
| Item | Typical requirement | Why it matters |
|---|---|---|
| Interior panel material | 1/2-1 inch thick | Provides a thermal break without crowding the dome |
| Reflective foil | 1 layer, cut to panel size | Reduces radiant exchange when an air space remains |
| Hook-and-loop tape | 4-8 pieces, 1-2 inches each | Prevents movement during vibration |
| Measuring tolerance | 1/8 inch clearance | Allows removal without forcing the garnish |
| Cleaning alcohol | 70% isopropyl alcohol | Removes oils from compatible hard trim |
| Build time | 30-60 minutes | Includes measuring, cutting, and test fitting |
| Typical cost | $15-$60 | Depends on foam, foil, edging, and attachment hardware |
Do not use solvent cleaners on acrylic unless the skylight manufacturer approves them. Alcohol may damage some plastics, coatings, or painted trim, so test a hidden area first and use mild soap and water when compatibility is uncertain.
Which Insulation Method Fits Your RV?
For most RV owners, a removable foam insert is the best all-season interior solution. Reflective foil costs less and stores flat, an exterior shade performs better against direct summer sun, and ceramic film preserves daylight but has the highest compatibility risk and installation precision requirement.
| Method | Typical cost | Build or install time | Summer performance | Winter performance | Light retained |
|---|---|---|---|---|---|
| Rigid foam insert | $15-$45 | 30-60 minutes | High | High | 0% |
| Reflective bubble-foil panel | $10-$35 | 15-30 minutes | Moderate to high with air space | Low to moderate | 0% |
| Quilted fabric cushion | $25-$75 | 5-15 minutes to fit | Moderate | Moderate | 0% |
| Exterior canvas or ABS shade | $40-$120 | 30-90 minutes | Very high | Low | 0%-10% |
| Ceramic window film | $25-$250 | 45-120 minutes | Moderate to high | Low | 50%-80% |
| Cellular shade or curtain | $20-$90 | 20-60 minutes | Moderate | Low to moderate | 10%-60% |
The performance descriptions above are practical comparisons, not laboratory R-values for a standardized RV skylight assembly. Published product R-values cannot be transferred directly to a thin, irregular skylight cavity without knowing thickness, air gaps, edge leakage, and installation orientation.
Rigid foam insert: best general-purpose choice
Use 1/2-inch foam when the garnish is shallow and 1-inch foam when the recess allows it. Polyisocyanurate offers more insulation per inch than many low-density foams, while expanded polystyrene is inexpensive and easy to cut.
Cover exposed foam with fabric, foil tape, or thin vinyl. The covering limits crumbling, improves removal, and prevents loose particles from entering the RV interior. Avoid spray foam inside the skylight cavity because it expands unpredictably and can make future skylight replacement difficult.
Reflective bubble foil: best budget choice
Reflective bubble foil works mainly as a radiant barrier, not as a substitute for thick foam. Install the foil on a lightweight panel or leave a clear air gap of approximately 1/2-1 inch between the foil and the skylight surface.
A foil layer touching the dome loses much of its radiant-barrier advantage. The panel can still reduce drafts and block sunlight, but marketing claims assigning R-3 or higher to a foil product alone do not describe every RV installation.
Exterior shade: best for desert sun
A canvas, vinyl, or rigid exterior cap blocks sunlight before the acrylic absorbs it. This arrangement can reduce the dome’s solar temperature and protects the plastic from ultraviolet exposure, but the cover must not pond water, flap in wind, or interfere with roof drainage.
Exterior shades require a roof-safe attachment system. Use existing snaps or a manufacturer-designed cover when possible. Do not drill through a skylight flange or roof membrane unless the skylight maker and roof manufacturer specify the location, fastener, and sealant.
Window film: best when daylight must remain
Ceramic or infrared-rejecting film can reduce solar transmission while leaving visible light, but film selection must match the skylight plastic. Automotive film installation practices do not automatically transfer to acrylic RV domes.
Ask the film manufacturer for written compatibility with acrylic or polycarbonate. Avoid applying dark, highly absorbing film to a sealed double-pane dome unless the skylight manufacturer approves it, because heat trapped between layers can cause distortion or seal failure.
How Do You Make an Interior Skylight Insulation Panel?
Make an interior skylight panel by tracing the smallest garnish opening onto foam, cutting the panel slightly undersized, adding a protective cover, and fitting it without touching the dome. The complete process usually takes 30-60 minutes and requires a tape measure, cardboard, a marker, a sharp knife, and attachment tape.
Step 1: Create a cardboard template
Remove the interior screen or trim only if the manufacturer permits removal. Hold cardboard against the garnish and trace the usable opening, marking corners, screws, wires, and any curved edges.
Cut the template and test it before cutting insulation. A cardboard template costs almost nothing and prevents wasting foam on a measurement error.
You will know it worked when: the template enters and leaves the opening without bending the garnish.
Common mistake: measuring the outside roof dome instead of the interior opening.
Step 2: Choose the thickness and orientation
Select the thickest panel that fits the available recess without touching the skylight. Place reflective foil toward the dome only when an air space remains between foil and plastic.
Leave clearance around any fan, light, crank, or emergency-exit hardware. Never cover an emergency escape hatch in a way that requires tools to remove the panel.
You will know it worked when: the panel sits flat and the dome remains visibly separated from the insulation.
Common mistake: using a thick cushion that presses into the acrylic and transfers road vibration.
Step 3: Cut the insulation
Trace the template onto the foam and cut with a sharp utility knife using several light passes. Cut the finished panel 1/8 inch smaller than the smallest measured opening for a rigid friction fit.
For a foil-faced board, seal cut edges with compatible foil tape. For unfaced foam, add a removable fabric sleeve or thin vinyl cover. Do not use ordinary duct tape near a hot skylight, because its adhesive can soften and leave residue.
You will know it worked when: all edges are smooth, the panel is square, and no foam dust remains.
Common mistake: cutting the panel to the largest measurement, which causes binding when the garnish is irregular.
Step 4: Attach the panel
Use four to eight hook-and-loop pieces on the garnish, or rely on a carefully sized friction fit when the panel is light. Press adhesive-backed tape onto a clean, dry, compatible surface and allow the adhesive to bond according to the tape manufacturer’s instructions.
For heavy quilted covers, use a continuous perimeter strip or mechanical retention designed for the garnish. Do not put screws into the skylight dome.
You will know it worked when: the panel stays in place during a firm hand shake of the surrounding trim and can still be removed without tools.
Common mistake: attaching adhesive to dusty, textured, damp, or low-surface-energy plastic.
Step 5: Test for moisture and heat
Install the panel for several hours, then remove it and inspect both sides for droplets, dampness, odor, or softened adhesive. During sunny weather, check whether the panel or surrounding trim becomes unusually hot.
Use a hygrometer if available. Indoor relative humidity around 30%-50% is a practical cold-weather target, although the correct level depends on temperature and occupancy.
You will know it worked when: the panel remains dry, the dome does not distort, and the insert does not migrate.
Common mistake: leaving a wet panel installed because the moisture is hidden from view.
How Should You Stop Condensation Behind the Panel?
Prevent RV skylight condensation by reducing indoor humidity, keeping the panel removable, and limiting warm air leakage without creating an uninspectable wet cavity. Cooking, showers, drying clothes, and sleeping occupants can raise humidity quickly in a small RV, especially during freezing weather.
A permanent airtight seal around an interior insert is not always the best answer. If moisture enters through a small leak, a fully sealed panel can trap it against a cold frame. Removable insulation allows periodic inspection and drying.
Use these controls:
- Run the bathroom exhaust fan during showers and for 15-20 minutes afterward.
- Vent cooking steam outside rather than recirculating it.
- Wipe visible water from the dome each morning in freezing conditions.
- Keep the panel dry before storage.
- Inspect the ceiling ring weekly during prolonged winter use.
- Avoid covering a skylight that already has a roof leak or wet insulation.
A vapor barrier belongs on the warm side of an assembly only when the entire construction supports that approach. A loose, removable panel inside an RV is different from a designed wall or roof assembly, so foil-taping every edge can create a maintenance problem rather than solving one.
Can an Exterior Cover Prevent More Heat Than an Interior Panel?
An exterior cover generally prevents more summer heat than an interior panel because the shade blocks solar radiation before it reaches the skylight dome. An interior panel still improves comfort by stopping the remaining heat from entering the living space and by reducing the dome’s radiant view.
| Scenario | First choice | Add-on | Main limitation |
|---|---|---|---|
| Desert camping, daytime sun | Exterior shade | Interior foam panel at night | Requires safe roof access |
| Subfreezing overnight use | Interior foam panel | Humidity control | Does not stop daytime solar load |
| Frequent setup and removal | Fabric cushion | Hook-and-loop anchors | Lower compression and insulation consistency |
| Rental RV or no modifications | Loose foam insert | Removable foil face | Adhesives may be prohibited |
| Need for daylight | Compatible ceramic film | Light cellular shade | Requires plastic compatibility confirmation |
| Double-pane acrylic skylight | Exterior shade | Thin, non-contact interior panel | Avoid heat-trapping dark film |
An exterior cover should be taut but not stretched across a sharp dome edge. Leave drainage paths open, inspect attachment points after the first windy trip, and remove the cover if it rubs the skylight or roof membrane.
What Are the Main Installation Risks?
The main risks are acrylic damage, roof leaks, trapped moisture, falling panels, and blocked emergency equipment. Each risk comes from treating an RV skylight like a household window rather than a lightweight vehicle component exposed to vibration, heat cycling, and flexible roof movement.
Acrylic or polycarbonate damage
Many household glass cleaners contain ammonia or solvents that can damage plastic. Use manufacturer-approved cleaners and soft microfiber cloths.
Do not scrape acrylic with a razor blade. Do not force a rigid insert into a curved dome. Do not lean on the skylight while working on the roof.
Thermal shock and double-pane failure
Highly absorbing dark film can raise the temperature of a plastic dome, particularly when an air cavity traps heat. A sealed double-pane skylight has less tolerance for improvised film and thick contact insulation than a simple single-pane dome.
Choose an exterior shade when solar heat is severe. If a dome begins to warp, crack, or show seal separation, remove the film or insert and replace the damaged skylight rather than attempting to flatten it.
Roof leaks
A cover should use existing attachment points whenever possible. If a fastener must penetrate the roof, the repair requires the correct sealant for the roof membrane, such as an EPDM-compatible or TPO-compatible product where applicable.
Self-leveling lap sealant is intended for compatible horizontal roof applications, but it is not a universal adhesive. Verify compatibility with the roof material and follow the product’s curing instructions before driving.
Falling panels
A loose panel can block a driver’s view, drop during sleep, or interfere with emergency egress. Friction fit is acceptable only when the panel remains secure during vibration and can be removed quickly by hand.
Do not use a spring tension rod across an emergency exit unless it releases instantly and does not obstruct the opening. A properly sized panel with four attachment points is usually safer.
What Common Mistakes Reduce Skylight Insulation Performance?
The most common mistakes are measuring the wrong opening, pressing foil against plastic, sealing moisture inside, using incompatible film, and attaching hardware to the roof without a sealing plan. Correcting the installation usually costs less than replacing a cracked dome or repairing a wet ceiling.
| Failure mode | Likely cause | Immediate fix | Prevention |
|---|---|---|---|
| Panel falls overnight | Undersized insert or weak adhesive | Add larger hook-and-loop tabs | Test with vibration and hand pressure |
| Water droplets appear | High humidity or cold cavity | Remove and dry the panel | Vent showers and inspect daily |
| Dome becomes very hot | Dark film or tight air trap | Remove absorbing material | Use an exterior shade |
| Foam crumbles | Uncovered low-density foam | Add fabric or foil-tape edges | Cover every exposed cut edge |
| Roof leaks after cover fitting | Wrong fastener or sealant | Dry, repair, and reseal penetration | Use existing mounts where possible |
| Panel will not fit | Template copied from nominal size | Recut using smallest dimension | Measure at three points |
Expert rule: prioritize solar control outside
A panel inside the RV blocks heat after the dome has already absorbed solar energy. For stationary summer camping, an exterior shade usually provides more effective solar control than adding another interior foil layer.
Expert rule: preserve inspection access
A panel that cannot be removed easily hides leaks, mold, and failed seals. Removable insulation is especially important around older skylights, where a small leak can soften the ceiling substrate before staining becomes obvious.
Expert rule: do not trust generic R-values
An advertised R-value may describe a laboratory material thickness rather than a foil-and-air-gap assembly inside an RV. Compare complete constructions, including edge leakage and contact with the dome, rather than choosing the largest printed number.
Which Method Should You Choose?
Choose a rigid foam insert for the best balance of cost, winter performance, and easy removal. Choose reflective foil for a low-cost seasonal shield, an exterior cover for severe summer sun, and approved ceramic film only when retaining daylight outweighs installation and compatibility risks.
For budget-conscious campers
Use a foil-faced foam board or thin foam insert costing about $15-$35. The panel blocks light, stores easily, and can be remade if the first template is inaccurate.
For four-season RV users
Use an interior foam insert during cold nights and an exterior shade during hot daylight periods. Inspect the assembly for condensation whenever outdoor temperatures fall below the indoor dew point.
For full-time desert travelers
Start with an exterior shade because solar radiation is the dominant load. Add an interior insert for sleeping, but remove it periodically so the skylight and garnish can cool and dry.
For renters and unmodified RVs
Use a removable quilted cushion or friction-fit foam panel. Avoid screws, permanent adhesive, and window film unless the owner approves them in writing.
For daylight-sensitive interiors
Use only a film documented as compatible with the skylight plastic, preferably installed by a technician familiar with acrylic and polycarbonate. A light cellular shade may offer a lower-risk alternative when preserving visibility matters.
How Much Does RV Skylight Insulation Cost and How Long Does It Take?
A DIY interior panel typically costs $15-$60 and takes 30-60 minutes, while an exterior shade costs $40-$120 and takes 30-90 minutes. Professional film installation can cost approximately $100-$250 because curved plastic, dust control, and compatibility testing increase labor.
| Project | Materials | Labor time | Skill level | Recurring maintenance |
|---|---|---|---|---|
| Foam insert | $15-$45 | 30-60 minutes | Basic measuring and cutting | Inspect monthly |
| Foil insert | $10-$35 | 15-30 minutes | Basic cutting and taping | Replace damaged tape |
| Quilted cushion | $25-$75 | 5-15 minutes | Fit and attachment | Wash and dry fabric |
| Exterior cover | $40-$120 | 30-90 minutes | Roof work and sealing | Check snaps and seams |
| Ceramic film | $25-$50 DIY | 45-120 minutes | High precision | Inspect edges and bubbles |
| Professional film | $100-$250 | 1-2 hours | Installer required | Follow film care instructions |
Prices are typical retail and DIY ranges, not guaranteed quotations. Replacement skylights, roof repairs, and professional access equipment are separate costs.
What Changes for Summer, Winter, and No-Roof-Access Use?
Summer insulation should reject sunlight before the dome heats up, winter insulation should reduce indoor-to-outdoor heat transfer while allowing moisture inspection, and no-roof-access solutions should remain entirely inside the RV. The same panel can support all three situations, but the attachment and ventilation requirements differ.
Hot summer variation
Install an exterior shade before the hottest part of the day. If roof access is unsafe, use a reflective interior panel with a clear air space, close curtains below the skylight, and ventilate hot air through roof vents or windows.
Do not place dark fabric directly against the dome. Light-colored exterior materials usually absorb less solar energy.
Cold winter variation
Fit a foam panel inside the garnish after checking that the skylight is dry. Keep indoor humidity controlled and remove the insert every few days for inspection during extended cold-weather occupancy.
If condensation persists, reducing humidity is more effective than adding a second layer of insulation. A warmer panel surface can reduce droplets, but it cannot remove water vapor generated by showers and cooking.
No roof access
Use a removable interior panel secured to the garnish. A cardboard template, 1/2-inch foam, fabric cover, and four hook-and-loop tabs are sufficient for many installations.
Never climb onto a wet, icy, or unsupported RV roof merely to install a shade. A small gain in summer performance does not justify a fall or roof-membrane repair.
FAQ
Can I use Reflectix directly on an RV skylight?
Reflectix or similar foil bubble material can reduce solar radiation when it faces the skylight across an air space. Direct contact with the acrylic reduces the radiant-barrier effect, and the material alone provides less cold-weather insulation than a rigid foam panel. Attach it to a removable insert rather than taping it permanently to the dome.
Should I leave my RV skylight covered all the time?
Leave an RV skylight covered only when the cover remains dry, secure, and compatible with the dome. Remove an interior panel periodically to inspect for condensation, mold, or heat damage. Remove an exterior cover during severe wind if snaps, straps, or edges begin rubbing the roof or skylight.
Can I insulate a leaking skylight?
Insulation cannot repair a leaking RV skylight. Remove the panel, locate whether water enters through the dome, fasteners, flange, or roof membrane, and repair the leak with compatible replacement parts and sealant. Dry wet ceiling materials before reinstalling any insulation.
Is foam board safe inside an RV?
Foam board is practical inside an RV when it is cut cleanly, covered, kept away from heat sources, and installed as a removable panel. Do not leave crumbly foam exposed, obstruct a heater or emergency exit, or use expanding spray foam around the skylight frame.
Will an RV skylight insulation panel stop drafts?
A close-fitting panel can reduce drafts through the skylight opening, but it will not correct a failed skylight seal or loose interior garnish. Inspect the frame and fasteners first. A panel should reduce air movement without being forced tightly enough to distort the plastic.
Can window tint damage an RV skylight?
Window tint can damage some acrylic or polycarbonate skylights when the film absorbs solar energy and traps heat, especially on double-pane units. Obtain compatibility confirmation from the film and skylight manufacturers before installation. An exterior shade is the lower-risk option when heat rejection is the priority.
The Bottom Line
The most reliable answer to how do you insulate an RV skylight is to build a removable, slightly undersized foam panel that attaches to the interior garnish without touching the dome. Add reflective foil only with an air space, use an exterior shade for severe summer sun, and treat ceramic film as a compatibility-sensitive specialist option. Inspect for condensation, preserve emergency access, and never sacrifice roof or skylight safety for a permanent cover.


