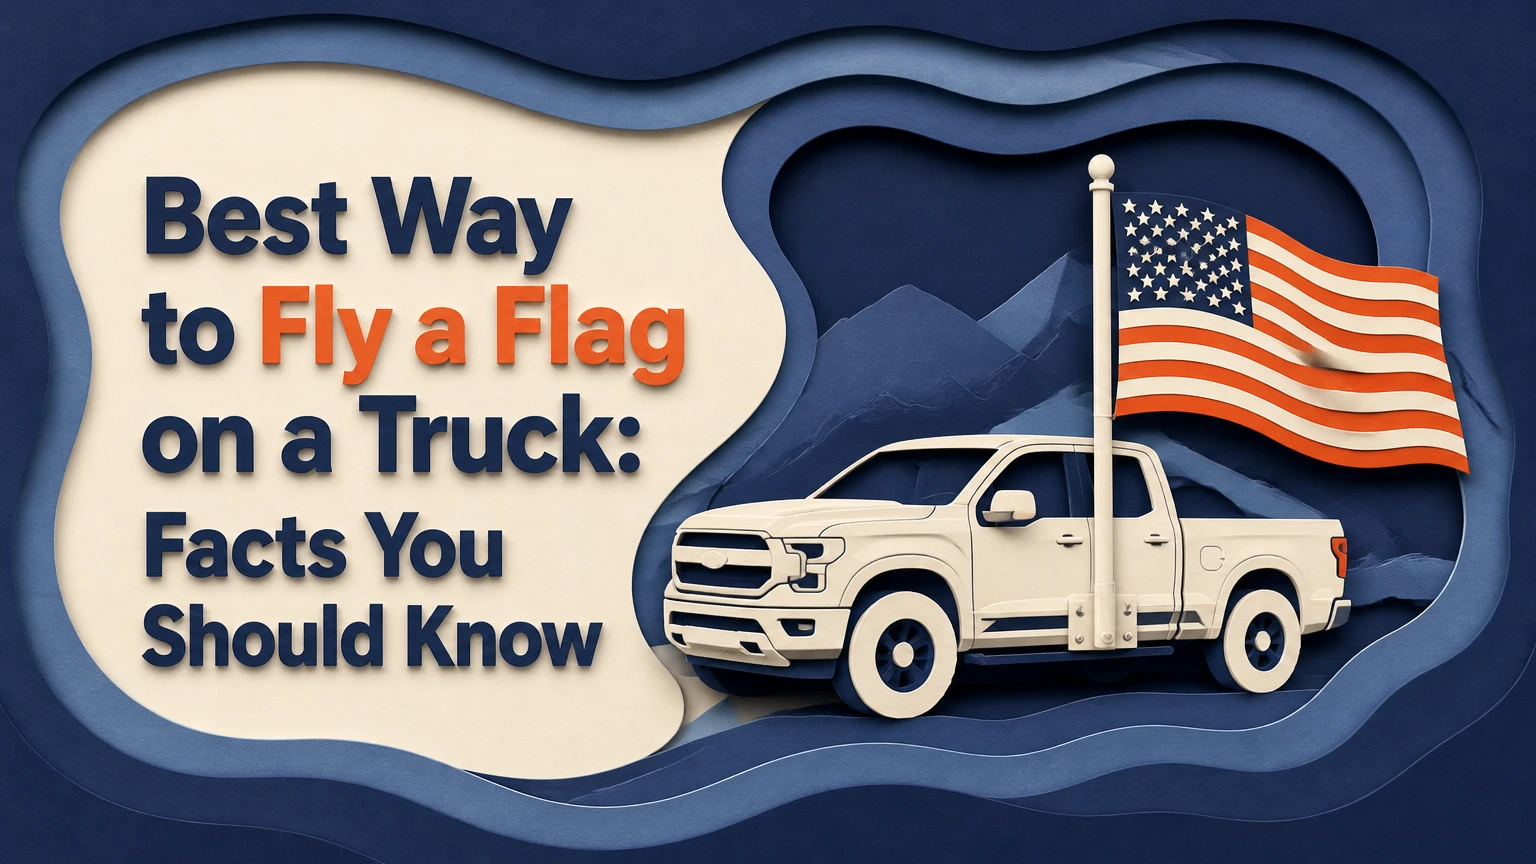
The best way to fly a flag on a truck is to use a vehicle-rated steel tow-hitch mount with a locking hitch pin, a properly supported aluminum or fiberglass pole, and a small, reinforced flag. A hitch mount offers the strongest attachment for moving vehicles, but only when the flag clears lights, the license plate, exhaust, cargo, and local equipment-law requirements.
Key Facts at a Glance
- A 2-inch receiver hitch mount is typically the strongest removable option for a moving pickup.
- A 3×5-foot flag presents 15 square feet of fabric and creates substantially more load than a 2×3-foot flag.
- Aerodynamic force rises approximately with the square of relative wind speed, so doubling speed can produce about four times the idealized drag.
- Window clips and suction mounts are generally appropriate for stationary displays or low-speed parades, not ordinary highway travel.
- A flagpole should flex in controlled conditions, while the receiver, bracket, and hitch pin should remain firmly constrained.
- The U.S. Flag Code requires the union to face forward when the flag is displayed from a vehicle; passenger-side placement alone is not a universal rule.
What Is the Best Way to Fly a Flag on a Truck?
A steel receiver-hitch flag mount is usually the best truck flag mounting method for highway-capable use because the load transfers into the truck’s frame-mounted receiver rather than thin sheet metal, glass, or a bed lip. Use a 2×3-foot flag for regular travel, and reserve a 3×5-foot flag for a robust mount with frequent inspections.
A hitch system normally consists of a steel shank, one or two pole sockets, a hitch pin, and retaining hardware. The receiver must match the mount, most commonly a 2-inch Class III or Class IV receiver. A loose adapter can move enough to amplify vibration even when the hitch pin remains installed.
The best setup is not automatically the largest setup. A larger flag increases visual area, drag, pole bending, fabric flutter, and the chance of covering lighting equipment. The right choice depends on speed, wind exposure, mount strength, flag material, and whether the truck will tow or carry a loaded bed.
Why Does Truck Speed Matter So Much?
A moving flag experiences relative wind created by vehicle speed plus or minus surrounding wind, depending on direction. A truck traveling 60 mph into a 15-mph headwind sees roughly 75 mph of relative airflow before turbulence and gusts are considered.
The idealized aerodynamic relationship is:
Drag force = 0.5 × air density × drag coefficient × area × velocity²
Real flags flap, fold, and spill air, so the equation does not predict exact hardware life. It does explain the important threshold: speed is disproportionately important. At 70 mph, the idealized velocity term is about 1.96 times the term at 50 mph, while gusts can create short-duration peaks that exceed steady cruising loads.
Aerodynamic drag is only one load. Whip, vibration, pole resonance, abrupt braking, crosswinds, and turbulence behind the cab can fatigue a bracket. A mount that survives a calm 55-mph trip may fail after repeated exposure to gusty weather.
Which Truck Flag Mount Should You Choose?
Tow-hitch mounts are the strongest general choice, stake-pocket mounts are useful when the receiver must remain available, bed-rail clamps suit semi-permanent installations, and window or suction mounts belong mainly on parked vehicles or parade routes. The mounting surface, driving speed, flag size, and required truck access determine the practical winner.
| Mounting system | Typical cost | Typical setup time | Appropriate use | Main limitation |
|---|---|---|---|---|
| Steel receiver hitch | $40-$120 | 5-15 minutes | Highway-capable setup, 2×3 or 3×5 flag | Occupies the receiver and may reduce tailgate clearance |
| Stake-pocket bracket | $35-$90 | 10-20 minutes | Bed use, parades, moderate road speeds | Pocket dimensions and bed-rail strength vary |
| Bed-rail or toolbox clamp | $30-$100 | 10-30 minutes | Semi-permanent display, parked events | May scratch paint or require drilling |
| Window clip | $10-$25 | Under 2 minutes | Low-speed parade or stationary display | Weak attachment and possible window damage |
| Suction-cup mount | $15-$45 | 2-5 minutes | Clean glass, parked display | Seal loss from dust, heat, rain, or vibration |
| Tire-anchor base | $20-$60 | 2-5 minutes | Parked tailgating or camping | Not suitable while the truck is moving |
Hitch Mounts
A receiver-hitch mount gives a flag the most direct structural path when the receiver is properly attached to the frame. Dual-socket versions can carry two poles, but two flags increase combined area and can introduce asymmetric side loading when one flag catches a gust.
Inspect the receiver for corrosion, cracks, bent edges, and weld damage. Use the manufacturer’s supplied pin or a correctly sized locking pin, then add an anti-rattle device if the shank moves inside the receiver. Anti-rattle hardware reduces noise and vibration, but it does not increase the receiver’s rated load capacity.
Stake-Pocket Mounts
Stake-pocket mounts sit in the rectangular openings along the top of many pickup-bed rails. They preserve the trailer hitch and often leave the tailgate usable, although a pole near the corner can obstruct cargo handling or contact the tailgate when opened.
Stake pockets are not identical across trucks. Measure the opening, inspect the pocket for rust, and confirm that the bracket bears against solid material rather than a loose plastic insert. Expansion-style anchors need firm contact and periodic retightening.
Bed-Rail and Toolbox Clamps
Clamp systems attach to a bed rail, tonneau-compatible rail, or heavy-duty toolbox. They are convenient when the hitch is used for a trailer, bike rack, or cargo carrier, but the clamp must avoid crushing thin aluminum rails or interfering with bed covers.
A drilled toolbox installation can be rigid when it uses backing plates and correctly sized fasteners. Drilling a bed rail, however, creates corrosion and warranty considerations. Use isolating washers and sealant where the manufacturer permits permanent installation.
Window and Suction Mounts
Window clips and suction cups provide the least reliable attachment for a moving truck. A rolled-up window can hold a small parade flag at low speed, but glass, weather seals, plastic clips, and suction seals are poor substitutes for a frame-mounted receiver.
A suction cup may hold briefly in a garage and fail after heat, dust, rain, or body vibration changes the seal. Treat these mounts as display accessories unless the product manufacturer explicitly rates the complete setup for the intended speed and flag area.
What Flag Size and Pole Should You Use?
A 2×3-foot flag is the most conservative choice for routine driving, while a 3×5-foot flag requires stronger hardware, a more durable pole, and more frequent inspection. Vehicle flags should use reinforced hems and attachment points because ordinary decorative flags often fail first at the grommets and fly-end stitching.
| Flag size | Fabric area | Typical pole range | Practical moving use | Typical retail flag cost |
|---|---|---|---|---|
| 12×18 inches | 1.5 sq. ft. | 0.5-0.75 inch | Small parade or slow local travel | $8-$20 |
| 2×3 feet | 6 sq. ft. | 0.75-1 inch | Most conservative road setup | $15-$40 |
| 3×5 feet | 15 sq. ft. | 1-1.25 inches | Strong hitch mount and frequent checks | $25-$70 |
| 4×6 feet | 24 sq. ft. | 1.25 inches or larger | Parked display or engineered specialty mount | $40-$100 |
| 5×8 feet | 40 sq. ft. | Engineered steel system | Stationary use only in most pickups | $60-$150 |
Flag area alone does not determine force. A porous polyester flag may spill air differently from tightly woven nylon, and a wet flag becomes heavier while changing its flutter behavior. Vehicle-rated polyester with double or quadruple stitching usually tolerates abrasion better than a thin promotional banner.
For poles, heavy-wall anodized aluminum offers low weight and corrosion resistance. Fiberglass can absorb flex but may splinter after ultraviolet exposure or impact. Thin PVC, broom handles, and untreated wood are poor choices because they can crack, shatter, or produce sharp fragments.
A 1 to 1.25-inch outside diameter is a common practical range for a 3×5-foot flagpole, but the manufacturer’s bending and speed rating matters more than diameter alone. A thick tube with a weak joint can fail before a smaller, continuous pole.
How Do You Install a Hitch-Mounted Truck Flag?
Install a hitch-mounted flag by cleaning the receiver, inserting and pinning the bracket, securing the pole, attaching the flag with rotating hardware, and checking every clearance point before driving. A basic installation takes 5-15 minutes, but the final inspection determines whether the setup is usable.
Before You Start
| Requirement | Typical specification |
|---|---|
| Receiver | 2-inch square receiver, free of cracks and severe rust |
| Mount | Steel shank with one or two pole sockets |
| Pole | 0.75-1.25-inch aluminum or fiberglass, manufacturer-rated |
| Flag | 2×3 feet for conservative travel, 3×5 feet for robust systems |
| Hardware | Correct hitch pin, retaining clip, swivel rings, stainless carabiners |
| Tools | Tape measure, flashlight, wrench, thread locker if specified |
| Inspection time | 10 minutes before first trip, 2 minutes before later trips |
Step 1: Inspect and Clean the Receiver
Remove dirt, loose scale, and debris from the receiver tube. Check the hitch welds, pin holes, safety-chain areas, and nearby bumper structure for damage.
You will know the receiver is ready when the shank slides fully into place without binding. Do not compensate for a bent receiver with force or oversized hardware.
Step 2: Insert and Pin the Mount
Push the hitch shank fully into the receiver and align the holes. Install the correctly sized hitch pin from the mount manufacturer, then secure its clip or locking mechanism.
A locking pin discourages theft but does not replace a retaining clip or correct fit. Add an anti-rattle clamp only after the mount reaches its full insertion depth.
Step 3: Secure the Pole
Insert the pole into the socket and tighten the supplied clamp, thumbscrew, bolt, or cotter-pin system. Keep the pole’s bottom below the socket’s minimum insertion mark, if one exists.
The pole should not rotate inside the socket unless the mount is designed to rotate. A loose pole magnifies motion and can wear the socket rapidly.
Step 4: Attach the Flag
Connect the flag’s grommets to swivel rings, rotating clips, or stainless carabiners. Leave enough freedom for the flag to rotate around the pole instead of winding tightly around it.
Do not use a single rigid zip-tie connection at every attachment point. Zip ties can supplement retention, but they can also concentrate stress and cut fabric during repeated flapping.
Step 5: Check Clearance
Measure the flag and pole against the truck with the tailgate closed and open. Confirm that the flag does not cover the license plate, tail lights, center high-mounted stop lamp, turn signals, reflectors, backup camera, exhaust outlet, or trailer connection.
Maintain a visible gap from hot exhaust components. Diesel exhaust systems, gasoline tailpipes, and regenerated diesel particulate filter systems can expose nearby fabric to damaging heat.
Step 6: Perform a Static Load Test
Shake the pole and mount by hand using firm, controlled force. Look for receiver movement, fastener loosening, fabric contact with metal, and interference with the tailgate.
The setup passes when the mount stays constrained, the pole returns without permanent bending, and no part touches a lamp, tire, exhaust outlet, or road surface. Recheck the hitch pin after the first short drive.
What Are the Legal and Etiquette Rules?
Driving with a truck flag may be legal, but state and local equipment laws can prohibit anything that obscures a license plate, lamp, reflector, or the driver’s view. The U.S. Flag Code provides display guidance, while traffic enforcement depends on the jurisdiction where the truck operates.
For the U.S. flag, 4 U.S.C. §7 states that when displayed on a vehicle, “the flag should be displayed with the union toward the front of the vehicle.” Congress describes the Flag Code as customary guidance rather than a general criminal penalty for private display, but local rules still govern roadway equipment.
The common claim that the U.S. flag must always occupy the passenger side is too broad. When multiple flags are displayed, placement depends on the viewing arrangement and the flag’s position of honor; follow the Flag Code and any event-specific protocol rather than relying on a passenger-side shortcut.
| Check before driving | Acceptable condition | Stop condition |
|---|---|---|
| License plate | Fully visible from required distance | Any fabric or pole covers characters |
| Tail lights | Entire lamp face remains visible | Flag overlaps brake or turn signal |
| Exhaust | Fabric remains outside hot-gas path | Flag contacts or trails over outlet |
| Tires | No fabric reaches the wheel path | Pole or cloth can enter tire area |
| Tailgate | Opens without striking hardware | Tailgate contacts pole or bracket |
| Driver view | No obstruction through mirrors or glass | Flag blocks mirror or rear view |
How Do the Mounts Compare for Real Truck Uses?
The strongest mount is not always the most useful mount because truck access, towing, storage, and speed change the decision. A hitch mount fits daily highway use, a stake-pocket mount suits an available bed pocket, and a tire anchor is better for a parked tailgate than for any moving application.
| Driver situation | Recommended mount | Flag size | Typical speed posture | Reason |
|---|---|---|---|---|
| Daily highway travel | Steel receiver hitch | 2×3 feet | Manufacturer-rated road use | Strongest common load path |
| Large event convoy | Dual hitch mount | 2×3 feet each | Conservative speed and inspections | Supports two poles with balanced spacing |
| Low-speed parade | Stake pocket or window clip | 12×18 inches or 2×3 feet | Parade speed only | Quick removal and lower exposure |
| Towing a trailer | Bed-rail clamp | 12×18 inches or 2×3 feet | Check manufacturer rating | Leaves receiver available |
| Tailgating while parked | Tire anchor | 3×5 feet or larger | Stationary only | Preserves tailgate access |
| Off-road camping | Bed clamp or tire anchor | 2×3 or 3×5 feet | Parked only | Avoids branches and impact loads |
The daily highway setup has an honest limitation: no consumer mount can guarantee safety in every wind, road, or vehicle condition. A hitch bracket can remain attached while a pole fractures, fabric tears, or a loose flag creates a distraction. Remove the system during severe weather, car washes, automated brush cleaning, and towing unless the complete arrangement is specifically approved.
What Common Problems Cause Failure?
Flag wrapping, pole breakage, rattling, fabric fraying, and blocked vehicle equipment are the most common truck flag failures. Each problem usually traces to a mismatch between flag area, attachment hardware, speed, and inspection frequency.
The Flag Wraps Around the Pole
Install rotating rings or swivel clips at the grommets. A flag tied tightly to a stationary pole cannot relieve torsional loading, so it winds around the pole and concentrates stress at the upper corner.
A free-spinning attachment reduces wrapping but does not eliminate drag. Replace the flag if the corner grommet pulls out or the hem splits more than a few inches.
The Pole Bends or Breaks
Reduce flag size first, then reduce speed and inspect the pole joint. A pole that permanently bows after a trip has exceeded its useful load range, even if it has not visibly cracked.
Do not replace a broken fiberglass pole with thin PVC of the same diameter. Material stiffness, wall thickness, joint design, and UV condition matter more than appearance.
The Hitch Mount Rattles
Use an anti-rattle clamp or wedge designed for the receiver size, then retighten the mount according to its instructions. Rattle indicates relative movement, which can accelerate hole wear and fatigue at welded joints.
An anti-rattle device cannot correct a mismatched shank, an oversized receiver opening, or a damaged pin hole. Replace defective components rather than silencing them.
The Fabric Frays Quickly
Choose a vehicle-rated polyester flag with a reinforced fly end, double-stitched hems, and metal or reinforced grommets. Inspect the leading edge, corners, and attachment points after every extended trip.
Trim loose threads only when the underlying hem remains intact. A torn corner needs sewing or replacement; tape alone usually peels under rain and airflow.
The Setup Blocks a Lamp or Plate
Move the mount, reduce the flag size, or remove the flag. Do not angle the fabric across a lamp and assume airflow will keep it clear, because braking, crosswinds, and a stopped vehicle can change its position immediately.
How Much Does a Truck Flag Setup Cost?
A practical truck flag setup typically costs $55-$190, including a mount, pole, flag, retaining hardware, and an anti-rattle accessory. A basic parade setup can cost $20-$60, while a dual-pole, permanently mounted, vehicle-rated system can exceed $200.
| Setup level | Included components | Typical total cost | Installation time |
|---|---|---|---|
| Parade basic | Window or stake mount, small flag, pole | $20-$60 | 2-15 minutes |
| Single hitch | Steel mount, pole, 2×3 flag, pin | $55-$140 | 5-15 minutes |
| Highway-oriented | Heavy hitch mount, reinforced pole, 3×5 flag, swivels | $90-$190 | 10-20 minutes |
| Dual display | Dual hitch mount, two poles, two flags, locks | $140-$300 | 15-30 minutes |
| Permanent bed setup | Drilled bracket, backing plates, pole, flag | $100-$250 | 30-90 minutes |
Prices are typical retail ranges rather than guaranteed quotes. Installation labor, custom fabrication, replacement flags, and vehicle-specific adapters can raise the total.
A useful practitioner rule is to spend more on the attachment system than on decorative fabric. The flag is a replaceable wear component; a cracked bracket or loose hitch connection is a vehicle-safety problem.
What Should You Inspect Before Every Trip?
Inspect the hitch pin, pole socket, pole joints, swivel rings, grommets, fabric hem, receiver fit, and vehicle clearance before driving. A two-minute inspection catches most developing failures, especially after rain, gravel roads, hard braking, or a long highway trip.
Use this sequence:
- Confirm the hitch pin and retaining clip are present.
- Pull upward and sideways on the mount by hand.
- Check pole cracks, bends, splinters, and loose joints.
- Examine both flag corners and every grommet.
- Confirm the flag cannot contact the exhaust or tires.
- Verify the plate, lamps, reflectors, mirrors, and camera remain visible.
- Recheck the system after the first 5-10 miles.
Remove the flag before entering an automatic car wash. Brushes can catch the pole, while high-pressure water can damage stitching and force moisture into suction-cup seals.
Which Setup Fits Each Driver?
The Highway Driver
Choose a steel receiver-hitch mount with a single 2×3-foot reinforced polyester flag and a locking pin. This arrangement minimizes sail area while using the truck’s strongest common mounting point.
The Parade Driver
Choose a stake-pocket mount or small window clip for controlled, low-speed routes. Keep the flag small, confirm event rules, and remove the accessory before joining normal-speed traffic.
The Towing Driver
Choose a bed-rail or toolbox clamp that does not occupy the receiver. Verify that the pole cannot contact the trailer, breakaway cable, safety chains, or turning envelope.
The Tailgater
Choose a tire-anchor mount for a stationary display. Never leave a tire-anchor flag installed while the truck is moving, even across a parking lot.
FAQ
Can You Drive on the Highway With a Flag on a Truck?
You may be able to drive on a highway with a flag when the complete mount is designed for vehicle motion and complies with local equipment laws. The setup must not obscure lamps, reflectors, mirrors, the license plate, or the driver’s view. Product speed claims are not universal legal approvals.
Is a 3×5 Flag Too Big for a Pickup Truck?
A 3×5-foot flag is not automatically too large, but its 15-square-foot area creates substantially more aerodynamic exposure than a 2×3-foot flag’s 6 square feet. Use it only with a robust mount, a supported pole, reinforced fabric, and conservative driving conditions.
Can a Truck Flag Stay Installed in the Rain?
A polyester flag can tolerate ordinary rain, but wet fabric becomes heavier and may increase stress on grommets and stitching. Remove the flag during storms, high winds, hail, freezing conditions, and long-term outdoor storage, then dry it fully before folding.
How Do You Stop a Flag From Wrapping Around the Pole?
Use swivel rings or rotating clips at the flag’s grommets so the fabric can rotate independently of the pole. Avoid tying the flag tightly to a fixed pole, and replace damaged corners because a torn grommet makes wrapping and failure more likely.
Can You Tow With a Hitch Flag Mount Installed?
Do not assume a hitch flag mount is compatible with towing. Many mounts occupy the receiver, reduce access to the hitch pin, interfere with trailer wiring, or place the flag near the trailer. Remove the flag mount unless its manufacturer specifically approves the towing configuration.
What Is the Safest Alternative to a Moving Truck Flag?
A magnetic door decal, removable vinyl graphic, or properly installed body decal avoids a projecting object and aerodynamic sail. For a physical flag, use a stationary tire-anchor or freestanding pole at the destination instead of transporting a large flag at highway speed.
The Bottom Line
The best way to fly a flag on a truck facts you should know all point to one decision: use a frame-supported steel hitch mount for moving applications, select a 2×3-foot flag unless the equipment is specifically robust, and inspect clearance before every trip. A 3×5-foot flag can work with stronger hardware, but no mount eliminates wind, vibration, weather, or local-law risks.


