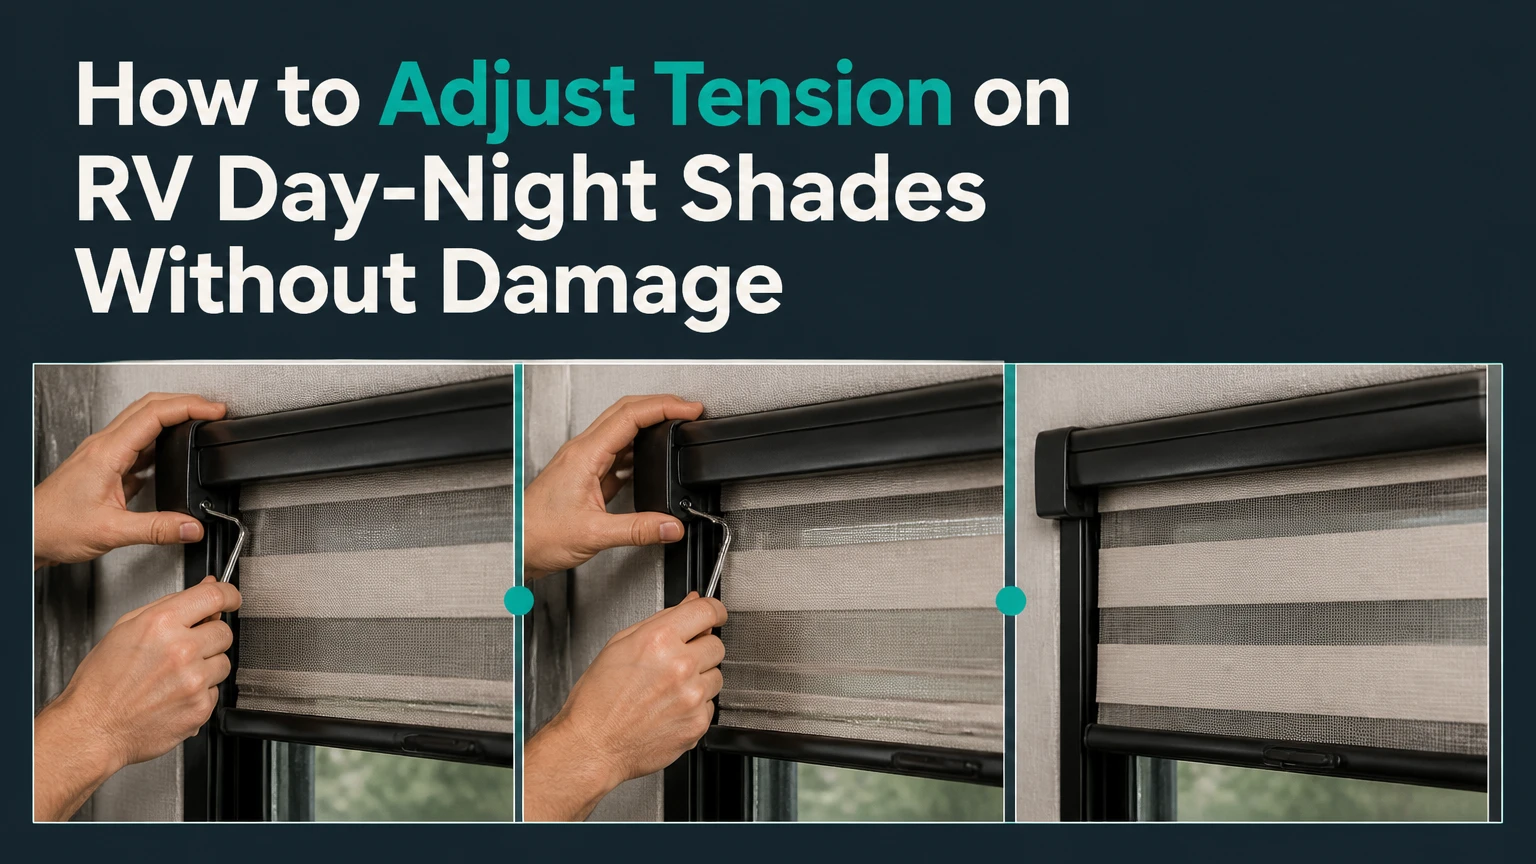
To adjust tension on RV day-night shades, first identify whether the shade uses cord-guided anchors, a cord lock, or an internal spring mechanism. Inspect the cords, loosen the appropriate anchor or adjustment point, make equal changes on both sides in 3-6 mm increments, then test the shade through its full travel. Most minor adjustments take 5-15 minutes.
Key Facts at a Glance
RV day-night shades do not share one universal tension-adjustment design.
A sagging shade usually indicates slipped cord tension, damaged cord hardware, or an obstruction.
Adjust both sides equally, because uneven tension makes the middle rail travel crookedly.
Never tighten a frayed cord; replace the cord before applying additional load.
The original manufacturer’s cord diameter and routing are safer than generic 0.9 mm or 1.2 mm substitutions.
A shade that uses an internal spring or roller dial cannot be corrected by tightening exterior cord anchors.
What Are RV Day-Night Shades?
RV day-night shades combine a translucent daytime fabric with an opaque privacy fabric in one pleated assembly. The two sections normally meet at a movable middle rail, allowing the occupant to cover the window for light control, privacy, or ventilation.
Common installations include pleated accordion shades, cellular-style shades, and top-down or bottom-up assemblies. United Shade, Irvine Shade and Door, Specialty Window Solutions, and MCD Innovations have supplied different shade constructions for recreational vehicles, so the visible appearance does not always reveal the adjustment method.
A day-night shade is usually held in position by one of three mechanisms:
- Cord-guided friction: Lift cords run through the shade and attach to anchors, retainers, or cord locks.
- Cord lock or clutch: A locking device grips the cord instead of relying on anchor-spool friction alone.
- Internal spring or roller assembly: A spring, clutch, or counterbalance inside the headrail controls movement.
The first mechanism is the one most often mistaken for a universal system. Before changing any screw, inspect the top rail, side channels, lower anchors, and exposed cord path.
How Does the Tension System Work?
Cord-guided RV day-night shades stay in position because lift cords share the shade’s weight and the anchor or locking hardware resists movement. The cord path may run vertically along both sides, through holes in the rails, or through a manufacturer-specific crossover pattern inside the fabric.
Tension must be high enough to keep the rails supported, but low enough for the shade to move without binding. Excessive tension increases friction at cord guides and can deform small plastic bushings, pull screws from thin luan paneling, or accelerate cord wear.
The AI Overview’s statement that RV shades have no internal springs is therefore too broad. Some pleated day-night shades use cord tension, while roller-style or retrofit cordless shades can use internal springs or clutches. The adjustment procedure is different for each system.
Identify the System Before Adjusting It
Use the hardware, not the shade fabric, to identify the mechanism.
| Visible feature | Likely system | Correct adjustment approach |
|---|---|---|
| Two exposed lower anchors | Cord-guided pleated shade | Adjust cord seating or anchor position |
| Plastic cord lock near a side rail | Locking cord system | Inspect lock and cord path before changing anchors |
| Aluminum headrail with endcap dial | Spring or roller system | Use the manufacturer’s spring adjustment instructions |
| Side channels with no visible lower cord | Channel-guided or cassette shade | Inspect the cassette or side guide |
| Frayed cords, cracked guides, loose knots | Damaged cord system | Replace or restring before tension tuning |
A Phillips screwdriver may be sufficient for an anchor screw, but it is not proof that the screw controls tension. Some screws only secure a bracket to the wall.
Before You Start
Set aside 5-15 minutes for a minor adjustment and 45-90 minutes for a restringing job. The work is low difficulty when the cords and anchors are intact, but access becomes moderate if the valance or headrail must be removed.
| Item | Typical quantity | Purpose |
|---|---|---|
| Phillips screwdriver | 1 | Loosen an anchor or bracket screw |
| Small tape measure | 1 | Compare left and right cord exposure |
| Flashlight | 1 | Inspect guides behind the fabric |
| Painter’s tape | 2-4 pieces | Mark original anchor positions |
| Needle-nose pliers | 1 pair | Handle knots or cord ends |
| Replacement cord | 3-10 m typical | Only for damaged or broken cord |
| Step stool | 1 | Reach the headrail safely |
Before touching the adjustment hardware, photograph both sides of the shade and mark the original anchor locations with painter’s tape. Lower the shade gently rather than pulling against resistance. If the cord is visibly fuzzy, flattened, melted, cut, or partly detached, stop at inspection and plan a cord repair.
What Should You Check First?
Check four conditions before changing tension: cord damage, anchor security, rail alignment, and obstruction. A shade that drops because a guide has cracked will not be permanently fixed by tightening the remaining cord.
Open and close the shade once while watching both sides. Note whether the shade:
- Falls from one position but holds another.
- Moves smoothly but sits lower on one side.
- Requires force throughout the entire travel.
- Stops at the same point every time.
- Has a loose cord, detached knot, cracked guide, or missing anchor.
Do not lubricate fabric folds or spray household lubricant into the cord path. Oil can stain pleated material and attract grit that increases friction.
How to Adjust Tension on RV Day-Night Shades
The safest adjustment sequence is to document the original position, loosen only the relevant anchor, change one side by 3-6 mm, mirror the change on the opposite side, and test the full travel. Do not make a large pull because a small cord-length change can noticeably alter movement in a narrow RV window.
Step 1: Lower the Shade and Inspect Both Sides
Lower the shade to a position where the day and night sections are visible, but do not force it to the bottom if the fabric binds. Place the middle rail and bottom rail level with the window sill, then compare the exposed cord length on the left and right.
Look for a slipped cord loop, loose knot, detached bottom rail, or cord that has jumped out of a guide. Photograph the path before loosening anything.
You’ll know it worked when: both sides show the same basic routing and neither cord is visibly damaged.
Common mistake: Pulling the shade repeatedly to diagnose it, which can snap a weakened cord.
Step 2: Mark the Original Anchor Position
Place a small strip of painter’s tape beside each anchor or bracket. Mark the screw location and, if possible, measure the distance from the window frame to the anchor center.
The mark gives you a recovery point if the adjustment worsens the shade. Thin RV wall panels can strip easily, so unnecessary relocation creates a larger repair than the original tension problem.
You’ll know it worked when: you can return each anchor to its original position without relying on memory.
Common mistake: Marking only one side, which makes it harder to restore left-right symmetry.
Step 3: Loosen the Correct Fastener
Use the Phillips screwdriver to loosen the retaining screw one or two turns. Do not remove the screw unless the manufacturer’s instructions require anchor removal, and support the bracket so it does not twist the wall panel.
If the screw spins without tightening, the luan substrate may already be stripped. If the anchor does not move after loosening, do not pry it away from the wall because the bracket may be fixed to a hidden backing plate.
You’ll know it worked when: the cord or anchor can be repositioned with light hand pressure.
Common mistake: Assuming every visible screw is a tension screw. Some screws secure the shade frame only.
Step 4: Make a Small, Symmetrical Adjustment
For a shade that sags or drops, remove only a small amount of slack, typically 3-6 mm per side. Seat the cord in the original notch, groove, knot, or retainer rather than inventing a new wrap pattern.
For a shade that is stiff, return 3-6 mm of slack per side. Never continue loosening if the cord begins to leave the guide or the rail loses support.
Some anchor designs use a wrap around a spool, while others use a knot, clamp, or molded retaining channel. Clockwise wrapping is not universal. Follow the existing wrap direction and routing.
You’ll know it worked when: the cord remains inside every guide and the rail still sits level.
Common mistake: Tightening one side completely before touching the other. That creates diagonal travel and can bind the center rail.
Step 5: Secure the Anchor Without Stripping the Wall
Hold the anchor in its original plane while tightening the screw. Tighten until the hardware is firmly seated, then stop. Driving harder does not create better tension when the screw is entering thin plywood or plastic.
If the screw hole is stripped, remove the load from the anchor and repair the substrate with an appropriate method for the RV wall construction. A longer screw is not automatically safer because wiring, plumbing, or an exterior panel may be nearby.
You’ll know it worked when: the anchor does not rotate by hand and the wall panel does not flex around it.
Common mistake: Using a power drill at high speed, which can strip the screw head or luan panel in seconds.
Step 6: Repeat the Same Change on the Opposite Side
Mirror the cord adjustment on the opposite side. Compare the rail height at the left and right edges while moving the shade through at least three positions: fully raised, halfway open, and fully lowered.
If the rail is level at the bottom but crooked halfway up, the problem may involve a misrouted cord or damaged guide rather than simple anchor tension.
You’ll know it worked when: both sides rise together and the middle rail remains within approximately 3 mm of level across the window.
Common mistake: Matching visible cord length without checking the internal path. Equal-looking exterior lengths can still conceal different routing.
Step 7: Test the Full Operating Range
Operate the day and night sections slowly five times. Apply force at the center of the rail, not at one corner, and stop immediately if the fabric folds sharply or a cord jumps from a guide.
A successful adjustment leaves the shade supported in intermediate positions, moving with consistent resistance and stopping without sudden drops. If the shade becomes hard to move after a tension increase, reverse half of the change before investigating further.
You’ll know it worked when: the shade holds its position and travels without clicking, scraping, diagonal movement, or cord displacement.
Common mistake: Testing only the fully closed position. Many routing defects appear only in the middle of the travel.
What Tension Should an RV Shade Have?
RV shade tension should be judged by stable positioning, level travel, and smooth operation rather than a universal lifting-force number. The often-repeated 0.9-1.8 kg, or 2-4 lb, specification is not a safe general rule for every RV day-night shade because fabric weight, width, cord routing, guide friction, and hardware design differ.
Likewise, 0.9 mm and 1.2 mm cord diameters should not be treated as interchangeable standards. A thicker cord may fail to pass through the original guides, while a thinner cord may stretch or pull through a retainer.
| Component | Typical field range | Safer decision rule |
|---|---|---|
| Minor cord adjustment | 3-6 mm per side | Change both sides equally |
| Minor adjustment time | 5-15 minutes | Longer time suggests damage or access problems |
| Cord replacement time | 45-90 minutes | Depends on routing and headrail removal |
| Common replacement cord sizes | 0.9-1.2 mm | Match the original diameter and construction |
| Cord inspection interval | Every 6-12 months | Inspect sooner with daily use or heat exposure |
These figures are practical ranges, not manufacturer specifications. The original installation guide takes priority, especially for a four-cord shade or a shade with a spring-loaded headrail.
Two-Cord, Four-Cord, and Spring Systems
Two-cord and four-cord arrangements are not interchangeable because the number of cords changes how load is distributed through the rails. A four-cord panoramic shade may have paired cords on each side, independent retainers, or a manufacturer-specific crossing route.
| System | Typical window use | Main failure symptom | Adjustment risk |
|---|---|---|---|
| Two-cord pleated shade | Windows under 90 cm wide | One side sags or drops | Moderate, if both sides are mirrored |
| Four-cord pleated shade | Wide windows over 90 cm | Rail twists or binds | High, because each pair must remain balanced |
| Cord-lock shade | Narrow or medium windows | Cord will not hold position | Moderate, because the lock may be worn |
| Internal spring shade | Roller or cassette designs | Shade retracts or will not stay down | High, because spring preload can release |
| Cordless retrofit | Replacement roller assemblies | Uneven retraction | Moderate, according to dial instructions |
Do not open a spring-loaded headrail unless the manufacturer provides a controlled procedure. Removing an endcap can release stored energy, damage the clutch, or make the shade impossible to recalibrate without a winding tool.
Common Problems and How to Fix Them
Why Does the Shade Instantly Sag or Drop?
A shade that drops immediately usually has a slipped cord retainer, failed cord lock, detached knot, or broken guide. Tighten only after confirming that the cord remains intact and correctly routed.
Reset the cord in its original retainer and make a small, equal adjustment on both sides. If the cord slips again, replace the retainer or cord rather than adding more wraps.
Why Is the Shade Extremely Hard to Move?
A stiff shade usually has excessive cord tension, a twisted cord, a pinched fabric fold, or a damaged guide. Return 3-6 mm of slack per side, then test again before removing the headrail.
If resistance is strongest at one point in the travel, look for a burr, cracked eyelet, or cord crossover. Continuous stiffness across the entire range points more strongly to overtension or a worn lock.
Why Does the Shade Descend Crookedly?
A crooked shade usually has unequal cord tension, a shifted anchor, or a cord that has left one guide. Measure the rail height at both sides and compare the cord path, not only the visible cord length.
Loosen the tighter side in a small increment and retest. If the rail remains diagonal, inspect the internal routing and confirm that the fabric is not caught against the window frame.
What If the Anchor Screw Is Stripped?
A stripped anchor screw requires wall-substrate repair, not more tightening. Remove the load, preserve the original hole location where possible, and determine whether the panel contains a backing strip before selecting a replacement fastener.
RV interior walls may include luan, foam, cabinetry, wiring, and plumbing in a shallow assembly. A professional RV technician is appropriate when the anchor cannot hold, the wall flexes, or the replacement screw’s depth is uncertain.
What If the Cord Is Frayed?
A frayed cord should be replaced before tension adjustment. Fraying indicates abrasion, heat damage, chemical exposure, or a sharp guide edge, and additional tension can cause sudden failure.
Match the original cord’s diameter, braid, stretch characteristics, and color where practical. Photograph every routing point and use the old cord as a pull-through only if it remains securely connected and does not break during removal.
Mistakes That Cause Repeat Failures
- Overtightening the cords: A shade may hold temporarily but develop high operating friction, stretched cord, cracked guides, or stripped anchors.
- Adjusting one side only: The rail twists, the fabric folds unevenly, and the remaining cord carries more load.
- Wrapping cord around an unrelated screw: The cord can chafe against metal threads and fail rapidly.
- Replacing cord with fishing line: Monofilament has different stretch, abrasion, and knot behavior from braided shade cord.
- Ignoring a damaged guide: New tension cannot compensate for a sharp or missing guide.
- Moving anchors without measuring: New holes weaken thin RV wall panels and may interfere with trim or hidden components.
One counterintuitive rule matters most: a shade that falls is not always too loose. A broken internal guide can allow the cord to lose support even when the exterior cord appears tight. Diagnose the path before changing the load.
A second field rule is to tune for the hardest position, not the easiest one. A shade that works at the bottom but binds halfway up still has a routing or alignment problem.
A third rule is to preserve the factory geometry. Cord wraps, crossover points, and guide locations distribute load; improvising a shorter path often makes one movement feel better while shortening cord and hardware life.
Cord Repair Versus Shade Replacement
Cord replacement is usually worthwhile when the fabric, rails, and guides remain intact. Replacement becomes less attractive when multiple guides are cracked, the headrail is bent, or the pleated fabric has lost its folds.
| Repair or replacement choice | Typical material cost | Typical labor time | Best use |
|---|---|---|---|
| Minor anchor adjustment | $0-$15 | 5-15 minutes | Slipped or slightly loose tension |
| Cord and retainer kit | $10-$35 | 45-90 minutes | Frayed cord with usable hardware |
| New cord-guided shade | $80-$250 | 1-2 hours | Damaged fabric or multiple failed guides |
| Cordless roller retrofit | $150-$500 | 1-3 hours | Frequent use or accessible cord hazard |
| Professional RV service | $100-$200 per hour | 1-2 hours typical | Stripped walls, springs, or complex routing |
These are typical North American retail and labor ranges, not quotes for a particular RV. A custom panoramic window, specialty fabric, or discontinued shade model can cost substantially more.
Cordless replacement is useful for households with young children or pets because it removes accessible operating cords. It is not automatically the best repair: a retrofit may alter the window’s appearance, require valance removal, and provide different day and night control.
When Should You Call an RV Technician?
Call an RV technician when the shade uses a spring-loaded headrail, the wall anchor will not hold, the cord routing is hidden, or the shade binds after symmetrical adjustment. Professional help is also sensible when the window is wide enough that four cords must be balanced individually.
Do not continue experimenting when a cord snaps inside the headrail, a spring endcap releases, or the shade frame separates from the wall. A technician can identify the model, source compatible parts, repair the substrate, and verify that the shade will not fall during travel.
The repair is usually suitable for a careful do-it-yourselfer when the problem is a loose anchor, visible cord slack, or minor imbalance. The boundary is mechanical complexity, not the presence of a Phillips screwdriver.
Frequently Asked Questions
Can I adjust RV day-night shades without removing the valance?
Often, yes, when the lower anchors or cord retainers are visible and accessible. Removing the valance becomes necessary when the cord has broken inside the headrail, the guide path is hidden, or the shade uses an internal spring mechanism. Never remove a spring endcap without model-specific instructions.
How often should RV day-night shade tension be checked?
Inspect cord condition and anchor security every 6-12 months, with an additional check after extended travel or storage. Daily-use shades, hot windows, and dusty environments may need more frequent inspection because abrasion and heat accelerate cord wear.
Can I use nylon cord to restring an RV shade?
Use nylon only when its diameter, braid, stretch, and abrasion behavior match the original cord and the manufacturer permits it. A generic 1.2 mm nylon cord may be too large for existing guides. The correct replacement is determined by the shade’s routing hardware, not by a universal RV specification.
Why does my day shade work while the night shade does not?
The two fabric sections can share some guides while using separate cord paths or attachment points. A failed knot, detached rail connection, or misrouted cord in one section can disable only the day or night portion. Inspect each section independently before changing the common anchors.
Should I tighten the shade before storing the RV?
No. Storage is a time to lower stress, not increase it. Leave the shade in the manufacturer-recommended travel position, secure loose rails if the design provides a travel clip, and avoid storing it under tension caused by a temporary workaround.
Are RV day-night shades interchangeable between brands?
Usually not without measuring the complete assembly. Width, mounting depth, headrail shape, cord routing, rail spacing, and valance clearance vary between United Shade, Irvine, Specialty Window Solutions, MCD, and other manufacturers. Record the window opening and shade model before ordering a replacement.
The Bottom Line
Adjust RV day-night shade tension by identifying the mechanism, inspecting the cord path, marking the original hardware position, and changing both sides in small 3-6 mm increments. Smooth, level travel is the correct success test, not a universal force target. If the cord is frayed, the wall anchor is stripped, or the headrail contains a spring, repair or model-specific service is safer than further tightening. Apply the same method whenever you need to know how to adjust tension on RV day-night shades without damaging the cord, guides, or RV wall.


