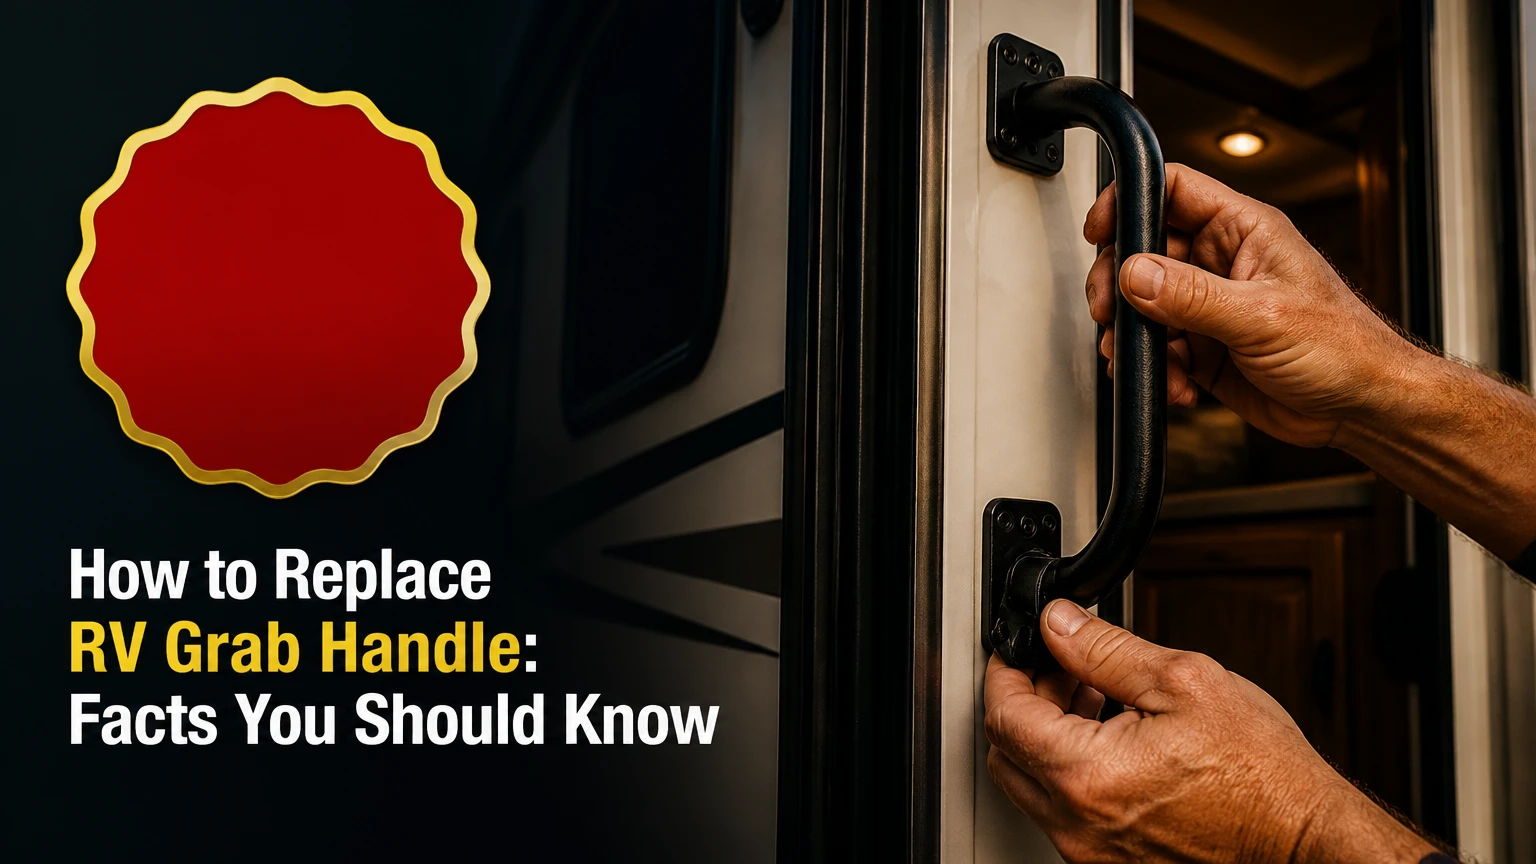
Replacing an RV grab handle usually takes 15-30 minutes for a direct swap and 45-90 minutes for a lighted model. Measure the mounting holes, confirm structural backing, remove the old sealant, apply butyl tape, fasten the new handle without over-tightening, and seal the perimeter. Wall strength determines safety more than handle appearance.
Key Facts at a Glance
RV grab handles should transfer pulling force into a stud, backing plate, or verified structural reinforcement.
Common center-to-center mounting patterns include 19.25 inches, 24.25 inches, and 25 inches.
Typical replacement prices range from $10-$22 for molded straps to $70-$125 for extended steel rails.
Butyl tape creates the primary water-resistant gasket; exterior RV lap sealant protects the exposed perimeter.
A direct replacement typically takes 15-30 minutes, while a 12-volt lighted handle usually takes 45-90 minutes.
A loose handle with rotten or missing wall backing requires structural repair before a new handle is installed.
What Does an RV Grab Handle Do?
An RV grab handle is a mounted safety rail beside the entry door that gives a person a stable handhold while using narrow, steep steps. The handle reduces balance demands during entry and exit, particularly when the bottom step is wet, uneven, or far below the threshold.
RV entry handles are not decorative trim. A user can apply a sudden downward or sideways force when slipping, so the mounting system must resist more than a person’s static body weight. Manufacturer load ratings are commonly listed around 200-300 pounds for standard brackets and as high as 400 pounds for some heavy-duty extended rails, but the wall attachment can be weaker than the rail itself.
Lippert’s RV steps and entry-accessory guidance distinguishes between step access and hand support, while product listings from MORryde and Stromberg-Carlson show that handle dimensions, bracket geometry, and mounting patterns vary by model. A replacement is therefore a fitment and structural project, not a universal hardware swap.
Which Replacement Handle Fits?
The correct RV grab handle matches four measurements: center-to-center hole spacing, usable rail length, bracket depth, and the wall’s mounting angle. A handle that matches only the screw spacing can still contact the door, sit crooked, or place force outside the reinforced section.
Measure the old handle before ordering. Record the distance between mounting-hole centers, the overall handle length, the distance from the wall to the grip, and the diameter of each screw. Photograph the old installation with the door open and closed.
| Handle type | Typical dimensions | Typical price | Main limitation |
|---|---|---|---|
| Molded plastic strap | 8-10 inches, fixed | $10-$22 | Lower rigidity and leverage |
| Folding aluminum rail | 24-28 inches, folding | $35-$55 | May rattle while traveling |
| Lighted acrylic handle | 12-18 inches, fixed | $55-$90 | Requires 12-volt wiring |
| Extended steel rail | 34-42 inches, multi-position | $70-$125 | Larger wall footprint |
How Do You Measure the Replacement?
Close the door, place a ruler through the center of the upper screw, and measure straight to the center of the lower screw. Do not measure from edge to edge, from screw-head edges, or along a curved wall surface.
Write the result to the nearest 1/16 inch. Common patterns include 19.25, 24.25, and 25 inches, but aftermarket handles may use metric spacing or a different bracket footprint. Also measure horizontal offset from the door frame, because two handles with identical hole spacing can have different bracket widths.
A useful fitment record contains:
- Upper-to-lower hole spacing
- Rail length and grip diameter
- Bracket width and projection
- Screw diameter and approximate length
- Distance to the door, window, awning, and trim
- Wall curvature at each mounting plate
The replacement fits when both plates sit flat, each hole lands in structural backing, and the handle clears the moving door through its full swing.
How Mounting Strength Works
An RV grab handle is safe only when its fasteners connect with structural backing rather than thin fiberglass, aluminum skin, or interior paneling alone. The backing may be a wood stud, aluminum frame member, plywood plate, composite reinforcement, or a manufacturer-installed metal mounting plate.
The exterior skin keeps weather out, but it usually cannot carry repeated pulling loads by itself. A screw can feel tight in fiberglass while holding very little usable thread. That false confidence is one of the most common causes of handle failure.
How Can You Find the Wall Backing?
Start with the old screw locations and inspect the exposed holes after removing the handle. Solid resistance, clean wood fibers, or a consistent metal stop suggests backing. Powdery wood, dark staining, wet insulation, or an empty cavity indicates a problem that must be resolved before installation.
A stud finder can behave unpredictably through fiberglass, foil insulation, and laminated walls. Better confirmation methods include manufacturer drawings, interior access behind the door frame, a borescope through an existing hole, or a small inspection probe used carefully in the hidden mounting area.
Practitioner rule: if a mounting screw spins freely after only a few turns, stop. Do not compensate with a longer screw until you know what lies behind the wall. A longer screw can puncture wiring, plumbing, or the interior finish.
What Tools and Materials Are Needed?
A direct RV grab-handle replacement needs a screwdriver or nut driver, a measuring rule, a plastic scraper, isopropyl alcohol, butyl tape, compatible exterior RV sealant, replacement stainless-steel screws, and a helper. A drill is useful for a damaged or slightly different hole pattern, but it should not substitute for locating structural backing.
Before You Start
Time: 15-30 minutes for a direct swap; 45-90 minutes with 12-volt lighting
Difficulty: Moderate, because wall backing and weather sealing affect safety
Typical parts cost: $10-$125 for the handle; $8-$20 for sealants and tape
Tools: #2 screwdriver or nut driver, ruler, plastic scraper, alcohol, probe, drill only if needed
Materials: 1 roll of butyl tape, 1 tube of exterior RV lap sealant, 4-6 stainless-steel screws
Prerequisite: Dry weather, stable steps, disconnected 12-volt power when wiring
Use stainless-steel fasteners where the handle manufacturer permits them. Match the original diameter and choose a length that gives adequate engagement in the backing without protruding into the interior. Screw length depends on wall thickness, bracket thickness, and backing position, so a universal length recommendation is unsafe.
How to Replace RV Grab Handle Facts You Should Know
Replacing an RV grab handle follows eight controlled stages: document the original fit, remove the hardware, inspect the wall, dry-fit the replacement, prepare the gasket, fasten the brackets, seal the perimeter, and test the handle. The key success factor is confirmed structural backing at every load-bearing screw location.
Step 1: Document the Existing Installation
Photograph the handle, bracket orientation, screw locations, wire routing, and door clearance before removing anything. Mark the upper and lower brackets with masking tape if the old handle has asymmetric parts or a folding mechanism.
Measure the existing hole pattern twice. Record whether the handle folds toward the wall, away from the wall, or upward, because a replacement with reversed hinge geometry can obstruct the entry door.
You will know it worked when: you have a complete fitment record and can identify every original wire and fastener.
Common mistake: removing the handle before recording its orientation, which makes an apparently compatible folding replacement difficult to position.
Step 2: Disconnect Power if the Handle Is Lighted
Turn off the relevant 12-volt circuit and verify that the handle light is dark before cutting or disconnecting wires. If the RV has a battery disconnect switch, use it, then confirm with a multimeter if the wiring is difficult to identify.
Label positive and negative conductors with tape. Most 12-volt LED handles use a positive supply and a negative return, but wire colors are not universal across RV manufacturers.
You will know it worked when: the wires show no active voltage and each conductor is labeled.
Common mistake: relying on a wall switch alone, because some entry-light circuits remain energized at the handle.
Step 3: Remove the Old Handle and Sealant
Support the handle while removing the screws so its weight does not twist the final fastener or crack the wall skin. Cut the sealant bead with a plastic scraper or blunt trim tool, then lift the brackets straight away from the wall.
Remove old butyl tape and lap sealant without gouging fiberglass or aluminum. A small amount of isopropyl alcohol on a cloth can remove residue after the bulk material is gone; test it on an inconspicuous finish first.
You will know it worked when: the wall surface is flat enough for a new gasket and the original holes remain visible.
Common mistake: using a metal putty knife aggressively, which can cut the exterior laminate and create a new leak path.
Step 4: Inspect the Wall and Backing
Probe each screw hole gently and inspect for soft wood, crumbling material, discoloration, delamination, or persistent moisture. Check the interior side of the wall around the door frame if access is available.
Water damage changes the repair. A new handle attached to rotten wood can pull out even when the screws initially tighten. Dry the area, identify the leak source, and repair or replace the damaged backing before proceeding.
You will know it worked when: every load-bearing hole has firm material behind it and the wall remains dry and rigid under light hand pressure.
Common mistake: treating a soft mounting hole as a simple stripped-screw problem. Epoxy putty cannot restore a missing structural plate by itself.
Step 5: Dry-Fit the New Handle
Place the replacement handle against the wall without tape or sealant. Align the plates with the existing holes, open and close the door, and check that the grip does not hit the screen door, window, awning arm, or entry light.
If the holes do not align, do not immediately drill new holes. First confirm that the replacement has the intended orientation and that the manufacturer’s measurement refers to center-to-center spacing rather than overall bracket distance.
You will know it worked when: the brackets sit flat, the door clears the handle, and the new holes align with verified backing.
Common mistake: forcing a curved mounting plate flat against a curved wall, which can stress the bracket and squeeze out the sealant.
Step 6: Apply Butyl Tape to the Mounting Plates
Apply continuous butyl tape to the back of each mounting plate, keeping the tape inside the outer edge so compression forms a water-resistant gasket. Overlap the ends rather than leaving a gap at a corner or screw hole.
Butyl tape is the primary gasket in this joint. Exterior RV lap sealant normally protects the exposed perimeter after the handle is compressed; sealant alone is not a substitute for a properly fitted gasket.
You will know it worked when: the tape forms an unbroken perimeter and does not obstruct the fastener holes.
Common mistake: stretching the tape thin around corners. Stretching reduces thickness and can create a leak channel.
Step 7: Fasten the Mounting Plates
Insert the screws through the plates and tighten them gradually in alternating turns. Bring the bracket into contact with the wall, then stop when the butyl tape compresses evenly around the plate.
Do not crush the fiberglass or strip the backing. If the manufacturer specifies a torque value, use it. If no value is supplied, tighten with a hand tool rather than an impact driver and stop at firm compression.
You will know it worked when: the bracket cannot shift under moderate hand pressure, the plate remains flat, and the wall skin shows no cracking or distortion.
Common mistake: using an oversized screw to mask a loose hole. Oversized hardware can split wood backing and may not fit the handle’s countersink.
Step 8: Seal the Perimeter and Connect Wires
Trim only the excess butyl that squeezes beyond the bracket, then apply a continuous bead of compatible exterior RV lap sealant around the exposed perimeter. Keep sealant away from moving hinges, drain paths, and the door seal.
For a lighted handle, connect positive to positive and negative to negative with sealed crimp connectors or another manufacturer-approved weather-resistant method. Secure the wires so vibration cannot pull on the handle terminals.
You will know it worked when: the sealant bead is continuous, the light operates without flickering, and no wire moves when the handle is operated.
Common mistake: sealing over a loose bracket or using household silicone that may complicate future removal and may not bond properly to the RV finish.
Which Handle Is Best for Each Situation?
A standard folding aluminum rail is the practical choice for most RV owners because it provides leverage, fits common entry layouts, and folds during travel. A molded strap suits low-use applications, while an extended steel rail better serves users who need support before reaching the top step.
| User situation | Suitable handle | Typical size | Decision reason |
|---|---|---|---|
| Budget traveler | Folding aluminum | 24-28 inches | $35-$55 and useful leverage |
| Dark campsite entry | Lighted acrylic | 12-18 inches | $55-$90 and integrated 12-volt visibility |
| Older budget RV | Molded plastic strap | 8-10 inches | $10-$22 and simple direct replacement |
| High fifth-wheel steps | Extended steel rail | 34-42 inches | $70-$125 and greater reach |
| Frequent highway travel | Fixed or locking fold-up rail | 18-28 inches | Less movement and reduced rattle |
| Mobility-limited user | Multi-position extended rail | 34-42 inches | Hand support begins closer to ground level |
A lighted acrylic handle is not automatically safer. It improves visibility at night, but its wiring introduces another failure point, and a short 12-18-inch rail may provide less leverage than a 26-inch folding bar.
An extended rail is also not suitable for every wall. Its greater length increases the potential load transferred into the mounting plates, so the backing, fastener pattern, and manufacturer rating must support the change.
Can You Change Handle Types?
You can replace a fixed strap with a folding rail or a non-lighted handle with a lighted model only when the wall structure, clearance, hole pattern, and electrical route support the new design. A different handle type is an upgrade only if its mounting plates transfer force into adequate backing.
Changing from a short strap to a long rail often changes the leverage applied to the upper bracket. Changing from a folding rail to a fixed handle can improve rigidity but may reduce travel clearance. A lighted model may require access behind the entry trim, an inline fuse, and protection from water at the wire entry point.
Comparison of Common Alternatives
| Option | Typical cost | Installation time | Best use | Main trade-off |
|---|---|---|---|---|
| Folding aluminum rail | $35-$55 | 15-30 minutes | General entry support | Rattle or hinge wear |
| Fixed steel rail | $45-$85 | 20-35 minutes | Maximum rigidity at one angle | Does not fold flat |
| Lighted acrylic rail | $55-$90 | 45-90 minutes | Night visibility | Wiring and corrosion risk |
| Doorway assist pole | $80-$180 | 5-15 minutes | Temporary or rental use | May not provide exterior support |
| Step upgrade with handrail | $250-$700 | 1-3 hours | High steps and mobility needs | Higher cost and storage demand |
A freestanding assist pole is not a direct substitute when the user needs support outside the doorway or while reaching the bottom step. A step upgrade may solve the access geometry more effectively than installing a longer wall rail, but it requires compatibility with the RV frame and entry height.
How Much Do Parts and Installation Cost?
A direct RV grab-handle replacement typically costs $18-$145 in parts and takes 15-30 minutes when the holes, backing, and replacement footprint match. A lighted installation commonly reaches $65-$120 in materials and 45-90 minutes because wiring, connectors, and access add labor.
| Job component | Typical quantity | Typical price | Typical time |
|---|---|---|---|
| Molded replacement strap | 1 | $10-$22 | 15-20 minutes |
| Folding aluminum handle | 1 | $35-$55 | 15-30 minutes |
| Extended steel handle | 1 | $70-$125 | 20-35 minutes |
| Butyl tape and lap sealant | 1 each | $15-$30 total | 10-15 minutes |
| Weatherproof wire connectors | 2-4 | $4-$12 total | 15-30 minutes |
| Professional structural repair | 1 service | $150-$600+ | 2-6 hours |
These are typical retail and practitioner ranges, not guaranteed quotes. Regional labor rates, access behind the wall, damaged laminate, and the need to fabricate a backing plate can change the final cost substantially.
What Are the Common Failure Modes?
The most serious RV grab-handle failures involve wall backing, not the rail material. A handle can have a 300-pound published rating and still fail when its screws hold only thin fiberglass or deteriorated wood.
The Screws Miss the Stud
Symptom: the screws tighten briefly, then spin or pull out under hand pressure.
Cause: the fasteners entered exterior skin without structural engagement.
Repair: remove the handle, locate the actual stud or backing plate, and reposition only if the new holes remain covered by a properly sized mounting plate.
The Wall Backing Is Rotten
Symptom: dark wood fibers, soft holes, staining, or a musty interior panel.
Cause: an earlier leak around the handle, door frame, window, or roof seam.
Repair: dry the wall, fix the leak, remove compromised material, and install sound structural backing. A surface filler is not a load-bearing repair.
The Handle Is Over-Tightened
Symptom: cracked gelcoat, distorted fiberglass, stripped wood, or a bracket that sits below the surrounding wall.
Cause: excessive torque or an impact driver.
Repair: replace damaged hardware, stabilize the backing, and refit the bracket with controlled hand tightening.
The Sealant Fails
Symptom: staining below the bracket, damp insulation, or recurring soft wood.
Cause: no butyl gasket, an interrupted bead, contaminated surfaces, or incompatible sealant.
Repair: remove the handle, clean and dry the joint, apply fresh butyl tape, and finish with exterior RV sealant.
The Light Flickers
Symptom: the LED works when the handle moves but fails during travel.
Cause: loose crimp, corroded ground, pinched wire, or a poor connection inside the door frame.
Repair: disconnect power, inspect both conductors, replace corroded connectors, and secure the wire against movement.
When Should You Stop and Call a Professional?
Stop the installation when the wall is soft over a broad area, the mounting plate cannot reach solid backing, water damage extends into the door frame, or the handle’s required position conflicts with hidden wiring or plumbing. Structural entry-wall repairs can involve laminated panels, aluminum framing, and interior cabinetry that are difficult to restore from the exterior.
Professional inspection is also appropriate when a user depends on the handle for substantial weight-bearing support and no manufacturer load rating or backing information is available. The goal is not merely to make the handle feel tight. The goal is to create a verified load path from grip to bracket, fastener, backing, and wall structure.
How Should You Maintain the New Handle?
Inspect the rail, hinge, brackets, screws, sealant, and wall surface at least twice a year and before extended travel. A two-minute check can identify a loose fastener or separating sealant before water reaches the wall core.
Use this maintenance sequence:
- Pull the handle in several directions without jerking it.
- Check for bracket movement, rattling, or hinge play.
- Look for cracked lap sealant and gaps in the butyl-compressed edge.
- Inspect screws for rust, discoloration, or backing movement.
- Lubricate a folding hinge only with the product specified by its manufacturer.
- Recheck after the first trip and after severe vibration or a hard slip.
Do not hang luggage, bicycles, or straps from an entry grab handle unless the manufacturer explicitly permits that load. A support rail is designed for controlled hand forces, not necessarily for suspended cargo.
Frequently Asked Questions
Can I reuse the original RV grab-handle screws?
Reuse screws only when they are undamaged, corrosion-free, correctly sized, and long enough for the new bracket and backing. New stainless-steel screws are usually the safer choice when the old fasteners show rust, damaged threads, sealant contamination, or uncertain engagement depth.
What if the new handle has different hole spacing?
A different hole pattern can work if the replacement plates fully cover the old holes, the new holes land in verified structural backing, and the new fasteners do not intersect hidden wiring or plumbing. Never leave abandoned holes unsealed, because each exposed opening can admit water into the wall.
Can I use silicone instead of RV lap sealant?
Use a sealant compatible with the RV’s exterior material and the manufacturer’s instructions. Household silicone may adhere poorly to some finishes and can make later repairs difficult; butyl tape beneath the bracket remains important even when a different compatible perimeter sealant is selected.
How much weight can an RV grab handle support?
Published capacities commonly range from 200-300 pounds for standard handles and reach approximately 400 pounds for some heavy-duty rails, but the real limit is the complete mounting system. Wall backing, fastener engagement, bracket design, installation angle, and sudden loading can reduce practical capacity.
Why does my folding handle rattle during travel?
Folding-handle rattling usually comes from hinge wear, a loose detent, missing friction hardware, or contact between the rail and its storage position. Tighten only the manufacturer-approved fasteners, inspect the hinge, and verify that the handle locks fully before travel.
Should a lighted handle use a fuse?
A lighted RV grab handle should use the circuit protection specified by the handle manufacturer and the RV’s 12-volt wiring design. Do not install a larger fuse to stop nuisance blowing, because that can allow a damaged wire or short circuit to overheat.
The Bottom Line
The safest way to replace an RV grab handle is to match the center-to-center spacing, verify structural backing, use a continuous butyl-tape gasket, tighten the fasteners gradually, and seal the exposed bracket perimeter. The exact handle type matters less than the load path and wall condition.
A folding aluminum rail suits most direct replacements, a lighted acrylic handle improves dark-entry visibility, and an extended steel rail helps users who need support across high steps. If the old screws spin, the wall feels soft, or water damage is present, repair the structure first. Those are the essential facts behind how to replace RV grab handle safely.


