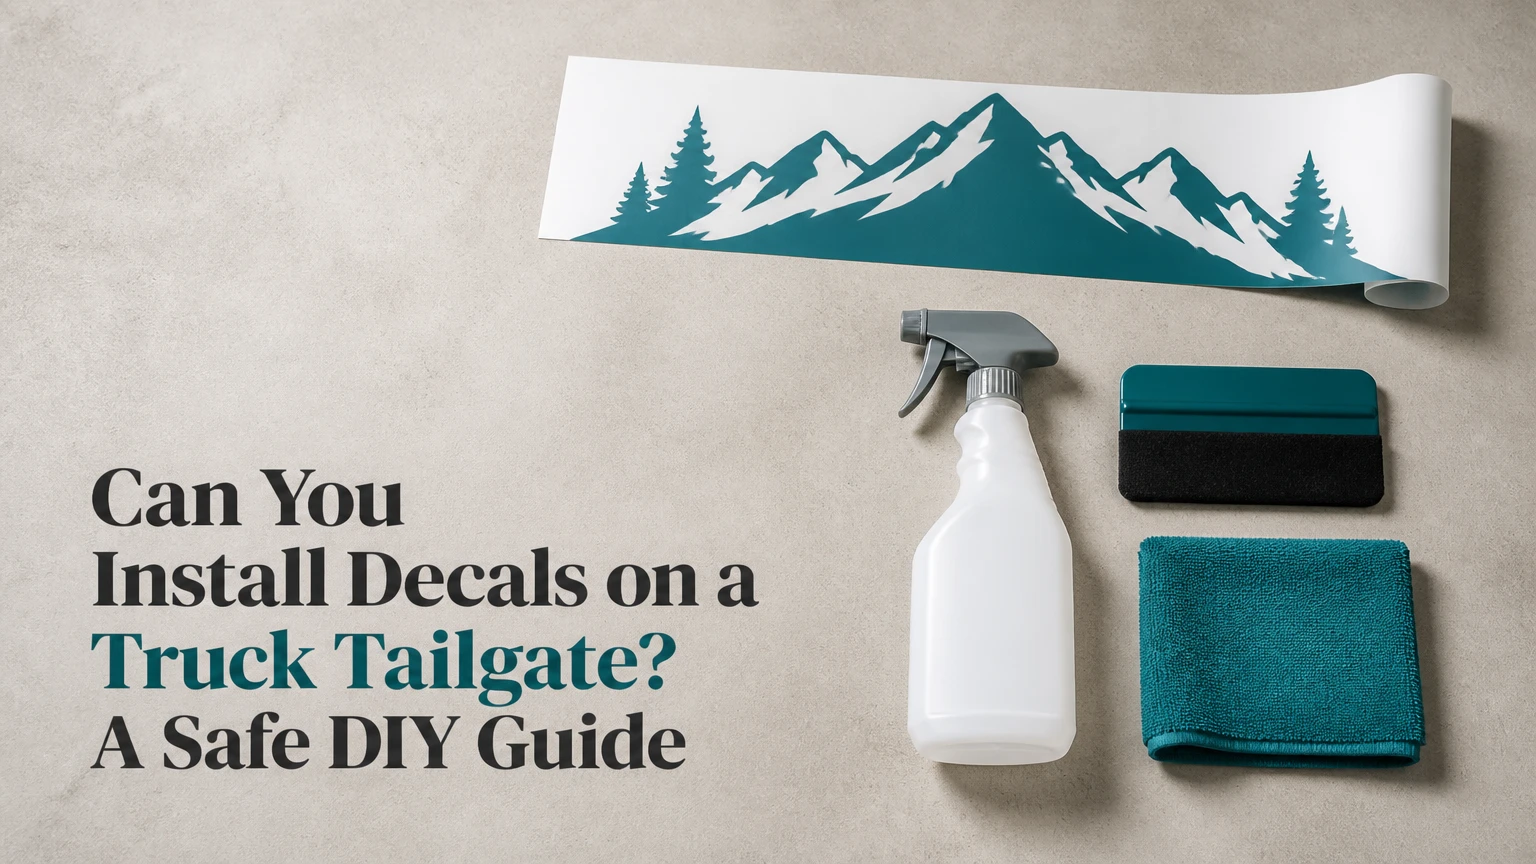
Yes, you can install decals on a truck tailgate, provided the painted surface is clean, smooth, dry, and free from wax or silicone. Small insert letters and die-cut graphics are suitable for careful DIY installation, while full tailgate wraps require advanced trimming around handles, cameras, recesses, and body contours.
Key Facts
A truck tailgate decal is pressure-sensitive vinyl applied directly to painted, metal, or approved smooth trim surfaces.
Typical DIY material costs range from $15-$40 for insert letters, $20-$60 for spot graphics, and $75-$200 for a full tailgate graphic.
Apply vinyl at approximately 60-78°F, or 15-25°C, in a clean, shaded, low-wind space.
A small decal usually takes 30-60 minutes; a full tailgate graphic commonly takes 2-3 hours for an experienced installer.
Cast vinyl conforms better to stamped lettering and curves than inexpensive calendered vinyl.
Keep a newly installed decal dry for at least 24 hours and avoid aggressive washing for 48 hours.
What Is a Truck Tailgate Decal?
A truck tailgate decal is a cut or printed sheet of automotive vinyl with a pressure-sensitive adhesive on its underside. The graphic can cover individual factory letters, occupy part of the panel, or extend across the entire tailgate as a commercial advertisement or decorative wrap.
Automotive vinyl is different from ordinary household stickers. Vehicle films are designed to tolerate ultraviolet exposure, temperature changes, washing, and moderate panel movement. High-quality wrap films may also contain air-release channels that give trapped air a path toward an edge during squeegee installation.
The tailgate remains a demanding installation area because it combines broad flat sections with handles, backup cameras, seams, stamped lettering, steps, emblems, and recessed license-plate areas. Vinyl can conform to these features, but heat and pressure must be controlled. Excessive stretching makes a graphic thinner and increases later shrinkage.
Which tailgate surfaces accept vinyl?
Smooth, factory-painted metal and smooth, sound plastic generally provide the best adhesion. Freshly repainted panels, oxidized paint, peeling clear coat, rust, textured plastics, rubber seals, and rough spray-in bedliners require special treatment or may be unsuitable.
A decal does not repair damaged paint. When removed, vinyl can expose differences in color between protected and unprotected paint, and weak clear coat may lift with the adhesive. The International Window Film Association recommends evaluating substrate condition before graphics installation, a principle that also applies to vehicle vinyl.
Which Type of Tailgate Decal Should You Choose?
The best tailgate decal depends on coverage, surface complexity, desired service life, and installation skill. Individual insert letters are the easiest option, while a full printed wrap demands accurate positioning, controlled stretching, careful post-heating, and clean trimming.
| Decal type | Typical size or coverage | Typical material cost | DIY difficulty | Best application |
|---|---|---|---|---|
| Insert letters | 2-6 inch letters; under 5% of panel | $15-$40 | Low | Factory “RAM,” “FORD,” “TACOMA,” or “CHEVROLET” recesses |
| Die-cut graphic | 12-24 inches; 5-20% of panel | $20-$60 | Low to moderate | Logos, flags, names, and small business marks |
| Stripe or accent | 10-30% of panel; 6-18 inches wide | $30-$100 | Moderate | Racing stripes, mountain graphics, and bedside extensions |
| Partial printed panel | 30-70% of panel | $60-$150 | Moderate to high | Large artwork without full edge-to-edge coverage |
| Full tailgate wrap | 100% of outer panel | $75-$200 | High | Advertising, camouflage, scenery, and major color changes |
Cast vinyl is usually the better choice for recessed lettering and curved tailgates because its thinner construction conforms with less force. Calendered vinyl costs less and works well on relatively flat panels, but it can show more memory, edge shrinkage, and stress around deep contours.
A transfer-tape graphic contains three layers: the transfer tape on top, the vinyl design in the middle, and the release liner underneath. A printed wrap may include a protective laminate, which improves resistance to abrasion and ultraviolet fading but adds thickness at trimmed edges.
Is a tailgate wrap different from a tailgate sticker?
A tailgate wrap is a large vinyl panel intended to cover substantial surface area, whereas a sticker or die-cut decal covers a limited area and usually has fewer difficult contours. The distinction matters because large films trap more air, require more alignment control, and are harder to reposition after adhesive contact.
Is Dry or Wet Application Better?
Dry application is generally better for large automotive graphics made with air-release vinyl, while wet application can help align small, simple decals without air-release channels. The decal manufacturer’s instructions take priority because adhesive chemistry, liner construction, and transfer tape vary between products.
| Application method | Suitable decal | Fluid | Main advantage | Main risk |
|---|---|---|---|---|
| Dry hinge method | Full wrap or large graphic | None | Strong immediate adhesive contact | Creases and trapped air if alignment fails |
| Dry center-out method | Air-release stripe | None | Fast installation on flat panels | Misalignment becomes difficult to correct |
| Wet placement | Small letters or simple sticker | Application fluid | Graphic can slide before bonding | Slow adhesion and moisture under edges |
| Wet transfer-tape method | Small cut lettering | Light fluid mist | Easier positioning of grouped letters | Tape may release vinyl unevenly |
Do not use household glass cleaner as a default application fluid. Ammonia, surfactants, waxes, and silicone residues can interfere with bonding. Use a manufacturer-approved fluid, or a very dilute soap solution only when the decal maker allows wet installation.
What Should You Prepare Before Installation?
Prepare the decal, tailgate, tools, and workspace before exposing the adhesive. The most common DIY failure begins with contamination, poor temperature control, or an untested fit rather than with the squeegee technique itself.
Before You Start
| Requirement | Typical specification | Why it matters |
|---|---|---|
| Workspace temperature | 60-78°F, or 15-25°C | Keeps adhesive and vinyl predictable |
| Preparation time | 20-40 minutes | Allows washing, drying, and inspection |
| Small-decal installation | 30-60 minutes | Includes alignment and transfer removal |
| Full-tailgate installation | 2-3 hours | Assumes one installer and moderate experience |
| Isopropyl alcohol | 70% or 91%, 4-8 fluid ounces | Removes wax and oily residue |
| Squeegee | Felt-edged, 4-6 inches wide | Applies pressure without scratching |
| Heat source | Heat gun on low or hair dryer | Softens vinyl around contours |
| Alignment materials | Painter’s tape, 1-inch width | Creates reference marks and a hinge |
| Cutting tool | New precision blade | Trims openings and edges cleanly |
Wash the tailgate with wax-free automotive soap, rinse thoroughly, and dry the panel with a clean microfiber towel. Open the tailgate and clean the upper edge, side gaps, latch area, handle recess, and camera surround because dirt from those locations can migrate beneath the film.
Wipe the installation area with isopropyl alcohol on a lint-free cloth. Do not flood badges, cameras, switches, or weather seals. Let the alcohol evaporate fully, then perform a final inspection under bright angled light.
How do you test-fit the graphic?
Place the decal against the tailgate with its release liner still attached, then use painter’s tape to mark the centerline, top edge, side margins, and relationship to factory lettering. Measure from fixed body features rather than guessing from the tailgate edges, which may not be symmetrical.
Check the tailgate in both closed and open positions. A graphic that looks centered while closed may conflict with a handle, hinge gap, backup camera, or tailgate step when the panel opens. Test-fit any opening before removing the liner.
How Do You Install a Small Tailgate Decal?
Install a small tailgate decal by cleaning the panel, creating alignment marks, applying the graphic from one controlled edge, and removing transfer tape slowly. Small graphics usually take 30-60 minutes, and the success checkpoint is firm adhesion without silvering, edge lift, or visible contamination.
Step 1: Clean and mark the surface
Wash, dry, and degrease the panel as described above. Apply short strips of painter’s tape to mark the horizontal and vertical position, leaving the decal on its backing during the alignment check.
You’ll know it worked when: the surface feels clean and squeaks slightly under a dry fingertip, with no waxy drag or visible dust.
Common mistake: applying vinyl immediately after a wax, ceramic coating, tire dressing, or spray detailer. Those products reduce initial adhesion.
Step 2: Separate the transfer tape and liner
Place the decal face down and peel the backing liner away from the vinyl at a shallow angle. If individual letters remain on the liner, press the transfer tape back down and burnish the design before trying again.
For a wet application, mist only the approved fluid onto the panel and adhesive side. Use enough liquid to float the graphic, not enough to create runs into seams or electronics.
You’ll know it worked when: every letter or design element remains attached to the transfer tape in its intended spacing.
Common mistake: pulling the liner straight upward, which can distort thin lettering or leave small characters behind.
Step 3: Apply the decal from the center outward
Set the center of the graphic onto the centerline first. Hold the remaining vinyl slightly away from the panel, then make overlapping squeegee strokes toward the nearest edge using moderate, even pressure.
You’ll know it worked when: the vinyl lays flat, the edges remain aligned with the tape marks, and no diagonal crease runs through the design.
Common mistake: pressing the entire graphic down at once. That action removes the ability to correct alignment and traps air under the center.
Step 4: Remove transfer tape slowly
Wait briefly if the application fluid remains under the graphic, then peel the transfer tape back over itself at approximately 180 degrees. Move slowly and stop immediately if a letter begins lifting.
You’ll know it worked when: the transfer tape comes away while every vinyl element remains fully bonded to the tailgate.
Common mistake: pulling the tape upward at a steep angle, which puts lifting force on small letters.
Step 5: Press edges and allow the adhesive to cure
Wrap a felt squeegee or clean microfiber cloth around a fingertip and press every edge. Keep the truck dry for 24 hours and avoid pressure-washing the graphic for 48 hours.
You’ll know it worked when: no edge can be lifted with a fingernail and the vinyl has no cloudy moisture pockets.
Common mistake: washing the truck immediately after installation. Water and high-pressure spray can reach uncured edges.
How Do You Install a Large or Full Tailgate Graphic?
Install a large tailgate graphic with a dry center hinge, controlled squeegee strokes, minimal stretching, and post-heating around contours. Full coverage is a high-risk DIY task because trimming near factory paint, backup cameras, handles, and body gaps can cause permanent damage.
Step 1: Position the wrapped graphic
Keep the backing liner attached and place the graphic on the tailgate. Align the center artwork and top edge, then secure a vertical strip of painter’s tape through the center to create a hinge.
Check the design from several feet away. Printed images can look centered by measurement but visually off-center if a logo or horizon line carries more weight on one side.
Step 2: Apply the first half
Lift one side over the tape hinge and peel the backing liner away without touching the adhesive. Cut the removed liner off with scissors, leaving the opposite half protected.
Hold the vinyl relaxed rather than stretched. Begin at the hinge and use overlapping strokes toward the outer edge. For air-release film, let the channels move trapped air outward; do not chase every faint line with excessive heat.
Step 3: Apply the second half
Remove the center tape and repeat the process on the remaining side. Keep the squeegee angle low, overlap each stroke, and maintain consistent pressure across broad flat sections.
If a crease forms, lift the affected vinyl completely beyond the crease, apply a short burst of low heat, allow it to relax, and reapply. Do not force a crease flat while the adhesive is already bonded.
Step 4: Conform around recesses and lettering
Use moderate heat to soften the vinyl around stamped logos, tailgate handles, steps, and shallow recesses. Press the film into the contour with a soft tool, but avoid stretching it deeply into a recess before the surrounding panel is stable.
A heat gun can quickly overheat paint, plastic trim, or the film itself. Keep the tool moving and use a thermometer when possible. Many professional wrap systems specify post-heating temperatures near 185-195°F, or 85-90°C, but the film manufacturer’s specification controls.
Step 5: Trim openings and edges
Use a new blade and trim against a protected edge, existing seam, or removable trim piece. Never cut directly toward the paint with force, and never assume a tailgate handle or camera can be safely covered.
For a camera opening, leave a clean perimeter rather than allowing vinyl to overlap the lens. For hinges and gaps, finish the visible outer panel first, then trim with enough clearance to prevent the film from catching when the tailgate moves.
Step 6: Post-heat and inspect
Post-heat stretched areas, recessed lettering, lower edges, and corners according to the vinyl maker’s instructions. Press those areas again after cooling, then inspect for lifting, tenting, bubbles, and exposed paint.
You’ll know it worked when: the film remains flat after cooling and no recessed section pulls back toward its original shape.
Common mistake: applying heat only because the vinyl looks wrinkled. Post-heating is also needed to stabilize stretched film and reduce memory-driven shrinkage.
How Much Does Tailgate Decal Installation Cost?
Typical material costs range from $15-$200, while professional labor commonly adds $75-$250 for a tailgate graphic. A simple insert-letter job may cost under $100 installed, whereas a printed full-panel design can exceed $400 when design, laminate, removal, and difficult trimming are included.
| Project | DIY materials | Professional labor | Typical total | Typical time |
|---|---|---|---|---|
| Insert letters | $15-$40 | $75-$125 | $90-$165 | 30-60 minutes |
| Die-cut logo | $20-$60 | $75-$150 | $95-$210 | 45-90 minutes |
| Accent stripe | $30-$100 | $100-$200 | $130-$300 | 1-2 hours |
| Partial graphic | $60-$150 | $125-$250 | $185-$400 | 1.5-3 hours |
| Full tailgate wrap | $75-$200 | $150-$300 | $225-$500 | 2-4 hours |
These are typical North American retail ranges, not fixed market prices. A shop may charge more for old adhesive removal, a textured tailgate, a multicolor print, ceramic-coated paint, a powered handle, or a design that continues onto the bedside.
A professional quote should identify vinyl brand, laminate, design charges, removal charges, surface preparation, installation warranty, and the exact areas covered. The lowest quote may omit edge finishing or use a film with a shorter outdoor rating.
Should You Install the Decal Yourself or Hire a Professional?
DIY installation makes sense for small, flat graphics when the paint is sound and replacement cost is low. Professional installation is the safer decision for full wraps, business graphics, expensive printed film, textured surfaces, or any job requiring close trimming around electrical components.
| Decision factor | DIY small decal | DIY full wrap | Professional installation |
|---|---|---|---|
| Out-of-pocket cost | $15-$60 | $75-$200 | $90-$500 total |
| Skill requirement | Basic alignment | Advanced handling | Installer-dependent |
| Typical completion time | 30-60 minutes | 2-4 hours | 1-3 hours |
| Repositioning tolerance | Moderate | Low | Usually higher |
| Warranty | Product warranty only | Product warranty only | Often 1-3 years |
| Damage risk | Low on smooth paint | Moderate to high | Lower, but not zero |
| Best candidate | First-time owner | Experienced hobbyist | Commercial or complex project |
An honest limitation matters: professional installation cannot correct failing clear coat, rust, deep scratches, or contaminated paint. A shop can produce a cleaner graphic, but the substrate still determines whether the adhesive remains attached and whether removal will be safe.
Ask the installer whether the truck has been ceramic-coated or waxed recently. Coatings can reduce vinyl adhesion, and some shops require mechanical or chemical preparation before accepting the job.
What If the Tailgate Has a Bedliner or Factory Texture?
Vinyl usually performs poorly on rough spray-in bedliner, heavily textured plastic, powder-coated texture, and porous composite surfaces because the adhesive cannot make continuous contact. A smooth, sealed bedliner may accept selected graphics, but the film maker should approve the substrate before purchase.
Tailgate caps create a second problem. The cap may overlap the painted panel, interrupt the decal’s intended edge, or flex differently from the metal beneath it. Measure the actual visible surface and decide whether the decal should stop at the cap, cover it, or be installed after temporary cap removal.
Factory stamped lettering requires a design made for that exact model and year. A flat rectangle cut for a 2024 Toyota Tacoma may not align with a 2018 Tacoma, even when the tailgate appears similar.
How Long Do Truck Tailgate Decals Last?
A quality automotive decal typically lasts 3-7 years, although direct sun, dark colors, abrasive washing, fuel contamination, poor preparation, and stretched edges can shorten that period. Cast films with protective laminate generally outlast low-cost calendered films on complex tailgate contours.
| Condition | Typical effect on service life | Main failure pattern |
|---|---|---|
| Premium cast vinyl, laminated, shaded parking | 5-7 years | Gradual color change |
| Cast vinyl, daily outdoor exposure | 3-5 years | Edge wear and fading |
| Calendered vinyl on flat paint | 2-4 years | Shrinkage and corner lift |
| Unlaminated printed graphic | 1-3 years | UV fading and surface abrasion |
| Rough or contaminated substrate | Under 1-2 years | Early edge release |
| Frequent pressure washing | Variable, often shorter | Lifted seams and corners |
The vinyl’s outdoor rating is not a guarantee for every orientation. A horizontal tailgate surface receives more road grit and wash impact than a protected side panel, while dark colors can absorb more heat and show shrinkage sooner.
Wash the decal with automotive soap and a soft mitt. Keep the pressure-washer nozzle at least 24 inches away, avoid directing water at edges, and do not use abrasive polish on matte or satin films.
How Do You Remove a Tailgate Decal?
Remove a tailgate decal by warming the film, lifting a corner with a plastic card, and pulling the vinyl slowly at a low angle. Adhesive residue can usually be treated with a vehicle-safe adhesive remover, but aged paint and failing clear coat may come away with the decal.
Work in a shaded area with the panel warm but not hot. A practical target is approximately 70-90°F, or 21-32°C. Pull the film back over itself rather than straight upward, because a low angle reduces the force directed into the paint.
For old, brittle vinyl, warm a small section and remove it in short strips. Test adhesive remover on an inconspicuous painted area, keep solvents away from rubber and camera components, and wash the panel after residue removal.
Paint beneath a decal may appear darker or cleaner than surrounding paint because the vinyl blocked ultraviolet exposure. That color difference is not necessarily decal damage, but aggressive polishing can expose more clear-coat variation.
What Are the Most Common Installation Mistakes?
The most common installation mistakes are contaminating the surface, choosing the wrong method, stretching the film, cutting against paint, and washing before the adhesive cures. Each mistake has a different recovery point, and some cannot be repaired without replacing the graphic.
- Applying over wax or silicone: Remove the decal while it is still repositionable, clean the panel with isopropyl alcohol, and restart. Edge lifting after several days often means contamination beneath the adhesive.
- Working in direct sunlight: Move to shade or an indoor space. Prematurely warmed vinyl becomes soft and difficult to control, while hot paint accelerates adhesive grab.
- Stretching across a recess: Lift the film, warm it briefly, let it relax, and reapply with less tension. Distorted lettering usually requires replacement.
- Using a dull blade: Replace the blade before trimming. A dull edge demands force and increases the chance of cutting paint or leaving a ragged film edge.
- Skipping post-heating: Reheat recessed and stretched areas to the manufacturer’s specified temperature, then press them after cooling. If the film has already shrunk, replacement may be the only durable repair.
- Using a pin on every bubble: Air-release film often allows bubbles to move toward an edge without puncturing. A pinhole is a last resort for isolated bubbles in non-air-release vinyl, and it may remain visible.
An expert rule of thumb is simple: if the graphic costs more than the tools and the tailgate contains deep lettering, pay for installation. Replacing a failed $150 wrap and correcting paint damage can exceed the original labor charge.
What Should You Check After Installation?
Check the decal immediately after installation and again after 24-48 hours. Inspect every edge, recessed section, seam, handle opening, camera perimeter, and lower corner because these locations reveal poor adhesion before the center panel fails.
| Inspection point | Acceptable result | Warning sign | Corrective action |
|---|---|---|---|
| Flat panel | Smooth film with no trapped air | Large bubble or crease | Lift, relax with low heat, re-squeegee |
| Recessed lettering | Film remains seated after cooling | Film pulls out of recess | Reheat and press, or replace |
| Outer edge | Continuous bonded perimeter | Curling or white edge | Clean, warm, press, and monitor |
| Camera opening | Lens fully unobstructed | Film overlaps lens | Trim immediately with care |
| Tailgate gap | Film does not catch or bridge gap | Vinyl rubs during movement | Retrim with clearance |
| Printed surface | Uniform color and laminate | Scuffing or silvering | Stop abrasion and contact installer |
Do not evaluate final adhesion by repeatedly lifting an edge. That test damages the bond. Use visual inspection and a gentle fingertip press instead.
Frequently Asked Questions
Can you install a decal over a tailgate badge?
You can install a decal over a smooth, firmly attached badge only if the graphic is designed to bridge or conform around that badge. A decal placed over a raised emblem may tent, trap air, and lift at the perimeter. Removing the badge first usually produces a flatter result, but confirm that removal will not damage sensors or wiring.
Can you put a decal on a truck with ceramic coating?
A decal may adhere poorly to ceramic-coated paint because the coating lowers surface energy and reduces adhesive contact. Ask the coating manufacturer and decal installer for compatibility guidance. In many cases, the coating must be removed or mechanically prepared from the graphic area, which can affect the coating warranty.
Can rain damage a newly installed tailgate decal?
Rain can interfere with a newly installed decal before the adhesive seals, especially around edges, seams, and recessed lettering. Keep the truck indoors or under cover for at least 24 hours, and extend that period to 48 hours when wet application fluid remains beneath the film or temperatures are below 60°F.
Can you install vinyl decals in cold weather?
You can install vinyl in cold weather only when the panel, film, and workspace remain within the manufacturer’s minimum temperature range. Below approximately 60°F, adhesive flow slows and the film becomes less conformable. A heated garage is safer than warming only the decal with a hair dryer.
Will a tailgate decal damage factory paint?
A properly installed decal normally does not damage sound, fully cured factory paint. Damage becomes more likely when the clear coat is failing, the panel was poorly repainted, aggressive solvents are used, or the film is removed from degraded paint. Test a small inconspicuous area when paint condition is uncertain.
What size decal fits a truck tailgate?
A decal’s usable size depends on the truck’s year, model, handle, camera, lettering, and tailgate cap. For a generic spot graphic, leave at least 2-4 inches from major edges and hardware. Model-specific templates are safer because full-width tailgates differ substantially even among trucks from the same manufacturer.
The Bottom Line
Can you install decals on a truck tailgate? Yes, and a small insert-letter or die-cut graphic is a reasonable first DIY project when the surface is smooth, clean, and between 60-78°F. Use dry application for large air-release graphics, wet application only when approved, and hire a professional for full wraps, textured surfaces, deep recesses, or expensive commercial artwork.
The preparation determines the bond. The film choice determines how well the graphic handles contours. Careful curing and washing determine whether the finished tailgate decal remains attractive for several years.


