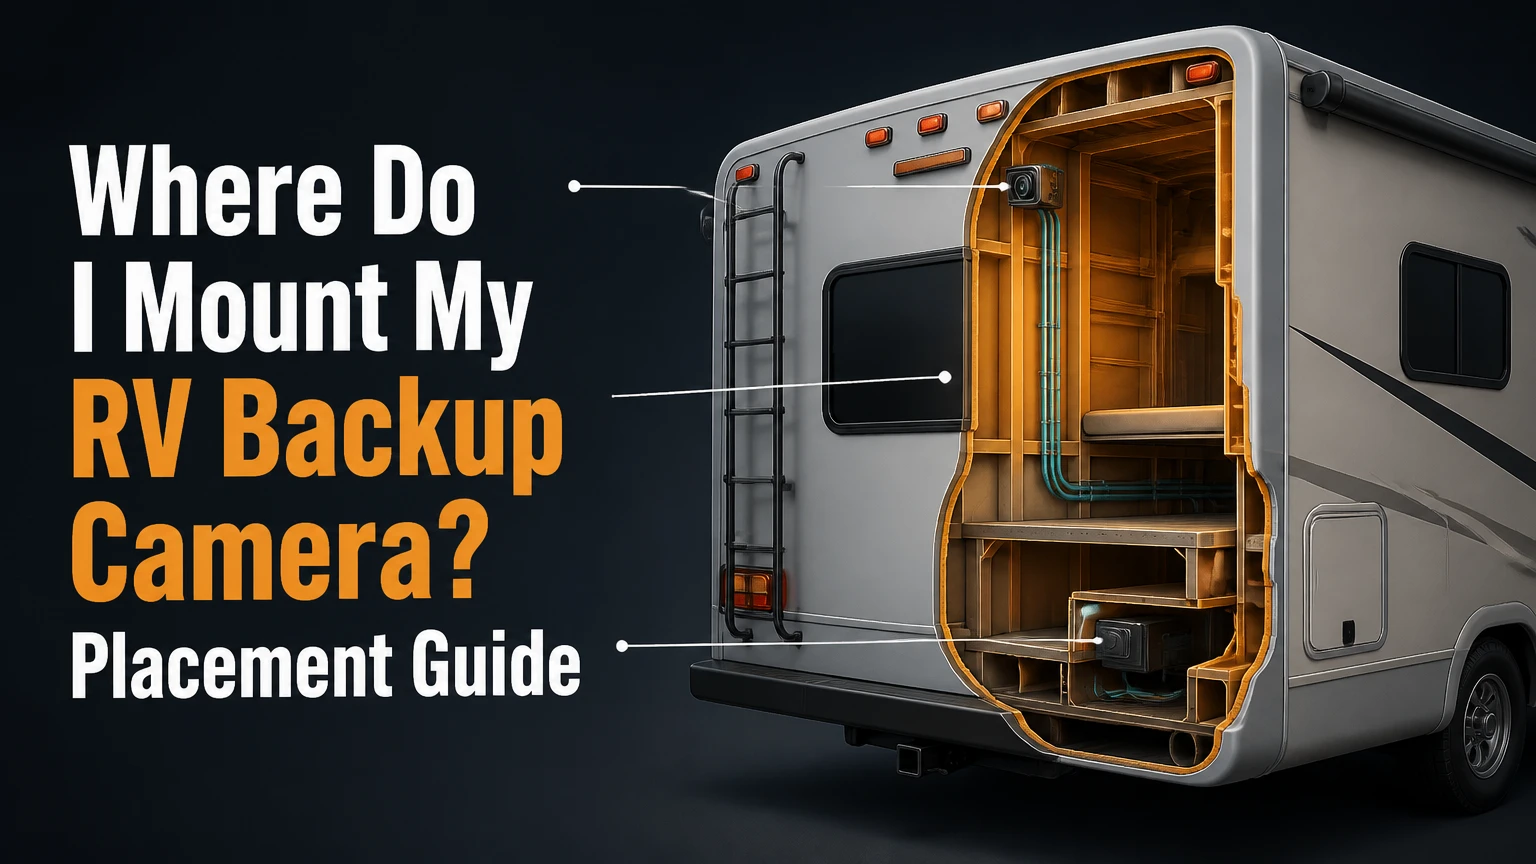
An RV backup camera should usually be mounted on the rear wall, centered horizontally and as high as practical, often 1-2 inches below the center running light. The RV backup camera should point slightly downward so the monitor shows traffic, the rear corners, and a strip of bumper or hitch area without obstruction from ladders, racks, spare tires, or tow equipment.
Key Facts at a Glance
- The best general-purpose location is the upper rear center of the RV, not the bumper or license plate.
- A practical mounting height is approximately 7-11 feet above ground, depending on the RV body and camera lens.
- A 130-150-degree horizontal viewing angle usually balances road coverage with manageable fisheye distortion.
- A camera powered only by reverse lights will normally operate only while reversing.
- A camera mounted high still needs downward tilt, because height does not guarantee visibility of the bumper or hitch.
- Every drilled hole in an RV exterior requires a compatible sealant and a water-shedding cable path.
Where Should You Mount an RV Backup Camera?
The upper rear center is the best mounting point for most motorhomes, travel trailers, and fifth wheels because it provides the broadest useful view from one camera. Position the RV backup camera on the centerline, close to the highest solid rear-wall area, while keeping the lens below roof trim and clear of marker-light housings.
A common starting point is 1-2 inches below the center running light, but that measurement is not universal. Some running lights sit on thin trim, curved fiberglass, or a decorative cap that cannot carry a bracket securely. In those cases, move the camera to the nearest flat, reinforced section rather than drilling into a weak edge.
The camera should show three zones: the roadway behind the RV, both rear corners, and a narrow portion of the bumper or hitch assembly. A view that shows only the horizon is poorly adjusted, even if the camera is mounted at the correct height.
How high should the camera be?
A camera height of 7-11 feet is typical for an RV, but the correct height depends on the body shape, lens angle, and intended use. A Class C motorhome may place its camera around 7-9 feet high, while a tall fifth wheel may put it near 10-11 feet.
| RV type | Typical camera height | Recommended view | Main limitation |
|---|---|---|---|
| Class B camper van | 5-7 feet | Roadway plus 2-3 feet behind bumper | Rear doors and trim can obstruct low mounts |
| Class C motorhome | 7-9 feet | Traffic, rear corners, bumper edge | Overhead cap may flex or curve |
| Class A motorhome | 8-11 feet | Long-range rear traffic view | Hitch detail can disappear without tilt |
| Travel trailer | 7-10 feet | Following traffic and trailer corners | Fiberglass wall may need backing support |
| Fifth wheel | 9-11 feet | Roadway and trailer perimeter | High camera may not show the pin box |
Height is a compromise. Higher mounting improves the view over bicycles and cargo, but it increases the distance to the hitch and can make close objects appear smaller. A dedicated hitch camera is often better than forcing one high camera to perform two incompatible jobs.
How Does an RV Backup Camera System Work?
An RV backup camera captures a rear image, sends the video through a wired or digital-wireless link, and displays it on a dashboard or cockpit monitor. The camera, transmitter, monitor, lens, infrared illumination, power circuit, and mounting bracket form one system, and each component affects reliability.
A hardwired system sends video through a dedicated cable, often coaxial or multi-conductor cable. It generally offers stable transmission and low delay, but cable routing through a long motorhome or articulated trailer can require substantial labor.
A digital-wireless system sends encoded video between a rear transmitter and a cab monitor. Wireless installation reduces cable routing, yet fiberglass, aluminum framing, foil insulation, batteries, and the tow vehicle distance can reduce signal quality. A product’s advertised range in open air is not the same as reliable range through an RV and truck.
Infrared LEDs help the camera see in darkness, but they do not turn the camera into a thermal sensor. Bright reflections from a glossy spare-tire cover, rear glass, or wet road can still reduce nighttime clarity.
Which camera specifications matter?
Choose the lens, image format, weather rating, and power behavior together rather than selecting the widest lens alone. A 170-degree lens covers more apparent width, but heavy barrel distortion can make distances and vehicle speed harder to judge.
| Specification | Practical target | Why it matters | Trade-off |
|---|---|---|---|
| Horizontal viewing angle | 130-150 degrees | Covers rear corners and adjacent lanes | Wider lenses distort distance |
| Video resolution | 720p-1080p | Preserves plate and vehicle detail at moderate range | Higher resolution can increase bandwidth |
| Weather protection | IP67 or IP69K | Resists rain, dust, and wash exposure | Ratings do not excuse poor cable sealing |
| Operating voltage | 10-16 volts DC | Matches most RV 12-volt circuits | Voltage drop can still cause shutdowns |
| Night illumination | 6-18 IR LEDs, typical | Improves dark-area visibility | Reflective surfaces can flare |
| Camera delay | Under 300 milliseconds | Keeps displayed movement usable | Wireless systems vary by interference |
Do not treat the camera’s viewing angle as a legal or safety guarantee. The National Highway Traffic Safety Administration’s rear-visibility rule, FMVSS 111, concerns required rear visibility for covered vehicles and equipment; it does not certify that an aftermarket RV camera eliminates every blind spot.
Which RV Camera Mounting Location Fits Your Use?
The upper center wall is the best general-purpose location, while a license-plate or bumper mount is better for close-range reversing and hitch alignment. A second camera can solve a different viewing problem more effectively than placing one camera in a compromise position.
| Mounting location | Typical height | Best viewing purpose | Installation consequence |
|---|---|---|---|
| Upper rear center | 7-11 feet | Following traffic and rear corners | Requires drilling and exterior sealing |
| License-plate bracket | 2-4 feet | Parking, curb distance, and close obstacles | Low view misses roof-level obstructions |
| Bumper or hitch bracket | 1-3 feet | Ball alignment and coupler positioning | Road traffic remains mostly invisible |
| Ladder or upper accessory bracket | 6-10 feet | No-new-hole installation when structurally rated | Ladder vibration can affect the image |
| Rear-window interior mount | 4-8 feet | Temporary or non-drill installation | Glass reflections and tint reduce clarity |
Is a license-plate mount good for an RV?
A license-plate mount is suitable for a small trailer, parking camera, or secondary hitch view, but it is usually a poor sole camera for highway observation. Its low perspective can hide children, bollards, bicycle racks, and vehicles close to the upper rear wall.
License-plate mounting is attractive because it may use an existing bracket and avoid drilling the body. The trade-off is geometric: a camera two feet above ground cannot see over the same obstacles as a camera eight feet high. Use it when near-field visibility matters more than long-range traffic monitoring.
Should a fifth-wheel use a hitch camera?
A fifth-wheel should use a separate low camera near the pin box or hitch if precise coupling is a priority. The upper rear camera remains useful for traffic behind the trailer, but it normally cannot provide a dependable view of the tow vehicle’s hitch because the trailer body blocks the downward angle.
Mount a hitch camera where the manufacturer’s bracket can resist vibration and where the pin box, kingpin, and jaws remain visible. Do not attach a camera to a moving coupler component unless the product specifically supports that installation.
How Do You Install a Rear-Wall RV Camera?
Installing a rear-wall RV camera usually takes 1-3 hours for a prepared, accessible trailer and longer when cable routing crosses finished cabinets or a motorhome chassis. The most important success factor is not drilling accuracy; it is choosing a structurally sound, dry cable path and sealing it correctly.
Before You Start
| Requirement | Typical value | Practical detail |
|---|---|---|
| Installation time | 1-3 hours | Add 1-2 hours for concealed cable routing |
| DIY difficulty | Moderate | Fiberglass, aluminum framing, and wall access increase difficulty |
| Camera system cost | $40-$700 | Budget plate cameras cost less than multi-camera systems |
| Labor cost | $150-$400 | Typical RV-shop labor, excluding unusual repairs |
| Pilot-drill size | 1/16-1/8 inch | Confirm the bracket screw specification first |
| Sealant quantity | 1-3 fluid ounces | Use enough for the cable entry and bracket perimeter |
| Essential tools | 6-8 items | Drill, bits, crimper, heat gun, multimeter, sealant, tape |
Before drilling, inspect the interior side of the proposed location. Avoid hidden wiring, plumbing, structural aluminum, roof-corner framing, and laminated wall edges. Disconnect shore power and the appropriate 12-volt battery source, then verify the circuit is dead with a multimeter.
Step 1: Confirm the Camera Position
Hold the bracket on the rear centerline and use masking tape to mark the upper and lower edges. Stand 25-40 feet behind the RV and check whether a ladder, spare tire, cargo tray, awning arm, or roof overhang will enter the image.
The camera should sit on a flat surface with enough material for the screws. A thin decorative panel may require a manufacturer-approved backing plate or through-bolts with interior washers.
You will know the position works when the planned image includes both rear corners and the bumper edge. The common mistake is centering the bracket visually on a curved cap instead of centering the lens on the vehicle’s actual longitudinal centerline.
Step 2: Check the Power Circuit
Identify whether the camera requires continuous power, reverse-trigger power, or both. The upper center running-light circuit can provide switched 12-volt power when the lights are on, but it may not be designed for continuous monitoring in every RV.
A camera connected to reverse lights will activate only during reverse gear. A camera connected to marker or running lights may remain available while driving, but the tow vehicle’s automatic daytime running lights may not energize the trailer’s rear marker circuit.
Use a fused accessory circuit or the manufacturer’s designated camera harness when continuous operation matters. Confirm polarity with a multimeter instead of assuming wire colors. The common mistake is tapping a circuit that appears convenient but has insufficient current capacity or an unexpected lighting-control signal.
Step 3: Drill the Cable Entry
Drill the smallest practical hole for the camera cable, keeping it inside the bracket’s sealed footprint. Use a depth stop or tape marker on the drill bit so the bit does not penetrate farther than necessary into the wall.
For a laminated fiberglass wall, avoid crushing the outer skin. For aluminum-framed construction, locate the cavity before drilling and protect the cable from sharp edges with a rubber grommet or edge sleeve.
You will know the entry is ready when the cable passes without abrasion and the hole remains fully covered by the bracket or a sealed gland. The common mistake is drilling a large hole that forces sealant to bridge an unsupported gap.
Step 4: Connect and Protect the Wires
Connect positive to the verified positive supply and negative to the correct ground or return conductor. Use adhesive-lined heat-shrink butt connectors, sealed crimp terminals, or the waterproof connector supplied with the camera.
Do not rely on a twisted connection covered with ordinary electrical tape. Road spray, condensation, and thermal cycling can corrode the splice and create intermittent video.
You will know the connection is sound when the camera powers consistently while the cable is gently moved. The common mistake is testing only with the cable stationary, which leaves a weak crimp undiscovered.
Step 5: Seal the Bracket and Cable
Apply an RV-compatible sealant around the cable entry, screw penetrations, and the upper and side edges of the bracket. Dicor non-sag lap sealant is commonly used on compatible exterior RV surfaces, while manufacturer-approved polyurethane or marine sealants may be suitable for other materials.
Do not seal the lowest edge in a way that traps water behind the bracket if the design requires drainage. Follow the camera and RV body manufacturer’s sealant instructions because silicone adhesion and future removability vary by surface.
You will know the seal is complete when no unfilled gap remains around the cable and every fastener head is covered or gasketed. The common mistake is sealing only the cable hole while leaving screw holes exposed.
Step 6: Aim and Calibrate the Image
Power the system and adjust the camera downward until the monitor shows a thin strip of bumper or hitch area, the ground behind the RV, and the roadway beyond it. Do not aim entirely at the ground, because that sacrifices traffic visibility.
Use a helper at 10, 25, and 50 feet to compare the real position with the monitor image. Reverse-image orientation varies by camera, so confirm whether left and right match the driver’s perspective before relying on guide lines.
You will know calibration is usable when the nearest visible ground begins at a predictable distance and both rear corners appear near the image edges. The common mistake is using the camera’s maximum downward angle without checking whether the horizon and following traffic disappear.
What Are the Main RV Camera Installation Mistakes?
The most damaging mistake is treating an RV camera as a simple accessory instead of an exterior penetration in a water-sensitive wall. Incorrect sealing, unsuitable power, and an obstructed lens can produce a camera that appears functional while failing during travel or rain.
- Mounting behind a ladder or bike rack: Relocate the camera above or beside the obstruction, or install a second camera. Do not accept a permanent blind zone.
- Using only reverse-light power: Rewire to a suitable switched accessory or running-light circuit if the monitor must operate while driving.
- Aiming at the horizon: Tilt the lens downward until the bumper edge and close ground are visible.
- Drilling into a structural or wet area: Inspect inside first and use a moisture meter when the wall shows staining or softness.
- Using household silicone without checking compatibility: Remove it if the manufacturer specifies a different sealant, because adhesion and later repair can suffer.
- Ignoring voltage drop: Measure voltage at the camera while operating; a long run or poor ground can cause resets even when the battery reads 12 volts.
- Assuming wireless means installation-free: Wireless systems still require rear power, transmitter protection, antenna placement, and a reliable monitor power source.
One practitioner rule matters especially on trailers: test the complete system while the tow vehicle and trailer are connected. A camera that works beside the parked trailer may fail when the truck body, hitch, and trailer angle create the real transmission path.
Wired or Wireless: Which System Is Better?
A hardwired RV camera is usually the better choice for large motorhomes and installations where uninterrupted video matters most; a digital-wireless system is usually easier for a travel trailer when routing cable through the tow vehicle is impractical. Neither option removes the need for correct power, sealing, and antenna placement.
| System type | Typical installed cost | Typical installation time | Best application | Main weakness |
|---|---|---|---|---|
| Analog wired | $100-$350 | 3-8 hours | Short cable runs and older monitors | Lower image quality and connector compatibility |
| Digital wired | $200-$700 | 4-10 hours | Class A or Class C motorhomes | Chassis routing requires protection |
| Digital wireless | $150-$500 | 1-3 hours | Travel trailers and pre-wired RVs | Interference and signal dropouts |
| Wi-Fi smartphone camera | $40-$200 | 1-2 hours | Temporary, budget, or rental use | Phone delay, app reliability, and distraction |
| Dual-camera system | $300-$900 | 3-10 hours | Traffic plus hitch visibility | Higher cost and more power connections |
A hardwired cable should run in protected loom along a frame rail or approved interior route, away from exhaust heat, suspension movement, sharp edges, and pinch points. A wireless transmitter should sit inside a protected, dry location near the camera, not exposed beneath the bumper unless its environmental rating and mounting instructions permit it.
What Should You Do If the RV Is Pre-Wired?
Use the pre-wired camera location and connector whenever the wiring is verified compatible with the replacement camera. Many RVs have a capped harness or mounting plate near the upper rear center, but connector shape alone does not prove that the pinout, voltage, or video standard matches.
Remove the protective cap and inspect for water intrusion, corrosion, loose pins, and damaged gasket material. Confirm supply voltage, ground continuity, and trigger behavior with a multimeter before connecting the camera.
A pre-wire can reduce installation time to approximately 30-90 minutes, including bracket mounting and image adjustment. It does not eliminate sealing work. Replace a brittle gasket, seal the fasteners, and route the cable so water cannot run directly into the connector.
Why Does an RV Camera Lose Signal or Show a Black Screen?
A black screen usually results from missing power, an incorrect trigger, a failed ground, an incompatible camera-monitor pair, or a loose connector. Intermittent video more often points to voltage drop, wireless interference, water intrusion, or a cable damaged by movement.
| Symptom | First test | Likely cause | Corrective action |
|---|---|---|---|
| Completely black screen | Measure camera voltage | Blown fuse or wrong circuit | Restore the correct fused supply |
| Image appears only in reverse | Turn on running lights | Reverse-trigger wiring | Add compatible continuous-power wiring |
| Flicker during travel | Test while moving cable | Loose crimp or damaged cable | Re-terminate or replace the damaged section |
| Wireless dropouts | Test with truck connected | Structural interference or antenna location | Reposition antenna or use wired video |
| Foggy image | Inspect inside lens | Failed seal and condensation | Replace camera or approved lens assembly |
| Reversed image | Compare with a person’s position | Mirror setting or camera orientation | Change monitor setting or rotate camera |
| Missing rear corners | Check lens angle | Narrow lens or incorrect aim | Re-aim or select a wider camera |
Automatic daytime running lights deserve a separate check. Many tow vehicles illuminate front lamps without powering the trailer’s rear marker-light circuit, so a camera tied to trailer running lights may remain off even though the dashboard appears bright.
Never troubleshoot a wireless signal by adding a random booster first. Confirm the camera’s voltage and ground, test the system at close range, then identify whether the failure follows distance, vehicle position, or vibration.
When Is One Camera Not Enough?
One upper rear camera is insufficient when the RV has a blocked hitch, broad side blind spots, a rear cargo rack, or a work requirement for precise close-range maneuvering. A second low hitch camera or side-camera pair is safer than aiming the primary camera so low that it loses traffic coverage.
A motorhome with long rear overhang and large side zones may benefit from left and right side cameras linked to a multi-camera monitor. A fifth wheel usually benefits most from combining an upper rear traffic camera with a pin-box or tailgate-facing hitch camera.
The honest limitation is important: an RV camera is a visual aid, not a substitute for mirror checks, spotters, turn-signal use, and physical inspection. Cameras flatten distance, compress depth, and can hide objects outside their lens or behind bright glare.
Can You Mount an RV Camera Without Drilling?
You can avoid new body holes by using a pre-wired bracket, an existing license-plate mount, a structurally rated ladder mount, or a temporary suction or magnetic system designed for the vehicle. Non-drill options are convenient, but they may transmit more vibration or provide a less suitable viewing height.
Do not attach a heavy camera to a thin ladder tube merely because the location is high. Check the ladder manufacturer’s load guidance, use a purpose-built clamp, and ensure the mount cannot rotate into the lens path.
A suction mount is best treated as temporary. Heat, dust, moisture, and road vibration reduce its holding reliability, and a detached camera can damage its cable or become a road hazard. For permanent travel, a sealed mechanical mount is more dependable.
How Much Does RV Camera Installation Cost?
Typical RV camera installation costs range from $40-$100 for basic self-installed plate cameras, $150-$500 for common wireless systems, and $200-$900 for professionally installed wired or multi-camera systems. Labor commonly adds $150-$400, with concealed motorhome cable routing accounting for the largest variation.
| Installation scenario | Equipment cost | Labor or DIY time | Typical total |
|---|---|---|---|
| Plate camera on small trailer | $40-$150 | 1-2 hours DIY | $40-$350 |
| Pre-wired wireless camera | $150-$400 | 30-90 minutes DIY | $150-$500 |
| New rear-wall camera, travel trailer | $150-$500 | 1-3 hours DIY | $150-$900 |
| Hardwired Class C motorhome | $200-$700 | 4-8 hours | $350-$1,300 |
| Rear plus hitch cameras | $300-$900 | 3-10 hours | $500-$1,500 |
These are typical planning ranges, not fixed prices. Wall access, connector compatibility, damaged exterior materials, and the need to remove interior panels can change the estimate substantially.
Frequently Asked Questions
Should the RV camera be above or below the running light?
The RV camera is usually mounted below the center running light because that position keeps the lens high while leaving the light visible and the bracket on the rear wall. The camera can move several inches lower when the light is mounted on thin trim, curved fiberglass, or a location without adequate screw support.
Should an RV backup camera be on all the time?
An RV backup camera should operate continuously when it is being used as a rear-view aid during travel, but the camera must connect to a suitable switched 12-volt circuit. Reverse-light wiring is appropriate for reversing-only operation and will not provide a continuous image while driving forward.
How far behind the RV should the camera see?
A general-purpose RV camera should show the bumper area, rear corners, and following traffic at roughly 25-100 feet, depending on lens resolution, lighting, and road conditions. A camera cannot provide reliable coverage at every distance when aimed at the hitch, so separate cameras may be necessary.
Can rain damage an RV backup camera?
Rain can damage an RV backup camera when water enters the cable joint, screw holes, housing, or wall cavity. An IP-rated housing reduces camera exposure, but installation quality still controls wall protection. Inspect sealant annually and after any bracket movement, cracking, or unexplained image failure.
Do RV cameras record video?
Most RV backup cameras provide a live view and do not record unless the system includes a digital video recorder, memory card, or recording monitor. Confirm storage capacity, loop-recording behavior, and overwrite settings before assuming that a live-view camera provides accident evidence.
What angle should an RV camera face?
An RV camera should face slightly downward, with the monitor showing a narrow bumper or hitch edge and the roadway beyond it. The exact tilt depends on camera height and lens angle, so calibrate at 10, 25, and 50 feet rather than copying a fixed bracket position.
The Bottom Line
For the query “where do i mount my rv backup camera,” start at the upper rear center, approximately 1-2 inches below the highest center running light, provided the wall is flat, structurally sound, and free of obstructions. Aim the lens slightly downward, verify the power circuit, protect every wire, and seal every penetration.
Use a license-plate camera for close parking visibility, a low hitch camera for coupling precision, and a second side or rear camera when one lens cannot cover the RV’s blind zones. The correct location is the one that preserves both traffic visibility and close-range maneuvering information.


