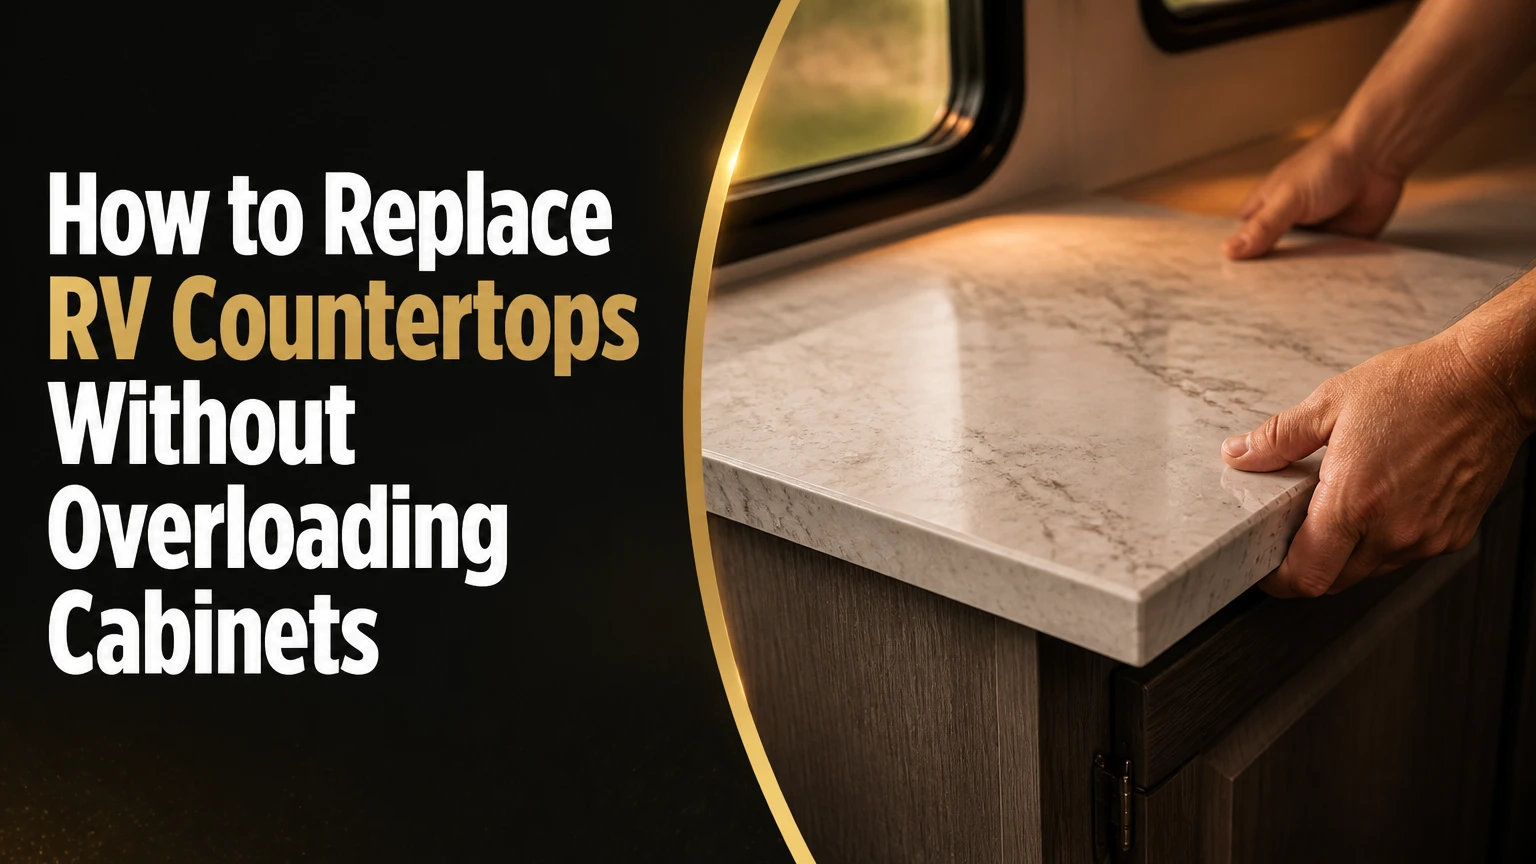
Replacing RV countertops requires four controlled stages: remove the old top, build an accurate template, fabricate the new surface, and fasten it for road movement. A successful replacement usually takes 8-16 working hours for laminate or butcher block, costs about $200-$1,200 in materials, and depends most on weight, cabinet strength, sink fit, and slide-out clearance.
Key Facts at a Glance
Laminate is typically the lightest countertop option at about 1.5-2.5 pounds per square foot.
Typical DIY replacement time is 8-16 working hours across 2-3 days.
A new countertop should be weighed before installation and compared with the old countertop.
Flexible silicone and correctly placed mechanical fasteners accommodate RV movement better than rigid construction adhesive alone.
A cardboard or luan template reduces errors around curved walls, sinks, cooktops, and appliance covers.
Quartz and granite often weigh 12-18 pounds per square foot before sink cutouts, so many RV cabinets require reinforcement before stone installation.
What Does an RV Countertop Replacement Involve?
An RV countertop replacement removes the factory worktop and installs a new surface on the existing cabinet structure. The project can improve water resistance, repair swollen particleboard, add a larger sink, change the cooking layout, or update the interior without rebuilding the entire galley.
RV construction differs from residential construction. A motorhome or trailer experiences chassis flex, vibration, temperature swings, and repeated loading during travel. Factory galley boxes commonly use lightweight plywood, stapled joints, or particleboard, so a material that works in a house may exceed the cabinet or axle’s practical load capacity.
The replacement is more than cutting a board to length. The installer must preserve access to plumbing, maintain appliance clearances, protect slide-out seals, support cutout areas, and allow small movements between the countertop and cabinet. Water management also matters because an exposed laminate core or unsealed wood edge can swell after a single faucet leak.
What changes the project difficulty?
A straight, 6-foot laminate run with a drop-in sink is a moderate DIY project. A curved solid-surface counter with an undermount sink, integrated backsplash, cooktop opening, and slide-out requires more advanced fabrication and careful dry fitting.
The original countertop may be held by screws inside cabinet boxes, brackets, clips, staples, silicone, or a combination of these methods. Never assume that prying harder is the correct removal method. Hidden screws can split a thin cabinet rail or damage a nearby appliance.
What Should You Check Before Removing the Old Top?
Before removing an RV countertop, photograph every connection, measure the existing overhang, and identify nearby water, electrical, propane, and appliance components. Disconnect only the utilities affected by the work, then confirm that the sink, faucet, cooktop, and backsplash can be removed without damaging reusable parts.
Before You Start
| Item | Typical requirement | Verification |
|---|---|---|
| Working time | 8-16 hours over 2-3 days | Add time for fabrication errors |
| DIY difficulty | Moderate for laminate, advanced for stone | Requires accurate cutting |
| Material budget | $200-$1,200 typical | Stone and custom solid surface cost more |
| Cardboard or luan | 1 sheet, 1/8-inch luan or equivalent | Covers the entire cabinet run |
| Silicone adhesive | 2-4 tubes, 100% silicone | Confirm compatibility with surfaces |
| Fasteners | 8-20 existing or replacement screws | Use short screws that cannot pierce the top |
| Measuring tools | Tape, square, compass, calipers | Measure walls and cutouts twice |
| Cutting tools | Jigsaw, drill, router or hole saw | Match blade to material |
| Safety equipment | Eye protection, respirator for dusty materials | Ventilate the RV |
Turn off the RV’s main propane valve if the countertop removal affects a cooktop, oven, or propane line. Switch off relevant 12-volt and 120-volt circuits before working near appliances or wiring, but do not treat a water-pump breaker as a universal countertop safety control. Water-pump power and appliance power are separate systems.
Close the freshwater supply or drain pressure before disconnecting the faucet. Place towels and a shallow pan beneath the connections. Photograph the hot, cold, drain, and water-filter connections before loosening them.
Which dimensions should you record?
Measure the countertop length, front-to-back depth, thickness, front overhang, wall gap, sink opening, faucet-hole positions, cooktop opening, and the distance to every moving component. Record measurements in millimeters or sixteenths of an inch, and note which edges are square and which follow a curved wall.
Also measure the clearance above the countertop. A thicker replacement can interfere with a window valance, sink cover, stove lid, cabinet door, or slide-out seal. On a slide-out galley, operate the room through its full travel before removal and photograph the seal position at both ends.
Which Material Fits Your RV?
Laminate is the best general-purpose choice for weight-sensitive trailers and budget renovations, while solid surface fits owners who prioritize seamless repairs and integrated sinks. Butcher block works for owners who accept regular maintenance, whereas granite and quartz should be reserved for chassis and cabinetry that have been professionally assessed for the added load.
| Material | Typical weight | Typical material cost | Best application |
|---|---|---|---|
| Laminate on lightweight core | 1.5-2.5 lb/sq. ft. | $20-$50/sq. ft. | Travel trailers and budget DIY work |
| Solid surface, such as Corian | 4-5.5 lb/sq. ft. | $75-$125/sq. ft. | Motorhomes needing repairable seams |
| Butcher block | 3.5-5 lb/sq. ft. | $40-$90/sq. ft. | Vans and rustic interiors |
| Quartz | 12-18 lb/sq. ft. | $100-$250/sq. ft. | Reinforced, high-capacity motorhomes |
| Granite | 12-18 lb/sq. ft. | $100-$250/sq. ft. | Speciality installations with structural review |
These are typical planning ranges, not manufacturer specifications. Actual weight changes with thickness, substrate, sink cutouts, edging, backsplash pieces, and moisture content.
Laminate offers the lowest weight and broadest color selection, but its exposed core fails quickly when water reaches an unsealed edge. Seal every cut edge and pay particular attention to the faucet, sink rim, backsplash joint, and drain cabinet.
Solid surface is nonporous and can usually be sanded when scratched. It also supports inconspicuous seams and integrated sinks, but fabrication requires suitable router bits, abrasives, and dust control. A solid-surface top is not ideal where the cabinet base is badly distorted or too weak for its weight.
Butcher block cuts with ordinary woodworking tools and adds a warm appearance. Wood moves with humidity, so finish every face and edge with the product manufacturer’s recommended finish, then maintain it according to the finish instructions. Food-safe oil alone is not a waterproof substitute for a properly sealed sink perimeter.
Quartz and granite provide a premium appearance but create the highest structural and transport risk. Quartz is not literally scratch-proof, and stone can crack from unsupported cutouts, point loads, or chassis movement. Stone installation is usually a professional job in a large Class A motorhome, not a default upgrade for a lightweight trailer.
How Do You Calculate the Added Countertop Load?
Calculate the replacement load by multiplying the material’s weight per square foot by its surface area, then add the sink, faucet, backsplash, reinforcement, and hardware. Compare the total assembly with the removed countertop and consider where the added mass sits relative to the axle and vehicle’s loaded weight rating.
For example, a 12-square-foot laminate top at 2 pounds per square foot weighs about 24 pounds before hardware. A 12-square-foot stone top at 15 pounds per square foot weighs about 180 pounds, creating an approximate 156-pound increase before the sink and supports are counted.
| Example countertop | Area | Material rate | Approximate top weight |
|---|---|---|---|
| Small laminate galley | 8 sq. ft. | 2 lb/sq. ft. | 16 lb |
| Medium butcher block | 10 sq. ft. | 4 lb/sq. ft. | 40 lb |
| Medium solid surface | 10 sq. ft. | 5 lb/sq. ft. | 50 lb |
| Large quartz installation | 12 sq. ft. | 15 lb/sq. ft. | 180 lb |
Weigh the old top if possible. A bathroom scale under a supported piece provides a more useful comparison than a visual estimate. Include the countertop’s permanent accessories, because a heavy farmhouse sink can add more weight than the surface itself.
Do not rely on a countertop material table to prove that your RV can carry the load. Check the RV manufacturer’s gross vehicle weight rating, cargo-carrying capacity, axle ratings, and current loaded axle weights. If the new installation adds a large amount of weight near one side, obtain a scale reading after completion.
Step 1: Remove the Existing Countertop
Remove the RV countertop by disconnecting affected utilities, taking out the sink and cooktop, removing upward-facing fasteners, cutting perimeter sealant, and lifting the surface without levering against thin cabinet panels. Preserve the old countertop until the new piece has been test-fitted, because it remains the most accurate physical reference.
- Shut off the relevant water supply and release faucet pressure.
- Close the main propane valve when a propane appliance is attached or nearby.
- Turn off relevant 12-volt and 120-volt circuits before working near wiring.
- Disconnect faucet supply lines and the drain trap, labeling each connection.
- Remove the sink clips, lift out the sink, and protect the opening.
- Remove a cooktop only according to its appliance instructions.
- Search inside every cabinet for screws pointing upward into the worktop.
- Cut silicone or caulk along the wall, backsplash, and front edge.
- Lift gradually with a second person supporting long or flexible pieces.
You will know the countertop is free when it lifts evenly without cabinet rails moving with it. Stop if a corner remains fixed, then search for another screw, bracket, staple, or adhesive patch.
The common mistake is prying against the cabinet face frame. Thin RV cabinet components can split before old silicone releases. Use a wide plastic putty knife to locate adhesive and a sharp utility knife to cut it in short sections.
Inspect the exposed cabinet rails immediately. Replace wet particleboard, loose staples, crushed plywood, and stripped screw holes before installing anything new.
Step 2: Build a Full-Size Template
Build the replacement template from the bare cabinets, not from the old countertop alone. A full-size cardboard or 1/8-inch luan template captures curved walls, irregular corners, appliance openings, sink position, and the actual overhang after the old top has been removed.
Lay the template material over the cabinet rails and tape sections together. Trace the wall profile with a compass or scribing block, then mark the front edge and desired overhang. Transfer plumbing penetrations, faucet holes, sink openings, cooktop openings, and removable covers.
Mark “front,” “wall,” “left,” and “right” on the template. Mark the finished thickness as well. A 1-inch replacement installed where a 5/8-inch top existed can reduce cabinet-door clearance and catch a slide-out seal.
Test the template in every relevant configuration. Open drawers, swing cabinet doors, operate the slide-out, lift the stove cover, and install the sink or cooktop temporarily. Maintain enough clearance for seals and moving parts, rather than cutting the countertop flush to a wall that moves relative to the cabinet.
You will know the template is accurate when it sits flat on all support rails, reproduces the intended overhang, and passes the movement test without touching a seal or appliance.
The common mistake is tracing the wall tightly. RV walls and cabinets are rarely perfectly parallel. Leave a controlled wall gap for sealant or trim, commonly about 1/8-1/4 inch, according to the planned backsplash detail.
Step 3: Transfer the Template and Cut the Countertop
Transfer the approved template to the new countertop with the finished face protected and the grain or pattern oriented correctly. Cut the outside shape first, leave a small trimming allowance where appropriate, and cut sink or cooktop openings only after verifying the manufacturer’s cutout dimensions.
Use a fine marker and keep the template orientation visible. For laminate and wood, a jigsaw with a suitable fine-tooth blade can handle many straight or curved cuts. A circular saw with a guide produces straighter long cuts, while a router and flush-trim bit can copy a secured template edge.
Sink openings require special care. Measure the actual sink, not only the old opening, because replacement sinks often differ in corner radius, rim width, clip location, and required support. An undermount sink also needs a stronger, cleaner opening than a drop-in model.
A router can make a clean solid-surface opening, but use the fabricator’s specified bit, speed, passes, and edge treatment. Wear eye protection and respiratory protection appropriate to the dust; quartz, solid surface, and wood produce different hazards.
You will know the cut is ready when the countertop drops over the template with the correct orientation and every cutout aligns with the appliance or sink without force.
The common mistake is cutting the sink opening from a generic internet dimension. Use the sink manufacturer’s template or the physical sink, and keep the opening supported until installation.
Step 4: Reinforce the Cabinets and Dry-Fit the Top
Reinforce weak cabinet rails before adhesive or fasteners are applied, especially under heavy solid surface, butcher block, or stone. Add well-bonded plywood or solid-wood cleats inside the cabinet structure, but do not block plumbing access, ventilation, drawer travel, or appliance removal.
Use reinforcement where the existing rail is thin, cracked, unsupported across a long span, or damaged by previous fasteners. The reinforcement should spread load along the cabinet rather than create isolated pressure points. Pre-drill screw holes in fragile plywood to reduce splitting.
Place the fabricated countertop on the cabinets without adhesive. Check the wall gap, overhang, sink alignment, faucet clearance, cooktop fit, backsplash height, drawer operation, and slide-out travel.
For a heavy surface, inspect the floor and cabinet connection as well as the top rail. Strengthening only the upper rail does not solve a cabinet box that is loose from the RV floor.
You will know the dry fit works when the top rests stable without rocking and every door, drawer, appliance, sink, and slide-out operates normally.
The common mistake is using long screws to compensate for weak cabinets. A screw that penetrates the countertop or reaches wiring and plumbing creates a new failure. Measure screw length against the combined rail and countertop thickness before fastening.
Step 5: Attach the Countertop for Road Movement
Attach the RV countertop with flexible, compatible 100% silicone at the support rails and short, correctly sized screws or brackets where the cabinet design permits. The silicone distributes contact and accommodates small movements, while mechanical fasteners prevent sliding and lifting.
Clean the bonding surfaces according to the countertop and silicone manufacturer’s instructions. Apply continuous beads along support rails, with additional beads near corners and long unsupported areas, but avoid sealing access panels that must remain removable.
Lower the countertop vertically onto the adhesive. Slide it as little as possible after contact, because dragging can smear the bead away from the support rail. Install fasteners from below through existing cabinet locations or approved brackets, leaving enough flexibility for movement.
Avoid relying on rigid construction adhesive as the only attachment method. Adhesive products vary, and a rigid bond can transfer chassis movement into a thin countertop, cabinet rail, or seam. The correct sealant depends on the material, substrate, and manufacturer’s warranty requirements.
You will know the installation is secure when the top does not shift under hand pressure, the wall gap is consistent, and no screw tip or adhesive has entered a sink, drawer, appliance, or finished surface.
The common mistake is over-tightening screws. Compressing the countertop against an uneven rail can create a stress point, especially around stone and solid-surface cutouts.
Step 6: Install the Sink, Faucet, and Backsplash Seal
Install the sink with the clips, brackets, and sealant specified for that sink type, then reconnect plumbing without twisting the faucet shank or drain fittings. Seal the wall joint and other exposed edges after the countertop has reached its stable position.
A drop-in sink normally seals beneath its rim with the specified kitchen-and-bath sealant. An undermount sink needs a designed support system, not silicone alone, because the sink’s filled weight transfers directly to the countertop opening.
Reconnect hot, cold, and drain lines while maintaining service loops and avoiding sharp bends. Turn on the water slowly, dry every joint, and check again after 10 minutes. Water around a faucet base often indicates a loose mounting seal or a countertop that slopes toward the faucet.
Apply a neat bead at the backsplash or wall transition. Seal raw laminate, wood end grain, faucet holes, sink cutouts, and any exposed countertop edge. Do not use caulk to conceal a structural gap or a countertop that does not sit flat.
You will know the wet installation works when the sink remains stable, the faucet does not rotate, the drain remains dry, and water flows toward the intended basin rather than the cabinet wall.
The common mistake is sealing before confirming levelness. Shim or correct the support first, because cured sealant will not compensate for a low corner.
Step 7: Cure, Test, and Recheck Before Driving
Leave the RV stationary for at least 24 hours after silicone installation, or for the full cure period printed on the product. Cure time changes with bead thickness, temperature, humidity, ventilation, and the specific silicone formula.
Before travel, inspect the entire installation in daylight. Run water for several minutes, fill the sink partially, drain it, operate the cooktop cover, open drawers, and cycle the slide-out. Check underneath for squeeze-out, loose fasteners, wet plumbing, and interference.
Record the completed countertop weight if the change is substantial. Recheck the RV’s loaded condition at a public scale when a heavy surface or stone sink has been added. The axle distribution matters as much as the total weight.
A useful road-readiness checklist includes:
- No slide-out seal contacts the new countertop.
- No drawer or door rubs the new overhang.
- Sink clips or support brackets are tight.
- Faucet and drain connections remain dry.
- Raw wood and laminate edges are sealed.
- Countertop fasteners do not pierce the surface.
- Silicone has cured for the stated period.
- The new load does not create an axle or cargo-capacity problem.
How Much Does It Cost and How Long Does It Take?
A typical DIY RV countertop replacement costs $200-$1,200 and takes 8-16 working hours for laminate or butcher block. Custom solid surface commonly takes 1-2 weeks because fabrication may occur off-site, while stone requires professional templating, reinforcement review, fabrication, and transport planning.
| Project path | Typical material cost | Working time | Main cost driver |
|---|---|---|---|
| Laminate DIY | $200-$500 | 8-12 hours | Sheet, edge treatment, sink |
| Butcher block DIY | $350-$900 | 10-16 hours | Wood thickness and finish |
| Solid surface | $800-$1,800 | 1-2 weeks | Fabrication and seam work |
| Quartz or granite | $1,500-$3,500+ | 1-3 weeks | Stone, transport, reinforcement |
| Professional laminate installation | $700-$1,500 | 2-5 days | Labor and custom fitting |
Prices are typical planning ranges for a small or medium RV galley in the United States. Local labor, material availability, countertop area, sink changes, backsplash work, and cabinet repairs can move the final price substantially.
Budget separately for a new sink, faucet, drain fittings, trim, sealant, reinforcement, and disposal. A replacement surface that appears inexpensive can become costly when the old cabinet rail is swollen or the sink opening requires fabrication.
Common Mistakes and How to Fix Them
What causes a countertop to crack after travel?
Unsupported cutouts, over-tightened fasteners, heavy point loads, and rigid attachment can cause cracking after road vibration. For solid surface, repairable seams may be routed and bonded with the correct repair system; cracked stone may require a fabricator because an epoxy fill does not restore structural support.
Why does water swell the countertop edge?
Water swells a laminate or wood edge when the core or end grain is unsealed. Dry the area, remove loose material, rebuild the damaged edge if needed, and seal the sink, faucet, backsplash, and exposed cutouts before reinstalling the counter.
How do you fix a gap at the RV wall?
A controlled 1/8-1/4-inch wall gap can receive matching silicone, trim, or backsplash material. A large or uneven gap usually indicates an inaccurate template, a bowed wall, or a cabinet that is not level, so measure the cause before hiding it with molding.
Why is water pooling near the faucet?
Pooling usually results from an out-of-level countertop, an unsealed faucet hole, or a loose faucet base. Confirm the cabinet level, correct the support, reseal the faucet opening, and test the area with dry paper towels under the counter.
What if the new top is too heavy?
Do not solve excessive weight by adding random screws. Remove or redesign the surface, choose laminate or thinner solid surface, reduce backsplash mass, or obtain a structural assessment and axle-weight measurement before the RV travels.
Which Material Works for Different RV Situations?
Material selection should follow the RV’s load margin and cabinet construction before appearance. A lightweight travel trailer usually benefits from laminate, a frequently used motorhome galley may justify solid surface, and butcher block suits owners prepared to maintain a moving natural material.
Lightweight trailer or fifth wheel
Choose premium laminate on a stable lightweight substrate. It minimizes added load, cuts with accessible tools, and allows a damaged section to be replaced without stone fabrication. Seal every edge, particularly around a drop-in sink.
Full-time motorhome
Choose solid surface when the cabinets can support its higher weight and the owner values a seamless, repairable worktop. Solid surface is easier to refinish after scratches than laminate, but it still needs supported cutouts and careful fastening.
Camper van or overland vehicle
Choose sealed butcher block when the owner accepts periodic maintenance and humidity-related movement. Leave the manufacturer’s recommended expansion space, finish all faces and edges, and avoid trapping the wood between rigid walls.
Large Class A motorhome
Consider quartz or granite only after checking cabinet reinforcement, floor attachment, cargo capacity, and axle distribution. A luxury appearance does not justify a load that reduces handling margin or causes cabinet failure.
FAQ
Can you replace an RV countertop without removing the sink?
Usually, removing the sink is safer and produces a more accurate result. Leaving the sink in place can hide mounting screws, prevent the old top from lifting, contaminate the new adhesive area, and make it difficult to verify the new cutout. Reuse is practical only when the sink remains fully supported and the replacement uses the same opening.
Should an RV countertop be screwed down?
An RV countertop generally benefits from mechanical fasteners combined with flexible sealant, provided the cabinet structure and screw length are suitable. Screws alone can create concentrated stress, while silicone alone may allow movement or lifting. Use existing attachment locations where possible and avoid penetrating wiring, plumbing, or the finished surface.
Can I use a residential countertop in an RV?
A residential countertop can be used if its weight, thickness, dimensions, and attachment method suit the RV. Standard quartz or granite creates more load than many travel-trailer cabinets can carry. Measure the completed assembly, inspect the supports, and check axle and cargo ratings before choosing a residential material.
How thick should an RV replacement countertop be?
Match the original thickness when possible, commonly about 5/8-1 inch, unless the cabinet, sink, appliance, and slide-out clearances support a change. Thickness affects weight, edge height, faucet reach, drawer clearance, and stove-cover operation. Confirm the finished height before cutting the material.
How long after installation can an RV be driven?
Wait at least 24 hours, or the full cure time specified by the silicone manufacturer, before driving. Cold temperatures, high humidity, thick beads, and poor ventilation can extend curing. Test plumbing, drawer movement, sink stability, and slide-out clearance before travel.
The Bottom Line
To replace RV countertops successfully, choose a material that fits the vehicle’s load margin, remove the old surface without damaging lightweight cabinets, build a full-size template, dry-fit every opening, and fasten the new top with flexible sealant plus correctly sized mechanical support. The safest DIY choice for most RVs is sealed laminate, while solid surface, butcher block, and stone require progressively greater attention to maintenance, cabinet strength, and weight. Plan the work around accurate measurements, a 24-hour cure period, and a final water, movement, and axle-load inspection. A careful how to replace rv countertops project improves the galley without turning a cosmetic renovation into a structural or road-safety problem.


