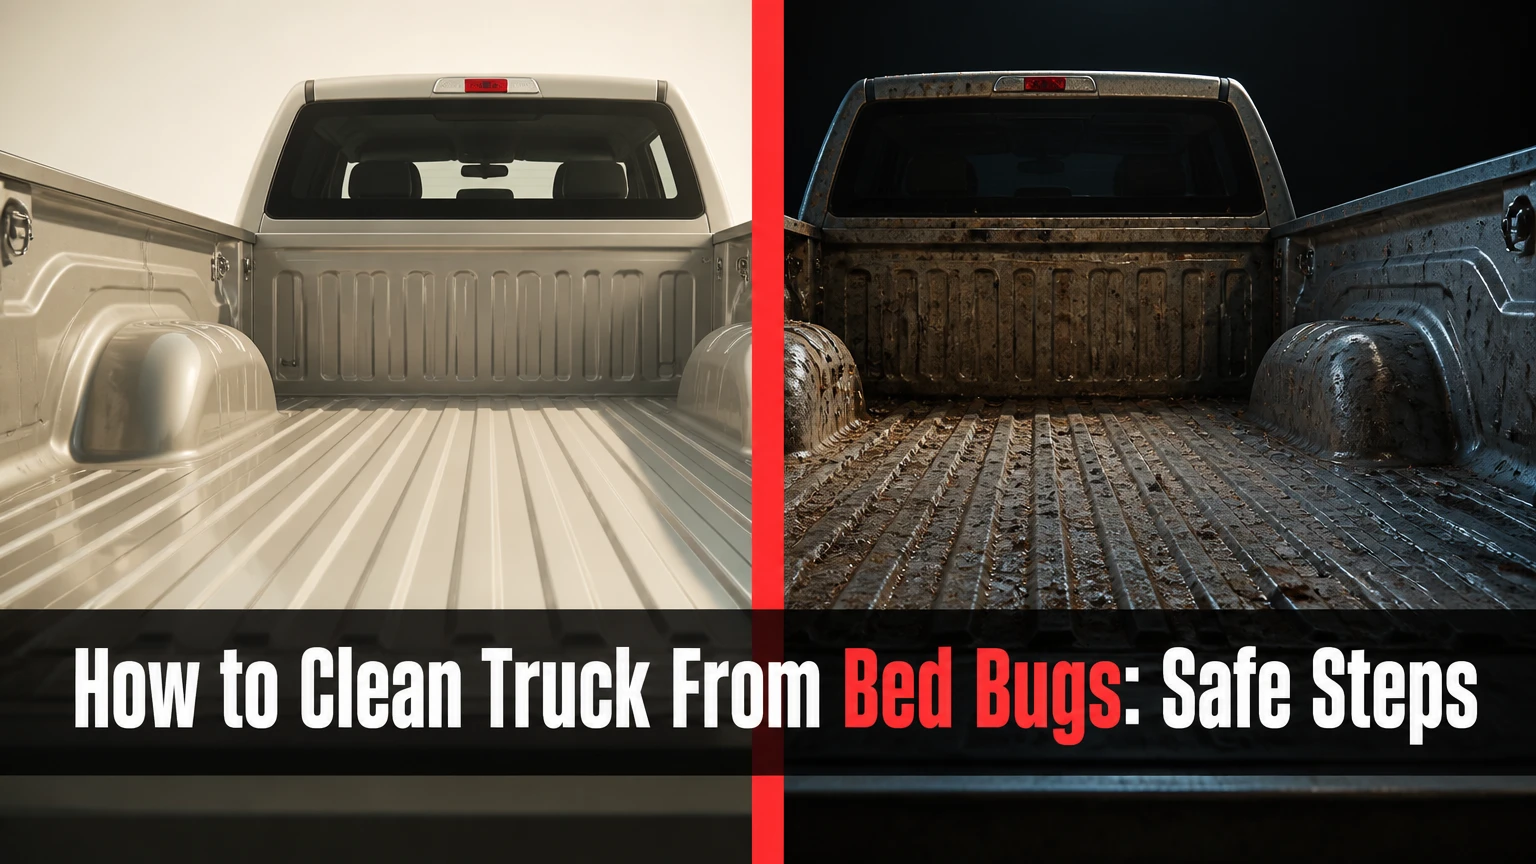
To clean a truck from bed bugs, isolate the vehicle, seal and heat-treat removable fabrics, vacuum every seam and floor edge, then use a professionally monitored heat treatment or an EPA-labeled pesticide program. Cleaning alone rarely eliminates hidden eggs, so inspect the cab or sleeper berth weekly for at least 30 days after treatment.
Key Facts at a Glance
- Bed bugs can hitchhike in a truck without living permanently in the vehicle.
- A household dryer on high heat is more dependable for clothing than washing alone.
- Professional heat treatment must verify lethal temperatures in the coldest hiding locations, not merely in open cab air.
- Vehicle pesticide use is legal and safe only when the product label specifically permits that site and application.
- Foggers and bug bombs do not reliably penetrate seat foam, trim gaps, or sleeper-berth structures.
- A truck should remain isolated from homes, hotels, and other fleet vehicles until inspection and treatment are complete.
Can Bed Bugs Survive in a Truck?
Bed bugs can survive in a truck for weeks or months when the cab provides sheltered seams, upholstery, bags, bedding, and access to a sleeping person. A truck is usually a transport site rather than the original source, so successful treatment must address the vehicle and the driver’s clothing, luggage, home, or lodging.
Adult bed bugs are reddish-brown, flattened insects about 4-7 millimeters long. Eggs are approximately 1 millimeter and pale; newly hatched nymphs are much smaller and translucent. Evidence includes live insects, shed skins, pale eggs, black fecal spots, and rusty stains on bedding.
The CDC states, “Bed bugs are not known to spread diseases to people.” Bites can still cause itching, sleep loss, skin infection from scratching, or allergic reactions. A suspected bite alone does not identify an infestation because mosquitoes, fleas, mites, and contact dermatitis can look similar.
Where Do Bed Bugs Hide in a Truck?
| Vehicle area | Common hiding point | Inspection method | Treatment concern |
|---|---|---|---|
| Driver seat | Piping, seat rails, recline mechanism | Flashlight and crevice tool | Foam can shield insects from surface sprays |
| Sleeper berth | Mattress zipper, bunk frame, wall seam | Remove mattress and inspect underside | Bedding can carry bugs into a home |
| Cab floor | Carpet edge, mat underside, pedal area | Lift mats and examine stitching | Dirt can conceal fecal spotting |
| Doors | Pocket corners, weather stripping, speaker grille | Open pockets and use a flashlight | Door electronics require chemical caution |
| Dashboard | Panel joints, glove box, wiring voids | Inspect without dismantling live electronics | Foggers may drive insects deeper |
| Personal cargo | Duffel seams, jackets, cardboard, paperwork | Isolate items in sealed bags | Cargo often reintroduces the infestation |
How Can You Confirm Bed Bugs Before Cleaning?
Confirm bed bugs with a captured specimen or clear photograph, because cleaning an incorrectly identified insect wastes time and can spread contaminated belongings. Place a specimen in a sealed container, photograph it beside a ruler, or request identification from a licensed pest professional or local extension service.
Inspect after the truck has been stationary for several hours. Use a bright flashlight, a plastic card for seams, and disposable gloves. Concentrate on sleeping and sitting areas first, then examine bags and clothing.
Do not rely on blood spots or bites as proof. Black marks that smear with a damp cotton swab may be fecal spotting, but mold, grease, and marker residue can look similar. A trained identification is especially valuable before applying pesticides or removing interior panels.
Before You Start: Time, Cost, and Materials
A basic containment and cleaning session takes 2-4 hours and costs approximately $20-$80 in bags, gloves, a vacuum filter, detergent, and inspection supplies. A confirmed infestation commonly requires professional treatment, which typically costs $300-$1,500 for a pickup or day cab and $500-$2,000 or more for a sleeper berth, depending on location and treatment scope.
| Requirement | Typical quantity or range | Purpose | Important limit |
|---|---|---|---|
| Contractor bags | 10-20 bags | Seal textiles and loose cargo | Do not carry open items through the cab or home |
| Dryer access | 30-60 minutes per load | Kill bugs on heat-tolerant fabrics | A wash cycle alone is unreliable |
| Shop vacuum | 1 machine with crevice nozzle | Remove insects, skins, and debris | Vacuuming does not guarantee egg removal |
| Flashlight | 500-1,000 lumens | Inspect dark seams | Bright light does not flush every bug |
| Nitrile gloves | 2-4 pairs | Handle contaminated items | Gloves do not replace handwashing |
| Mattress encasement | 1 per sleeper mattress | Reduce hiding places | It must be labeled for bed bugs and fully zipped |
Remove food, medication, loose electronics, aerosols, and heat-sensitive materials before professional heat treatment. Tell the provider about lithium batteries, aftermarket wiring, medical equipment, fire extinguishers, and temperature-sensitive cargo.
How to Clean Truck From Bed Bugs: Seven Steps
Step 1: Isolate the Truck and Stop Moving Items
Park the truck away from homes, employee lounges, hotel entrances, and other vehicles. Close the cab, mark it out of service, and do not transfer bedding, uniforms, bags, or tools until each item is sealed.
Notify a fleet manager or employer when the truck is company-owned. Record the date, vehicle number, driver, suspected exposure location, photographs, and any recent hotel or household exposure. Isolation prevents a cab infestation from becoming a fleet or residential infestation.
You’ll know it worked when: every loose item is either sealed inside a bag or left in the isolated truck.
Common mistake: carrying an unbagged jacket or pillow into a home “for washing.”
Step 2: Bag Textiles and Use a Dryer First
Place blankets, clothing, towels, pillows, and removable covers directly into sealed bags. Empty one bag at a time into a dryer, then run the hottest fabric-safe setting for at least 30 minutes after the load reaches operating heat; many pest programs use 30-60 minutes for ordinary garments.
The dryer is the important stage. Washing may kill some insects, but water temperature, detergent concentration, and cycle duration vary widely. Dry-clean-only items should go to a professional cleaner after disclosure, while heat-sensitive items need advice from a pest professional.
Seal treated items in new bags. Do not return them to the cab until treatment is complete.
You’ll know it worked when: treated textiles remain sealed and no clean items contact untreated bags.
Common mistake: opening bags in a laundry room and shaking clothing before drying.
Step 3: Remove Clutter and Inspect the Interior
Take out trash, cardboard, loose paperwork, food packaging, tools, and personal bags. Dispose of unwanted items in sealed bags outside the truck, and retain necessary cargo in clear plastic containers that can be inspected.
Remove floor mats, mattress covers, seat cushions if designed for removal, and storage-bin contents. Do not dismantle airbags, seat-belt pretensioners, dashboard wiring, or sleeper panels unless a qualified technician authorizes the work.
Use a flashlight to inspect seat piping, rails, mattress zippers, bunk joints, door pockets, carpet edges, and wall-to-floor transitions. Mark evidence with removable tape and photograph it before vacuuming.
You’ll know it worked when: every accessible seam is visible and the source area is documented.
Common mistake: focusing only on the mattress while leaving a nearby duffel bag untreated.
Step 4: Vacuum Seams, Edges, and Hiding Places
Vacuum slowly with a crevice attachment along seat stitching, seat rails, carpet borders, floor-mat undersides, sleeper-frame joints, mattress seams, door pockets, and accessible trim gaps. Spend approximately 20-30 seconds per linear foot on heavily infested seams rather than making one rapid pass.
A vacuum removes insects and debris but does not reliably kill all eggs attached to fabric or hidden inside foam. If the machine uses a disposable bag, remove and seal it immediately outdoors. For a bagless vacuum, empty the canister into a sealed bag outdoors, then clean the canister and nozzle according to the manufacturer’s instructions.
Place a second sealed bag over the vacuum contents before disposal. Wash hands after removing gloves.
You’ll know it worked when: no visible insects or debris remain in accessible seams and the vacuum contents are sealed outside.
Common mistake: vacuuming the cab and then storing the uncleaned vacuum in a bedroom or garage.
Step 5: Choose a Treatment That Reaches Hidden Areas
Professional heat is usually the most comprehensive chemical-free option for a vehicle, but only when technicians use calibrated sensors and protect heat-sensitive components. A licensed pest professional may instead use an EPA-registered product whose label permits vehicle interiors, combined with inspection, vacuuming, and follow-up visits.
Do not improvise heaters, use propane appliances, or seal a truck with a chemical gas product. Vehicle interiors contain plastics, adhesives, wiring, batteries, and enclosed spaces that can overheat, corrode, or accumulate toxic concentrations.
| Treatment option | Typical price | Typical downtime | Main strength | Main limitation |
|---|---|---|---|---|
| Professional vehicle heat | $300-$1,500 pickup; $500-$2,000+ sleeper | 4-8 hours | Reaches multiple life stages when monitored | Requires equipment, preparation, and component protection |
| Licensed pesticide service | $300-$850 per visit | 2-6 hours plus re-entry time | Residual control and targeted application | Often needs 2-3 visits; label restrictions apply |
| Professional steam | $100-$300 as an add-on | 1-3 hours | Kills exposed bugs and eggs on contact | Does not reach deep foam or enclosed voids |
| DIY vacuum and containment | $20-$80 supplies | 2-4 hours initially | Removes clutter and limits spread | Not a complete eradication method |
| Chlorine dioxide gas | Provider-specific | Often 12-24 hours or longer | Can enter some enclosed spaces | Respiratory, corrosion, sealing, and clearance hazards |
The prices are typical U.S. ranges, not guaranteed quotes. Region, truck size, infestation level, emergency scheduling, and whether a sleeper mattress or cargo area is included can change the total substantially.
Which Treatment Works Best for a Pickup or Sleeper Truck?
Professional heat is often the best single-visit choice for a stripped pickup cab or sleeper berth when the provider can document temperatures at cold spots. A pesticide program is often more practical for repeated fleet exposure, but it requires label-compliant products, ventilation, re-entry instructions, and usually more than one visit.
Heat treatment is not automatically safe. Temperatures that kill bed bugs can damage dashboard displays, adhesives, aftermarket electronics, aerosol cans, medications, and some plastics. Ask the provider how many sensors will be used, where they will be placed, what maximum temperature is permitted for the vehicle, and how treatment completion will be documented.
The EPA recommends using pesticides according to their labels. A product approved for a bedroom, warehouse, or crack-and-crevice application is not automatically approved for a truck cab.
When Is Steam Useful?
Steam is useful for exposed seams, mattress edges, seat piping, and other surfaces where the nozzle can move slowly and maintain contact. Steam is a supplemental treatment, not a reliable replacement for whole-vehicle heat or an integrated pest-management program.
A commercial steamer should produce adequate heat at the treated surface, and the operator should move slowly enough to heat the seam without soaking upholstery. Test an inconspicuous area first. Keep steam away from screens, switches, speakers, sensors, wiring connectors, and leather finishes.
Steam cannot reliably treat the center of thick seat foam, closed wall cavities, insulation, or dashboard voids. It also leaves no residual protection, so untreated bugs can reinfest the cleaned area.
Expert insight: A visible nozzle temperature is not the same as lethal exposure inside upholstery. Surface contact, speed, moisture, and material thickness determine whether steam reaches the insect.
How Should Pesticides Be Handled in a Truck?
Pesticides should be applied inside a truck only by following the product label, the applicator’s legal requirements, and the manufacturer’s re-entry instructions. Never spray bedding, clothing, steering wheels, food-contact surfaces, air filters, or electronics unless the label specifically permits that use.
Ask for the product name, EPA registration number, application sites, drying time, ventilation procedure, and re-entry interval. Remove people, pets, food, medication, and unsecured personal items. Do not use outdoor agricultural chemicals, household products without vehicle directions, or excessive concentrate.
A residual product may kill bugs that cross treated surfaces, but residual chemistry does not prove that eggs or insects hidden inside foam have been reached. Follow-up inspection and a second treatment may be necessary.
Why Should You Avoid Foggers and Chlorine Dioxide Kits?
Foggers and bug bombs should not be used in a truck because their aerosol droplets settle on exposed surfaces and do not reliably penetrate seams, foam, wall cavities, or dashboard voids. Foggers can also increase exposure, create fire risks, and push insects deeper into inaccessible spaces.
Consumer chlorine dioxide kits present a separate hazard. Chlorine dioxide is an inhalation hazard, and an improvised vehicle treatment can leave unsafe concentrations, corrode metal or electronics, damage materials, or fail to provide validated distribution and clearance. A sealed vehicle is not a controlled fumigation chamber.
Expert insight: A chemical that can kill bed bugs in a test chamber is not automatically safe or effective in a truck. Concentration, humidity, sealing, distribution, material compatibility, and post-treatment clearance all matter.
Step 6: Treat the Sleeper Mattress and Personal Cargo
Use a bed-bug-rated encasement on the sleeper mattress only after inspecting and treating the mattress surface and surrounding frame. The zipper must close completely, and the cover should remain intact for the period specified by the manufacturer or pest professional.
Place work bags, uniforms, shoes, and personal luggage in sealed containers during treatment. Hard plastic containers are easier to inspect than cardboard. Heat-treat fabric items where the material permits, and inspect seams on bags, tool cases, and seat covers.
Do not assume a new mattress solves the problem. Replacing a mattress without treating the bunk frame, adjacent wall, curtains, and luggage can leave the infestation behind.
You’ll know it worked when: the mattress is enclosed, cargo is treated or isolated, and no untreated soft item returns to the sleeper.
Common mistake: storing clean bedding on the truck floor before the final inspection.
Step 7: Monitor and Reinspect for at Least 30 Days
After treatment, inspect the cab and sleeper berth at least weekly for 30 days. Use a flashlight and, where practical, interceptor cups under stationary bunk or seat-support legs. Interceptors help detect activity but cannot monitor every hiding place or prevent hitchhiking in bags.
Record each inspection date, findings, photographs, and any captured insect. Avoid repeated insecticide applications based on one suspected sighting. Identification comes first because a dead beetle, carpet beetle larva, or roach nymph can trigger unnecessary treatment.
If live bugs appear within the first few days, contact the treating provider and preserve evidence. If nymphs appear 10-21 days later, possible explanations include missed eggs, an untreated bag, or a new introduction. The correct response is inspection and a label-compliant follow-up, not automatic spraying.
You’ll know it worked when: no live bugs, fresh fecal spotting, shed skins, or new captures appear during the monitoring period.
Common mistake: returning the vehicle to service after one visual inspection.
How Long Does Treatment Take?
DIY containment and cleaning usually require 2-4 hours initially, while professional heat commonly requires 4-8 hours of preparation and treatment. Chemical service may take 2-6 hours per visit, but a complete program can extend over 2-6 weeks because follow-up inspections and repeat applications may be required.
| Situation | Initial work | Typical total timeline | Return-to-service condition |
|---|---|---|---|
| Suspected exposure, no confirmed bug | 1-2 hours | 7-14 days monitoring | No evidence after inspection |
| Pickup cab, confirmed low activity | 2-4 hours | 1-3 days with heat; 2-4 weeks with chemicals | Provider clearance or documented inspection |
| Sleeper berth, confirmed infestation | 3-5 hours | 1 day with heat; 2-6 weeks with chemicals | Mattress, frame, cargo, and cab inspected |
| Fleet vehicle with repeated exposure | 2-4 hours per unit | 2-6 weeks | Treatment records and negative follow-up |
| Infestation linked to a home or hotel | Vehicle plus source treatment | Several weeks | Vehicle and source location both controlled |
Do not judge clearance solely by the absence of bites. Some people do not react to bites, and itching can continue after insects are gone.
Common Mistakes and How to Fix Them
| Mistake | Why it fails | Recovery |
|---|---|---|
| Parking in direct sun | Interior air may heat unevenly and cold spots remain | Use monitored professional heat or a label-compliant program |
| Spraying household insecticide | Product may be illegal or unsafe inside vehicles | Remove occupants and obtain licensed advice |
| Washing clothing only | Water cycles vary and may not kill all stages | Dry on a fabric-safe high setting first |
| Replacing the mattress alone | Frame, curtains, bags, and trim remain untreated | Treat the entire sleeper environment |
| Leaving the vacuum indoors | Captured insects can escape later | Seal contents outdoors and clean the machine |
| Releasing a truck too early | Eggs or hidden bugs can restart activity | Use documented follow-up inspections for 30 days |
One practitioner rule matters most: treat the truck as part of a connected exposure chain. A clean cab can be reinfested by a hotel bag, home laundry basket, passenger coat, or untreated fleet vehicle within hours.
What Should Different Truck Users Do?
Pickup Truck Owners
Remove child seats, groceries, clothing, and tool bags before inspection. If the infestation is limited to a seat or floor area, vacuuming plus professional steam may reduce exposure, but a confirmed infestation still warrants a whole-cab assessment.
OTR Drivers
Report the problem before entering another terminal, hotel, or home. Keep bedding and luggage sealed, request fleet-directed treatment, and use a clean replacement vehicle only after personal cargo has been treated.
Fleet Managers
Quarantine the affected unit and any vehicle sharing drivers, bedding, or cargo. Maintain treatment records, document product labels and re-entry times, and inspect adjacent vehicles when multiple reports occur.
Rideshare and Delivery Fleets
Increase inspection frequency after a passenger report or hotel exposure. Do not use routine fogging as a fleet policy; rapid vacuuming, removable seat-cover laundering, professional assessment, and documented monitoring provide better control.
How Can Drivers Prevent Reinfestation?
Drivers can reduce reinfestation by keeping luggage off hotel beds, inspecting mattress seams and headboards, storing clothing in sealed bags, and avoiding cardboard storage inside the sleeper. At home, place work clothing directly into a dryer or sealed container rather than on beds, couches, or floors.
Use a hard-sided storage tote for clean bedding and uniforms. Keep the sleeper mattress encased, repair torn seams, and inspect curtains and bunk joints monthly. Prevention works best when the truck and the driver’s regular lodging or home receive the same attention.
Bed bugs do not live on people like lice. They travel in belongings, fabric folds, furniture joints, and luggage seams, so personal hygiene does not eliminate the transport risk.
What If Bed Bugs Appear After Treatment?
A live bug after treatment requires identification, documentation, and provider follow-up, not panic or an unplanned second chemical dose. Photograph the insect, capture it in clear tape or a sealed container, note the exact location, and review whether untreated luggage or clothing reentered the truck.
Fresh nymphs 10-21 days after treatment may indicate missed eggs, although a new introduction remains possible. Fresh black spotting, shed skins, or repeated captures provide stronger evidence than a single wandering insect. Heat-treated textiles, mattress encasements, and monitoring should continue while the source is investigated.
If pesticide exposure causes breathing difficulty, dizziness, vomiting, confusion, or eye irritation, leave the vehicle and contact emergency services or Poison Control in the United States at 1-800-222-1222. Follow the product label and obtain medical advice for persistent or severe skin reactions.
Frequently Asked Questions
Can I drive my truck after vacuuming bed bugs?
Vacuuming removes some insects but does not establish that the truck is clear. Drive only when necessary, keep the cab isolated from homes and other vehicles, seal personal items, and arrange professional assessment. If the truck contains a sleeper berth or confirmed live bugs, return to service should follow treatment and documented inspection.
Can bed bugs live in truck air vents?
Bed bugs can enter gaps around vents and dashboard components, but air ducts are not usually their primary habitat. Do not spray or fog HVAC ducts. Inspect accessible joints and have a licensed professional determine whether treatment can legally and safely address those areas without damaging electronics.
Does freezing kill bed bugs in truck items?
Freezing can kill bed bugs when the entire item reaches approximately 0°F (-18°C) and remains there for several days, but household freezers vary and large bags may not cool evenly. Dryer heat is usually faster for suitable fabrics. Never freeze electronics, liquids, or materials that the manufacturer excludes.
Should I throw away the sleeper mattress?
Discarding a sleeper mattress is usually unnecessary unless it is heavily damaged, cannot be inspected, or a professional recommends replacement. A certified encasement can contain residual insects while the surrounding frame and cab receive treatment. Dispose of a mattress responsibly and mark it to prevent reuse if replacement is required.
Do bed bug interceptors eliminate an infestation?
Bed bug interceptors detect and sometimes stop insects crossing a monitored support, but they do not remove bugs hidden in seats, walls, mattresses, bags, or dashboard gaps. Use interceptors as monitoring devices alongside inspection and treatment, not as a stand-alone eradication method.
Who pays for treatment in a company truck?
Payment depends on the employer’s policy, lease terms, insurance, and whether the exposure resulted from work travel or personal belongings. Drivers should report suspected bed bugs promptly, avoid unauthorized pesticide use, and obtain written instructions before paying for treatment or moving the vehicle.
The Bottom Line
To clean a truck from bed bugs, isolate the vehicle, bag every textile, dry heat-treat washable fabrics, remove clutter, vacuum seams, and arrange a professionally monitored or label-compliant treatment. Do not rely on sun-baking, foggers, improvised heaters, or chlorine dioxide kits. Keep the truck isolated until follow-up inspections show no live bugs or fresh evidence for at least 30 days.