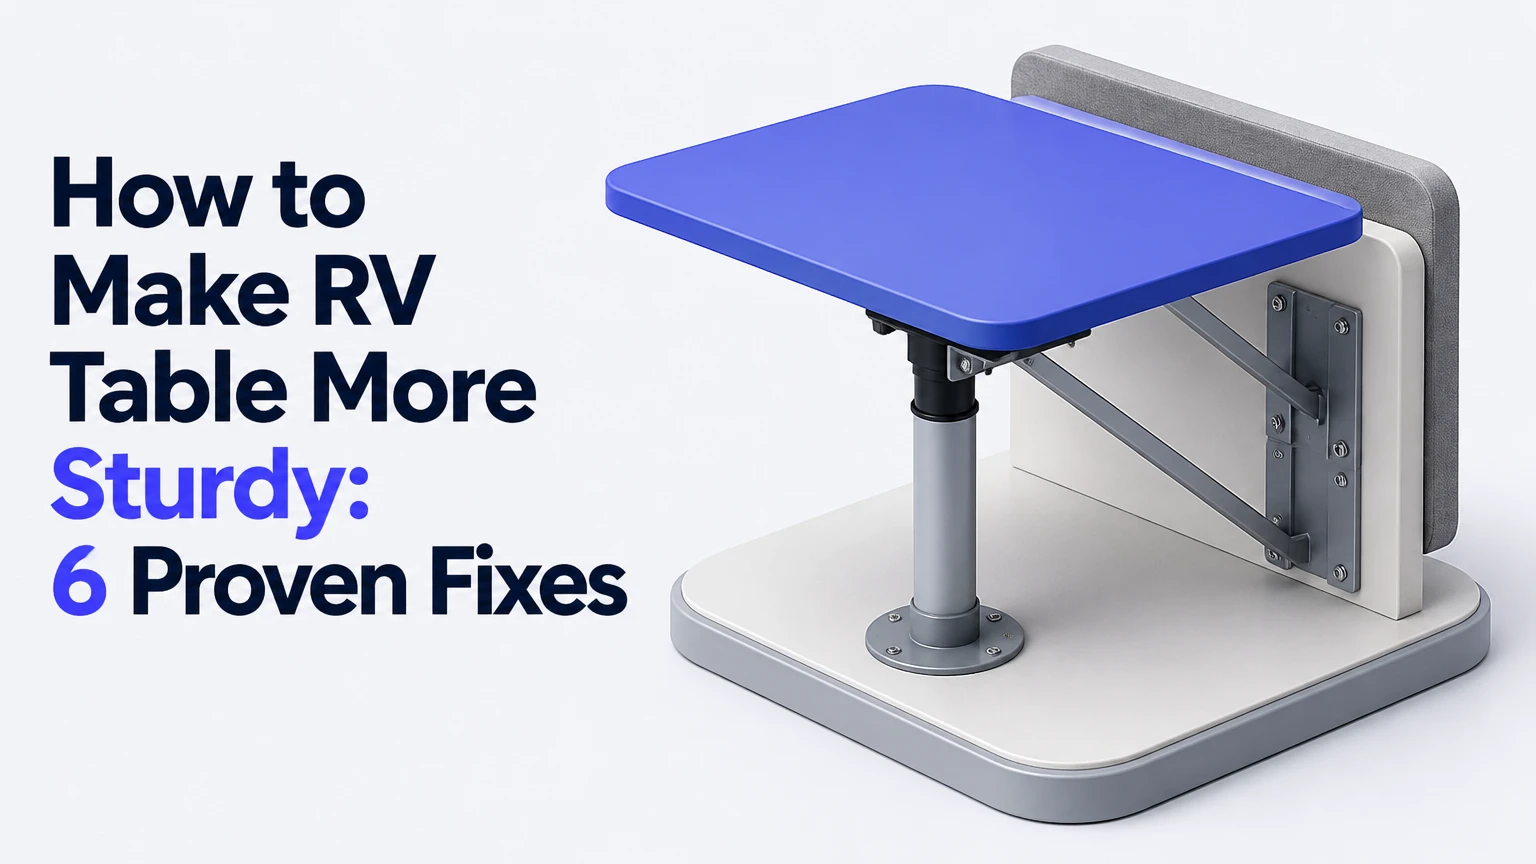
To make an RV table more sturdy, identify whether movement comes from the floor base, pedestal post, tabletop flange, or wall, then reinforce that specific connection. Most repairs take 30-90 minutes and cost $10-$250. The strongest practical fix combines repaired screw holes, correctly sized hardware, a rigid wall bracket, and a level floor base.
Key Facts at a Glance
- An RV table usually wobbles because a short pedestal amplifies movement at the tabletop edge.
- Thin RV subfloors may not hold longer screws safely if tanks, wiring, or plumbing sit underneath.
- A wall bracket must attach to a stud, structural backing, or seat box, not 1/8-inch interior paneling alone.
- Wood epoxy or a hardwood dowel repair provides a stronger screw location than repeatedly tightening stripped holes.
- A dual-post pedestal reduces side-to-side leverage but occupies more legroom than a single post.
- Adhesive fills gaps and limits sliding, but construction adhesive cannot replace adequate mechanical fasteners.
Why Do RV Tables Wobble?
RV tables wobble because lightweight tabletops, flexible subfloors, loose pedestal collars, and vehicle vibration combine to create leverage at the table edge. A person leaning 18-24 inches from a central post produces far more rotational force than the same person pressing near the post, so small movement at the base becomes obvious at the tabletop.
The common RV pedestal arrangement uses a removable post, a floor insert or mounting plate, and an underside flange. Friction-fit posts are convenient for converting a dinette into a bed, but worn collars can permit rotation. Short screws driven into thin plywood can also loosen after repeated loading and road vibration.
Where Does the Movement Start?
Test the table in four directions before removing anything. Place one hand over the floor base, another over the post joint, and press the tabletop edge with approximately 10-15 pounds of force.
| Movement location | Likely failed component | Confirmation test | Typical repair |
|---|---|---|---|
| Floor base shifts | Stripped subfloor holes | Base moves against the floor | Repair holes and refasten |
| Post rotates | Worn collar or loose insert | Post turns while base stays fixed | Replace collar or locking base |
| Tabletop moves around post | Loose flange or cracked insert | Gap appears under tabletop | Replace flange or add block |
| Wall side flexes | Paneling or weak bracket | Wall bows during pressure | Fasten into backing or stud |
| Entire floor flexes | Thin subfloor or unsupported span | Base is tight but floor bends | Add distributed backing support |
An expert diagnostic rule is simple: do not upgrade the pedestal before proving the pedestal is the failure point. A rigid new post attached to a loose floor plate transfers the same movement into a stronger component.
How Do You Make an RV Table More Sturdy?
Make an RV table more sturdy by working from the lowest structural connection upward: inspect the floor and tabletop fasteners, repair damaged screw holes, reinforce the floor base, add wall support where possible, then align and load-test the finished assembly. The sequence prevents a new bracket from masking an unresolved base failure.
Before You Start
| Requirement | Typical specification |
|---|---|
| Working time | 30-90 minutes, excluding epoxy cure |
| DIY difficulty | Moderate, with careful drilling |
| Basic cost | $10-$35 for hardware and repair materials |
| Wall-bracket upgrade | $15-$50 |
| Pedestal replacement | $50-$250 |
| Tools | #2 screwdriver, drill, bits, level, tape measure |
| Safety materials | Drill stop, eye protection, painter’s tape |
| Repair materials | Hardwood dowel or wood epoxy, adhesive, washers |
| Prerequisite | Check RV floor plans for tanks and wiring |
Do not drill through an RV floor until you know what lies below the dinette. Freshwater, gray-water, and black-water tanks can sit beneath seating areas, along with PEX plumbing, electrical cables, propane lines, and heating ducts.
Step 1: Remove the Tabletop and Map the Connections
Remove the tabletop from its pedestal or wall cleat and photograph every connection before disassembly. Mark the original screw positions with painter’s tape, then measure tabletop thickness, post diameter, floor-base footprint, and the distance from the base to nearby tanks or cabinets.
A typical RV tabletop is 3/4-1 inch thick, while common pedestal posts measure approximately 2-2 3/8 inches in diameter. Those dimensions determine whether replacement flanges fit and whether screws can penetrate the tabletop without breaking through the finished surface.
You will know the inspection is complete when every fastener, collar, bracket, and floor contact point has a recorded location. The common mistake is assuming matching appearance means matching dimensions. RV pedestal systems are not universally interchangeable.
Step 2: Inspect and Tighten Every Connection
Tighten loose screws only after removing dirt, checking for cracks, and confirming that the fastener still grips solid material. Use a manual screwdriver for the final tightening because an impact driver can strip aluminum threads, crush thin plywood, or pull a screw head below the tabletop surface.
Replace missing or damaged screws with corrosion-resistant wood screws of suitable length. A typical replacement is a #10 screw that penetrates roughly 1/2-5/8 inch into sound wood, but the correct length depends on the floor thickness and hidden components.
| Connection | Typical hardware | Tightening method | Stop condition |
|---|---|---|---|
| Floor plate to wood floor | #10 wood screws, 1-1 1/4 inches | Hand screwdriver, cross pattern | Stop when plate contacts floor |
| Flange to tabletop | #8 wood screws, 3/4-1 inch | Pilot hole and hand tightening | Stop before penetrating top |
| Metal bracket to stud | #10 or 1/4-inch structural screw | Pilot hole where required | Stop at firm compression |
| Through-bolt connection | 1/4-inch bolt, washers, locknut | Wrench on both sides | Stop when washer seats |
| Aluminum collar | Manufacturer’s supplied fastener | Low torque, straight engagement | Stop at thread resistance |
You will know tightening worked when the base remains fixed while the tabletop receives 10-15 pounds of edge pressure. The common mistake is using a longer screw without checking the underside. Length does not improve strength when the screw enters a tank or misses the structural layer.
Step 3: Repair Stripped Screw Holes
Repair stripped RV table screw holes with a hardwood dowel or cured wood-repair epoxy, then drill fresh pilot holes into the repaired material. Toothpicks and wood glue can provide a temporary repair for lightly damaged solid wood, but a 1/4-inch hardwood dowel or structural epoxy is more reliable under recurring vibration.
For a dowel repair, remove the loose screw, drill the damaged hole cleanly to match the dowel diameter, apply wood glue, tap the dowel flush, and allow it to cure for the adhesive manufacturer’s stated period, commonly 12-24 hours. Drill a pilot hole through the center before reinstalling the fastener.
For a shallow plywood repair, pack a compatible wood epoxy into the hole, allow full cure, and drill a pilot hole smaller than the screw’s root diameter. Do not simply fill the hole with silicone or construction adhesive. Those materials remain too flexible to form dependable screw threads.
The repair has succeeded when the screw tightens progressively and the base does not rotate under hand pressure. The common mistake is redrilling immediately after applying adhesive, which leaves uncured material unable to resist pullout.
Step 4: Reinforce the Floor Base
Reinforce the RV floor base with a mechanically fastened plate, a suitable adhesive bed, or a backing plate accessible from below. Construction adhesive can fill micro-gaps and reduce sliding, but the adhesive is secondary to fasteners that reach sound structural material.
Clean both surfaces, apply a continuous bead or thin coverage layer beneath the plate, and reinstall the screws in a cross pattern. Keep adhesive away from removable post sockets and drainage paths. Follow the product’s temperature and cure requirements; many construction adhesives need approximately 24 hours before substantial loading.
If underside access exists, through-bolts with large washers and locking nuts provide a stronger connection than screws in thin plywood. Use a backing plate or fender washers to distribute force rather than tightening a small washer against soft flooring.
You will know the base is reinforced when no visible gap opens beneath the plate during edge loading. The common mistake is bonding a plate permanently over a service hatch or removable bed-conversion component.
Step 5: Add a Wall Bracket or Cleat
Add a wall bracket, T-bracket, or wooden cleat beneath the table when the dinette borders a structurally suitable wall or seat box. A wall connection reduces the unsupported span and removes much of the lateral leverage, but a bracket attached only to thin luan paneling can tear out under a child’s or adult’s body weight.
Locate a stud, aluminum framing member, factory backing plate, or substantial seat-box structure with a stud finder, probing, cabinet access, or the RV manufacturer’s construction drawings. Use two attachment points when the bracket design permits, and keep the bracket close to the tabletop edge without interfering with bed conversion.
| Wall-support type | Typical reach | Fasteners | Best use |
|---|---|---|---|
| Steel T-bracket | 2-4 inches | 4-6 #10 screws | Fixed dinette edge |
| Aluminum angle | 2-3 inches | 4 #10 screws | Lightweight permanent support |
| Hardwood cleat | 1 1/2-2 inches | 4-6 structural screws | Broad tabletop support |
| Folding wall bracket | 10-16 inches | 6-8 structural screws | Convertible workspace |
| Seat-box bracket | 2-4 inches | 4-6 bolts or screws | Dinette with strong bench base |
You will know the wall support is adequate when the wall does not visibly bow and the table edge moves less than approximately 1/8 inch under firm hand pressure. The common mistake is trusting a hollow-sounding wall section without confirming structural backing.
Step 6: Shim, Align, and Load-Test
Shim the low side of the floor plate with rigid plastic or purpose-made composite shims, then tighten the fasteners gradually while checking the tabletop with a level. Avoid soft cardboard, loose wood scraps, and compressible foam because they settle and recreate the original wobble.
Test the repaired table in stages: press each corner, apply pressure at the center of the long edge, place a typical meal load on the surface, and operate the bed-conversion mechanism if the RV uses one. A practical household test load is 25-40 pounds distributed across the tabletop, not a concentrated person’s full body weight.
| Test | Applied load | Acceptable result | Failure response |
|---|---|---|---|
| Corner press | 10 pounds | No base rotation | Recheck floor plate |
| Long-edge press | 15 pounds | Movement under 1/8 inch | Add wall support |
| Distributed load | 25-40 pounds | No fastener creep | Inspect flange and post |
| Bed conversion | Full tabletop cycle | No binding or scraping | Reposition bracket |
| Road vibration check | 2-3 trips | Fasteners remain tight | Add locking hardware |
The repair is ready when the table remains level, the post does not rotate, the wall does not flex, and all conversion functions operate without binding. The common mistake is testing only the center of the table, where leverage is lowest.
Which Stabilization Method Is Best?
The best RV table stabilization method depends on whether the table must convert into a bed, how much footroom is available, and whether a structural wall or seat box can accept fasteners. A wall cleat offers the best low-cost improvement, a dual-post system provides strong lateral control, and a Lagun-style arm offers the best adjustability when a rigid vertical mount exists.
| Method | Typical cost | Installation time | Load or dimension | Main limitation |
|---|---|---|---|---|
| Wall T-bracket or cleat | $15-$50 | 30-60 minutes | 2-4-inch support reach | Requires structural backing |
| Dual-post pedestal | $60-$120 | 60-120 minutes | 18-24-inch post spacing | Reduces legroom |
| Locking base conversion | $50-$180 | 60-120 minutes | 2 1/4-inch post common size | Compatibility and thread wear |
| Lagun-style arm | $200-$300 | 1-2 hours | About 50-pound rated models | Needs 8-inch vertical mount area |
| Folding table legs | $40-$100 | 45-90 minutes | 27-28-inch height, up to 100-pound rated models | Less convenient for frequent conversion |
| Through-bolted plate | $20-$75 | 90-180 minutes | 1/4-inch bolts typical | Requires underside access |
What Do RV Table Stabilization Options Cost?
Typical DIY stabilization costs range from $10 for a stripped-hole repair to $300 for an articulated table-arm system. Labor, delivery, tabletop modifications, and hidden floor damage can increase the total, while reusing the original tabletop usually keeps the project within the lower half of each range.
A wall bracket is the strongest value when a stud or seat box lies directly beneath the table. Dual posts suit a long rectangular dinette because an 18-24-inch separation reduces rotation, although the second post can obstruct knees and make sliding into the bench harder.
A Lagun-style system works well for a van or compact RV workspace because its arm can swing aside and adjust vertically. It is a poor choice when the mounting wall is only thin paneling or when the table receives concentrated loads near its unsupported end.
Locking bases preserve the factory layout and often retain bed-conversion capability. They do not cure a flexible floor, stripped subfloor, or cracked tabletop flange.
Can You Stabilize a Table Without New Floor Holes?
You can stabilize an RV table without drilling new floor holes by repairing existing fastener locations, adding a wall cleat, replacing the tabletop flange, or installing a seat-box support. Non-drilling methods work only when the remaining structure is sound; adhesive-only repairs are unsuitable for a table that supports body weight or repeated road vibration.
A removable wall bracket can provide meaningful improvement if it attaches to verified structural backing. A secondary hardwood block beneath the tabletop can also support a cracked flange, provided the block is fastened into healthy tabletop material and does not interfere with the post.
Use adhesive-only stabilization for small lateral gaps, not primary load transfer. Adhesive can shear, soften with heat, and fail when the substrate is dusty or poorly prepared. The practical rule is that fasteners carry the load and adhesive controls movement.
What If the Table Still Wobbles After Tightening?
If an RV table still wobbles after tightening, inspect the tabletop flange, pedestal collar, floor flexibility, and hidden damage rather than applying more torque. A cracked plastic insert, warped post, loose friction ring, or flexible floor can preserve movement even when every visible screw feels tight.
| Symptom after tightening | Probable cause | Replacement or repair | Typical time |
|---|---|---|---|
| Post turns in socket | Worn friction ring | Locking collar or base | 45-90 minutes |
| Tabletop rocks around flange | Cracked flange | New flange or support block | 30-60 minutes |
| Base lifts at one edge | Uneven floor | Composite shim and reseat | 20-40 minutes |
| Screws spin freely | Damaged plywood | Dowel or epoxy repair | 1-2 days including cure |
| Wall bows | Panel-only fastening | Stud-backed cleat | 45-90 minutes |
| Post leans | Bent or mismatched post | Correct diameter replacement | 30-90 minutes |
A post that leans after the base is level may be bent or incorrectly seated. Measure the post diameter and socket depth before ordering parts, because a visually similar 2 3/8-inch component may not fit a 2 1/4-inch system.
Common Mistakes and How to Fix Them
Drilling Without a Depth Stop
Use a drill stop or tape flag to limit drilling depth before entering the floor or tabletop. RV tanks and plumbing often occupy the space below dinettes, while a tabletop screw that is 1/4 inch too long can puncture the finished surface.
Fastening Into Paneling
Move the bracket until its holes align with a stud, backing plate, or seat-box framing. Thin luan wall panels distribute little load, so a screw can feel tight while the panel fibers remain the only structural material.
Over-Tightening Aluminum Threads
Start every aluminum fastener by hand and keep it straight. Stop when the component seats firmly. Cross-threaded or stripped aluminum threads often require replacing the collar or base rather than using a larger screw.
Blocking Bed Conversion
Cycle the table through its full dining and bed positions before final tightening. Keep wall brackets and cleats outside the mattress or filler-panel path, and confirm that the tabletop can still lift from removable sockets.
Using Soft Shims
Replace cardboard or foam with rigid plastic, fiberglass, or composite shims. Soft materials compress under the base, change the tabletop angle, and make the original repair appear to fail weeks later.
Relying on Adhesive Alone
Remove adhesive-only repairs when the table experiences concentrated edge loads. Install mechanical fasteners into repaired wood, structural backing, or a through-bolted plate, then use adhesive only to close gaps and reduce sliding.
Which Solution Fits Your RV?
For a Fixed Dinette
Choose a wall cleat or steel T-bracket if the table sits against a backed wall. This configuration provides high stability for approximately $15-$50 and preserves the original tabletop, but it limits table movement and may complicate bed conversion.
For a Convertible Dinette Bed
Choose a locking pedestal base or folding legs when the tabletop must be removed or lowered regularly. A dual-post system can be very stable, but two posts may need to be removed before the table can fit into the bed platform.
For a Compact Van Workspace
Choose a Lagun-style articulated arm when a seat box or reinforced wall provides at least 8 inches of vertical mounting area. The arm gives adjustable height and swing-away access, but its $200-$300 typical price is difficult to justify for an occasional dining table.
For Children or Heavy Edge Loads
Use a repaired floor base plus wall support or two separated posts. No tabletop support should be treated as a substitute for preventing a child from climbing onto the table, because concentrated dynamic loads exceed ordinary dining loads.
For a Weekend Budget Repair
Repair stripped holes, reseat the factory base, and add a low-cost bracket into confirmed backing. This approach often costs $20-$75 and preserves the original floor plan without cutting a larger hole for a replacement system.
How Do You Maintain a Sturdy RV Table?
Maintain a sturdy RV table by checking fasteners every three to six months and after the first two or three trips following a repair. Inspect the floor plate for gaps, the post collar for rotation, and wall brackets for panel movement before each long journey.
Keep the table dry, avoid using it as a handhold when entering the RV, and distribute heavy objects across the surface. Recheck bed-conversion hardware after repeated cycles because removable systems can loosen faster than fixed brackets.
Record the screw sizes, post diameter, and mounting locations in the RV maintenance file. That information prevents accidental drilling into the same damaged holes and makes future replacement-part matching more accurate.
FAQ
How much weight can an RV table hold?
An RV table’s safe load depends on the tabletop, pedestal, floor, and fasteners, so a single universal rating is unreliable. Typical replacement folding legs advertise up to 100 pounds, while some articulated arms advertise approximately 50 pounds. Treat those figures as component ratings, not permission to place a person on the table.
Are longer screws better for an RV table?
Longer screws are better only when they reach sound structural material without contacting tanks, wiring, plumbing, or the tabletop surface. A #10 screw with approximately 1/2-5/8 inch of sound wood engagement can outperform a longer screw that strips thin plywood or penetrates a hidden component.
Should an RV table pedestal be glued?
An RV table pedestal base may be bedded with construction adhesive to fill gaps and reduce sliding, but glue should not replace mechanical fasteners. Adhesive-only mounting is a poor choice for concentrated edge loads, removable tables, and floors that flex during travel.
Can I replace a single pedestal with two posts?
You can replace a single pedestal with two posts if the tabletop and floor provide enough mounting area and the posts match in height and diameter. Spacing the posts approximately 18-24 inches apart improves lateral stability, but the arrangement can reduce knee clearance and complicate bed conversion.
Why does my RV table lean even when the screws are tight?
An RV table can lean despite tight screws because the floor is uneven, a pedestal is bent, a collar is incompletely seated, or the tabletop flange is damaged. Check the base with a level, inspect the post vertically, and use rigid composite shims under the low side before replacing parts.
Is a wall-mounted RV table stronger than a pedestal table?
A wall-mounted RV table is usually more resistant to side-to-side movement when its bracket reaches a stud, backing plate, or seat-box frame. A wall bracket attached only to thin paneling is weaker than a properly fastened pedestal, so structural attachment matters more than the table’s visual design.
The Bottom Line
To make an RV table more sturdy, diagnose the exact movement first, repair stripped holes, use safe fastener lengths, reinforce the floor base, and attach a wall bracket only to verified structural backing. Choose a locking base for factory-style bed conversion, dual posts for long tables, a wall cleat for low-cost fixed stability, or a Lagun-style arm for an adjustable compact workspace.


