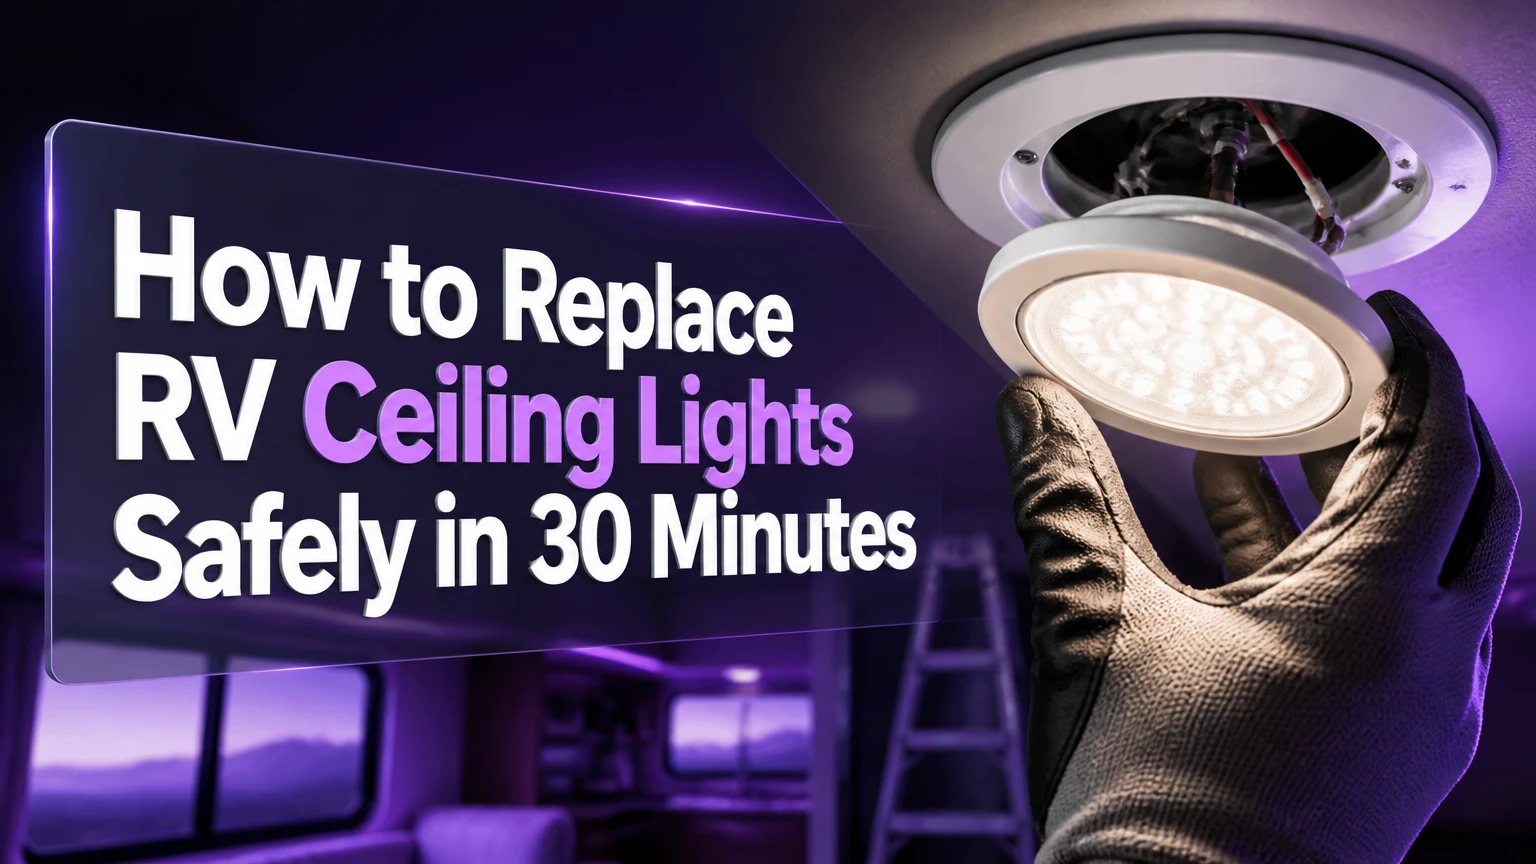
To replace RV ceiling lights, disconnect every power source, remove the old fixture, identify the 12V positive and negative conductors, splice the new light with vibration-resistant connectors, and secure the fixture without crushing the ceiling. A direct puck or dome-light swap typically takes 15-30 minutes when the replacement matches the original cutout and mounting pattern.
Key Facts at a Glance
- Most RV interior ceiling lights use a nominal 12V DC house-battery circuit, not household 120V AC.
- A direct replacement normally costs $10-$25 for a puck or dome fixture and takes 15-30 minutes.
- Integrated LED fixtures require complete fixture replacement when the circuit board fails.
- Typical modern RV LED fixtures draw 3-6 watts, or approximately 0.25-0.5 amps at 12V.
- The replacement must match the original cutout diameter, surface footprint, voltage, polarity, and mounting method.
- Adhesive-only mounting and household wire nuts are poor choices where road vibration can loosen connections.
What Type of RV Ceiling Light Are You Replacing?
The replacement method depends on whether the light is recessed, surface-mounted, or suspended. Recessed puck lights usually use spring clips, surface dome lights use screws, and pendant fixtures require both electrical disconnection and secure structural mounting.
RV ceiling lights are specialized low-voltage fixtures designed for vibration, temperature changes, and limited ceiling depth. The fixture may contain a replaceable 12V bulb, an integrated LED board, a switch, a dimmer, or a removable lens. Identify those features before ordering parts.
| Fixture type | Typical mounting | Typical cost | Typical replacement time | Main measurement |
|---|---|---|---|---|
| Recessed LED puck | Spring clips or hidden bezel screws | $12-$25 | 15-30 minutes | Cutout diameter, often 2.5-4 inches |
| Surface dome | Two to four visible screws | $10-$30 | 10-20 minutes | Length, width, screw spacing |
| Double-dome fixture | Surface screws and snap lens | $18-$45 | 15-25 minutes | Base footprint and lens clearance |
| Pendant light | Canopy screws and ceiling bracket | $35-$85+ | 30-60 minutes | Canopy diameter and bracket support |
| Flush-mount decorative light | Surface bracket or plate | $25-$85 | 20-45 minutes | Plate size, depth, screw pattern |
A light that has a removable 921, 912, 1141, or similar bulb does not always need a new fixture. In that case, an LED bulb upgrade may be cheaper and simpler, but the bulb must match the socket, physical clearance, polarity tolerance, and brightness requirement.
How does the 12V circuit work?
The RV house battery supplies direct current to interior lighting, while the converter supplies or charges that circuit when the RV is connected to shore power. The light switch commonly interrupts the positive conductor, although manufacturer wiring practices vary, so the white wire should not automatically be treated as a residential neutral.
A nominal “12V” RV system can measure roughly 12.0-12.8V with the battery resting and approximately 13.2-14.6V while charging, depending on battery chemistry and charger settings. Select a fixture explicitly rated for RV or automotive 12V systems. A 120V household fixture is electrically incompatible and unsafe on the lighting circuit.
Integrated LED lights contain a circuit board rather than a removable lamp. Flickering, dark sections, or a failed board usually means replacing the entire fixture, unless the manufacturer provides a serviceable LED module.
What Should You Check Before Buying the Replacement?
Measure the existing fixture before removal whenever possible. The five measurements that prevent most failed installations are voltage, cutout diameter, exterior footprint, screw spacing, and wire-entry location.
Choose a replacement with equal or lower current draw unless the circuit, fuse, switch, and wiring have been evaluated for a larger load. Brightness is specified in lumens, while color temperature is measured in Kelvin. A 3000K-4000K LED usually gives a warmer or neutral interior appearance; 5000K-6500K produces a bluer daylight appearance that some owners find harsh at night.
| Selection attribute | Typical RV range | Practical target | Why it matters |
|---|---|---|---|
| Operating voltage | 10-16V DC | 12V DC RV-rated | Accommodates battery and charging voltage |
| Power draw | 3-6W | 3-4W for boondocking | Reduces battery consumption |
| Brightness | 250-800 lumens | 400-600 lumens for general ceiling use | Prevents dim work areas or glare |
| Color temperature | 2700K-6500K | 3000K-4000K | Balances comfort and visibility |
| Fixture depth | 0.4-2.5 inches | Under 1 inch for low ceilings | Prevents cabinet and head clearance problems |
| Dimming compatibility | On/off only or PWM dimming | Match the existing dimmer | Prevents flicker and premature failure |
| Expected LED rating | 25,000-60,000 hours | 30,000 hours or more | Indicates expected service life, not a guarantee |
Measure the ceiling opening with a ruler or calipers, not by appearance. A replacement puck that is 3 inches wide may still fail if its spring clips require a 2.5-inch cutout and the existing opening is 3.25 inches.
Before You Start
| Requirement | Typical specification |
|---|---|
| Time | 15-30 minutes for one direct swap |
| Difficulty | Basic DIY electrical work |
| Fixture cost | $10-$30 for most puck or dome lights |
| Screwdriver | #1 or #2 Phillips, square-drive, or manufacturer-specified bit |
| Electrical tester | Digital multimeter set to DC volts |
| Wire tool | Insulated wire stripper and flush cutter |
| Connectors | Two appropriately sized crimp butt connectors or approved lever connectors |
| Protection | Heat-shrink tubing or adhesive-lined butt connectors |
| Other materials | Painter’s tape, small pliers, flashlight, replacement screws |
Before touching the wiring, photograph the old connections and label each conductor with tape. Disconnect shore power, switch off the inverter if fitted, turn off the house-battery disconnect, and remove the lighting-circuit fuse when its location is known.
A battery disconnect does not guarantee that every lighting conductor is dead. Some RVs have multiple battery feeds, solar charging paths, or circuits that remain energized through a converter. Verify the wires with a multimeter before cutting.
How to Replace RV Ceiling Lights
Step 1: Isolate and Verify All Power Sources
Disconnect the RV from shore power and turn off the generator. Disable the inverter if the RV has one, switch off the house battery, and remove the appropriate 12V fuse.
Set the multimeter to DC voltage. Place the black probe on the suspected negative conductor and the red probe on the suspected positive conductor, then test before and after toggling the wall switch. A safe reading should be approximately 0V with the circuit isolated.
Success checkpoint: The fixture does not illuminate, and the meter shows 0V across the accessible supply conductors.
Common mistake: Testing only with the light switch off. A switch may interrupt one side of the circuit while power remains present at the fixture.
Step 2: Remove the Lens and Old Fixture
Remove a dome lens by squeezing its long sides, releasing its tabs, or using the molded pry slot. Do not insert a screwdriver deeply because the tool can damage the LED board or scratch the lens.
For a surface-mounted fixture, remove the visible screws while supporting the housing. For a recessed puck, rotate the bezel if the model uses a twist-lock ring, or pull the trim down gradually if spring clips hold it in the ceiling.
Spring clips can snap closed when released. Grip each clip with pliers or press it flat against the fixture as the light comes through the opening.
Success checkpoint: The fixture hangs freely with the supply wires still intact and the ceiling material uncracked.
Common mistake: Pulling hard on a recessed puck. That can enlarge a foam-core or luan opening and leave the new spring clips unable to grip.
Step 3: Identify Positive and Negative Conductors
Do not assume that black is positive or white is negative. RV manufacturers commonly use colored stripes, red or black positive wires, and white negative wires, but conventions differ between brands and production years.
Use the old photograph, the new fixture’s wiring diagram, and a voltage test when power can be restored safely. If the wires are not marked, trace the circuit or consult the RV wiring diagram. The fixture’s positive lead normally connects to the circuit positive, and its negative lead connects to circuit negative.
LED polarity matters. Reversing the conductors may prevent illumination, and some fixtures include reverse-polarity protection while others do not. Never swap wires as a casual test when a fuse or electronic board could be damaged.
Success checkpoint: Each conductor is labeled positive or negative based on documentation or measurement, not color alone.
Common mistake: Treating the white RV conductor as AC neutral. A 12V lighting circuit has positive and negative conductors, not residential hot and neutral.
Step 4: Cut, Strip, and Secure the Wiring
Cut the old fixture’s leads close to the fixture only when enough ceiling wire remains for the new connection. If the wires are short, remove the old connector instead, or extend the conductors with the same or larger gauge wire.
Typical RV fixture wiring is 16-18 AWG copper. Strip the amount specified by the connector, commonly 6-8mm, or approximately 1/4-5/16 inch. Do not strip a fixed 1/2 inch unless the connector instructions require it, because excessive bare copper can remain outside the terminal.
Tape or clamp the ceiling wires to the opening before releasing them. Short wires can retract into the ceiling cavity, especially when the fixture hole has no accessible backing.
Success checkpoint: Copper is clean, strands are intact, and no bare conductor extends beyond the connector barrel or terminal.
Common mistake: Cutting both wires at once with a metal cutter. That can short the circuit if power was not fully isolated.
Step 5: Make a Vibration-Resistant Splice
Use two separate connections, one for positive and one for negative. For most permanent RV installations, insulated crimp butt connectors sized for the wire gauge provide a compact mechanical connection; adhesive-lined versions also seal against moisture.
Insert each conductor fully into its connector, crimp with the correct die, and pull-test the wire. If heat-shrink tubing is separate, center it over the splice and shrink it with controlled heat, keeping the heat source away from vinyl ceiling material.
Lever connectors can work in an accessible, dry location when their wire-size range and temperature rating match the conductors. They require enough cavity space and should not be left where the fixture presses against the lever. Traditional twist-on wire nuts are more vulnerable to loosening in mobile applications and may not fit inside shallow fixtures.
| Connector method | Typical wire range | Installation time | Best use | Limitation |
|---|---|---|---|---|
| Adhesive-lined butt splice | 16-22 AWG | 3-5 minutes | Permanent hidden splice | Requires correct crimping tool |
| Insulated butt splice | 16-22 AWG | 2-4 minutes | Dry interior ceiling cavity | Needs strain relief and insulation |
| Lever connector | Often 12-24 AWG | 1-3 minutes | Accessible serviceable fixture | Takes more cavity space |
| Twist-on wire nut | Depends on model | 1-2 minutes | Temporary or accessible connection | Less suitable for road vibration |
Success checkpoint: A firm pull-test does not separate either wire, no copper is exposed, and the splice fits without forcing the fixture against it.
Common mistake: Using a connector rated for solid household wire on fine-stranded automotive wire. Use a connector approved for the actual conductor type and size.
Step 6: Mount the New Fixture Without Damaging the Ceiling
Fold or guide the splices into the cavity, keeping them away from sharp metal edges and spring clips. Do not pack a large connector behind a shallow puck if it presses against the LED board or prevents the trim from sitting flat.
For screw-mounted lights, use the original holes if they remain sound. RV ceiling panels may be thin luan, vinyl-covered foam, or composite laminate, so use short screws that cannot penetrate wiring, insulation, or the roof membrane. Tighten until the fixture is secure, then stop. Over-tightening can strip the substrate or distort the housing.
For spring-mounted lights, compress the clips, align the fixture with the cutout, and press it evenly into place. If the cutout is too large, do not rely on stronger springs alone. Use a compatible trim ring or install a surface-mounted fixture that covers the damaged opening.
Success checkpoint: The fixture sits flush, does not rock when pressed lightly, and the lens clears the LED board.
Common mistake: Leaving the wire splice directly under a spring arm. Vibration can abrade the insulation and create an intermittent short.
Step 7: Restore Power and Test Under Load
Reinstall the correct fuse, reconnect the house battery, and restore shore power only after the fixture is mounted. Turn on the wall switch and any local fixture switch, then test every brightness setting if the light is dimmable.
Observe the fixture for several minutes. A successful installation produces steady light, no heat-discolored plastic, no odor, and no fuse failure. Test the wall switch again after gently pressing the fixture and moving the lens, because a loose connection may appear sound until the housing is disturbed.
Success checkpoint: The light operates steadily at battery voltage and while the converter is charging.
Common mistake: Installing a higher-rated fuse because the original one blows. A blown fuse indicates a fault or excessive load; increasing the fuse rating can damage wiring.
Which Replacement Features Matter Most?
Brightness, color temperature, dimming compatibility, and current draw matter more than decorative appearance. A 600-lumen, 3000K surface fixture may be more useful in a kitchen than a stylish 250-lumen pendant, while a 3W puck is usually preferable above a bed or in a boondocking trailer.
A replacement should also tolerate the RV’s charging voltage. Check the manufacturer’s voltage range rather than relying on the phrase “12V,” which may describe nominal voltage without specifying the operating limits.
| Use location | Suggested brightness | Suggested color | Preferred draw | Useful feature |
|---|---|---|---|---|
| Bedroom or reading area | 250-450 lumens | 2700K-3500K | 2-4W | Local switch or dimming |
| Kitchen or galley | 500-800 lumens | 3500K-4500K | 4-6W | Wide lens and high color rendering |
| Bathroom | 400-700 lumens | 3500K-5000K | 3-6W | Moisture-resistant housing |
| Hallway or entry | 150-350 lumens | 2700K-4000K | 1.5-3W | Low-profile surface mount |
| Exterior-covered area | 300-700 lumens | 4000K-6000K | 3-8W | Appropriate weather resistance |
Color rendering matters when selecting a kitchen or bathroom light. If the manufacturer publishes a CRI, a rating of 80 or higher generally gives more natural-looking colors than very inexpensive low-CRI boards.
Can You Replace the Fixture With a Bulb or a 120V Light?
You can replace only the bulb when the existing RV fixture has a removable socket and the replacement bulb matches the socket and voltage. You cannot use a standard 120V household ceiling light directly on the RV’s 12V lighting circuit, although a separate inverter-fed AC circuit could power one if designed and protected correctly.
Bulb-only replacement is useful when the housing, switch, lens, and socket remain sound. It is not a solution for cracked housings, burned contacts, damaged wiring, water intrusion, or an integrated LED board.
A household AC fixture also creates practical problems: it may require an inverter, consumes more system energy, uses different switching and protection, and may not tolerate vehicle vibration. A 12V RV-rated fixture is the appropriate direct replacement.
Common Mistakes and How to Fix Them
The new light does not turn on
First check the fuse, wall switch, local switch, and polarity. Then measure DC voltage across the supply wires with the light switched on. A reading near battery voltage indicates a fixture or connection problem; a reading near 0V shifts attention to the fuse, switch, ground return, or upstream wiring.
The light flickers when the RV moves
A loose crimp, partially inserted lever connector, corroded conductor, or failed switch is more likely than a bad battery when one fixture flickers. Remove power, remake the splice, and inspect the switch terminals. If several lights flicker together, check battery voltage, converter output, the main negative connection, and the lighting fuse panel.
The light works on battery but not while plugged in
A converter can produce abnormal voltage or electrical noise, while a dimmer may be incompatible with the new LED driver. Measure the circuit with the converter running and compare the result with the fixture’s voltage range. Remove or bypass the dimmer only according to the RV and fixture instructions.
The replacement will not stay in a recessed opening
The cutout is probably oversized, the spring clips are too short, or the ceiling substrate has crumbled. Install a trim ring designed for the replacement, repair the opening with a suitable backing plate, or choose a surface-mounted fixture with a larger footprint.
The fuse blows immediately
Disconnect the new light and inspect for pinched insulation, reversed or shorted conductors, loose copper strands, and a connector contacting the metal ceiling structure. Never replace the fuse with a larger rating. If the fuse blows with the light disconnected, the fault is upstream.
The lens or housing becomes unusually hot
Turn the circuit off and check the fixture’s voltage rating, wattage, ventilation, and polarity. An LED fixture should become mildly warm, but excessive heat can indicate an incompatible dimmer, overvoltage, a failed driver, or a fixture installed against insulation contrary to its instructions.
Variations for Common RV Situations
Replacing several ceiling lights
Replace one fixture first and confirm its brightness, color, fit, and switch behavior before buying a complete set. Ten 5W lights consume approximately 50W, or about 4.2 amps at 12V, while ten 3W lights consume approximately 30W, or 2.5 amps.
Battery runtime depends on battery capacity, temperature, chemistry, inverter losses, and other loads. For example, a 100Ah lead-acid battery should not routinely be treated as 100Ah of usable energy, while a lithium battery may provide a greater usable fraction under suitable battery-management conditions.
Replacing a recessed puck in a thin ceiling
Measure the cavity depth and inspect for roof framing, wiring, ductwork, and insulation before choosing a deeper fixture. A slim surface light may be safer than enlarging a recessed hole when the ceiling contains little clearance.
Replacing a pendant over a dinette
Confirm that the ceiling bracket is attached to structural backing, not only thin paneling. Use a fixture designed for mobile applications, secure the cord or stem against swinging, and verify that the pendant cannot strike cabinets during travel.
How Much Time and Money Should You Expect?
A single direct puck or dome replacement generally costs $10-$30 and takes 15-30 minutes. A pendant, damaged opening, inaccessible wire, or failed dimmer can raise the total to $50-$150 in parts and 30-90 minutes of work.
| Project condition | Parts cost | Typical time | Primary variable |
|---|---|---|---|
| Bulb-only LED upgrade | $5-$15 | 5-10 minutes | Socket and bulb fit |
| Direct surface dome swap | $10-$30 | 10-20 minutes | Screw and wire access |
| Direct recessed puck swap | $12-$30 | 15-30 minutes | Spring clips and cutout |
| Multiple-light replacement, 4 fixtures | $50-$120 | 1-2 hours | Repeated access and testing |
| Pendant replacement | $35-$85+ | 30-60 minutes | Structural bracket and travel restraint |
| Damaged or oversized ceiling opening | $20-$60 additional | 45-90 minutes | Backing repair and trim coverage |
The largest cost risk is ordering the wrong dimensions, not the wiring itself. Compare the old fixture’s measurements with the manufacturer’s cutout and exterior dimensions before purchase.
Expert Rules That Prevent Repeat Repairs
- Preserve wire length whenever possible. Cutting conductors flush with a fixture can turn a five-minute replacement into a ceiling-access repair.
- Use a pull-test on every splice. A connector that looks closed can still hold insulation instead of copper.
- Do not judge polarity by color alone. RV production changes, previous repairs, and aftermarket additions frequently create nonstandard color combinations.
- Keep connectors mechanically supported. A splice suspended by its own wires transfers road vibration into the crimp and switch terminals.
- Test with the converter both off and on. A light that works only at one system voltage may expose a driver or dimmer compatibility problem.
- Replace a damaged mounting surface, not merely the fixture. Stronger springs cannot reliably compensate for a ceiling opening that has lost its substrate.
These rules also explain why a direct replacement is usually preferable to a decorative conversion. The best fixture is the one that fits the opening, handles the charging voltage, dissipates heat correctly, and remains secure after repeated travel.
FAQ
Do RV ceiling lights use a fuse?
Yes, most RV interior lights receive protection from one or more 12V fuse-panel circuits. The fuse rating varies by circuit and manufacturer, so replace it only with the specified rating and investigate repeated failures rather than installing a larger fuse.
Can I install brighter LED lights in my RV?
Yes, provided the replacement is 12V-rated, physically compatible, and does not exceed the circuit, switch, dimmer, or fuse requirements. Higher brightness usually increases wattage, but efficient LEDs can produce more lumens than incandescent bulbs at a lower current draw.
Why does my RV LED light stay faintly on when switched off?
A faint glow can result from leakage through an electronic wall switch, dimmer, indicator lamp, or poorly compatible LED driver. Confirm that the switch fully interrupts the intended conductor and choose a fixture rated for the existing control system.
Should RV ceiling lights be warm white or daylight?
Warm white around 2700K-3500K is generally comfortable for bedrooms and evening use, while 3500K-5000K provides clearer task lighting in kitchens and bathrooms. Color preference is subjective, but very cool 5500K-6500K lighting can produce glare in a small interior.
How do I replace an RV ceiling light without losing the wires?
Secure the conductors to the ceiling opening with painter’s tape, a clamp, or a temporary hook before disconnecting the fixture. Leave as much factory wire as possible, and never push an unattached wire bundle into the cavity where it can retract beyond reach.
Is replacing an RV ceiling light safe for a beginner?
A direct 12V fixture swap is usually suitable for a careful beginner who can isolate power, identify polarity, and make a secure connector. Stop and use a qualified RV technician when wiring is undocumented, the ceiling contains damaged conductors, multiple power sources remain active, or the circuit continues blowing fuses.
The Bottom Line
Replacing RV ceiling lights is a manageable 12V repair when the replacement matches the original voltage, cutout, footprint, polarity, and mounting method. Disconnect shore power, generator, inverter, battery, and fuse protection before testing; use correctly sized vibration-resistant splices; and verify operation at both battery and charging voltage. For most direct puck or dome swaps, plan on $10-$30 and 15-30 minutes per fixture.


