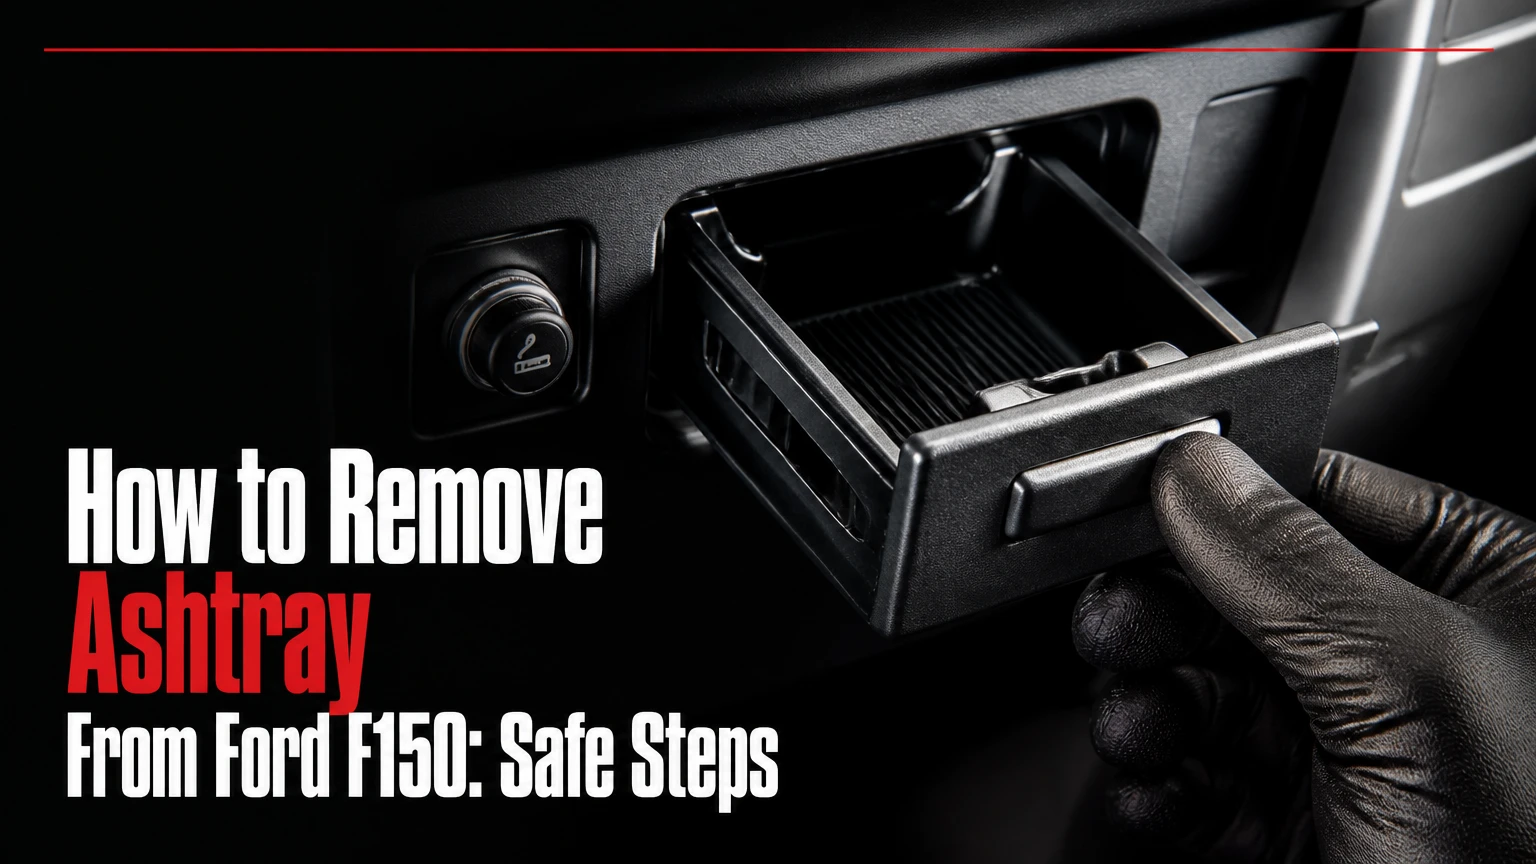
To remove an ashtray from a Ford F-150, first identify whether the truck has a screw-mounted dash assembly, a sliding tray, or a removable console insert. Disconnect the negative battery cable before handling lighter wiring, then remove the visible fasteners or release the tray’s retention tabs without forcing the plastic. Most removals take 10-30 minutes.
Key Facts at a Glance
A 1992-1996 Ford F-150 commonly uses a dash-mounted ashtray housing secured by 7 mm screws.
A 1997-2003 Ford F-150 commonly uses a sliding ashtray or cup-holder assembly with rear retention stops.
A 2004 Heritage truck can resemble the 1997-2003 layout, while a redesigned 2004 F-150 uses a different center-stack arrangement.
A 2004-2008 F-150 may require partial center-stack bezel removal before the ashtray housing can come out.
A 2009 and newer F-150 may have a removable smoker’s-package cup, a fixed console insert, or no ashtray, depending on trim and options.
Typical DIY removal costs $0-$25 when the original part is reused and $15-$150 when the tray or housing needs replacement.
Which Ford F-150 ashtray do you have?
The truck’s model year, dashboard design, and console configuration determine the removal method more reliably than the ashtray’s appearance. Ford changed the F-150 interior in 1997 and again in 2004, and the 2004 Heritage continued the earlier body and dashboard architecture.
Do not assume every 2009 or newer F-150 has a twist-lock ash cup. Some trucks have a loose smoker’s-package insert, some have a molded center-console compartment, and others have a storage pocket with no ashtray at all. The insert can be removed without tools, but a fixed housing requires trim-panel access.
| F-150 period | Typical ashtray location | Common retention method | Likely removal approach |
|---|---|---|---|
| 1992-1996 | Lower center dash | Three or more 7 mm screws and dash brackets | Remove screws, pull housing forward, unplug wiring |
| 1997-2003 | Lower center dash | Sliding rails and rear plastic stops | Extend tray, release both stops, slide assembly out |
| 2004 Heritage | Lower center dash | Similar slider architecture to 1997-2003 | Use slider procedure, then disconnect wiring |
| 2004-2008 | Center stack or lower dash | Trim panel, screws, clips, brackets | Remove bezel carefully, remove housing fasteners |
| 2009-2014 | Console or center utility pocket | Friction fit or molded console opening | Lift removable insert or remove console trim if fixed |
| 2015-present | Center console or accessory pocket | Trim-specific insert, friction ribs, or molded pocket | Confirm smoker’s-package configuration before prying |
The fastest identification method is visual. A tray that extends several inches and stops is probably a slider. A shallow cup-shaped insert that lifts vertically is probably a removable ash cup. A tray surrounded by a large radio or climate-control bezel usually requires trim removal.
What tools and precautions are required?
A basic removal needs a 7 mm socket, ratchet, plastic trim tool, flashlight, small flat screwdriver, needle-nose pliers, and a container for screws. Disconnecting the battery is the safest choice whenever the tray includes a cigarette lighter, power outlet, lamp, or aftermarket wiring.
Before you start
| Item | Typical requirement | Why it matters |
|---|---|---|
| Work time | 10-30 minutes | Includes trim removal and connector access |
| Difficulty | Low to moderate | Plastic clips and hidden stops create most problems |
| 7 mm socket | 1 tool | Common on older Ford interior fasteners |
| Plastic trim tools | 1-2 tools | Reduce marks on bezel edges |
| Small flat screwdriver | 1 tool | Releases slider stops and connector locks |
| Flashlight | 1 tool | Shows rear tabs and wiring |
| Battery wait time | 10 minutes | Allows modules and circuits to power down |
| Replacement clips | 2-4 optional | Useful when old bezel clips break |
Park on level ground, set the parking brake, switch off the ignition, and remove the key. Move the transmission selector only as needed for access, and never place the vehicle in gear as a substitute for the parking brake.
Disconnect the negative battery cable and isolate it so the terminal cannot touch the post. Wait at least 10 minutes before working around a center stack that includes an airbag indicator, heated-seat controls, or other powered modules. The ashtray itself is not an airbag component, but careless tools can short the lighter circuit or damage nearby wiring.
Practitioner rule: never use a metal pry tool against a visible bezel edge until you have confirmed that the panel is clip-retained. A hidden screw can make a clipped panel feel “stuck,” and additional force usually leaves a permanent dent.
How do you remove a 1992-1996 F-150 ashtray?
A 1992-1996 Ford F-150 ashtray generally comes out by removing the housing screws, releasing the assembly from its brackets, and disconnecting the lighter and lamp wiring. The common fastener is a 7 mm hex-head screw, although prior repairs and trim packages can add or relocate fasteners.
Step 1: Expose the lower center-dash fasteners
Open the tray and inspect the lower edge, side wings, and surrounding trim with a flashlight. Remove the visible 7 mm screws and place them in a labeled container because screw lengths can differ between the tray housing and adjacent dash panels.
Do not remove the radio unless the ashtray housing is physically attached to the radio bezel. On many early trucks, the ashtray assembly is a separate lower-dash component.
Success checkpoint: the housing should move slightly when pulled forward, but it should not require levering against the dashboard.
Common mistake: treating a retaining bracket as a stuck tray. Inspect both sides and underneath before increasing pull force.
Step 2: Pull the housing forward evenly
Grip both sides of the ashtray frame and pull it straight toward the seats. Keep the housing level so the rear bracket does not catch on the dash opening.
If the assembly stops after moving 10-20 mm, look behind it for a bracket, ground wire, or connector. Do not twist the unit sideways because older ABS and polypropylene parts can become brittle from heat and age.
Success checkpoint: the rear of the housing becomes visible while the wiring remains slack.
Common mistake: pulling until the lighter wires become tight. Stop when resistance changes from mechanical friction to electrical tension.
Step 3: Disconnect the electrical components
Depress the connector lock before separating the cigarette-lighter or power-outlet plug. If the truck has a separate ground lead, remove the terminal from its stud or bracket with pliers rather than pulling on the wire.
A courtesy lamp may use a twist-lock socket. Rotate the socket counterclockwise and withdraw it from the housing. Avoid touching a hot incandescent bulb, and replace a damaged bulb only after the circuit is disconnected.
Success checkpoint: the housing can be held in both hands with no wire carrying its weight.
Common mistake: pulling on the harness instead of the connector body. A detached terminal can require repair behind the dash.
Step 4: Remove the assembly and inspect the opening
Withdraw the ashtray housing and check the dash brackets, screw holes, lighter socket, and lamp socket for heat damage. A darkened lighter socket or loose terminal indicates a previous overload and should be repaired before reinstalling an accessory.
Clean loose ash and debris with a vacuum and a soft brush. Do not spray lubricant into a lighter socket or electrical connector.
How do you remove a 1997-2003 or 2004 Heritage sliding ashtray?
A 1997-2003 Ford F-150 and many 2004 Heritage trucks use a sliding tray retained by rear stops or tabs. Extend the ashtray fully, locate the retention points at the upper rear of the tray or rail, depress them with a narrow tool, and pull the assembly straight out while protecting the attached wiring.
Step 1: Extend the tray to its stop
Pull the ashtray or integrated cup holder completely open. The rear retention features become accessible only when the tray reaches its normal travel limit.
Use a flashlight from above and below the opening. Depending on trim, the release surfaces may be easier to see from the side than from directly in front.
Success checkpoint: the tray is fully extended and both sides can be inspected.
Common mistake: trying to release the tray halfway open. The rails remain engaged at that position.
Step 2: Locate both release stops
Look for a stop ramp, flexible tab, or small lever on each side near the rear of the tray. Some versions use the upper edge of the tray shell as the release point, while others expose the rail stop when the tray is fully open.
Use a thin plastic pick or small flat screwdriver. Protect the visible trim with masking tape if a metal tool is necessary.
Success checkpoint: both retention points move slightly without whitening, cracking, or bending the tray shell.
Common mistake: depressing only one side. Uneven release twists the tray and can break one rail.
Step 3: Depress the stops and slide the tray out
Press both release points at the same time while pulling the tray toward the seats. If one person cannot maintain both releases, use two tools or ask another person to pull gently.
The required force should remain modest. If the tray does not move after both stops are visibly depressed, stop and reassess the release location rather than pulling harder.
Success checkpoint: the tray slides beyond the normal stop without scraping the dash opening.
Common mistake: using a putty knife as a wedge. A wedge can push the rail outward and permanently distort the bezel.
Step 4: Disconnect the lighter and courtesy lamp
Support the released tray with one hand and identify every wire before moving it farther. Unplug the lighter connector by its plastic body, remove a separate ground wire if present, and twist out the courtesy-lamp socket where fitted.
Older trucks may have a connector that feels stuck because ash and tobacco residue have entered the latch. Use a pick to lift the locking tang, not the wire.
Success checkpoint: no connector, ground strap, or lamp socket remains attached to the tray.
Step 5: Inspect the rails and spring
Check the rail stops, spring anchor, side guides, and tray lip. A bent guide can cause binding, while a broken rear stop allows the tray to fall out during normal use.
Clean the rails with a dry cloth first. Apply only a very small amount of silicone-based trim lubricant if the manufacturer-approved material is compatible with the plastic. Grease and petroleum sprays collect dust and can soften some plastics.
Expert insight: lubrication rarely fixes a tray that binds at the same point every time. A repeated hard stop usually indicates a displaced guide, coin, broken tab, or deformed rail.
Does a 2004-2008 F-150 require bezel removal?
A redesigned 2004-2008 F-150 often requires partial center-stack bezel removal when the ashtray is part of the lower radio or climate-control housing. The visible tray may lift or slide separately, but the structural housing and electrical components can remain secured behind the surrounding trim.
Step 1: Confirm the truck is not a 2004 Heritage
A 2004 Heritage uses the older F-150 body and interior, so it generally follows the 1997-2003 sliding-tray method. A redesigned 2004 F-150 has a different dash shape, instrument layout, and center-stack bezel.
Check the vehicle identification label or owner’s manual if the dashboard is unclear. Parts catalogs often list Heritage separately from the redesigned 2004 model.
Step 2: Remove the surrounding trim carefully
Set the parking brake, disconnect the battery, and use a plastic trim tool at a lower corner of the center-stack bezel. Work around the perimeter to release clips in sequence.
Do not pull the bezel far from the dash immediately. Some versions retain wiring for the hazard switch, climate controls, power outlet, or radio controls.
Success checkpoint: the bezel releases from its clips while every attached connector remains supported.
Common mistake: starting at the top edge near the windshield. Lower corners generally offer better tool access and less risk of marking the visible surface.
Step 3: Remove housing screws and disconnect wiring
After the bezel is loose, inspect the ashtray frame for 7 mm screws or Torx fasteners. Remove only the fasteners attached to the ashtray or lower utility housing, then pull the component forward enough to reach the connectors.
Label connectors with masking tape if several plugs have similar shapes. Never force a connector that has a secondary lock.
Step 4: Reassemble the center stack
Reconnect the lighter, lamp, and any bezel-mounted switches before pressing the panel into place. Test the lighter or power outlet before final clip engagement, because removing the bezel again is unnecessary work.
Align every clip with its opening and press around the perimeter using the heel of your hand. Do not strike the bezel, since repeated impact can crack its mounting ears.
| Symptom during 2004-2008 removal | Likely cause | Correct response |
|---|---|---|
| Bezel releases on one side only | Remaining clip or hidden screw | Inspect the edge, then release one clip at a time |
| Housing moves but will not exit | Connector or rear bracket attached | Support housing and inspect behind it |
| Power outlet stops working | Loose connector or blown fuse | Reconnect plug, then check the owner’s-manual fuse |
| Panel rattles after installation | Misaligned clip or missing screw | Remove panel and reseat every mounting point |
| Plastic edge turns white | Excessive bending stress | Stop, warm the cabin, and use a wider trim tool |
How do you remove a 2009 or newer F-150 ash cup?
A 2009 or newer Ford F-150 may have a removable ash cup that lifts directly from a console or utility pocket, but the exact design depends on the smoker’s package and interior trim. Inspect the cup for friction ribs, a flange, or a quarter-turn lock before applying tools.
Step 1: Empty and inspect the insert
Remove loose ash, coins, and debris. Look inside the cup and around its rim for a molded arrow, locking notch, retaining flange, or rubber ribs.
A removable insert usually has a complete rim and can be lifted independently of the console. A fixed pocket will have molded walls that continue into the console structure.
Step 2: Lift or rotate the cup
Pull the insert vertically with both hands. If it resists, rotate it counterclockwise approximately 15-30 degrees while lifting, but use that motion only when a flange or lock indicates rotational retention.
Do not pry against a leather-wrapped console, painted trim, or soft-touch surface. A plastic trim tool under a dedicated removable rim is safer than a screwdriver.
Success checkpoint: the insert separates without console movement or cracking.
Common mistake: assuming a tight friction fit is a twist lock. Search for molded lock indicators before rotating aggressively.
Step 3: Remove a fixed housing only with trim access
If the cup is part of a larger console insert, remove the applicable console trim rather than forcing the cup upward. Console screws may be hidden under rubber mats, hinge covers, or storage-lid liners.
Disconnect the battery if the console contains a power outlet, USB module, lighting, or wiring harness. A loose cup insert has no electrical connection, but a console module can.
| 2009-present configuration | Electrical connection at cup | Tool requirement | Typical action |
|---|---|---|---|
| Loose smoker’s-package cup | None | None | Lift insert vertically |
| Friction-fit utility insert | None | Plastic trim tool, optional | Lift from molded rim |
| Fixed console pocket | Possible nearby wiring | 7 mm socket and trim tools | Remove console trim first |
| Aftermarket charging pod | Yes, accessory harness | Trim tools and connector pick | Disconnect harness before removal |
| Storage cubby conversion | Usually none | Trim tools, possible screws | Remove pod according to its hardware |
The 2009-present procedure cannot be reduced to one universal release method. Ford sold multiple cab and console layouts, and aftermarket charging modules create additional variations.
What should you do when the tray is stuck?
A stuck Ford F-150 ashtray should be released by finding the mechanical obstruction, not by increasing pulling force. Common causes include coins, hardened residue, broken rail stops, a displaced spring, or a bezel screw that was left installed during a previous repair.
Use a flashlight to inspect the lower and side gaps. Remove loose debris with a plastic pick or vacuum nozzle, then try the release procedure again. Do not insert a screwdriver deep enough to contact a lighter terminal or an unseen harness.
Common failure modes and repairs
| Failure mode | What you observe | Safe correction |
|---|---|---|
| Coin behind tray | Tray stops at one repeatable position | Remove debris with pick or vacuum |
| Broken rear stop | Tray tilts or falls out | Replace tray or rail component |
| Sticky tobacco residue | Slow movement across full travel | Clean with mild interior cleaner on cloth |
| Seized screw | Driver slips from fastener head | Use correct 7 mm socket and penetrating oil only on metal threads |
| Brittle plastic | White stress marks or cracking | Warm cabin, widen support, replace damaged part |
| Trapped wiring | Tray pulls forward only a short distance | Push connector release and support harness |
| Displaced spring | Tray will not retract correctly | Photograph position, replace or reseat spring |
Expert insight: cold plastic is substantially less forgiving than warm plastic. Bringing the truck into a warm garage for 20-30 minutes can reduce cracking risk, but a heat gun is unsafe near wiring, upholstery, and instrument-panel coatings.
If a screw spins without backing out, its clip or speed nut may be turning behind the dash. Hold the clip with pliers if accessible. If the screw head is stripped, avoid drilling until every nearby wire and plastic surface is shielded.
How should you handle the lighter and power-outlet wiring?
Treat the cigarette-lighter socket as a live high-current circuit until the negative battery cable is disconnected. The socket’s center contact can short against the metal housing or a screwdriver, blowing a fuse and damaging a connector.
After battery disconnection, wait 10 minutes, support the tray, and unplug each connector by its locking body. Photograph the wiring before separation, especially on trucks with an added 12-volt outlet, LED lamp, remote-start module, or aftermarket USB charger.
Never test a disconnected lighter circuit by bridging contacts with a screwdriver. To diagnose a dead outlet, reconnect the battery only after the tray is secured and all exposed terminals are insulated.
What are the removal times and replacement costs?
Typical Ford F-150 ashtray removal takes 10-15 minutes for a loose insert, 15-25 minutes for a sliding tray, and 25-45 minutes when a center-stack bezel must be removed. Replacement pricing varies with color, trim, model year, and whether the purchase includes the complete housing, lighter socket, lamp, and brackets.
| Repair situation | DIY time | Typical parts cost | Typical shop labor |
|---|---|---|---|
| Remove and clean loose insert | 5-10 minutes | $0-$10 | $20-$50 |
| Remove slider and reuse tray | 15-25 minutes | $0-$15 | $40-$90 |
| Replace 1992-2003 tray | 20-35 minutes | $15-$75 used | $60-$140 |
| Replace complete older housing | 30-60 minutes | $50-$150 used | $100-$220 |
| Remove 2004-2008 bezel and housing | 25-45 minutes | $0-$150 | $80-$180 |
| Install storage or USB replacement | 30-90 minutes | $25-$200 | $100-$300 |
These are typical aftermarket and used-part ranges, not Ford’s published pricing. Confirm the part number by VIN, color code, cab style, and console design before ordering.
A replacement ashtray is worthwhile when the goal is factory appearance or when the tray supports the lighter and courtesy lamp. A storage cubby is more practical when the original insert is permanently damaged, but an aftermarket USB module must include proper fuse protection and secure wiring.
Which replacement option fits your use case?
The best replacement depends on whether the truck needs original appearance, clean storage, or accessory power. An OEM tray preserves fit and wiring, while a storage conversion can eliminate a damaged sliding mechanism but may sacrifice the original lighter location.
| Replacement option | Typical price | Installation time | Main benefit | Main limitation |
|---|---|---|---|---|
| Used OEM ashtray | $15-$75 | 15-30 minutes | Correct factory fit | Used plastic may be brittle |
| New reproduction tray | $30-$100 | 15-30 minutes | Cleaner surface and guides | Color match may vary |
| Complete OEM housing | $50-$150 | 30-60 minutes | Includes brackets and sockets | Higher cost and scarcity |
| Storage cubby | $25-$100 | 20-45 minutes | Holds keys or small tools | May not support original wiring |
| USB charging pod | $40-$200 | 30-90 minutes | Adds modern charging | Requires fused installation |
| Blank delete panel | $15-$80 | 20-45 minutes | Simplifies damaged opening | Removes ashtray and outlet function |
The original ashtray is not a reliable high-capacity storage compartment. Coins, metal tools, and loose cables can obstruct the slider or contact the lighter socket, so a dedicated cubby is safer for regular storage.
Do not install a USB charger by tapping an unfused wire behind the dash. Use the accessory circuit specified by the product maker, protect the circuit with the correct fuse rating, and secure the harness away from moving pedals and sharp brackets.
How do you reinstall the ashtray correctly?
Reinstall a Ford F-150 ashtray by reconnecting the wiring first, aligning every guide or bracket, tightening the original fasteners, and testing the outlet or lamp before closing the trim. The tray should move smoothly through its full travel and stop without side-to-side looseness.
For a sliding unit, place both rails into their guides and push evenly until the rear stops engage. For a screw-mounted unit, connect the lighter and lamp before positioning the housing, then install screws by hand for several turns to prevent cross-threading.
After reconnecting the battery, test the lighter or 12-volt outlet with a known-good accessory, verify the courtesy light, and check that the tray neither binds nor opens by itself. A tray that rattles usually has a missing guide, loose screw, or broken stop rather than insufficient lubricant.
Reinstallation checklist
- Confirm every connector is fully latched.
- Confirm the ground wire is attached where originally installed.
- Route wires away from rail movement.
- Start each screw by hand.
- Tighten plastic-mounted screws firmly, not forcefully.
- Refit bezel clips without trapping wires.
- Test the tray, lamp, and outlet.
- Check for rattles during a short drive.
What mistakes damage Ford F-150 ashtrays?
The most damaging mistakes are pulling a slider without releasing both rear stops, prying against visible trim with a metal screwdriver, and removing a wired housing without supporting the harness. Older dashboard plastic can fracture even when the removal method is otherwise correct.
Avoid these four errors:
- Pulling harder after the tray reaches a stop: a mechanical stop is evidence that a release point or obstruction remains.
- Removing only one fastener: the housing can twist and crack when a hidden screw still holds one side.
- Ignoring trim configuration: a 2004 Heritage truck and a redesigned 2004 F-150 do not necessarily share the same removal process.
- Spraying lubricant into electrical parts: silicone may help a clean plastic rail, but it does not belong in a lighter socket, lamp socket, or connector.
The ashtray housing is also a poor place to store flammable aerosols, loose batteries, or objects that can bridge a power outlet. Removing the ashtray does not automatically make the opening suitable for an unprotected accessory.
Frequently Asked Questions
Can I remove the ashtray without disconnecting the battery?
A loose, non-electrical ash cup can usually be lifted without disconnecting the battery. Disconnect the negative cable whenever the assembly includes a cigarette lighter, 12-volt outlet, courtesy lamp, or aftermarket charger because exposed terminals can short during removal.
What socket size removes older F-150 ashtray screws?
A 7 mm socket commonly removes older F-150 interior ashtray and trim screws, especially on 1992-2003 trucks. Inspect the fastener before applying force because prior repairs may have substituted a Torx or Phillips screw.
Why does my F-150 ashtray stop halfway?
A halfway stop usually indicates a coin, hardened residue, bent guide, broken rail stop, or an unreleased retention tab. Inspect both rails with a flashlight, clear debris, and release both sides before pulling again.
Can a broken ashtray spring be replaced?
A broken spring can sometimes be reseated or replaced, but the correct part depends on the tray design. If the spring anchor or rail is cracked, replacing the complete used OEM tray is usually more reliable than repairing aged plastic.
Does every F-150 have a removable ashtray?
No. F-150 interiors vary by model year, cab, center-console design, and smoker’s package. Some trucks have a removable ash cup, some have a fixed storage pocket, and some have no ashtray at all.
Is removing the ashtray a good place to add USB charging?
The ashtray opening can house a USB charging pod when the product is designed for that dashboard and the circuit is properly fused. Confirm clearance, connector polarity, heat management, and mounting security before modifying the factory wiring.
The Bottom Line
To remove an ashtray from a Ford F-150, identify the dashboard generation first, then use the matching method: screws for many 1992-1996 assemblies, rail releases for 1997-2003 and 2004 Heritage sliders, bezel access for many 2004-2008 housings, and lift-out inspection for later removable inserts. Disconnect the battery before handling wiring, release both retention points, and never overcome a hard stop with force.


