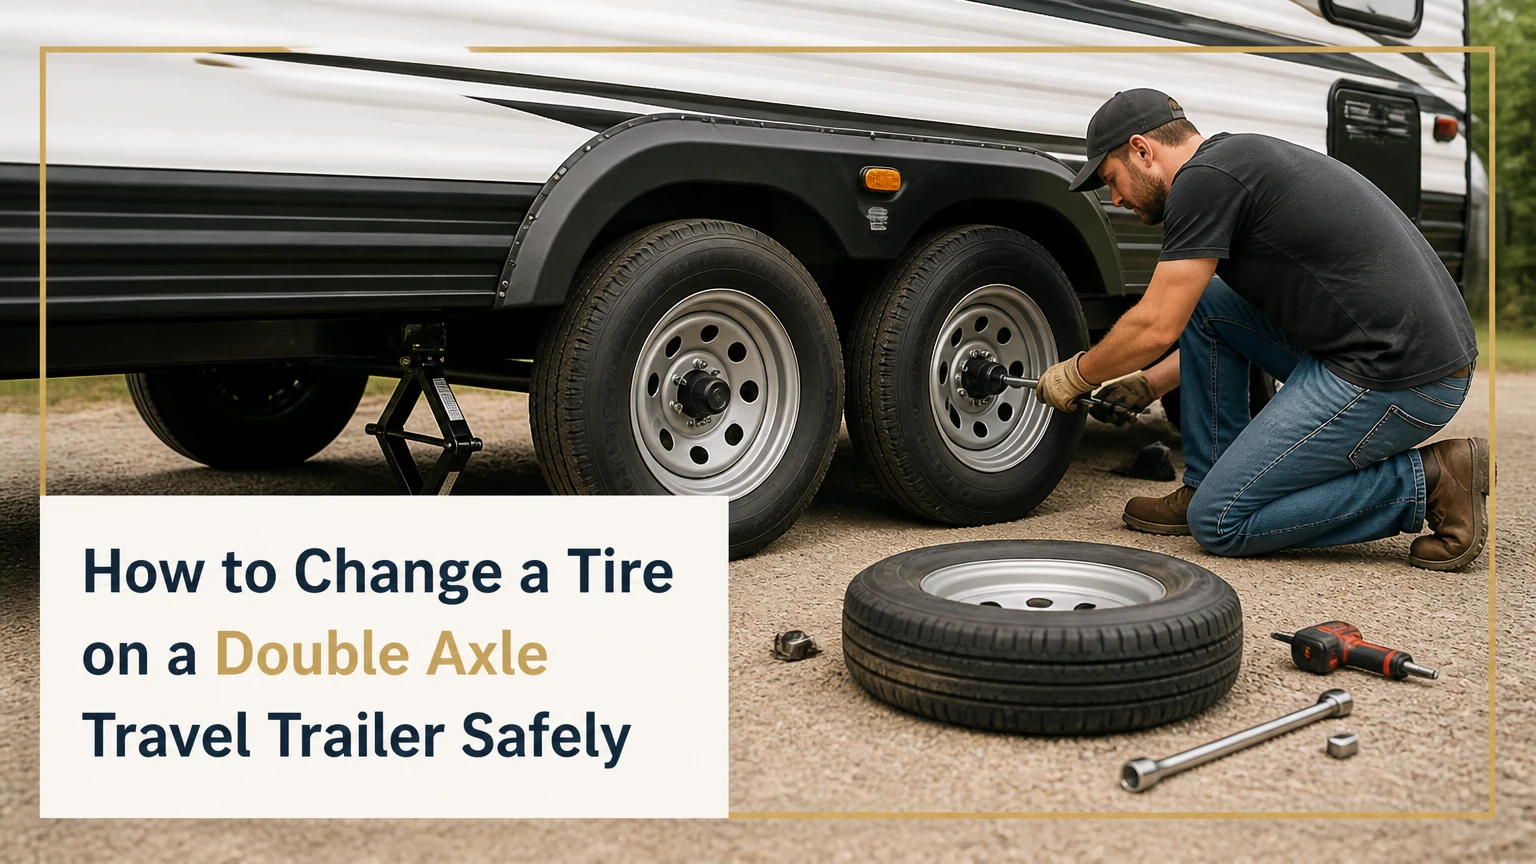
To change a tire on a double axle travel trailer, secure the hitched rig, loosen the lug nuts, lift the failed wheel with a tandem-trailer ramp or approved frame jack, install a matching spare, and torque the nuts to the trailer manufacturer’s specification. A single-wheel change typically takes 20-35 minutes when the spare and tools are ready.
Key Facts at a Glance
- A tandem-axle travel trailer normally has two closely spaced axles connected by an equalizer or coordinated suspension system.
- A purpose-built trailer ramp can lift one failed tire when the other tire on that side is inflated and structurally sound.
- A jack must contact an approved trailer frame or manufacturer-designated lifting point, never the thin axle tube.
- The spare tire must match the original wheel’s bolt pattern, diameter, offset, load rating, and tire size.
- Trailer lug-nut torque is vehicle-specific; common steel-wheel values are approximately 90-120 ft-lb, but the owner’s manual takes priority.
- The tow vehicle should remain coupled to the trailer during the repair unless the manufacturer specifies another procedure.
How Tandem Axles Change the Job
A double axle travel trailer carries its load across two axles, so the suspension links the front and rear wheel positions more closely than a single-axle trailer. Leaf-spring tandems use equalizers, shackles, and spring hangers; torsion tandems use separate torsion assemblies with less visible linkage. The lifting method must suit that design.
When the good tire on the same side climbs a tandem-trailer ramp, the suspension geometry transfers load and raises the adjacent flat tire. The ramp method is fast because it does not require lifting the trailer frame with a jack. It is unsuitable when the remaining tire is flat, badly damaged, overloaded, or sitting on unstable ground.
A ramp does not support every tandem axle in the same way. Follow the ramp manufacturer’s direction for front-tire and rear-tire placement, because the correct approach direction depends on the ramp shape and tire spacing. Move the tow vehicle only enough to seat the good tire securely.
A bottle jack provides more independence but introduces additional hazards. The frame lifting point must be confirmed in the trailer manual, on a factory decal, or through the trailer or axle manufacturer. Dexter’s service guidance gives the essential rule in direct terms: “Never crawl under a trailer supported only by a jack.” The wheel change should require no body part beneath the trailer.
Before You Start: Tools, Time, and Limits
Prepare the equipment before towing. A roadside tire change becomes substantially more hazardous when the spare is inaccessible, the jack capacity is unknown, or lug nuts require a tool unavailable in the vehicle.
| Item | Typical specification | Purpose |
|---|---|---|
| Spare tire and wheel | 1 matching ST tire, 14-16 inches typical | Replacement assembly |
| Breaker bar | 1/2-inch drive, 18-24 inches | Initial lug-nut loosening |
| Socket | Correct trailer lug size, often 13/16, 7/8, or 1 inch | Nut removal |
| Torque wrench | 1/2-inch drive, 50-150 ft-lb range | Final tightening |
| Tandem ramp | 1 molded ramp rated for trailer axle load | Single-wheel lifting |
| Bottle jack | Capacity above required wheel-end load | Independent lifting |
| Wheel chocks | 4 heavy-duty chocks | Preventing movement |
| Base blocks | Two or more hardwood or rated composite blocks | Stabilizing a jack on soft ground |
| Inflation equipment | 12-volt compressor and pressure gauge | Restoring spare pressure |
Typical preparation time is 5 minutes, the physical replacement takes 10-20 minutes, and final inspection adds 5-10 minutes. A molded tandem ramp commonly costs $45-$80, a heavy-duty bottle jack $50-$150, a torque wrench $40-$150, and a complete roadside tool kit $150-$350.
Do not begin if traffic creates immediate danger, the trailer is on a steep slope, the wheel is smoking, fuel or brake fluid is leaking, or the tire has damaged the hub, spring, fender, or frame. Call roadside assistance or a commercial trailer service when the safe work zone cannot be established.
What should you verify before lifting?
Verify the trailer remains coupled, the parking brake is applied on the tow vehicle, the transmission is in Park or in the manufacturer-specified gear, the hazards are operating, and the spare is inflated. Confirm the replacement wheel has the same bolt pattern and that the tire load capacity meets or exceeds the trailer’s required wheel-end load.
Use the trailer’s GVWR and axle rating as planning limits. A 10,000-pound trailer does not place exactly 5,000 pounds on each axle or exactly 2,500 pounds on each wheel, because tongue weight, cargo distribution, road crown, and suspension geometry alter the load. A jack rated for the whole GVWR is not automatically safe unless its lifting point and placement are approved.
How to Change a Tire on a Double Axle Travel Trailer
The following seven-step procedure covers a single failed tire with the trailer still attached to the tow vehicle. The ramp method is preferred when the opposite tire on that side is serviceable; the approved frame-jack method is the fallback when a ramp cannot work.
Step 1: Establish a Safe Work Zone
Pull as far from moving traffic as the shoulder permits, choose the firmest level surface available, and keep the trailer aligned with the tow vehicle. Apply the tow vehicle’s parking brake, select Park, activate the hazard lights, and leave the trailer coupled.
Place chocks on both sides of both tires on the opposite side of the trailer. If the shoulder is narrow, position warning triangles or roadside emergency markers according to local law and remain outside the traffic path whenever possible.
You will know the rig is secured when the tow vehicle and trailer cannot roll forward or backward with gentle hand pressure against the body. Do not rely on the failed tire, the trailer’s parking brake, or a single small chock.
Common mistake: Disconnecting the trailer to make access easier. Uncoupling permits the tongue and frame to pivot while lifting, which can destabilize a jack or ramp.
Step 2: Break the Lug-Nut Torque
Remove the wheel cover if necessary, then loosen each lug nut by approximately one-quarter to one-half turn while the failed wheel still contacts the ground. Use the correct socket and a breaker bar rather than a short cross wrench when nuts are corroded or previously overtightened.
Loosen nuts in a star or alternating pattern. Do not remove them yet, because the wheel’s contact with the ground provides resistance and prevents the assembly from rotating.
You will know the step is complete when every nut turns without requiring body weight or a sudden uncontrolled pull. If a nut does not move, stop before rounding it.
Common mistake: Spraying penetrating oil onto the brake rotor or drum. Apply a small amount only to the exposed nut-to-stud interface, allow several minutes, and keep lubricant away from braking surfaces. Never use an impact tool to force a visibly damaged stud.
Step 3: Choose the Ramp or Jack Method
Use a tandem-trailer ramp when one tire on the failed side is inflated, the ramp is rated for the axle load, and the ground is firm enough to prevent sliding or sinking. Use an approved frame jack when both tires on that side have failed, the good tire cannot be trusted, or ramp positioning is impossible.
| Method | Working condition | Typical time | Main limitation |
|---|---|---|---|
| Molded tandem ramp | Same-side companion tire inflated | 10-15 minutes | Cannot safely lift two failed tires |
| Hydraulic bottle jack | Approved frame point available | 15-25 minutes | Requires stable base and correct lift point |
| Commercial service jack | Professional roadside service | 20-60 minutes | Service availability and callout cost |
| Tow truck recovery | Unsafe shoulder or structural damage | 45-180 minutes | Highest typical roadside cost |
A ramp is usually the better tool for an occasional camper because it avoids placing a person beneath the trailer and usually keeps the suspension loaded. A bottle jack is more versatile for a full-time RVer, but only when the operator knows the approved frame point and carries enough blocking.
Expert insight: A ramp is not a substitute for a jack when the good tire has lost air. The ramp transfers load through a tire that must still support the trailer while climbing; a compromised tire can roll off, separate, or collapse.
Step 4: Lift the Failed Wheel
For a ramp change, place the ramp directly ahead of or behind the good tire on the same side, following the ramp manufacturer’s orientation. With a helper watching the tires, move the tow vehicle slowly until the good tire is centered on the ramp and the failed tire clears the ground by roughly 1-2 inches.
Set the transmission in Park, reapply the parking brake, and confirm the ramp remains flat and centered. Do not use a ramp on loose gravel, a steep cross-slope, deep mud, or a shoulder that allows the ramp to slide.
For a jack change, place the bottle jack beneath the manufacturer-approved structural frame point near the failed wheel. Add a rated base board or dense hardwood block on soft asphalt or soil, keep the jack vertical, and raise the trailer only until the tire clears the ground.
You will know the wheel is high enough when the tire rotates freely and the spare can pass over the hub or brake drum. Two inches of clearance is usually sufficient; excessive lifting increases instability.
Common mistake: Placing the jack beneath the round axle tube, spring, equalizer, or thin suspension bracket. These components can bend, deform, or shift under a concentrated jack load. The axle tube is designed to carry distributed wheel loads, not a small lifting pad.
Step 5: Remove and Inspect the Wheel
Finish removing the loosened lug nuts and place them in a clean container. Pull the wheel straight outward, supporting its weight with both hands; a loaded trailer wheel can weigh 50-100 pounds depending on size and construction.
Inspect the hub face, studs, brake drum or rotor, wheel bearing area, spring components, and fender clearance. Look for a bent stud, elongated wheel hole, cracked wheel, grease leakage, hot brake hardware, or a tire tread section wrapped around the axle.
You will know the wheel is ready for replacement when the hub face is clean, the studs are straight, and no damaged component prevents the spare from seating flush. Clean rust scale from the mating face with a wire brush, but do not grind away structural metal.
Common mistake: Installing the spare over dirt or heavy rust. Debris between the wheel and hub can prevent flat seating, then loosen the wheel after vibration and heat cycles.
Step 6: Install the Matching Spare
Check the spare’s size, load range, maximum cold inflation pressure, bolt pattern, and wheel seating surface before installation. Mount the wheel onto the studs, push it fully against the hub, and install every lug nut by hand.
Tighten the nuts in a star pattern until the wheel is snug. Do not lubricate wheel studs or lug-seat surfaces unless the trailer or wheel manufacturer specifically requires it, because lubrication changes the friction used to establish clamping force.
If the holes do not align, raise the wheel slightly with the jack or ramp. Never force a stud through a misaligned hole with a lug nut, because the wheel can hang crooked and damage the stud threads.
You will know the wheel is seated when the wheel face contacts the hub evenly and each nut turns smoothly by hand for several threads. A nut that binds immediately may indicate cross-threading.
Common mistake: Mixing tapered and flat-seat lug nuts. The correct nut must match the wheel’s seat design, and an apparently similar nut can produce inadequate clamping or wheel damage.
Step 7: Lower, Torque, and Recheck
Lower the trailer slowly until the replacement tire contacts the ground enough to prevent rotation, then torque the lug nuts in a star pattern. Use the trailer, wheel, or axle manufacturer’s specification rather than relying on a generic chart.
Typical values for many light travel trailers fall near 90-120 ft-lb for steel wheels and 100-140 ft-lb for aluminum wheels, but the correct value can differ by stud diameter, wheel material, nut type, and model year.
| Component or condition | Typical value | Correct authority |
|---|---|---|
| 1/2-inch trailer wheel stud | 90-120 ft-lb | Trailer or wheel manual |
| 9/16-inch wheel stud | 120-150 ft-lb | Trailer or axle manual |
| ST tire cold pressure | Sidewall maximum, often 50-80 PSI | Tire sidewall and placard |
| Initial recheck | After 10-25 miles | Wheel manufacturer guidance |
| Second recheck | After 50-100 miles | Trailer manufacturer guidance |
Fully lower the trailer, remove the ramp or jack, reinstall the wheel cover if it is secure, and store the failed tire so it cannot shift. Recheck torque after the first 10-25 miles and again near 50-100 miles, unless the manufacturer specifies a different interval.
You will know the repair is complete when the tire holds pressure, the wheel runs without wobble, no rubbing occurs, and all lug nuts reach the specified torque. Stop immediately if the trailer pulls, vibrates, smells of hot brakes, or produces repeated clicking.
Which Tire and Wheel Specifications Matter?
The replacement must be an ST, or special trailer, tire when the trailer manufacturer specifies ST service. Passenger-car tires can have different sidewall construction, load capacity, and service assumptions, even when the nominal size appears similar.
Match the tire size, load range, load index, speed rating, maximum pressure, and radial construction. Match the wheel diameter, width, bolt pattern, center bore, offset, and lug-seat style. A wheel can fit the studs while still contacting the brake assembly or placing the tire too close to the frame.
| Specification | Example value | Verification point |
|---|---|---|
| Tire size | ST225/75R15 | Existing sidewall and trailer placard |
| Load range | D or E | Sidewall and axle requirement |
| Cold pressure | 65 or 80 PSI | Sidewall maximum and placard |
| Bolt pattern | 5 on 4.5 inches | Wheel and hub measurement |
| Wheel diameter | 15 inches | Existing wheel |
| Wheel offset | Zero or manufacturer value | Wheel specification |
| Tire age | Date code under 5-7 years preferred | DOT date code and manufacturer guidance |
Inflate the spare to its specified cold pressure before installation. The maximum sidewall pressure is often the operating pressure for ST tires, but the trailer placard and tire manufacturer’s instructions control when they differ. Never reduce pressure simply because the tire feels firm or because a passenger vehicle uses a lower value.
A spare that has been carried for years may be unsafe despite having full tread. Inspect for sidewall cracking, bulges, bead damage, and an old DOT date code. Replace a suspicious spare before the next trip.
What Must Never Support the Trailer?
Never place a jack under the axle tube, torsion arm, leaf spring, equalizer, stabilizer jack, propane tray, thin crossmember, or suspension bracket unless the manufacturer explicitly identifies that component as a lifting point. These parts can bend or shift, causing alignment damage or a sudden drop.
Do not use leveling jacks as emergency lifting devices unless the trailer manufacturer rates them for that purpose. Stabilizer jacks are intended to reduce movement after the trailer is supported, not to raise a loaded wheel for service.
Do not put any part of your body beneath a trailer held only by a hydraulic jack. A jack stand may provide secondary support when the manufacturer’s service procedure permits it, but the wheel replacement itself should be performed from outside the trailer’s underside.
How much jack capacity is enough?
Select a jack with a rated capacity greater than the maximum expected load at the lifting point, not merely greater than the tire’s weight. A typical planning margin is at least 1.5 times the anticipated lifted load, while the trailer manufacturer’s service instructions remain the controlling requirement.
For example, if a 12,000-pound GVWR trailer is estimated to place 3,500 pounds on one wheel end, a 6-ton jack provides a larger nominal margin than a 3-ton jack. Capacity alone does not correct a poor frame location, unstable base, excessive extension, or sloped ground.
Common Mistakes and How to Fix Them
The ramp slips or the good tire will not climb
Stop movement immediately, lower the rig if possible, and reposition the ramp on firmer, flatter ground. Do not place loose boards in front of a molded ramp as improvised extensions unless the ramp manufacturer permits them. If the companion tire is underinflated or damaged, switch to an approved jack or call for service.
The jack sinks into asphalt or soil
Lower the jack, keep the trailer secured, and place a thick, flat base board beneath it. A 2-inch hardwood block or purpose-built composite jack pad distributes the load better than a thin plywood sheet. Replace the plan if the ground continues to deform.
The lug nut is seized
Use the correct six-point socket and controlled breaker-bar force. Penetrating oil may help exposed corrosion, but it must not reach brake friction material. If the stud twists, the nut rounds, or the wheel begins to deform, stop and request roadside service.
The spare does not fit over the hub
Confirm that the spare has the correct center bore, brake clearance, and wheel diameter. If the hub sits too low, raise the trailer only slightly. Never hammer the wheel onto the hub or draw it into place with the lug nuts.
The replacement tire rubs
Lower the rig and inspect the tire size, wheel offset, spring position, fender, and brake hardware. A larger spare or incorrect offset can contact the frame during suspension movement. Do not tow until clearance is restored.
The second tire fails after the first blowout
Treat the trailer as unsafe to move. Two failed tires on one side can overload the remaining axle components and make a ramp ineffective. Use commercial trailer service, a tire carrier, or a recovery method designed for the trailer’s actual weight.
What If Conditions Are Different?
A safe roadside procedure changes when the environment or failure pattern changes. The single-tire, level-shoulder method should not be applied mechanically to every breakdown.
- Nighttime: Use a headlamp, reflective vest, warning triangles, and a vehicle-mounted work light. Do not rely on a phone flashlight while handling a heavy wheel.
- Highway shoulder: Exit from the traffic side only when unavoidable, keep passengers inside the tow vehicle, and call emergency services if the shoulder is too narrow.
- Soft or sloped ground: Avoid a ramp and jack operation if the trailer can roll or the support base sinks. A professional service truck is safer.
- Both tires on one side flat: Do not climb a ramp. The good tire required by the ramp method is absent, so use a properly rated commercial jack or roadside service.
- Tire damage near the hub: Inspect bearings, brakes, wiring, spring hangers, and fender supports before installing a spare. A blowout can damage more than rubber.
- No matching spare: Do not use a passenger-car tire as a casual substitute. Arrange a correct ST tire and wheel or have the trailer recovered.
How Can You Prevent Another Trailer Blowout?
Preventive checks should cover pressure, loading, age, heat, and wheel security. The U.S. Department of Transportation’s National Highway Traffic Safety Administration identifies underinflation as a major contributor to tire failure, and trailer tires are particularly sensitive because heavy loads and long highway runs generate substantial heat.
Check cold pressure before every travel day, preferably with a gauge rather than a visual inspection. Inspect tread shoulders and sidewalls, remove stones from grooves, and look for bulges, weather cracking, uneven wear, and valve-stem leaks.
Keep cargo within the trailer GVWR and axle ratings. Excess tongue weight, rear cargo concentration, or side-to-side imbalance can overload one wheel end even when the total trailer weight appears acceptable.
Retorque wheel nuts after wheel installation and inspect them periodically. Replace tires according to the tire manufacturer’s age guidance, not only when tread is worn. A trailer tire can look unworn while its rubber has degraded from ultraviolet exposure, heat, and long storage.
Time, Cost, and Equipment Choices
A prepared owner usually completes one tire replacement in 20-35 minutes. A roadside technician commonly takes 20-60 minutes after arrival, while total commercial service cost often reaches $100-$300 before a new tire, depending on location, time, trailer weight, and recovery requirements.
| User situation | Recommended equipment | Typical purchase cost | Reason |
|---|---|---|---|
| Occasional weekend camper | Molded tandem ramp, breaker bar | $75-$180 | Fast single-tire repair |
| Long-distance traveler | Bottle jack, blocks, torque wrench | $150-$350 | More independent roadside capability |
| Remote boondocker | Jack, ramp, compressor, spare | $250-$550 | Handles varied terrain and pressure loss |
| Large or high-GVWR trailer | Commercial service plan | $100-$250 per year typical | Reduces lifting risk |
| Two-tire failure risk | Two spares or service coverage | $150-$500 additional | Prevents an unusable ramp scenario |
A ramp is the better first purchase when the trailer has a healthy companion tire and most travel occurs on maintained roads. A frame-rated jack is the better addition for remote travel, but it does not eliminate the need for chocks, blocks, a torque wrench, and a correct spare.
The limitation is important: no portable method makes a dangerous shoulder safe. If traffic, slope, structural damage, or weather prevents stable work, roadside recovery is the correct repair decision.
FAQ
Can I change a tandem trailer tire without a jack?
Yes, a purpose-built tandem-trailer ramp can lift one failed wheel when the other tire on that side is inflated and sound. The ramp must be rated for the trailer’s load, placed on firm level ground, and used according to its orientation instructions. A ramp cannot safely replace a jack when both same-side tires have failed.
Should the trailer be connected to the tow vehicle?
Yes, keep the travel trailer coupled during a normal roadside tire change. The tow vehicle adds stability and reduces tongue movement while the wheel is lifted. Apply the tow vehicle parking brake, select Park, and chock the opposite-side wheels. Uncoupling can allow the trailer frame to pivot or shift.
Can I use the trailer’s stabilizer jacks to lift the wheel?
Usually no. Stabilizer jacks are designed to reduce movement after the trailer is positioned, not to raise a loaded wheel for service. Use only a lifting point and procedure identified by the trailer manufacturer. A stabilizer jack can bend, slip, or overload its mounting structure when used as a service jack.
What pressure should a travel-trailer spare tire have?
Inflate the spare to the cold pressure specified by the tire sidewall, trailer placard, and manufacturer instructions. Many ST tires require 50, 65, or 80 PSI, depending on size and load range. Check pressure before travel because a spare stored for months commonly loses air even when it appears fully inflated.
Do I need to replace both tires on the same side?
Not automatically. Replace the failed tire with a matching tire if the companion tire has adequate tread, no cracking or damage, compatible size and load rating, and a similar service history. Replace both when the remaining tire is aged, damaged, mismatched, or shows uneven wear caused by an alignment or suspension problem.
What should I do with the failed tire after reaching a repair shop?
Have the shop inspect the failure cause rather than simply mounting another tire. Ask for checks of wheel torque, bearing play, brake heat, axle alignment, spring hardware, fender clearance, and tire load. A tread separation or blowout can leave hidden damage that causes the replacement tire to fail.
The Bottom Line
Changing a tire on a double axle travel trailer is safest when the trailer remains hitched, the opposite-side wheels are chocked, and the failed wheel is lifted with the correct method for the failure. Use a tandem ramp for one failed tire with a reliable companion tire; use an approved frame jack or commercial service when both tires, the ground, or the trailer structure make ramp lifting unsafe. Verify the ST spare, inflate it correctly, torque the lug nuts to the manufacturer’s specification, and recheck them after the first short drive.


