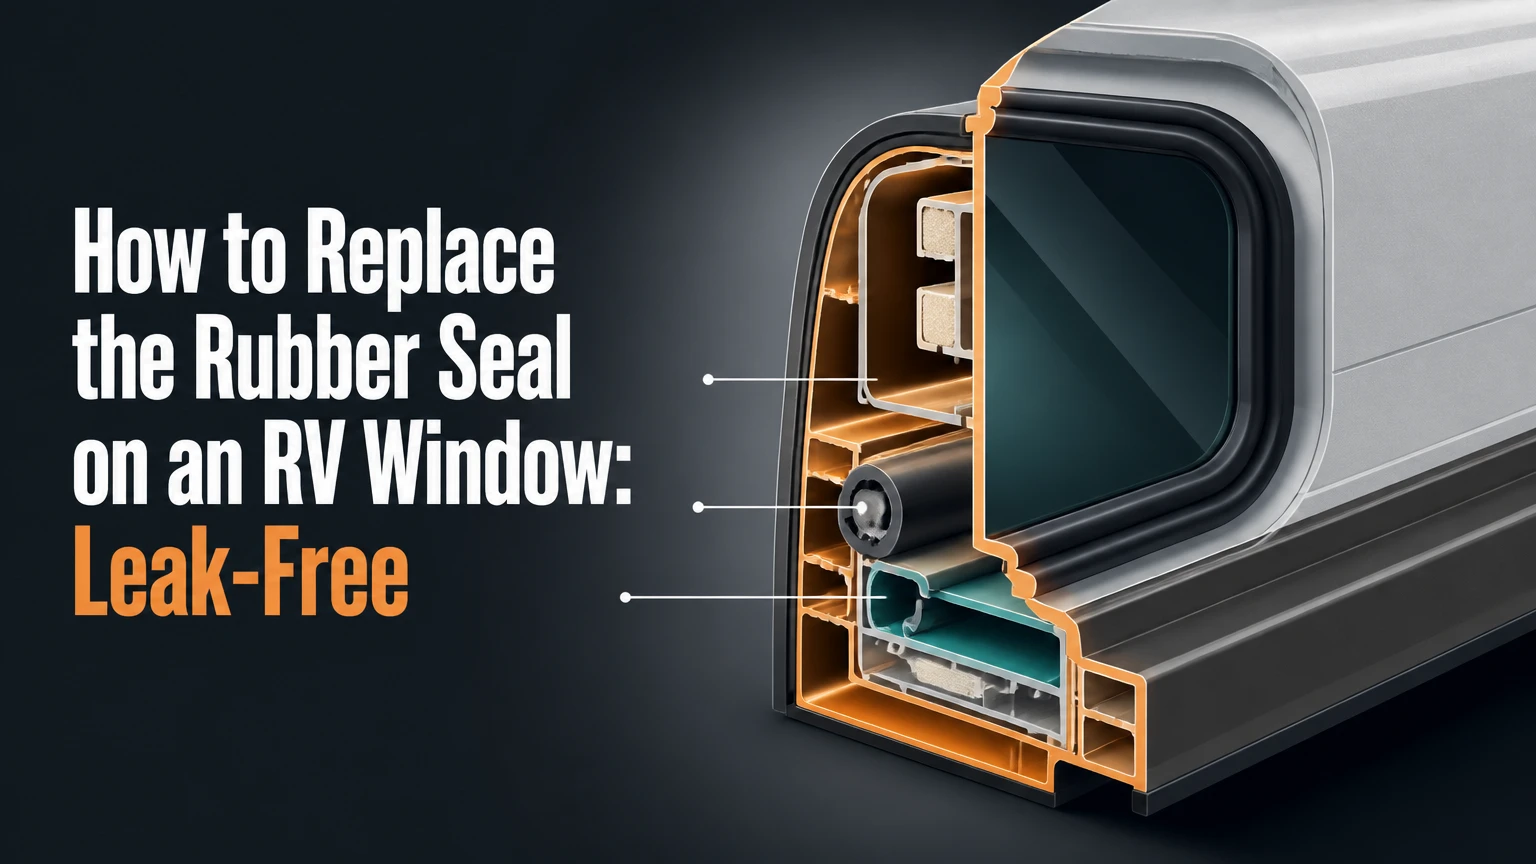
To replace the rubber seal on an RV window, first identify whether the leak comes from the frame-to-wall joint, sliding glass channel, glazing bead, or bulb gasket. Remove the window when the exterior frame seal has failed, clean every mating surface, install the correctly sized EPDM gasket or butyl tape without stretching it, then reinstall and test drainage.
Key Facts at a Glance
Butyl tape seals the joint between an RV window frame and the RV wall; it does not replace every glass gasket.
EPDM is typically the better rubber compound for exposed window channels because ultraviolet light and temperature changes damage inferior vinyl faster.
A typical removable RV window takes 1.5-3 hours to reseal, excluding repairs to rotten wall structure.
Most RV window frames use an inner clamp ring and exterior frame, but some frameless and bonded windows require a different procedure.
Weep holes must remain open because they drain water from the lower window track.
Over-tightening clamp-ring screws can distort an aluminum frame and create a new leak path.
Identify the Failed RV Window Seal First
The correct repair depends on where water crosses the window assembly. Water at the interior perimeter usually indicates a failed frame-to-wall seal, while water inside a slider track may be normal until it cannot exit through the weep holes.
Dry the window, then spray small sections of the exterior with a garden hose while an assistant watches inside. Do not use a pressure washer. Begin at the bottom and move upward, because spraying the top first can flood several paths at once.
Which seal are you replacing?
| Seal type | Physical appearance | Installation location | Correct replacement |
|---|---|---|---|
| Frame-to-wall seal | Sticky gray or black strip | Outer frame flange against RV wall | 3/4-inch or 1-inch butyl tape, commonly 1/8-inch thick |
| Sliding glass channel | U-shaped rubber or felt-lined channel | Aluminum track around moving glass | Correct EPDM or channel profile |
| Glazing bead | Wedge, lockstrip, or vinyl strip | Glass edge and fixed frame | Model-specific wedge or locking gasket |
| Bulb gasket | Hollow round or D-shaped rubber | Frameless window perimeter or hatch edge | Adhesive-backed or push-in EPDM bulb seal |
A failed frame seal often leaves a dark interior stain below one corner. A failed sliding channel typically causes rattling, drafts, or water that remains around the moving pane. Cloudy moisture between dual panes is an insulated-glass failure, not a removable exterior gasket problem.
Can you reseal an RV window without removing it?
You can temporarily reseal a visible exterior gap, but a durable frame-to-wall repair normally requires removing the window. Surface caulk cannot clean the compressed butyl hidden behind the flange, and it may trap water against the wall.
A removable window is usually held by an interior clamp ring. A bonded, frameless, or fixed automotive-style window may use urethane adhesive instead. Do not pry a bonded window out with a putty knife; glass breakage and wall damage can result.
Choose the Correct Rubber, Tape, and Sealant
Use butyl tape between a removable RV window frame and the sidewall, and use a model-specific EPDM or rubber channel where glass moves. Household silicone is a poor primary choice because it complicates later removal, can reject replacement sealants, and does not substitute for a properly compressed gasket.
How do EPDM, butyl, and silicone compare?
| Material | Typical specification | Best location | Main limitation |
|---|---|---|---|
| Butyl tape | 1/8-inch thick, 3/4-1-inch wide | Frame-to-wall flange | Oozes in heat and remains messy |
| EPDM rubber | Profile-specific width and channel depth | Slider channel or bulb gasket | Wrong profile will not compress correctly |
| Neoprene rubber | Profile-specific, less UV-resistant | Protected interior or older replacement profile | Faster weathering in strong sunlight |
| Foam tape | 1/16-1/8-inch closed-cell thickness | Temporary or low-load patch | Permanent compression and water absorption risk |
| Polyurethane sealant | Product-specific, often 3M 4200-type | Auxiliary exterior bead when approved | Adhesive strength can complicate removal |
| Silicone caulk | Usually 100% silicone | Limited trim and nonstructural applications | Poor primary choice for removable RV frames |
EPDM tolerates ultraviolet exposure, ozone, and temperature cycling better than many inexpensive vinyl profiles. The compound alone does not guarantee compatibility. A thick EPDM strip can be just as wrong as a thin vinyl strip if its channel width, bulb diameter, or locking leg does not match the frame.
Measure the old profile after removal and record its width, height, channel depth, and locking shape. Photograph each corner before disassembly. Manufacturer-specific profiles from suppliers such as Steele Rubber Products are safer than generic weatherstrip when the original shape remains identifiable.
What size butyl tape should you buy?
For many removable RV windows, 3/4-inch or 1-inch-wide butyl tape with approximately 1/8-inch thickness is typical. The correct width is the flange width, not the visible frame width, and tape should cover the sealing land continuously without blocking the window opening.
Buy enough tape to make one uninterrupted perimeter plus 10-15 percent extra. A 12-foot perimeter therefore needs roughly 13.2-13.8 feet. Keep the tape in its original liner until application so dust does not contaminate the adhesive surface.
Prepare the RV and Gather Tools
A typical DIY reseal costs about $25-$90 in materials for one removable window, depending on the gasket profile and whether damaged trim or wall material needs replacement. Allow 1.5-3 hours for a sound frame, plus drying or inspection time if the wall has absorbed water.
Before-you-start checklist
| Requirement | Typical quantity or range | Why it matters |
|---|---|---|
| Butyl tape | 1 roll, 3/4-1 inch wide | Covers the complete frame flange |
| Replacement rubber | 1 measured perimeter plus 10% | Prevents a short corner splice |
| Screwdriver or bit set | 1 set, commonly Phillips or square-drive | Matches clamp-ring fasteners |
| Plastic scraper | 1, 1-2 inch blade | Removes old butyl without gouging fiberglass |
| Isopropyl alcohol | 8-16 fluid ounces | Removes compatible residue from clean surfaces |
| Painter’s tape | 10-20 feet | Holds the exterior frame and marks position |
| Helpers | 1 person | Controls the window during removal and insertion |
| Nitrile gloves and eye protection | 1 pair each | Protects against sharp aluminum and debris |
Park level, disconnect nearby electrical equipment, and work in shade. Moderate temperatures around 60-80°F make butyl easier to handle without turning it into a liquid. In cold weather, warm the tape indoors; in hot weather, keep the roll out of direct sun.
Before removing screws, photograph the interior trim, latch orientation, and weep-hole positions. Place a towel beneath the opening and protect painted or fiberglass surfaces with painter’s tape. Have an assistant outside before the last fasteners come out.
Step 1: Remove the Interior Clamp Ring
Remove the interior trim or clamp ring and support the exterior frame before loosening the final screws. Most removable RV windows use screws that pass through the inner ring into the outer frame, so the window can shift outward as compression is released.
Remove screws in a controlled sequence rather than using an impact driver. Keep them in a labeled container because lengths may differ around latches, corners, or vent sections. If a screw spins without loosening, its aluminum thread may already be stripped.
After removing the last two screws, leave one loosely engaged until the assistant has firm control outside. Cut any paint or sealant bridge with a plastic blade. Do not force the frame sideways, because a thin aluminum flange can bend permanently.
Success checkpoint: The clamp ring separates from the interior wall without tearing paneling or pulling insulation into the opening.
Common mistake: Allowing the window to fall outward. Use painter’s tape as a secondary restraint, but treat the assistant as the primary support.
Step 2: Lift Out the Window and Inspect the Opening
Push the frame outward evenly while the outside helper supports its weight. Place the removed window on padded cardboard, exterior side up, and keep loose screws away from the glass.
Inspect the wall opening for swollen wood, delaminated fiberglass, soft substrate, crushed foam, and corrosion. A new seal cannot compensate for a warped frame or a wall flange that no longer provides a flat compression surface.
Measure the opening width and height before removing the old tape from the frame. Compare those dimensions with the window frame and record any corner radius. If the frame is pitted, remove loose corrosion, smooth sharp edges, and use a manufacturer-approved primer where the sealant system requires one.
Success checkpoint: The opening is structurally firm, square enough for the frame to sit flat, and free of loose material.
Common mistake: Reinstalling over damp wood. Moisture trapped behind butyl may remain hidden and continue damaging the wall.
Step 3: Remove Old Butyl and Rubber
Scrape degraded butyl from the RV wall and the back of the window flange with a plastic scraper. Remove rubber-channel residue from the aluminum track separately, because a slider channel replacement does not require the same cleaning sequence as a frame reseal.
Peel large strips slowly. Warm, pliable butyl may come away in ribbons, while aged material may require repeated passes. Use a plastic razor rather than a metal blade on fiberglass, painted aluminum, and gelcoat.
Isopropyl alcohol can remove light residue from many metal surfaces, but test it first on an inconspicuous painted or plastic area. Some plastics, graphics, and uncured coatings can haze or soften. Do not use gasoline, lacquer thinner, or aggressive solvent on an RV wall without confirming compatibility.
Success checkpoint: A fingertip moved across the sealing flange finds no raised chunks, sharp burrs, loose dust, or oily residue.
Common mistake: Cleaning only the visible outer edge. The hidden flange contact area determines compression and must be equally clean.
Step 4: Install the New Rubber Profile or Butyl Tape
Install a replacement rubber channel by pressing it fully into the aluminum track without stretching it. For a frame reseal, place one continuous butyl strip around the rear flange, keeping it centered on the sealing land and leaving weep-hole passages unobstructed.
Do not stretch butyl tape or rubber gasket material. Stretching reduces cross-sectional thickness, encourages corner shrinkage, and can pull the ends apart during temperature changes. Press the tape down lightly enough to maintain its original thickness.
At the bottom center, overlap the butyl ends by about 1/4 inch and press the joint together. Avoid placing the splice at an upper corner, where gravity and water flow can expose a weak discontinuity. Do not stack multiple layers to correct a bent flange; repair the flange instead.
For a push-in gasket, cut the profile slightly long only when the supplier permits compression allowance. A generic “one size fits all” gasket may have the wrong locking leg or bulb diameter, causing glass binding or inadequate compression.
Success checkpoint: The tape forms a continuous perimeter, the corners remain full, and the rubber sits evenly without twists or gaps.
Common mistake: Blocking the lower weep holes with tape. Mark their positions before application and leave the drainage path open.
Step 5: Reinstall and Compress the Frame
Set the window into the opening from outside while the interior helper aligns the clamp ring. Keep the frame square, and insert every screw by hand before tightening any fastener.
Tighten in a crisscross pattern, moving around the frame in small increments. The goal is even compression, not maximum force. A typical small RV window uses light hand-tool pressure, but manufacturers differ, so follow the window maker’s torque specification when available.
Stop when the frame is seated and the butyl has compressed into a consistent bead around the flange. If one side bottoms out while the opposite side remains loose, remove the frame and correct the alignment rather than tightening harder.
Success checkpoint: The inner ring contacts the interior wall evenly, the outer frame remains flat, and the glass opens or latches normally.
Common mistake: Using a power driver at full speed. Stripped aluminum threads and warped frames can turn a simple reseal into a window replacement.
Step 6: Finish the Joint and Test Drainage
Leave squeezed-out butyl in place initially. After the frame has settled, commonly after 24 hours in warm conditions, trim excess with a plastic scraper or pull small rolls away by hand without disturbing the compressed joint.
Butyl does not require a chemical cure, so the mechanical seal begins immediately after installation. Avoid aggressive washing, pressure spraying, or long exposure to rain during the first day so the assembly can settle undisturbed.
Pour a small amount of clean water into the exterior lower track. Water should move toward and exit through the weep holes. Clear blocked holes with a soft zip tie or low-pressure compressed air, then repeat the test.
Success checkpoint: The interior remains dry during a controlled hose test, and water exits the lower track rather than pooling.
Common mistake: Adding exterior silicone over a leak before testing the drainage path. Surface caulk can hide the true defect and obstruct the holes that should release water.
Situational Variations That Change the Procedure
Not every RV window uses a removable clamp-ring design. Confirm the construction before ordering parts or applying force.
How do you replace a sliding-window channel?
A sliding-window channel can often be replaced with the frame installed. Remove the sliding pane according to the window manufacturer’s procedure, extract the old U-channel, clean the aluminum track, and press in the new channel from one end.
Measure the channel width and depth, then verify that the glass moves freely without excessive side play. Felt-lined channels reduce friction but may not provide the same water management as a bare EPDM profile. Never cover the frame’s weep holes with channel adhesive.
How do you replace a frameless RV window gasket?
Frameless RV windows may use an adhesive-backed bulb seal, perimeter gasket, or bonded glass system. Remove the old bulb seal only after confirming that the glass itself is not bonded to the sidewall with polyurethane.
Clean the adhesive substrate using a compatible product recommended by the gasket manufacturer. Begin at a lower corner, keep the profile relaxed, and join the ends where the manufacturer specifies. A bonded window usually requires glass-setting equipment and primer, so professional installation is safer.
What if the RV window has dual-pane moisture?
Moisture between insulated panes indicates failed edge seals inside the glass unit. Replacing the exterior frame butyl or rubber gasket will not remove that fogging. The practical repair is a replacement insulated-glass unit or specialist resealing service, followed by inspection of the outer frame seal.
Common Mistakes and How to Fix Them
| Failure mode | Likely cause | Corrective action | Prevention |
|---|---|---|---|
| Leak returns at one corner | Gap or stretched tape | Remove and reseal the complete perimeter | Keep tape relaxed and splice at bottom center |
| Water pools in slider track | Blocked weep holes | Clear holes and repeat water test | Keep sealant away from drainage slots |
| Frame bows inward | Screws over-tightened | Loosen, realign, and inspect the flange | Tighten progressively by hand |
| Butyl squeezes out for months | Heat and excessive compression | Trim surface ooze with plastic tool | Use the specified tape thickness |
| Rubber pulls from corners | Gasket stretched during fitting | Replace the affected profile section or full gasket | Install without tension |
| Interior wall remains damp | Hidden structural damage | Dry and repair substrate before resealing | Inspect the opening after removal |
A useful practitioner rule is to diagnose the leak path before buying material. Many apparent “bad gasket” leaks originate from a blocked drain, a cracked frame corner, or water entering above the window and traveling inside the wall.
Another rule concerns sealant quantity: more material does not equal a better seal. Correct compression across a clean, flat flange is more reliable than a thick exterior bead that conceals poor contact.
A third rule is to treat every removed screw as a structural clue. Uneven screw spacing, stripped threads, or missing fasteners can explain leaks that recur after otherwise competent sealing work.
Cost, Time, and Professional Limits
Typical DIY material cost ranges from $25-$90 per window in the United States, while professional service commonly ranges from $150-$400 for a straightforward removable window. Larger windows, imported gasket profiles, corrosion, and rotten wall structure can raise the total substantially.
| Repair situation | DIY materials | Typical labor time | Professional range |
|---|---|---|---|
| Frame-to-wall butyl reseal | $25-$60 | 1.5-2.5 hours | $150-$300 |
| Sliding U-channel replacement | $20-$75 | 1-2 hours | $125-$275 |
| Glazing bead replacement | $30-$100 | 2-3 hours | $200-$400 |
| Frameless adhesive gasket | $40-$150 | 2-4 hours | $250-$600 |
| Rotten wall or corroded flange | $75-$300 additional | 4-12 hours | $500-$1,500+ |
These are typical planning ranges, not manufacturer price lists. Local labor rates, RV size, window brand, access, and replacement-part availability control the final estimate.
Stop the DIY repair and contact an RV or glass professional when the wall is soft across a broad area, the frame is visibly twisted, the window is bonded with polyurethane, the glass is cracked, or the clamp-ring threads will not hold. A reseal over structural damage postpones the failure rather than fixing it.
Final Inspection and Maintenance
Check the interior perimeter after the first rain and again after the next trip. Look for darkening, damp insulation, loose trim, or a new draft at a corner.
Inspect butyl squeeze-out in hot weather because thermal expansion can push a small amount beyond the flange. Trim excess with a plastic tool; do not pull a long strip from the joint, since pulling can disturb the sealed interface.
Clean the lower track twice yearly and inspect weep holes before winter storage. Avoid petroleum-based dressings on EPDM, because some formulations can swell or degrade rubber. Record the gasket profile, tape width, and installation date in the RV maintenance log.
Frequently Asked Questions
How long does an RV window rubber seal last?
A removable butyl frame seal can remain serviceable for many years, but heat, ultraviolet exposure, movement, and installation quality determine actual life. EPDM channels commonly outlast inexpensive vinyl in exposed slider tracks. Replace a seal when it is brittle, visibly separated, permanently flattened, or associated with a confirmed leak.
Should I use black or white butyl tape?
Color rarely determines sealing performance; width, thickness, adhesion, and compatibility matter more. Black tape can be less visible behind dark frames, while white tape may show less against light fiberglass. Choose the tape specified by the window or RV manufacturer, and do not select color as a substitute for correct dimensions.
Can I use automotive weatherstripping on an RV window?
Automotive weatherstripping is suitable only when its profile, rubber compound, adhesive system, and compression range match the RV window. A door bulb seal may look similar but fail to fit the aluminum channel. Compare cross-sectional dimensions and retain the original profile until the replacement is confirmed.
How soon can I wash the RV after resealing a window?
Wait about 24 hours before washing the window aggressively, even though butyl itself does not chemically cure. Avoid pressure washers around the frame permanently because concentrated water can bypass drainage design and force water past compressed seals. A gentle rain test is preferable to high-pressure spraying.
Why is my RV window still leaking after new butyl tape?
A persistent leak after new butyl usually indicates a blocked weep hole, incomplete surface cleaning, a warped frame, an unsealed corner, or water entering above the window. Remove interior trim, perform a controlled bottom-to-top hose test, and trace the first wet point instead of adding another exterior bead.
Is silicone ever appropriate around an RV window?
Silicone can be appropriate for limited trim or nonstructural applications when the window manufacturer specifies it, but it should not replace butyl tape at a removable frame flange. Silicone residue can interfere with later sealant adhesion and makes future disassembly difficult. Use only a product compatible with the frame, wall coating, and glass.
The Bottom Line
Replacing the rubber seal on an RV window succeeds when the leak source, seal profile, surface condition, and compression method all match. Use butyl tape for a removable frame-to-wall joint, use the correct EPDM or channel gasket for moving glass, preserve the weep holes, and tighten the clamp ring gradually. The most reliable repair is clean, relaxed, evenly compressed, and tested with water before the RV returns to service.


