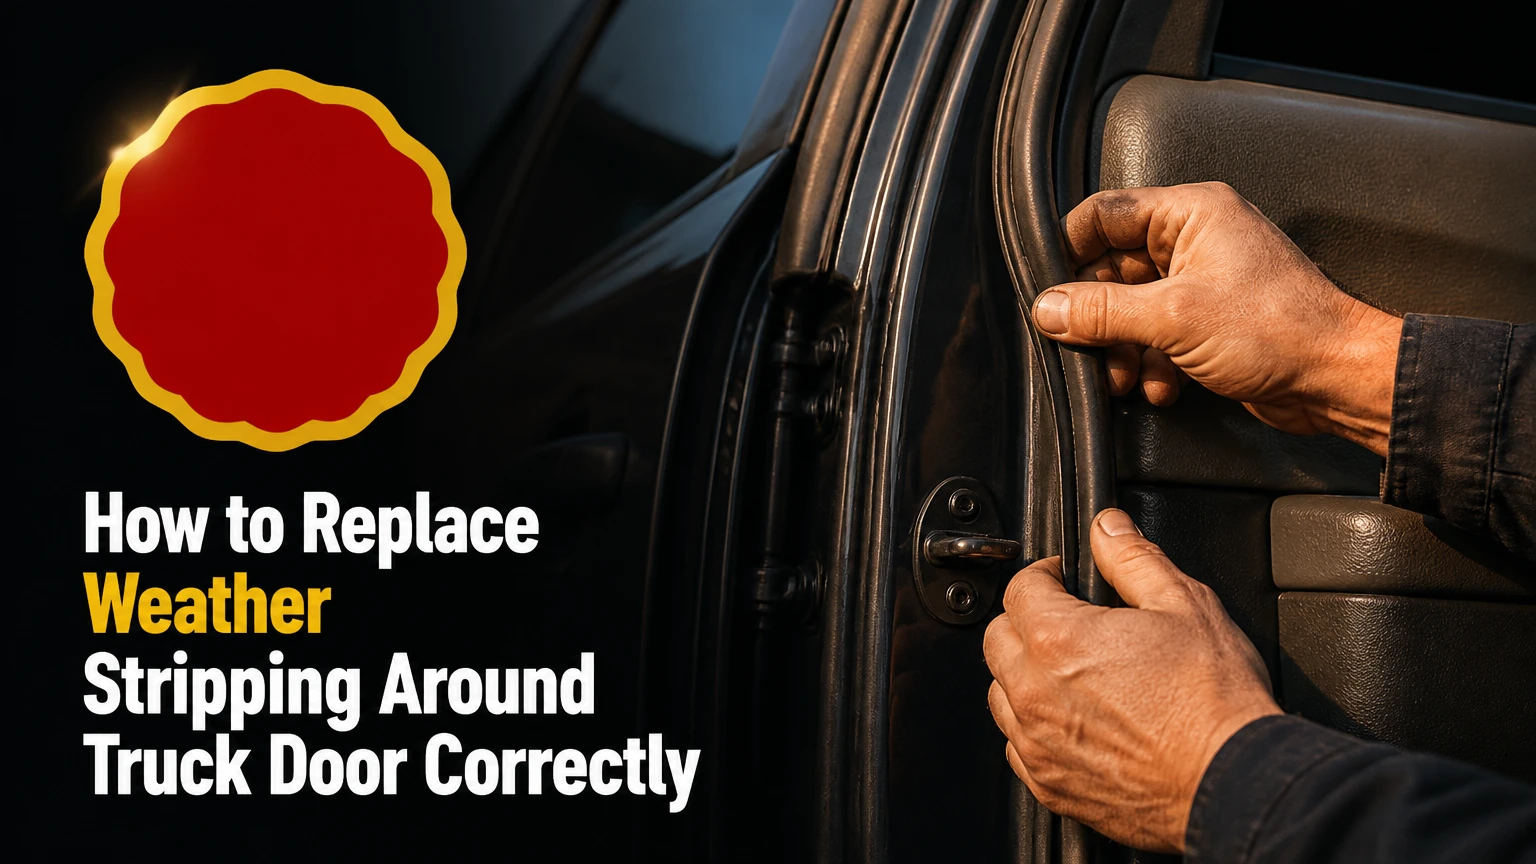
To replace weather stripping around a truck door, remove the old seal, clean the mounting flange, dry-fit the correct replacement, install it without stretching, and allow adhesive to cure before driving. A typical DIY replacement takes 1-2 hours per door, and clean surface preparation determines whether the new seal stays watertight.
Key Facts at a Glance
Vehicle-specific molded EPDM weather stripping usually provides the most reliable fit around truck doors.
Do not stretch a rubber seal during installation because stretched material can shrink away from corners.
A clean, dry, residue-free mounting surface matters more than using extra adhesive.
Push-on seals normally need no adhesive, while bonded seals require automotive weatherstrip adhesive.
Keep the door closed only to the first latch position during initial curing if the seal shifts under full compression.
Test for leaks and wind noise after curing, then allow approximately 1-2 weeks for a new EPDM seal to settle.
Before You Start the Truck Door Seal Replacement
A truck door weatherstrip replacement normally requires 1-2 hours, moderate hand-tool skill, and $20-$70 in parts and consumables for one door. The most important prerequisite is identifying the failed seal, because a door perimeter seal cannot repair a leaking beltline, vent-window seal, windshield gasket, or blocked drain.
Confirm that the perimeter seal is actually leaking
Inspect the rubber around the complete door opening. Look for flattened sections, splits, hardening, missing clips, pulled corners, shiny compression marks, or a gap between the seal and painted flange.
Use a dry paper towel to trace the leak. Place separate strips at the upper front corner, roof corner, rear edge, and lower sill, then spray water gently from above. Water entering near the glass often indicates a beltline or run-channel problem rather than the main door weatherstrip.
A sagging door can also create an apparent seal failure. If the gap around the door changes from top to bottom, or the latch requires lifting the door, inspect hinges, striker alignment, and body damage before buying rubber.
Tools and materials checklist
| Item | Typical quantity | Purpose | Acceptable specification |
|---|---|---|---|
| Replacement weatherstrip | 1 door kit | Seals the door perimeter | Molded OEM or automotive EPDM |
| Weatherstrip adhesive | 1 tube, 5-6 oz | Bonds adhesive-type seals | Automotive contact adhesive |
| Isopropyl alcohol | 4-8 fl oz | Final surface cleaning | 90% or higher |
| Adhesive remover | 2-4 fl oz | Softens old glue | Paint-safe automotive formula |
| Plastic trim tools | 2-3 pieces | Removes clips and old rubber | Nylon or acetal |
| Microfiber towels | 4-6 towels | Cleaning and wipe-off | Lint-free |
| Painter’s tape | 1 roll | Holds corners during cure | Low-tack masking tape |
| Shears or razor | 1 tool | Makes square cuts | Sharp, controlled cutting edge |
| Nitrile gloves | 2-3 pairs | Protects hands from solvent | Chemical-resistant nitrile |
Work in a ventilated area, keep ignition sources away from solvent, and protect painted surfaces with masking tape. A metal scraper can cut paint inside the flange, leaving a concealed rust path beneath the seal.
Which Replacement Weather Stripping Should You Buy?
Buy a molded, vehicle-specific EPDM seal when the truck is available in that configuration; choose a universal push-on EPDM profile only when its channel size and cross-section match the original. Adhesive-backed foam is a short-term patch, not a durable substitute for a door perimeter seal exposed to repeated compression.
Compare the common seal profiles
| Profile | Typical material | Attachment | Best use | Main limitation |
|---|---|---|---|---|
| Molded bulb loop | EPDM rubber | Clips or adhesive | Vehicle-specific door perimeter | Higher cost and limited availability |
| Push-on channel | EPDM with metal core | Gripping channel | Straight flanges and work trucks | Poor fit on complex molded corners |
| Flange or wiper | Silicone or neoprene | Channel or adhesive | Glass and beltline water deflection | Not a primary door-opening seal |
| Closed-cell foam tape | Polyurethane foam | Acrylic adhesive | Small temporary gaps | Loses shape under repeated door compression |
| Open-cell foam tape | Polyurethane foam | Acrylic adhesive | Interior draft blocking | Absorbs moisture and deteriorates quickly |
EPDM is the normal automotive choice because it tolerates ultraviolet exposure, ozone, rain, and broad temperature swings. Silicone remains flexible at lower temperatures and can tolerate higher temperatures, but it tears more easily and many ordinary weatherstrip adhesives bond poorly to silicone.
Neoprene handles oil and some chemical exposure well, which can help on work trucks, but it generally offers less ultraviolet resistance than EPDM. Do not select by material name alone. The profile height, bulb diameter, channel width, clip position, corner shape, and compression load must also match.
EPDM versus silicone versus foam
| Material | Typical temperature range | UV and ozone behavior | Bonding behavior | Recommended role |
|---|---|---|---|---|
| EPDM | -40°C to 125°C | Strong resistance | Works with automotive adhesive | Primary door perimeter |
| Silicone | About -60°C to 200°C | Strong resistance | Requires compatible adhesive | Extreme cold or specialty areas |
| Neoprene | About -35°C to 105°C | Moderate resistance | Generally bondable | Oil-exposed applications |
| Closed-cell foam | About -30°C to 90°C | Moderate to poor | Strong initial acrylic tack | Temporary or secondary seal |
| Open-cell foam | About -20°C to 70°C | Poor when wet | Variable | Interior draft reduction only |
When is universal weather stripping acceptable?
Universal rubber is acceptable on a simple, continuous flange when the replacement profile matches the original seal within a few millimeters and does not interfere with the latch or window. It is a poor choice for doors with molded corners, integrated retainer clips, frameless glass, or complicated roof-to-pillar transitions.
Measure the original seal only after removing it, because old rubber can flatten or shrink. Compare the replacement channel width, bulb diameter, overall height, and corner geometry. A thicker seal may appear more protective but can prevent the door from reaching the second latch position.
How to Replace Weather Stripping Around Truck Door
The replacement process has six stages: diagnose the seal, remove the old rubber, clean the flange, dry-fit and cut the new piece, attach it, and verify compression after curing. Keep the replacement relaxed throughout installation, because tension is the most common cause of corner separation and later shrinkage.
Step 1: Mark the Original Seal and Remove Retainers
Open the truck door and photograph the seal orientation, corner transitions, seam location, clips, and molded end pieces. Mark the top, front, rear, and bottom with painter’s tape before removing anything.
Start at a seam or accessible corner. Pull the rubber steadily by hand, then use a nylon trim tool to release push-in clips. If the seal is bonded, peel it slowly while cutting adhesive strands with a plastic scraper or controlled razor work.
Save every unusual clip and end-cap. Some truck door seals use different retainers at the upper corners and lower hinge area, and a missing retainer can create a gap that adhesive alone cannot correct.
Success checkpoint: The seal is removed without bent metal, torn paint, or missing clips.
Common mistake: Pulling so hard that a clip remains in the body flange or breaks inside its hole.
Step 2: Strip Adhesive and Clean the Mounting Flange
Apply a small amount of paint-safe adhesive remover to a towel or the residue, not indiscriminately over the entire door. Allow the product to soften the old adhesive according to its label, then lift residue with a plastic scraper.
Follow with 90% or higher isopropyl alcohol on a clean microfiber towel. Wipe until the towel no longer picks up black adhesive, wax, silicone, or dust. Let the flange dry completely, usually 5-10 minutes in normal workshop conditions.
Do not use gasoline, brake cleaner, lacquer thinner, or aggressive solvent unless the truck manufacturer and product label confirm paint compatibility. Solvent damage can appear as softened clear coat or staining after the new seal conceals the area.
Success checkpoint: The mounting surface feels dry and clean, with no glossy adhesive film under fingertip pressure.
Common mistake: Applying new adhesive over old residue, which creates a weak bond layer.
Step 3: Dry-Fit the New Seal Without Stretching
Lay the new seal around the door opening with no tension. Begin at the factory reference point, usually a molded corner, clip hole, or lower seam, and work around the perimeter without pulling the rubber longer.
Check that the bulb points toward the compression surface and that any drainage lips face downward or outward. On a continuous universal loop, place the splice at the lower center or another manufacturer-specified low point, away from the most direct rain and wind path.
Mark the final cut only after the seal has rested in position. A small 1/8-inch to 1/4-inch allowance can compensate for minor settling, but do not force an overlap that creates a raised lump. Cut with sharp shears or a fresh blade, keeping the ends square.
Success checkpoint: The seal reaches every corner naturally and the door can close without the rubber folding inward.
Common mistake: Stretching the strip around the roof corner, which makes the bottom section too short later.
Step 4: Apply the Correct Attachment Method
Push-on weather stripping does not normally need adhesive. Align its metal-reinforced channel with the body flange and press it down by hand in short sections; use a rubber mallet and a wood or plastic block only when the manufacturer permits it.
For bonded weatherstrip, use an automotive weatherstrip adhesive such as 3M Super Weatherstrip Adhesive or an equivalent product approved for the seal material. Apply a thin continuous bead, commonly about 3-5 mm, to the cleaned track or the seal’s bonding surface, following the adhesive instructions.
Do not substitute household silicone caulk for contact adhesive. Silicone sealant can remain flexible but may not provide the required peel resistance, and later removal becomes difficult. Silicone rubber itself also requires a compatible bonding system.
Allow contact adhesive to flash until tacky, often 2-4 minutes, before joining the surfaces. Product instructions control the exact time because temperature and humidity change open time.
Success checkpoint: Adhesive contacts clean surfaces continuously without pooling inside clip holes or drainage paths.
Common mistake: Using a thick bead, which increases door closing force and prevents the seal from seating evenly.
Step 5: Seat the Seal Around the Perimeter
Press the weatherstrip into place in sections of approximately 100-150 mm, or 4-6 inches. Use your thumb or a small roller to apply even pressure, especially at corners, butt joints, and clip locations.
Never pull the rubber forward while seating it. If a section is short, remove it and refit the preceding section rather than stretching the material. Press the corners into their original contours and leave drainage openings unobstructed.
Apply painter’s tape across tight-radius corners and over the seam. Keep the tape on long enough for the adhesive’s stated initial cure, commonly overnight. Wipe adhesive squeeze-out immediately with the product-approved cleaner rather than flooding the seal.
Success checkpoint: The seal sits flush, has no ripples, and maintains consistent bulb orientation from hinge side to latch side.
Common mistake: Taping the bulb shut or covering a drain opening, which can trap water inside the door channel.
Step 6: Cure the Adhesive and Check Door Compression
Close the door gently to the first latch position if the seal moves under full closure. This lightly compresses the rubber while avoiding excessive pressure that can squeeze adhesive out or permanently distort a fresh profile.
Keep the truck dry and avoid driving until the adhesive reaches its label-specified cure. A typical automotive weatherstrip adhesive needs at least 24 hours for normal handling, while pressure washing should wait about 72 hours unless the product specifies otherwise.
After curing, inspect the contact imprint around the entire perimeter. The rubber should show a continuous, moderate compression mark without a completely untouched area or a crushed section.
Success checkpoint: The door latches normally, the seal remains fixed, and compression is continuous.
Common mistake: Testing with a high-pressure washer before cure, which can lift an uncured corner.
How Can You Test the New Truck Door Seal?
A new truck door seal should pass visual, paper, water, and road-noise checks after adhesive curing. The paper test identifies low-compression areas, while a gentle hose test confirms water shedding without the misleading force created by a pressure washer.
Use four post-installation checks
- Visual check: Look for rolled edges, gaps, displaced clips, exposed adhesive, and blocked drains.
- Paper test: Place a strip of paper between the seal and body, close the door, and pull. Moderate resistance should remain at several points around the frame.
- Hose test: Run a gentle stream from the roof downward for 5-10 minutes. Do not spray directly at the seam from close range.
- Road test: Listen at 30-60 mph for new wind whistle, then inspect the interior carpet and sill for moisture.
The paper test is comparative rather than a laboratory measurement. A bill sliding freely at one point indicates a local contact problem, but adding random foam behind the seal can overload the door or distort the latch. First check profile height, body alignment, and whether the seal is seated in its channel.
What Are the Cost and Time Requirements?
A typical DIY truck door weatherstrip replacement costs $20-$70 per door and takes 1-2 hours, while a professional repair commonly costs $100-$250 per door depending on access, part price, and labor rates. Molded OEM kits cost more than universal rubber but reduce trimming and corner-fit risk.
| Repair path | Parts cost per door | Labor time | Typical total cost |
|---|---|---|---|
| Closed-cell foam patch | $8-$20 | 20-40 minutes | $8-$35 DIY |
| Universal push-on EPDM | $20-$50 | 45-90 minutes | $20-$70 DIY |
| Molded OEM EPDM kit | $60-$180 | 1-2 hours | $60-$250 DIY |
| Professional OEM installation | $60-$180 parts | 2-4 hours shop time | $100-$250 typical |
| Rust or flange repair first | $50-$300 materials | 2-6 hours | $200-$800 with bodywork |
Prices vary by truck size, model year, door design, and region. A rear crew-cab door may use a longer or more complex seal than a regular-cab door, while frameless windows can require additional glass adjustment.
Which Problems Occur After Installation?
Most post-installation failures come from the wrong profile, contaminated bonding surfaces, stretched rubber, incorrect orientation, or a door that was already misaligned. Troubleshooting should begin with fit and compression before adding adhesive or adjusting hardware.
| Symptom | Likely cause | First inspection | Corrective action |
|---|---|---|---|
| Door is hard to close | Oversized bulb or displaced seal | Check latch stage and corner folds | Reseat or replace profile |
| Wind whistle above 40 mph | Local compression gap | Perform paper test by zone | Correct seating or alignment |
| Water at lower sill | Blocked drain or low seam | Inspect drainage path | Clear drain and reseal joint |
| Corner peels up | Contamination or tension | Lift only loose section | Clean, rebond, tape 24 hours |
| Seal pulls from clips | Wrong retainer spacing | Compare old and new clips | Install correct retainers |
| Door rebounds from latch | Profile too thick | Check second latch engagement | Use correct cross-section |
| Rubber shrinks at ends | Seal stretched during fitting | Compare relaxed length | Replace or splice correctly |
Why is the truck door extremely hard to close?
A truck door that becomes difficult to close usually has an oversized replacement profile, a folded corner, or a seal that is not seated in its retainer. Fresh EPDM can require several days to settle, but the door should still reach its normal latch positions without force.
Do not immediately move the striker outward. Striker adjustment changes door alignment and can create a new leak, uneven body gap, or latch safety issue. First compare the new cross-section with the original, inspect the upper corners, and confirm that clips are fully seated.
Why is there still wind noise?
Persistent wind noise usually indicates a local gap, misaligned door, window run-channel issue, mirror triangle seal, or body repair distortion. A perimeter weatherstrip cannot correct every source of aerodynamic noise.
Divide the frame into four zones and perform the paper test at each zone. If the paper releases at only one location, correct that section. If resistance is weak around the entire frame, the replacement profile may be too small or the door may require hinge and striker inspection.
What should you do if a corner peels away?
Remove only the loose section when the surrounding bond remains sound, then clean both contact surfaces with adhesive remover followed by isopropyl alcohol. Apply a fresh, thin layer of compatible weatherstrip adhesive, allow it to become tacky, press the corner into its contour, and tape it for at least 24 hours.
A corner that repeatedly lifts usually has a mechanical cause. Look for stretched rubber, an overly tight radius, a missing retainer, paint contamination, or a replacement seal with the wrong molded geometry.
Can You Replace Only a Damaged Section?
A partial repair is reasonable when damage is limited to a short straight section and the replacement material matches the original profile. Replace the complete molded seal when a corner, clip interface, splice, or complex transition has failed.
For a short repair, cut the damaged area out with square ends, match the replacement profile exactly, and bond the joint with a compatible automotive adhesive. Keep the joint away from the roof and forward edge when possible. A butt joint at the lower section is easier to protect from direct water impact.
Do not splice a hollow bulb to a solid foam strip. Different compression rates create a pressure discontinuity that can produce both wind noise and water entry.
When Should a Shop Replace the Door Weatherstrip?
Use a body or glass shop when the truck has rusted mounting flanges, collision damage, frameless glass, a door that does not align, or a seal integrated with a window regulator or molded corner assembly. Professional work becomes worthwhile when diagnosis is uncertain or the replacement requires door adjustment.
A shop can measure door gaps, inspect hinge sag, set striker engagement, adjust glass contact, and repair corrosion before installing rubber. Adhesive replacement alone will not restore a flange that has lost metal or a door that sits several millimeters out of position.
Expert Installation Rules That Prevent Repeat Repairs
- Seal geometry beats adhesive quantity. Extra adhesive cannot compensate for a bulb that is too tall, a channel that is too wide, or a corner molded for another cab style.
- Compression must be distributed. A seal that feels very tight at one corner and loose elsewhere will create door-load problems before it creates a reliable water barrier.
- The lower joint is safer than the roof joint. Gravity and water flow make a bottom splice less exposed, but the vehicle manufacturer’s molded seam location takes precedence.
- Do not lubricate the bonding surface. Silicone spray can improve rubber appearance while preventing adhesive from wetting the flange.
- Do not force a door adjustment to hide a seal error. Striker movement should follow a confirmed alignment diagnosis, not compensate for an incorrect replacement profile.
Frequently Asked Questions
Can I use universal rubber instead of an OEM truck door seal?
Yes, universal rubber can work on a straight, uncomplicated flange when its channel width, bulb height, and compression shape match the original. Molded OEM weatherstripping remains preferable for curved corners, clip-mounted designs, frameless windows, and seals with integrated end-caps.
Should I use silicone grease on new weather stripping?
Use a manufacturer-approved rubber conditioner sparingly on the exposed sealing surface, not on the bonding track. Silicone grease can reduce sticking in freezing weather, but contamination on the adhesive surface can cause the seal to peel.
How long does new EPDM weather stripping last?
A high-quality automotive EPDM seal can last roughly 8-12 years in typical service, although ultraviolet exposure, ozone, chemicals, door use, and installation quality change the result. A poorly prepared bonded seal can fail within weeks even when the rubber itself is durable.
Why does water enter after the seal looks correctly installed?
Water can bypass a correctly seated perimeter seal through the beltline, glass run channel, mirror sail panel, roof seam, blocked door drain, or body flange corrosion. Trace the entry point with paper towels and gentle water rather than assuming every leak comes from the new weatherstrip.
Can I drive immediately after installing the seal?
You can usually move the truck carefully after a push-on seal is fully seated, but bonded weatherstrip should remain undisturbed for at least 24 hours in typical conditions. Avoid rain, car washes, and pressure washing until the adhesive reaches its specified cure time.
The Bottom Line
To replace weather stripping around truck door openings successfully, identify the actual leak, select a profile that matches the original geometry, remove every trace of old adhesive, and install the rubber without stretching it. Allow at least 24 hours for automotive adhesive to cure, then confirm continuous compression with a paper test and gentle hose test.


