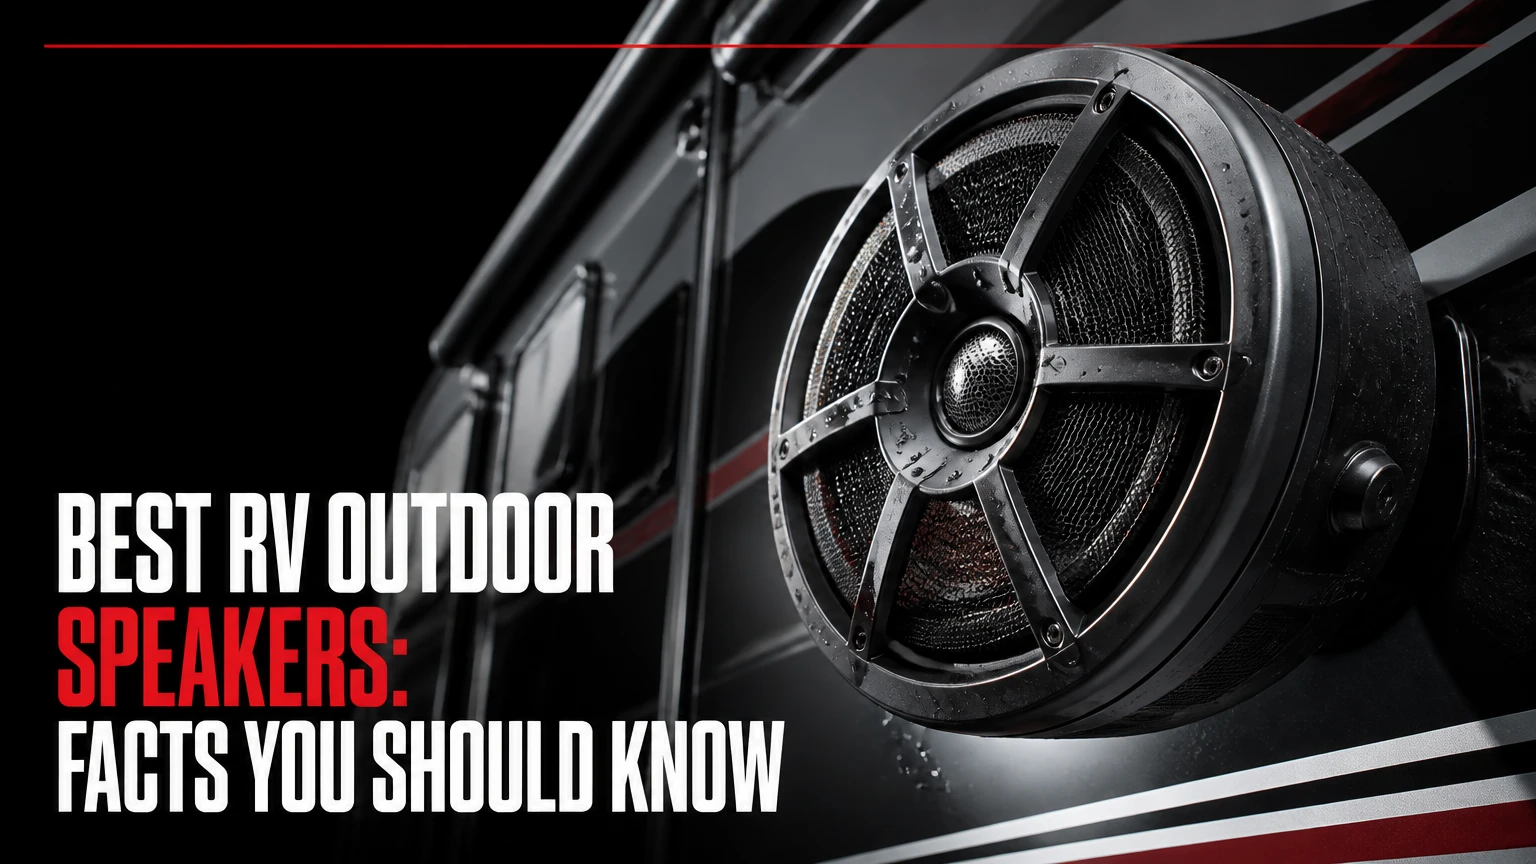
The best RV outdoor speakers are weather-resistant marine or RV-rated speakers matched to the vehicle’s cutout, amplifier impedance, and available power. Flush coaxial speakers suit factory replacements, enclosed pods provide stronger outdoor bass without cutting the RV wall, and rugged Bluetooth speakers offer the lowest installation risk and highest portability.
RV Outdoor Speakers at a Glance
- Marine-grade polypropylene cones and UV-resistant surrounds tolerate sunlight and moisture better than ordinary indoor or car speakers.
- IP65 protects against dust and water jets, while IP67 adds temporary immersion protection under the IEC 60529 rating system.
- A speaker’s RMS rating describes sustained handling; peak watts are a short-term marketing figure and should not guide amplifier matching.
- Most factory RV audio systems use 4-ohm speakers, but the head unit manual must confirm the safe load before replacement.
- A direct wired replacement usually takes 1-2 hours; a new cutout, cable route, and amplifier can take 3-5 hours.
- The best speaker type depends more on mounting location and power capacity than on maximum advertised wattage.
What Are RV Outdoor Speakers?
RV outdoor speakers are weatherized loudspeakers mounted on an RV exterior wall, awning assembly, frame bracket, or campsite support. They convert an audio signal from a stereo receiver, television, smartphone, Bluetooth module, or dedicated amplifier into cone movement and audible sound in an open campsite.
Outdoor RV audio differs from indoor home audio because the speaker usually has no nearby walls to reinforce low frequencies. Manufacturers therefore emphasize efficient midrange projection, controlled treble, sealed enclosures, and corrosion resistance rather than the warm bass produced by a living-room speaker near room boundaries.
An exterior speaker also faces vibration during travel, ultraviolet radiation, condensation, road spray, dust, and large temperature changes. A speaker can survive rain yet fail from water trapped behind its mounting flange, so the enclosure and the installation seal matter equally.
How Do RV Outdoor Speakers Produce Sound?
An RV receiver sends an alternating electrical signal through the speaker’s voice coil. The coil interacts with a permanent magnet, moving the cone forward and backward; the cone then compresses and rarefies the surrounding air to create sound waves.
A coaxial model combines a larger woofer cone with a smaller tweeter, while a dual-cone model uses one cone to reproduce the full usable range. An enclosed pod places the driver in a cabinet that controls the rear wave and often produces fuller bass than a shallow flush mount.
What Makes a Speaker Suitable for Exterior RV Use?
Suitable RV speakers use moisture-tolerant materials, sealed or treated terminals, UV-stable plastics, corrosion-resistant baskets, and a gasket or flange designed for exterior mounting. Polypropylene cones generally resist moisture better than untreated paper, although cone material alone does not make a speaker waterproof.
Marine-rated does not mean indestructible. A speaker exposed to continuous sun, salt air, freezing water, or pressure-washer spray will experience more stress than one mounted beneath an awning.
Which Type of RV Outdoor Speaker Is Best?
Flush-mount coaxial speakers are best for direct factory replacement, bracket-mounted pods are best when you want stronger bass without cutting the RV wall, and portable Bluetooth models are best for renters, boondockers, and owners who prioritize portability. Awning-light combinations make sense when the existing light bar already needs replacement.
| Speaker type | Typical price | Installation time | Best use |
|---|---|---|---|
| 4-6.5-inch flush coaxial | $30-$150 per pair | 1-2 hours | Factory cutout replacement |
| Enclosed bracket pod | $80-$300 per pair | 1-3 hours | Bass and no wall cutting |
| Awning light and speaker bar | $100-$400 | 2-4 hours | Existing powered awning assembly |
| Rugged Bluetooth speaker | $40-$350 each | 5-20 minutes | Portable campsite listening |
Flush-Mount Coaxial Speakers
Flush coaxial speakers install into a circular or oval wall cutout and sit close to the RV exterior. They preserve the factory appearance, use existing speaker cable, and usually offer the simplest replacement path.
Their main weakness is low-frequency output. A shallow wall cavity provides little acoustic volume, and the wall opening can allow leaks if the gasket or sealant fails. Measure the existing cutout diameter, mounting depth, screw pattern, and surrounding clearance before ordering.
Bracket-Mount Pod Speakers
Pod speakers use an enclosed cabinet attached to a bumper rail, storage compartment, awning channel, or purpose-built bracket. The enclosure gives the woofer a defined rear volume, which commonly improves perceived bass compared with a thin flush panel.
Pods protrude farther from the RV and can contact branches, campground equipment, or storage covers. Stainless hardware and a strong bracket are mandatory, especially when the speaker is exposed to highway vibration.
Awning Light and Speaker Combinations
Awning speaker bars combine illumination and audio in one exterior assembly. Many connect to existing 12V awning-light wiring, but the lighting circuit may not be sized or switched for the audio amplifier inside the product.
Check the manufacturer’s wiring diagram, fuse requirement, current draw, and control method. A light circuit may provide power but no audio signal, so the unit might need Bluetooth, a separate receiver, or an additional signal cable.
Portable Rugged Bluetooth Speakers
Portable speakers require no RV wall cutout and can be moved away from neighboring campsites when quiet hours begin. Many use internal lithium-ion batteries, USB-C charging, IP-rated enclosures, and automatic standby modes.
Portable audio has trade-offs. Battery capacity declines in cold weather, maximum volume can reduce runtime sharply, and a Bluetooth connection may be interrupted by distance, walls, or competing wireless devices. Suction cups and magnetic mounts should never be trusted as the only restraint during travel.
Which Specifications Matter Most?
The most important RV speaker specifications are impedance, RMS power, sensitivity, physical fit, ingress protection, and mounting depth. IP65 or better is a sensible baseline for exposed installations, while sensitivity around 88-91 dB at 1 watt/1 meter helps a modest RV head unit produce useful volume.
| Specification | Practical target | Why it matters | Buying mistake |
|---|---|---|---|
| Impedance | 4 ohms for many RV head units | Determines amplifier load | Assuming every amplifier accepts 2 ohms |
| RMS handling | 30-75 watts per speaker | Indicates sustained thermal capacity | Comparing 500-watt peak claims |
| Sensitivity | 88-91 dB/W/m | Higher output from limited power | Treating sensitivity as sound quality |
| Ingress protection | IP65-IP67 | Indicates dust and water resistance | Calling an unrated speaker waterproof |
| Mounting depth | Measure, often 1.5-3 inches | Prevents contact with framing | Ordering by diameter alone |
| Frequency response | Manufacturer range, often 60 Hz-20 kHz | Indicates stated operating bandwidth | Expecting deep bass from a 4-inch flush unit |
Is IP67 Better Than IP65 for an RV?
IP67 offers greater protection than IP65 because the second digit covers temporary immersion as well as water jets. IP65 is usually sufficient for an exterior speaker mounted beneath an awning or on a vertical wall, provided the mounting seal prevents water from entering behind the frame.
The IEC 60529 standard defines the IP code, but the rating applies to the tested enclosure under specified conditions. It does not guarantee protection for an incorrectly sealed cutout, corroded wire connection, open grille, or modified housing.
How Much RMS Power Does an RV Speaker Need?
A typical factory replacement needs 30-50 watts RMS per speaker, while a dedicated amplifier may justify 50-75 watts RMS. More power does not automatically produce louder sound because the receiver, speaker sensitivity, enclosure, and distortion limit the final result.
A low-powered head unit can drive a high-sensitivity speaker effectively. Conversely, connecting a 75-watt speaker to a weak receiver does not create 75 watts of output; it only gives the speaker a higher safe handling ceiling.
How Should Impedance Be Matched?
Match the speaker impedance to the minimum load specified by the RV receiver or amplifier. A 4-ohm speaker is common in vehicle audio, but a 2-ohm model can overheat an amplifier that requires 4 ohms, while an 8-ohm speaker may play quieter because the amplifier delivers less power into the higher load.
Never assume impedance from the speaker’s marketing category. Read the head unit manual, inspect the original speaker label, and avoid wiring multiple speakers in parallel unless the resulting load is known and supported.
What Is the Best RV Outdoor Speaker Setup for Each User?
The best setup changes by campsite behavior, battery capacity, wall construction, and listening expectations. A factory replacement favors flush coaxials, a no-cut installation favors pods, and limited house-battery capacity favors a portable Bluetooth speaker.
| User situation | Recommended system | Typical budget | Main reason |
|---|---|---|---|
| Budget replacement | 4-6.5-inch 4-ohm coaxials | $30-$80 per pair | Uses existing wiring |
| Family campground | Flush coaxials with zone control | $60-$180 per pair | Simple volume management |
| Boondocking | Efficient Bluetooth speaker | $50-$250 | Avoids house-battery draw |
| Audiophile-oriented camper | Pod speakers plus 50-100-watt amplifier | $180-$500 | Better enclosure and headroom |
| Salt-air coastal use | IP66-IP67 marine speakers | $100-$300 per pair | Greater corrosion and spray margin |
Best Choice for a Budget-Conscious RVer
A 4-ohm marine coaxial pair in the existing 5.25-inch or 6.5-inch cutout is usually the most economical upgrade. Budget models from established marine-audio lines can cost $30-$80 per pair, but the buyer must verify mounting depth and gasket dimensions rather than relying on nominal speaker size.
The limitation is refinement. Entry-level speakers commonly use basic dual-cone or coaxial designs, modest grilles, and lower-quality terminals. Typical service life is approximately 2-4 years in exposed, sunny service and longer when covered.
Best Choice for a Boondocker
A rechargeable Bluetooth speaker is usually the better boondocking choice because it avoids converting house-battery energy through the RV receiver and amplifier. Select a model with USB-C charging, a stated IP rating, replaceable or serviceable battery support if available, and a runtime measured at a realistic volume.
Solar charging is not automatically sufficient. A compact panel may restore energy slowly under shade, clouds, or low winter sun, so retain a USB or 12V charging plan.
Best Choice for an Audiophile-Oriented Camper
Enclosed pods powered by a dedicated marine amplifier provide the best path to stronger bass and higher output. A 50-100-watt RMS amplifier with an appropriate crossover can deliver cleaner peaks than a factory receiver operating near its limit.
This setup costs more, consumes more battery power, and needs protected cable routing. It is also less discreet, so bracket strength and branch clearance become part of the audio design.
How Do You Replace Factory RV Outdoor Speakers?
Replacing factory RV outdoor speakers usually requires 1-2 hours, a plastic pry tool, a multimeter, marine-grade terminals, stainless screws, butyl tape or compatible sealant, and the exact replacement dimensions. The most important success factor is preserving a continuous water seal around the cutout.
Before You Start
| Requirement | Typical specification |
|---|---|
| Difficulty | Moderate, direct replacement |
| Labor time | 1-2 hours for two speakers |
| Replacement cost | $30-$150 per pair |
| Tools | Screwdriver, plastic scraper, wire stripper, crimper, multimeter |
| Materials | Butyl tape, isopropyl alcohol, tinned terminals, heat-shrink tubing |
| Safety prerequisite | Disconnect the negative house-battery terminal |
Step 1: Disconnect Power
Turn off the stereo, battery disconnect, and relevant 12V circuits, then disconnect the negative house-battery terminal if the installation manual permits that procedure. Confirm that the exterior speaker wires are dead with a multimeter before touching bare conductors.
You know the circuit is safe when the receiver cannot power up and the measured voltage is zero. The common mistake is disconnecting only the speaker switch while leaving an amplifier or accessory circuit energized.
Step 2: Remove the Old Speaker
Remove the screws without enlarging the holes, then use a plastic pry tool to separate the old gasket or butyl seal from the fiberglass, aluminum, or composite wall. Do not lever against a thin gelcoat edge with a metal screwdriver.
You know the speaker is free when the flange lifts without cracking the wall surface. Photograph the wiring before disconnecting it, especially if the RV has multiple zones.
Step 3: Identify Polarity and Measure the Cutout
Label the positive and negative conductors, then measure cutout diameter, mounting depth, screw spacing, and clearance behind the wall. Solid and striped wire conventions are common, but RV wiring colors are not universal, so continuity and polarity testing are safer than color assumptions.
A correct fit leaves the cone and magnet clear of framing, insulation, and cabinetry. The common mistake is buying a 6.5-inch speaker whose basket is deeper than the factory cavity.
Step 4: Clean and Prepare the Surface
Scrape away old adhesive with a plastic scraper and clean the mounting surface with isopropyl alcohol. Allow the surface to dry completely before applying new butyl tape or sealant.
The surface is ready when no loose gasket fragments, oxidation, dust, or oily residue remain. Do not aggressively sand fiberglass around the opening because a larger damaged area makes a reliable seal harder.
Step 5: Connect the Speaker Wires
Crimp tinned-copper marine terminals or solder the conductors, then protect each connection with adhesive-lined marine heat-shrink tubing. Keep positive and negative conductors from touching the basket or mounting screws.
A successful connection remains mechanically secure when pulled lightly and shows no exposed copper beyond the terminal. Loose crimp joints commonly cause intermittent popping after repeated road vibration.
Step 6: Seal and Mount the Speaker
Apply a continuous bead or strip of compatible butyl tape around the rear mounting flange, align the speaker, and install stainless-steel screws. Tighten gradually in a cross pattern until the gasket compresses evenly; do not crush the flange into the wall.
You know the seal is uniform when a small amount of material compresses around the perimeter without large gaps. Silicone is not a universal substitute for RV sealant, and some silicone products adhere poorly to specific plastics or interfere with later removal.
Step 7: Test Before Final Cleanup
Reconnect power, test both channels at low volume, verify left and right balance, and listen for rattles before trimming excess sealant. Check phase by playing a vocal track or using a polarity test signal; both speakers should reinforce bass rather than cancel it.
Test the speaker again after tightening the grille. A speaker that works on the bench can still distort when its cone contacts a screw, wire, or wall obstruction.
What Are the Most Common RV Speaker Problems?
The most common RV speaker failures are water intrusion, corroded terminals, incorrect polarity, amplifier overload, blown fuses, and physical damage from branches. Troubleshooting should begin with power and wiring, then move to the speaker, seal, amplifier load, and receiver settings.
| Symptom | Likely cause | Corrective action |
|---|---|---|
| Low volume | High impedance or weak head unit | Confirm 4-ohm compatibility and gain settings |
| Thin or weak bass | Reversed polarity or shallow enclosure | Check positive and negative wiring |
| Intermittent popping | Corroded terminal or loose crimp | Replace with tinned heat-shrink terminal |
| Complete silence | Blown fuse or disabled outdoor zone | Check fuse and Zone B or Zone C setting |
| Distortion at moderate volume | Clipping or damaged cone | Reduce gain and inspect cone and surround |
| Water stains behind speaker | Failed flange seal | Remove, dry, reseal, and inspect wall damage |
Why Is the Sound Quiet or Bass-Limited?
Quiet output usually results from low sensitivity, an impedance mismatch, an incorrectly configured zone, or insufficient amplifier power. Weak bass often comes from reversed polarity, an open-backed flush installation, or a speaker that cannot reproduce low frequencies in its small enclosure.
A phase error is particularly deceptive. Both speakers can produce sound individually, yet bass nearly disappears when they operate out of phase and push air in opposite directions.
Why Does an RV Outdoor Speaker Pop?
Popping usually indicates a loose or oxidized connection, unstable amplifier power, or a damaged voice coil. Pull the speaker, cut back any green or darkened copper, install a tinned marine terminal, and protect the connection with adhesive-lined heat shrink.
Do not ignore intermittent noise. Road vibration can turn a small resistance problem into heat at the terminal or amplifier output.
Why Is There No Sound?
Check the receiver’s outdoor zone, mute state, balance, source selection, speaker fuse, and amplifier power before removing the speaker. Many RV entertainment systems label exterior output as Zone B, Zone C, patio, or outside rather than using a separate physical switch.
If voltage reaches the speaker wires but no sound emerges, test the speaker with a known-good channel at low volume. Never use a high-power amplifier for this diagnostic test.
RV Outdoor Speakers Versus Other Options
RV outdoor speakers provide integrated control and permanent availability, but they are not always the best audio solution. Portable speakers reduce installation risk, soundbars suit awning entertainment, and indoor speakers should remain indoors unless the manufacturer explicitly rates them for outdoor exposure.
| Option | Typical cost | Power source | Main limitation |
|---|---|---|---|
| Wired flush speakers | $30-$150 per pair | RV receiver or amplifier | Wall seal and fixed position |
| Wired pod speakers | $80-$300 per pair | RV receiver or amplifier | Projection and branch exposure |
| Portable Bluetooth speaker | $40-$350 each | Internal battery | Charging and wireless range |
| Outdoor soundbar | $100-$500 | AC, USB, or 12V adapter | Larger storage footprint |
| Indoor home speaker | $30-$300 | Receiver or AC amplifier | Paper and non-weatherized parts |
A standard car speaker is not automatically an exterior speaker. Automotive products may tolerate temperature variation but lack the UV protection, drainage, terminal treatment, and water resistance expected for continuous outdoor exposure.
What Do RV Outdoor Speakers Cost to Own?
A typical direct replacement costs $30-$150 for a pair of speakers, while a pod system with brackets and wiring costs approximately $100-$350. A professionally installed new system can reach $300-$800 when labor, an amplifier, structural routing, and wall repair are included.
Typical service life is 2-4 years for low-cost exposed speakers, 5-8 years for better sealed marine models, and eight or more years for premium units that remain shaded and properly maintained. These are practitioner ranges, not manufacturer guarantees; salt, sun, washing methods, and seal quality change the result substantially.
Replacement cost is only part of ownership. A failed wall seal can damage insulation, trim, or wood framing, creating a repair that costs far more than the speaker pair.
How Should You Maintain Exterior RV Speakers?
Inspect the grille, flange, terminals, and surrounding seal at least twice each camping season and after severe weather. Rinse salt residue with fresh water, dry the speaker naturally, and keep high-pressure spray away from the cone, grille, and mounting perimeter.
Before winter storage, disconnect or charge portable speakers according to the battery manufacturer’s instructions. Do not store lithium-ion products fully discharged in freezing conditions, and do not leave a portable speaker mounted outside while towing.
Keep sound levels reasonable around neighboring sites. Exterior speakers project farther than owners expect because there are no interior walls to absorb the sound.
Which RV Outdoor Speakers Should You Choose?
Choose flush coaxials for a factory replacement, enclosed pods for stronger bass without cutting the RV wall, an awning-light combination for a planned awning upgrade, and portable Bluetooth audio for boondocking or temporary use. Verify impedance, IP rating, cutout dimensions, and power before comparing brand names.
Choose Flush Coaxials If You Want a Clean Replacement
Flush coaxials fit owners who value an integrated appearance, existing receiver controls, and minimal installation time. Select a 4-ohm model only after confirming the receiver’s load specification, and choose a mounting depth that clears the wall cavity.
Skip flush coaxials if deep bass is the main goal or if the existing wall has water damage. A larger speaker will not repair a compromised enclosure or create the acoustic volume of a pod.
Choose Pods If You Want More Bass
Enclosed pods are the better choice when the RV has a suitable rail, bracket, or protected exterior mounting point. Their cabinet volume improves low-frequency output, and installation avoids cutting a new hole through the RV skin.
Skip pods if branches, storage doors, or narrow travel routes can strike the enclosure. A damaged bracket can transmit force into the RV wall or disconnect the speaker during travel.
Choose Bluetooth If You Want the Lowest Risk
A rugged Bluetooth speaker is the safest choice when no suitable factory cutout exists or when the owner changes campsites frequently. Battery operation avoids permanent wiring, and the speaker can be placed closer to listeners at modest volume.
Skip Bluetooth if you need synchronized indoor and outdoor audio, permanent receiver control, or all-day high-volume playback without recharging.
FAQ
Can I Use 8-Ohm Speakers in an RV?
You can use 8-ohm speakers only when the RV receiver supports that load and the reduced output is acceptable. An 8-ohm speaker generally draws less current than a 4-ohm speaker but may play quieter from the same amplifier. Confirm the receiver specification before replacing factory speakers.
Are RV Speakers the Same as Marine Speakers?
RV and marine speakers overlap in construction, but marine speakers are usually designed for more persistent moisture, UV exposure, and corrosion. A marine rating still does not replace correct sealing. Choose the product with the better documented IP protection, terminal treatment, and fit for the RV cutout.
Can RV Outdoor Speakers Drain the House Battery?
Wired RV speakers draw power through the receiver or external amplifier, so battery use depends mainly on amplifier efficiency, listening volume, and operating time. A portable Bluetooth speaker uses its internal battery instead. An amplifier operating near its limit can consume substantially more energy than a low-volume factory receiver.
Should I Install an Amplifier for RV Speakers?
Install an amplifier when the receiver clips before reaching the desired volume, when pod speakers need more clean power, or when the system has multiple exterior channels. An amplifier is unnecessary for a direct replacement that already reaches comfortable volume without distortion. Match its RMS output and minimum impedance to the speakers.
Can I Pressure-Wash Exterior RV Speakers?
Do not aim a pressure washer directly at an RV speaker, grille, mounting flange, or wire entry point. IP ratings describe controlled test conditions, not resistance to concentrated high-pressure spray. Use a gentle freshwater rinse and allow the enclosure and seal to dry before storage.
What Size Speaker Fits My RV?
The correct size is determined by the existing cutout diameter, mounting depth, screw pattern, and clearance, not by the advertised nominal size alone. Common RV replacements measure 4, 5.25, or 6.5 inches, but manufacturer dimensions can vary within each category.
Conclusion: The Best RV Outdoor Speakers Depend on Fit
The best RV outdoor speakers facts you should know are practical: match impedance to the receiver, prioritize RMS over peak power, require a documented IP rating, measure the cutout, and protect every exterior connection from water. Choose flush coaxials for a clean replacement, pods for enclosure-supported bass, or Bluetooth for portable low-risk listening.


