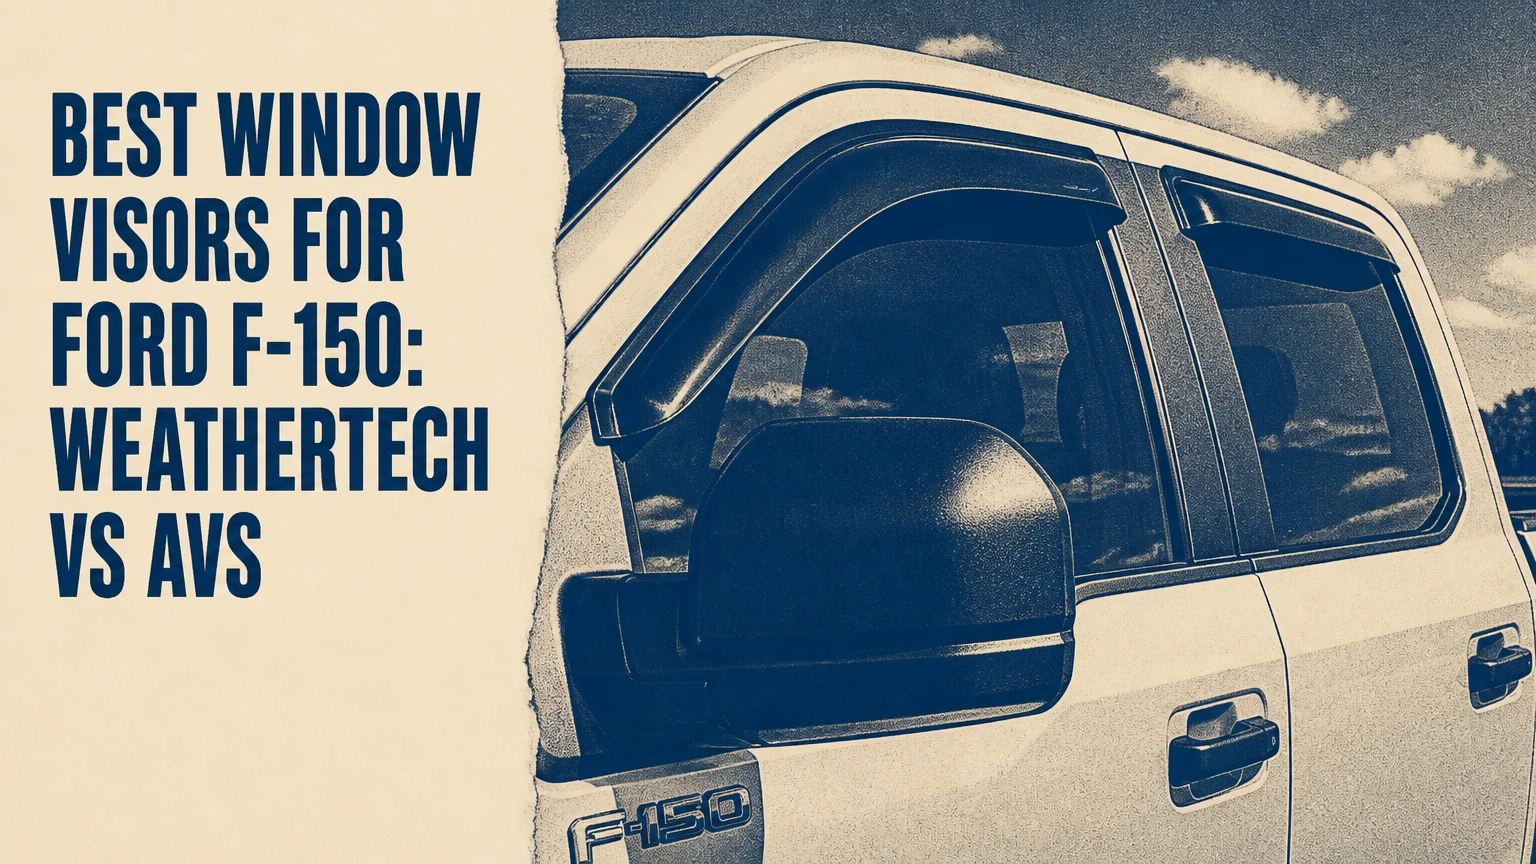
The best window visors for Ford F-150 trucks are WeatherTech In-Channel Deflectors for a clean factory-style fit, while AVS Original Ventvisors are better for work trucks that should avoid glass-channel friction. EGR In-Channel Deflectors offer another strong low-profile choice, and Stampede Snap-Inz usually provide the lowest typical price.
Key Facts at a Glance
- WeatherTech In-Channel Deflectors suit owners prioritizing a flush appearance and concealed mounting.
- AVS Original Ventvisors mount outside the window channel, so they avoid direct contact with the window glass path.
- Typical four-piece Ford F-150 visor sets cost $60-$160, excluding unusual dealer pricing and shipping.
- In-channel installation normally takes 20-45 minutes; tape-on installation commonly takes 15-30 minutes.
- Exact fitment depends on model year, cab style, door configuration, and whether the truck has factory-installed deflectors.
- Visors permit partial window opening during light rain, but they cannot prevent water entry during heavy spray or high crosswinds.
Which Are the Best Window Visors for Ford F-150?
WeatherTech is the best overall choice for most Ford F-150 owners because its in-channel design provides a restrained appearance without visible exterior tape. AVS Original is the best outside-mount option for frequent commercial washing or owners concerned about window-channel resistance, while Stampede is the practical budget pick.
The recommendation changes with the truck’s use. A SuperCrew used for commuting benefits from a narrow, smoke-tinted profile, whereas a construction truck used on dusty sites may benefit more from an outside-mounted visor that leaves the glass run channel untouched.
Our Top Picks
- Best overall: WeatherTech In-Channel Deflectors
- Best for work trucks: AVS Original Ventvisor
- Best low-profile alternative: EGR In-Channel Deflectors
- Best budget choice: Stampede Snap-Inz
- Best for a more pronounced exterior style: AVS Aeroskin or another model-specific tape-on design
How We Chose
The ranking weighs five practical criteria: confirmed F-150 fitment, mounting reliability, window operation, airflow coverage, and installation risk. Finish matters, but a dark smoke color cannot compensate for incorrect door geometry or a visor that interferes with the glass.
Product specifications and prices vary by model year. The figures below are typical market ranges for model-specific four-piece sets, not guaranteed current prices.
| Product family | Mounting style | Typical set price | Best use |
|---|---|---|---|
| WeatherTech In-Channel | In-channel | $100-$160 | OEM-style daily driving |
| AVS Original Ventvisor | Tape-on | $60-$110 | Work trucks and zero channel contact |
| EGR In-Channel | In-channel | $90-$150 | Slim profile with molded fit |
| Stampede Snap-Inz | Tape-on or snap-fit, model dependent | $55-$95 | Budget replacement |
| AVS Aeroskin or similar low-profile tape-on | Tape-on | $80-$140 | More visible exterior styling |
1. WeatherTech In-Channel Deflectors: Best Overall
WeatherTech In-Channel Deflectors are the strongest all-around choice for Ford F-150 owners who want a low-profile, dark-smoke visor with no external adhesive line. The product sits inside the upper window channel and visually follows the door frame more closely than a large bubble-style exterior visor.
The main advantage is appearance. The visor does not occupy as much visual space above the window, which works particularly well on F-150 trucks with factory privacy glass. The molded acrylic is typically about 2-3 millimeters thick, and the set normally covers all four side windows when the selected cab configuration supports rear-door pieces.
In-channel fit requires care. Dirt inside the rubber run channel can prevent the flange from seating, while a visor installed too aggressively can trigger the one-touch window’s obstruction detection. The first window closure should be slow and controlled rather than performed repeatedly with the automatic switch.
Drawback: WeatherTech’s in-channel design can create temporary glass resistance until the weatherstrip conforms, and an incorrect part for the cab style may cause persistent auto-reverse behavior.
Choose this if: you want a factory-like appearance, concealed mounting, and a premium fitment-focused product.
Skip it if: your truck already has a tight or damaged window run channel, or you specifically want zero visor contact inside the glass path.
2. AVS Original Ventvisor: Best for Work Trucks
The AVS Original Ventvisor is the best Ford F-150 window visor for owners who prioritize an exterior-mounted design and straightforward installation. Its tape-on position keeps the visor outside the glass channel, eliminating the direct friction point that can affect window closing during the initial seating period.
AVS Original uses pre-applied automotive-grade acrylic foam tape on the door-frame surface. The broad exterior flange creates a more noticeable profile than WeatherTech, but that shape can provide useful coverage when a driver opens the window several inches for ventilation. A properly prepared painted surface gives the tape a stronger bond than a dusty or waxed surface.
This style is useful for contractors, fleet vehicles, and trucks that regularly carry tools or wet equipment. Outside mounting also avoids expanding the rubber run channel, an issue that matters when the channel is already aged or compressed.
Drawback: Exterior tape edges remain exposed to ultraviolet light, pressure washing, ice, and repeated brush contact, so installation alignment and surface preparation have a larger effect on long-term durability.
Choose this if: you want no internal channel contact, simple installation, and a more pronounced exterior appearance.
Skip it if: you prefer a nearly invisible profile or frequently use aggressive automatic car washes.
3. EGR In-Channel Deflectors: Best Slim Alternative
EGR In-Channel Deflectors are a good choice for Ford F-150 owners who want a slim, molded acrylic design but prefer an alternative to WeatherTech. EGR products commonly use dark smoke acrylic and model-specific shaping for the front and rear door openings.
The product category suits daily drivers that keep their windows slightly open for ventilation. A low-profile flange reduces the chance of the visor contacting the glass at the wrong angle, although precise fitment still depends on the truck’s generation and cab style.
EGR’s installation process generally combines channel friction with adhesive sections or supplied retention hardware, depending on the exact product line. Buyers should inspect the included instructions because the mounting details differ between an in-channel product and EGR’s tape-on Slimline designs.
Drawback: The product name alone does not establish fitment. EGR listings may separate SuperCab and SuperCrew applications, and a rear-door shape from one generation can look similar while being unusable on another.
Choose this if: you want a narrow in-channel profile and can verify the exact EGR part number.
Skip it if: the seller provides only a generic “F-150” description without year and cab information.
4. Stampede Snap-Inz: Best Budget Choice
Stampede Snap-Inz are the best budget-oriented Ford F-150 window visors when the listing confirms the truck’s year, cab, and door count. The typical price range is about $55-$95 for a complete set, making the product attractive for older work trucks or owners replacing damaged pieces.
A lower price does not remove the need for careful preparation. Snap-in or tape-assisted systems still depend on accurate door geometry, clean contact areas, and correct window operation. Some configurations have a more visible exterior shape than premium in-channel products, which may be desirable on a lifted or accessorized pickup.
Stampede is particularly sensible when a truck faces branches, job-site debris, or frequent cosmetic wear. Replacing a lower-cost four-piece set is less painful than replacing a premium set after damage, provided the replacement remains available.
Drawback: Finish consistency, adhesive quality, and installation hardware can vary by specific product line and seller, so the warranty and return policy deserve attention.
Choose this if: price is the primary constraint and the product listing shows exact compatibility.
Skip it if: you want the narrowest factory appearance or cannot confirm whether the set uses tape, clips, or channel insertion.
5. AVS Aeroskin-Style Tape-On Visors: Best Exterior Styling
A low-profile tape-on visor, including AVS designs marketed around slim exterior styling, suits owners who want visible door-frame protection without the bulk of a traditional bubble visor. The outside-mount position avoids the window track and can work well on trucks with sensitive or aging window regulators.
These products normally use automotive acrylic foam tape and a molded acrylic or reinforced polymer body. The installation surface must be dry, clean, and warm enough for pressure-sensitive tape to bond. Typical installation takes 15-30 minutes, but the truck should remain out of rain and the windows should stay closed for at least 24 hours.
The visual result depends heavily on alignment. A visor mounted 3 millimeters too low can interfere with the window seal or create an uneven gap, while one mounted too high may expose the glass opening to rain.
Drawback: Tape-on products cannot be repositioned cleanly after full adhesion, and exposed tape edges are more vulnerable to car-wash brushes than in-channel mounting.
Choose this if: you want an exterior design with moderate visual presence and no channel friction.
Skip it if: you cannot install in controlled temperatures or need the cleanest possible factory appearance.
Should You Choose In-Channel or Tape-On Visors?
Choose in-channel visors for a concealed, OEM-style appearance, and choose tape-on visors when avoiding glass-channel contact matters more than visible adhesive. Neither mounting type is universally superior because each transfers risk to a different part of the truck.
In-channel products place the visor inside the rubber run channel. That produces a clean appearance but can increase closing resistance until the seal adapts. Tape-on products isolate the glass path but depend on surface cleanliness, adhesive temperature, and accurate alignment.
| Decision factor | In-channel visor | Tape-on visor |
|---|---|---|
| Typical installation time | 20-45 minutes | 15-30 minutes |
| Main contact area | Upper rubber window channel | Painted exterior door frame |
| Visible tape line | Usually none | Usually visible from close range |
| Initial window resistance | Possible for 1-3 days | Normally absent |
| Typical curing period | 24-72 hours | At least 24 hours |
| Best visual profile | Flush and integrated | More pronounced and exterior-mounted |
| Main failure mode | Auto-reverse or channel rattle | Peeling tape or misalignment |
A practitioner rule is simple: never select an in-channel visor solely because a product photo looks correct. Compare the door count, mirror shape, rear-door length, and window-frame design in the fitment listing.
How Do You Confirm F-150 Fitment?
Confirm Ford F-150 fitment using model year, cab style, door configuration, and mounting position before comparing brands. “Fits F-150” is incomplete because SuperCab and SuperCrew doors use different visor lengths, and some listings cover only the front windows.
Ford F-150 generations also change door-frame geometry. A visor designed for 2009-2014 trucks may not fit a 2015-2020 truck, and a 2021-2025 listing must still identify whether it covers a SuperCrew or another cab configuration.
Use this checklist:
- Record the truck’s model year from the registration or door-jamb label.
- Identify Regular Cab, SuperCab, or SuperCrew.
- Count the usable side windows and confirm whether rear pieces are included.
- Check whether the truck has factory-installed window deflectors or unusual rain-sensing equipment.
- Match the manufacturer’s part number, not only the marketplace title.
- Compare the return policy before opening adhesive backing.
| F-150 detail | Why it changes the purchase | Verification method |
|---|---|---|
| Model year | Door-frame geometry changes between generations | Registration and manufacturer selector |
| SuperCab | Rear half-door visor shape differs | Side profile and part-number listing |
| SuperCrew | Full rear-door visor is required | Four-door photo and fitment chart |
| Front-only set | May include only two pieces | Package contents |
| Factory visor already installed | Existing adhesive or clips can interfere | Physical inspection |
| Window tint | Dark smoke visor may reduce contrast | View product finish beside glass |
How Much Do F-150 Window Visors Cost?
A complete four-piece Ford F-150 window visor set typically costs $60-$160, while a front-only two-piece set commonly costs about $35-$100. Shipping, model-year scarcity, premium branding, and cab-specific rear pieces account for much of the difference.
The installation tools add little to the budget if the owner already has microfiber towels and isopropyl alcohol. A new trim tool, masking tape, and surface-preparation wipes usually add approximately $5-$20.
| Purchase level | Typical price | Included coverage | Expected installation time |
|---|---|---|---|
| Budget two-piece set | $35-$70 | Front windows only | 15-25 minutes |
| Budget four-piece set | $55-$95 | Front and rear side windows | 20-35 minutes |
| Midrange four-piece set | $80-$130 | Cab-specific four-window coverage | 20-40 minutes |
| Premium four-piece set | $100-$160 | Molded model-specific coverage | 25-45 minutes |
| Replacement single piece | $20-$55 | One damaged visor | 10-20 minutes |
Cheap universal visors are usually a false economy. Cutting or bending a generic piece changes its aerodynamic edge and increases the chance of wind lift, water intrusion, or window interference.
Do Window Visors Reduce Wind Noise?
Window visors reduce wind buffeting when the F-150 window is partially open, but they do not guarantee a quieter cabin with every window position. The greatest benefit is ventilation with a 1-3 inch opening, where the visor redirects some external airflow away from the cabin.
The effect depends on speed, opening size, visor shape, and whether the opposite-side window is also open. A visor cannot eliminate turbulence created by an open rear window, an improperly seated seal, roof accessories, or a loose exterior trim piece.
Published manufacturer claims sometimes report reductions of up to roughly 30 percent in perceived buffeting, but those figures are product-specific and are not a universal decibel standard. Treat them as marketing test results unless the test speed, window opening, microphone position, and baseline are disclosed.
Window visors are better understood as airflow-management accessories. They are not acoustic insulation.
How Do You Install Window Visors?
Install window visors in 15-45 minutes, using isopropyl alcohol, microfiber towels, painter’s tape, and a trim tool when supplied. The most important success factor is fitment and surface preparation, followed by keeping the windows closed for the adhesive manufacturer’s curing period.
Before You Start
| Requirement | Typical specification |
|---|---|
| Work time | 15-45 minutes |
| Temperature | Preferably 60°F or warmer |
| Cleaning material | 70% or higher isopropyl alcohol |
| Tools | 2 microfiber towels, painter’s tape, trim tool |
| Window position | Fully lowered before installation |
| Cure period | 24-72 hours with windows closed |
Step 1: Clean the Contact Area
Lower the glass fully. For an in-channel product, clean the rubber run channel from the mirror area to the rear stop with an alcohol-dampened microfiber towel. For tape-on products, clean the painted door frame and allow it to dry completely.
You will know the surface is ready when the towel collects no visible dust or wax residue. Avoid silicone-based detailing products before installation.
Common mistake: installing over tire dressing, polish, or factory transport film.
Step 2: Test-Fit the Visor
Hold each visor in place without removing all backing. Verify the front edge, rear edge, mirror clearance, and relationship to the glass seal. Mark the outside position with short pieces of painter’s tape.
You will know the part is oriented correctly when the visor follows the entire upper frame without forcing the acrylic into a twist.
Common mistake: confusing left and right pieces because both sides have similar curves.
Step 3: Seat an In-Channel Visor
Insert the front tab beside the mirror, gently bow the visor outward, and tuck the rear tab into the channel. Press the horizontal flange upward from front to rear, then install supplied clips if the instructions specify them.
Close the glass slowly by hand or with brief switch movements. You will know the visor is seated when the glass passes behind the flange without scraping or dropping back down.
Common mistake: forcing the visor into the channel with a metal screwdriver, which can cut the weatherstrip or scratch the acrylic.
Step 4: Bond a Tape-On Visor
Expose only the first 1-2 inches of tape at each end, align the visor with the test-fit marks, and press the ends firmly. Pull the remaining backing gradually while applying thumb pressure along the visor.
Acrylic foam tape bonds through pressure and time. Press each section for approximately 30-60 seconds, concentrating on the front and rear ends.
Common mistake: removing all backing before alignment. Once the tape contacts painted metal, repositioning can weaken the bond.
Step 5: Cure the Installation
Keep all windows closed for at least 24 hours, and use 48-72 hours when temperatures are low, humidity is high, or the product instructions specify a longer period. Avoid pressure washing during the same period.
You will know the bond is stable when the visor has no lifting edge and the window operates through its complete travel without contact.
Common mistake: testing the automatic window repeatedly immediately after installation.
Why Is the Window Reversing?
The Ford F-150 window reverses when its anti-pinch system detects resistance from an in-channel visor, dirty channel, misalignment, or a seal that has not yet adapted. The correct response is to stop cycling the window, inspect the fit, and follow the truck’s owner-manual initialization procedure rather than repeatedly forcing the glass.
A common reset sequence on power-window systems is to close the window fully and hold the switch briefly, but the exact procedure varies by model year. Consult the F-150 owner’s manual for the truck’s prescribed initialization sequence.
Check these causes in order:
- Confirm that the visor flange is fully above the glass path.
- Remove any loose adhesive backing or packaging material.
- Clean the run channel again.
- Inspect for a bent visor or displaced retention clip.
- Reinitialize the window only after mechanical interference is corrected.
Do not add tape inside the channel as a first response. Extra material can narrow the glass path and make the resistance worse.
What Problems Occur After Installation?
Most post-installation problems come from incorrect fitment, contaminated adhesive surfaces, premature window operation, or channel debris. A symptom-based inspection is more reliable than applying more adhesive immediately.
| Symptom | Likely cause | Corrective action |
|---|---|---|
| Window auto-reverses | Flange contacts glass | Re-seat visor and inspect channel |
| Visor rattles at speed | Loose clip or poor friction fit | Reinstall clips and verify seating |
| Tape edge lifts | Cold or contaminated surface | Remove, clean, and replace tape |
| Water enters at front | Visor misaligned near mirror | Reposition or replace part |
| Acrylic cracks | Excessive bending or impact | Replace damaged piece |
| Wind whistle | Gap at edge or distorted visor | Check alignment and weatherstrip |
An expert rule of thumb is to avoid using a heat gun on acrylic. A hair dryer on low can gently warm a cold surface, but concentrated heat can distort the visor or damage the rubber seal.
When Are Window Visors Worth Buying?
Window visors are worth buying when you regularly need fresh air during light rain, snow flurries, dusty driving, or smoke exposure while keeping the window opening partially covered. They provide more practical benefit to smokers, pet owners, contractors, and drivers who dislike full air-conditioning use.
Window visors are less useful for owners who never open the windows or who expect complete rain exclusion at highway speeds. They also cannot replace a failed door seal, correct water leaking through the windshield, or stop cabin noise from roof racks and tires.
For a commuter, choose a low-profile in-channel set. For a work truck, choose an outside-mounted design if the window channel already binds. For a truck that sees automatic brush washes, verify adhesive quality and allow the full curing period before the first wash.
Which Visor Should Each F-150 Owner Pick?
The best choice depends on the owner’s tolerance for channel contact, visible exterior hardware, adhesive maintenance, and installation precision. The following situations provide a faster decision than brand preference alone.
Choose WeatherTech for an OEM-Style Daily Driver
WeatherTech fits the driver who values a restrained appearance, concealed mounting, and a premium model-specific product. Verify the exact year and cab before ordering.
Choose AVS Original for a Contractor or Fleet Truck
AVS Original fits a truck that needs ventilation but should avoid placing a visor inside the window run channel. Its exposed tape requires better surface preparation and more care around pressure washers.
Choose EGR for a Slim In-Channel Alternative
EGR suits owners who want a low-profile in-channel design and find a confirmed EGR part number for their specific cab. Inspect the supplied instructions because EGR product families use different mounting methods.
Choose Stampede for a Budget Replacement
Stampede makes sense when the truck is older, cosmetic damage is likely, or the total price matters more than the narrowest profile. Buy from a seller with a clear return policy.
FAQ
Can I install window visors on only the front windows?
Yes, front-only visor sets are available for many Ford F-150 configurations, and they usually cost $35-$100. Front-only installation is useful for Regular Cab trucks, owners who want driver ventilation, or buyers replacing only damaged front pieces. Confirm that the listing explicitly says two-piece front coverage.
Do window visors affect Ford F-150 window tint?
Window visors usually do not affect factory privacy glass because they mount above or inside the upper window frame. Aftermarket tint film can be affected if an in-channel flange presses against the film’s upper edge. Check the clearance before closing the glass and avoid forcing the visor against recently installed tint.
Can I remove window visors without damaging paint?
Tape-on visors can usually be removed with controlled heat, plastic trim tools, and adhesive remover safe for automotive paint. Pulling the visor outward abruptly can lift clear coat or leave foam tape behind. In-channel visors generally remove more cleanly, although clips can damage the rubber run channel if pried incorrectly.
Are clear window visors better than dark smoke visors?
Clear visors provide less visual contrast and may preserve a brighter appearance around the window, while dark smoke acrylic better matches factory privacy glass. Dark finishes can become more noticeable when scratched or faded. Neither finish automatically provides better rain protection because coverage depends on the molded shape.
Can window visors go through an automatic car wash?
In-channel visors generally tolerate car washes better because the mounting interface is protected within the window frame. Tape-on visors can also survive normal washing when fully cured, but brushes and high-pressure spray aimed at the tape edge increase peeling risk. Wait at least 24-72 hours after installation before washing.
What should I do if the visor starts rattling?
Inspect the visor’s channel seating, supplied clips, and edge contact before adding adhesive. Remove dirt, reseat the piece, and replace damaged clips or tape with the manufacturer’s specified hardware. Persistent rattling usually indicates incorrect fitment or a warped visor, not a problem that more exterior tape will reliably solve.
The Bottom Line
The best window visors for Ford F-150 trucks are WeatherTech In-Channel Deflectors for the cleanest daily-driver installation and AVS Original Ventvisors for owners who want zero visor contact inside the glass channel. EGR provides a credible slim-profile alternative, while Stampede offers a lower-cost solution. Confirm the exact model year and cab style before buying, then allow the full 24-72 hour cure period.