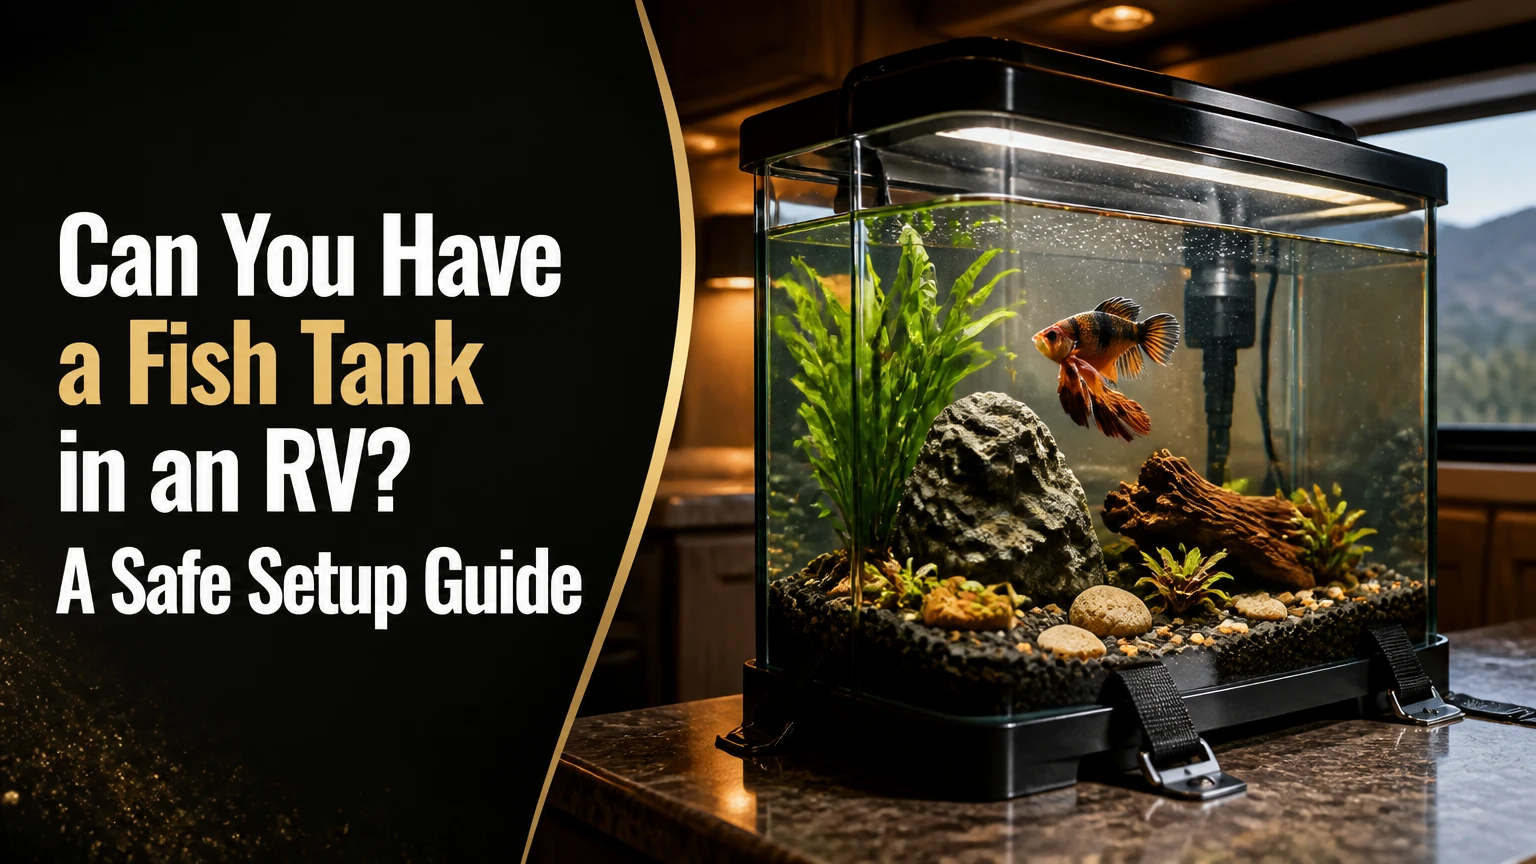
Yes, you can have a fish tank in an RV, but a permanent aquarium is safest when it is small, lightweight, securely supported, and treated as stationary equipment during travel. The fish should normally travel in a separate insulated container, while the aquarium is drained, restrained, and protected from leaks. Frequent movers may be better served by a temporary transport setup.
Key Facts at a Glance
Aquarium water weighs 8.34 pounds per US gallon, before substrate, glass or acrylic, equipment, and the stand are counted.
A practical mobile display is usually 5-10 gallons, with a conservative total wet weight of about 60-110 pounds.
Glass is heavier and more vulnerable to impact; acrylic reduces weight but scratches more easily and still requires a rigid, level base.
A full aquarium should not travel on ordinary roads because braking, cornering, and chassis flex can spill water or damage seams.
A cycled sponge filter, battery air pump, insulated fish container, and pretreated water are more useful on travel day than a large permanent filter.
RV cargo-carrying capacity, floor structure, battery capacity, and travel frequency determine whether an aquarium is practical.
Can You Have a Fish Tank in an RV?
An RV can support a fish tank when the aquarium’s loaded weight, structural support, spill protection, and electrical demand remain within the vehicle’s limits. The most reliable arrangement is a small acrylic or polycarbonate tank used as a stationary display at camp, with fish transported separately whenever the RV moves.
The central constraint is mass. Ten gallons of water weigh approximately 83.4 pounds, and a 10-gallon setup can reach 100-125 pounds after adding substrate, décor, heater, filter, lid, and stand. That load also consumes cargo-carrying capacity, or CCC, which includes occupants, food, clothing, propane, fresh water, tools, and aftermarket equipment.
Travel adds a second constraint. An RV does not behave like a house: a motorhome body can flex, a trailer can pitch and yaw, and a slide-out can carry less structural load than the main floor. A tank that appears stable at rest can shift during a sudden stop.
The practical answer is therefore conditional:
- Occasional traveler: A 5-10 gallon display can work if drained and secured before each move.
- Part-time traveler: A 3-5 gallon nano aquarium is more manageable for multi-week stays.
- Full-time mover: A temporary transport container or non-livestock display is usually safer.
- Boondocker: Battery runtime and temperature control may rule out tropical fish.
How Large Should an RV Aquarium Be?
A 5-gallon aquarium is the most practical starting point for many RVs, while 10 gallons is a conservative upper boundary for a permanent mobile display. The correct limit comes from loaded weight and support structure, not from the tank’s advertised water volume alone.
Use this calculation:
Total aquarium load = water + tank + substrate + décor + equipment + stand + stored water.
A 10-gallon tank containing 10 gallons of water already carries 83.4 pounds of water. A typical loaded system may weigh substantially more:
| Aquarium size | Water weight | Typical tank and equipment | Typical loaded display weight |
|---|---|---|---|
| 2.5 gallons | 20.9 lb | 8-15 lb | 30-45 lb |
| 5 gallons | 41.7 lb | 15-25 lb | 60-75 lb |
| 10 gallons | 83.4 lb | 25-40 lb | 105-125 lb |
| 20 gallons | 166.8 lb | 45-75 lb | 220-270 lb |
These are typical planning ranges, not engineering ratings. A 20-gallon aquarium may be acceptable in a large Class A motorhome after a professional structural review, but it is a poor default for a travel trailer, van, or slide-out.
Leave a meaningful margin below the RV’s published CCC. If the loaded aquarium weighs 75 pounds, do not treat a listed 75-pound support point as adequate. Dynamic forces from road impacts increase the effective load, and water movement transfers force into the stand and floor.
Can a Fish Tank Go on an RV Slide-Out?
An aquarium should not be placed on a slide-out unless the RV manufacturer or a qualified RV structural technician confirms that the slide floor, rollers, and mechanism can support the loaded weight. Slide-outs are designed for specific distributed loads, and an aquarium concentrates heavy, moving mass in a small footprint.
The main floor over a structural frame is generally easier to evaluate. Positioning near the axle line can reduce some pitching movement, but axle location does not prove that the floor can carry the aquarium. Inspect the framing, locate plumbing and wiring, and avoid drilling into tanks or electrical routes.
A stand should distribute weight across a broad footprint. Four small furniture feet can create damaging point loads even when the aquarium’s total mass appears modest.
Which Tank Material Is Safest?
Acrylic is usually the best tank material for an RV because it weighs less and tolerates impact better than ordinary glass, but acrylic is not immune to cracking, seam failure, or distortion. Polycarbonate offers high impact resistance, while glass remains attractive and scratch-resistant but is heavier and less forgiving during vibration.
The claim that acrylic is universally “17 times stronger than glass” is too broad for aquarium decisions. Strength varies by sheet thickness, formulation, support, temperature, fasteners, and loading direction. The useful RV comparison is practical rather than promotional:
| Material | Typical 5-gallon empty weight | Impact behavior | Main weakness | RV verdict |
|---|---|---|---|---|
| Acrylic | 6-12 lb | Resists many impacts without shattering | Scratches and can craze near solvents | Best general choice |
| Standard glass | 10-18 lb | Rigid but can chip or crack | Heavy and brittle at edges | Acceptable only when stationary |
| Tempered glass | 10-18 lb | Strong surface under normal use | Can fail suddenly after edge damage | Not a travel solution |
| Polycarbonate | 5-10 lb | Very high impact resistance | Scratches and may discolor | Excellent custom option |
Acrylic needs a rigid, level support surface across its entire base. Do not rely on a soft cushion to correct a twisted floor, because uneven support can stress the seams. Use a protective mat only when the tank manufacturer permits it and the mat does not make the tank unstable.
What Equipment Works in an RV Aquarium?
A sponge filter is usually the most travel-compatible biological filter because it has no impeller to lose prime and can run from a low-power air pump. A tightly secured internal filter can also work, while a hang-on-back filter is a poor choice for a tank that will be drained or exposed to sloshing.
| Equipment | Typical power draw | Travel advantage | Travel limitation | Practical use |
|---|---|---|---|---|
| Sponge filter and air pump | 1-5 W | Keeps biofiltration and oxygenation simple | Removes less fine debris | Best primary filter |
| Internal power filter | 3-10 W | Compact and contained inside tank | Must remain adequately submerged | Good for stationary periods |
| Hang-on-back filter | 3-10 W | Inexpensive and effective at camp | Loses prime and can spill when water drops | Remove before travel |
| Small canister filter | 5-20 W | Strong mechanical filtration | Hoses, seals, and trapped air add failure points | Large stationary setups only |
| Battery air pump | 0.5-3 W | Maintains oxygen during transitions | Does not heat or filter mechanically | Essential backup |
A sponge filter does not preserve the entire biological cycle by itself. Beneficial bacteria live on filter media and surfaces, and a long outage, drying event, medication course, or major water replacement can reduce biological capacity. Keep the sponge wet in removed aquarium water if the filter is disconnected.
How Much Power Does an RV Fish Tank Need?
A small freshwater aquarium commonly needs 5-25 watts for filtration and aeration, but a heater can add 25-100 watts and becomes the dominant electrical load. Heating demand depends on indoor temperature, tank volume, lid coverage, ambient airflow, and the temperature required by the livestock.
A 50-watt heater running continuously for 24 hours would theoretically use 1,200 watt-hours, or 100 amp-hours from a 12-volt battery before inverter and battery losses. A thermostat cycles the heater, so actual use may be lower, but cold weather can raise it substantially.
Power planning should include:
- A 12-volt or USB air pump for backup aeration.
- A battery capacity estimate based on the heater’s worst plausible duty cycle.
- An inverter sized above the heater’s startup and operating requirements if AC equipment is used.
- A low-water shutoff or manual procedure to prevent a heater from operating exposed.
- Shore-power confirmation before leaving the aquarium unattended.
Solar panels may support filtration and aeration, but small solar systems cannot guarantee tropical temperature control through cloudy weather or cold nights. A battery monitor gives more useful information than assuming a nominal battery rating equals usable energy.
How Do You Install an Aquarium in an RV?
Install the aquarium only after confirming CCC, floor support, clearances, and power access. The installation should create a level load path from the tank base into the RV’s structural floor, while straps or brackets prevent lateral movement without compressing the tank.
Step 1: Measure the Loaded Weight
Calculate the full operating weight, including water, substrate, décor, equipment, stand, and any buckets carried for water changes. Compare the result with the RV’s CCC and the verified floor or cabinet rating.
Success checkpoint: The planned load remains below the structural rating with a safety margin.
Common mistake: Counting only water and ignoring the stand and stored water.
Step 2: Choose a Structural Location
Prefer a main-floor position over framing or a broad cabinet base. Keep the aquarium away from exterior doors, direct sunlight, furnace outlets, and locations where a leak can reach electrical panels or soft furnishings.
Success checkpoint: A technician or the manufacturer’s drawings identify the support path.
Common mistake: Choosing a location because it looks level while it rests on a flexible cabinet lid.
Step 3: Build and Anchor the Stand
Use an aquarium-rated stand with a continuous top surface. Anchor the stand to structural framing with appropriate fasteners, but verify the location of wiring, plumbing, propane lines, and water tanks before drilling.
Success checkpoint: The empty stand does not rock when pushed from several directions.
Common mistake: Using a household bookshelf, whose shelves may sag under a concentrated load.
Step 4: Secure the Tank and Equipment
Use a fitted retaining frame, marine-grade brackets, or restrained straps that contact the stand rather than squeezing the aquarium walls. Install a tight lid, secure tubing with clamps, and fasten décor so rocks cannot strike the tank.
Success checkpoint: The tank cannot slide forward or sideways during a firm hand test.
Common mistake: Relying on adhesive hook-and-loop tape as the sole restraint for a heavy filled aquarium.
Step 5: Cycle Before Adding Livestock
Complete a fishless nitrogen cycle, which commonly takes 4-6 weeks, and verify repeated ammonia and nitrite readings of zero before adding fish. A mature filter is more valuable than an attractive aquascape when the aquarium will experience travel interruptions.
Success checkpoint: Ammonia and nitrite remain at zero after a measured test dose or established biological load.
Common mistake: Adding fish after the water turns clear, because clear water does not prove biological maturity.
Step 6: Test a Stationary Operating Period
Run the complete setup for at least one to two weeks while parked. Check for leaks, condensation, temperature swings, noise, battery drain, and water movement when people walk inside.
Success checkpoint: Temperature stays within the livestock’s acceptable range and the floor remains dry.
Common mistake: Performing the first test during a departure morning.
How Should Fish Travel on Moving Day?
Fish should travel in a separate insulated, lidded container with adequate oxygen and temperature protection, rather than remaining in a shallow aquarium while the RV moves. A clean fish bag, lidded transport tub, or purpose-built bait container can work when its material is fish-safe and its volume matches the livestock.
A travel container should be large enough to prevent crowding and should not be filled so high that water spills during braking. For longer trips, use a battery air pump with a sponge filter or air stone, and monitor temperature with a separate thermometer.
Use this travel sequence:
- Stop feeding 12-24 hours before departure for healthy adult fish, reducing waste during transport.
- Prepare clean, temperature-matched, dechlorinated water.
- Move fish with a soft net or specimen container, avoiding prolonged chasing.
- Place the container in an insulated cooler or box that cannot slide.
- Keep the container out of direct sun, extreme heat, and cold airflow.
- Drain the aquarium to a low level, remove heavy décor, and disconnect exposed heaters.
- Keep filter media wet in removed aquarium water.
- Secure the empty or partially drained tank and seal the remaining water against splashes.
- Reassemble the aquarium at arrival, restore temperature gradually, and observe fish before feeding.
Transporting fish in the aquarium’s remaining 20%-30% water is not a standard safe method. It leaves enough water to generate force during movement, and fish can be thrown against décor or the tank wall. The shallow-water approach may be used only as an emergency compromise for very short movement under direct control, not as a normal road-trip procedure.
Can an RV Aquarium Stay Full While Driving?
An RV aquarium should not remain full while driving because water mass creates shifting loads, wave action, and spill pressure during braking and cornering. A tight lid reduces splashing but does not eliminate the force generated by a 40- or 80-pound water column.
Drain most water into clean, sealable containers, but do not assume stored water is automatically better than fresh treated water. Old water can preserve temperature and chemistry, yet waste products, low oxygen, and contamination can also accumulate. Keep enough mature filter media wet to protect beneficial bacteria, then test ammonia and nitrite after setup.
Do not transport loose gravel, large stones, or unsecured driftwood in the tank. Hardscape can become a projectile inside the aquarium, damage seams, or shift the center of mass. Bare-bottom or thin-sand systems are easier to move and easier to inspect for leaks.
What Does an RV Fish Tank Cost?
A small RV aquarium typically costs $150-$450 initially, excluding major electrical upgrades, custom cabinetry, or professional structural work. Recurring expenses include water conditioner, test kits, replacement media, livestock, electricity, and occasional leak-control materials.
| Cost item | Typical low price | Typical high price | Cost driver |
|---|---|---|---|
| 5-10 gallon acrylic tank | $60 | $180 | Custom dimensions and thickness |
| Sponge filter and pump | $15 | $45 | USB, 12-volt, or AC model |
| Low-watt heater | $20 | $45 | Wattage and thermostat design |
| Stand and restraints | $30 | $150 | Existing cabinet versus custom frame |
| Test kit and conditioner | $25 | $60 | Liquid kit and water volume |
| Livestock and plants | $25 | $150 | Species, quantity, and planting |
| Insulated transport container | $20 | $80 | Basic tub versus aerated system |
A leak tray, absorbent pads, spare airline, battery pump, and replacement fuse are inexpensive compared with flooring or cabinet repairs. Budget for them at installation rather than after the first spill.
Which Setup Fits Your Travel Pattern?
A permanent aquarium suits RV owners who remain parked for weeks and can keep shore power or a reliable battery system available. Frequent movers should choose a temporary display, because repeated draining, netting, temperature changes, and reassembly impose more risk than a small aquarium’s appearance justifies.
| RV situation | Recommended setup | Livestock approach | Travel frequency |
|---|---|---|---|
| Class A, long stays | 5-10 gallon acrylic tank | Single betta or carefully stocked nano community | Monthly or less |
| Travel trailer, seasonal camps | 3-5 gallon acrylic tank | Shrimp, snails, or one suitable small fish | Every 2-4 weeks |
| Class B van, frequent moves | Temporary 2-5 gallon display | Transport separately; display livestock only when parked | Weekly |
| Full-time mover | No permanent livestock tank | Plants, empty aquascape, or temporary container | Several times weekly |
| Boondocker without backup power | Unheated low-bioload setup | Temperature-tolerant species only after research | Variable |
Betta fish are not automatically ideal for RV travel. A betta still requires stable temperature, filtration, water quality, and enough volume, and individual tolerance varies. Neocaridina shrimp and freshwater snails produce a relatively low bioload, but they are not “massless,” immune to motion stress, or guaranteed to survive poor oxygen and temperature conditions.
Saltwater aquariums are substantially harder in an RV. Salt creep, evaporation, salinity changes, heavier equipment, replacement water, and the consequences of a spill make marine systems unsuitable for most mobile beginners.
What Problems Occur and How Do You Fix Them?
The most serious RV aquarium failures are leaks, power loss, temperature excursions, oxygen depletion, and ammonia increases after travel. Fast response matters more than attempting to preserve the original aquascape.
| Symptom or failure | Likely cause | Immediate action | Do not do this |
|---|---|---|---|
| Water on floor | Loose lid, hose, seam, or shifted tank | Unplug safely, move livestock, drain tank | Stand in pooled water near power |
| Fish gasping | Low oxygen, ammonia, or temperature problem | Add battery aeration and test water | Feed until the cause is known |
| Cloudy water | Substrate disturbance or bacterial bloom | Increase aeration and test ammonia | Add multiple chemicals blindly |
| Heater stops | Battery, thermostat, fuse, or inverter failure | Insulate briefly and restore safe power | Run an exposed heater |
| Filter will not restart | Air lock or low water level | Refill to operating level and prime safely | Allow the pump to run dry |
| Acrylic haze or crack | Scratching, solvent damage, or flexing base | Empty and isolate the tank | Patch a loaded tank and keep using it |
If ammonia or nitrite is detectable after arrival, increase aeration and perform a partial water change with temperature-matched, conditioned water. A 25%-50% change is a reasonable emergency range when fish show distress, but testing should guide repeated changes.
A heater must be unplugged before draining. Glass and ceramic heating elements can crack from thermal shock or exposure to air while hot. Allow the unit to cool before handling it.
A tank with a suspected seam failure should be emptied immediately. Aquarium-safe solvent cement may repair some acrylic damage, but a repaired tank should be leak-tested away from the RV for at least 24 hours before reuse. Do not attempt to repair a structural crack while livestock or water remains inside.
What Are the Best Alternatives to a Permanent Tank?
The safest alternative for frequent RV travel is a temporary aquarium or transport container that is completely emptied before each move. A planted empty display, sealed aquascape without livestock, or small observation container can provide visual interest without exposing fish to repeated road vibration.
Choose among these options:
- Temporary transport setup: Best for weekend trips. Keep fish in a prepared, aerated container and set up the display only at the destination.
- Stationary nano aquarium: Best for owners who stay several weeks in each location and can manage daily power.
- Plant-only aquascape: Best for frequent movers who want a display without animal transport.
- Shrimp or snail aquarium: Lower bioload than many fish tanks, but still requires stable water quality and careful transport.
- No aquarium: Best when CCC is low, the RV has no secure floor location, or travel occurs every few days.
The no-aquarium choice is sometimes the most responsible answer. An RV fish tank is a poor fit when the owner cannot provide temperature control, backup aeration, a secure transport container, or enough time for departure and arrival maintenance.
How Do You Decide Whether Your RV Is Suitable?
Use five checks before buying livestock: available CCC, verified floor support, travel frequency, electrical independence, and a safe fish-transport plan. If any check fails, reduce the tank size or use a temporary, plant-only, or no-tank alternative.
A practical decision rule is:
- Can the RV carry the loaded system with margin? Include water, stand, supplies, and passengers.
- Can the floor support concentrated weight? Confirm the structure, especially in trailers and slide-outs.
- Can the aquarium operate for 24-48 hours without shore power? Include heater demand, not only filter wattage.
- Can fish travel separately at a controlled temperature? A bucket without insulation is not a complete plan.
- Can the owner spend 30-60 minutes before and after each move? Draining, securing, transporting, and testing take time.
If the answer is no to two or more questions, a permanent fish tank is not a sensible RV installation. The aquarium can be attractive and technically functional while still being a poor match for the owner’s travel pattern.
FAQ
Can a betta live in a fish tank inside an RV?
A betta can live in a properly filtered, heated aquarium inside an RV when the tank remains stationary and water quality is stable. A 5-gallon tank is easier to keep thermally and chemically stable than a smaller bowl. Transport the betta separately during travel, and never rely on shallow tank water for routine driving.
How long can fish stay in a travel container?
Healthy fish can often remain in a properly prepared transport container for several hours, but the safe duration depends on species, temperature, container volume, stocking density, oxygenation, and waste production. For a full travel day, use insulation, battery aeration, minimal feeding beforehand, and checks during stops rather than assuming a sealed container is sufficient.
Do I need to save all the aquarium water?
You do not need to save all aquarium water because beneficial bacteria live mainly on filter media and solid surfaces, not in the water itself. Saving some conditioned water can simplify temperature and chemistry matching, but use fresh treated water when stored water is dirty, depleted of oxygen, or contaminated.
Can an RV aquarium use solar power?
An RV aquarium can use solar power for a small air pump and filter, but solar alone may not reliably run a heater overnight or during cloudy weather. Calculate watt-hours, battery usable capacity, inverter losses, and expected heater duty cycle. A battery-powered air pump is an important backup for every off-grid setup.
Is a fish tank safe in a travel trailer?
A fish tank can be safe in a travel trailer only after the trailer’s CCC, floor structure, axle loading, and restraint method are checked. Travel trailers experience pitching and lateral movement that can stress a stand and spill water. A 3-5 gallon acrylic aquarium on the main floor is a more conservative choice than a large glass tank.
The Bottom Line
Yes, you can have a fish tank in an RV, but the safe design is a small, securely supported aquarium that operates while parked and travels separately from its fish. Choose acrylic or polycarbonate, calculate the complete wet weight against CCC, avoid unverified slide-out locations, use a sponge filter with backup aeration, and drain the tank before driving. For frequent movers, a temporary or plant-only display is usually the better decision.


