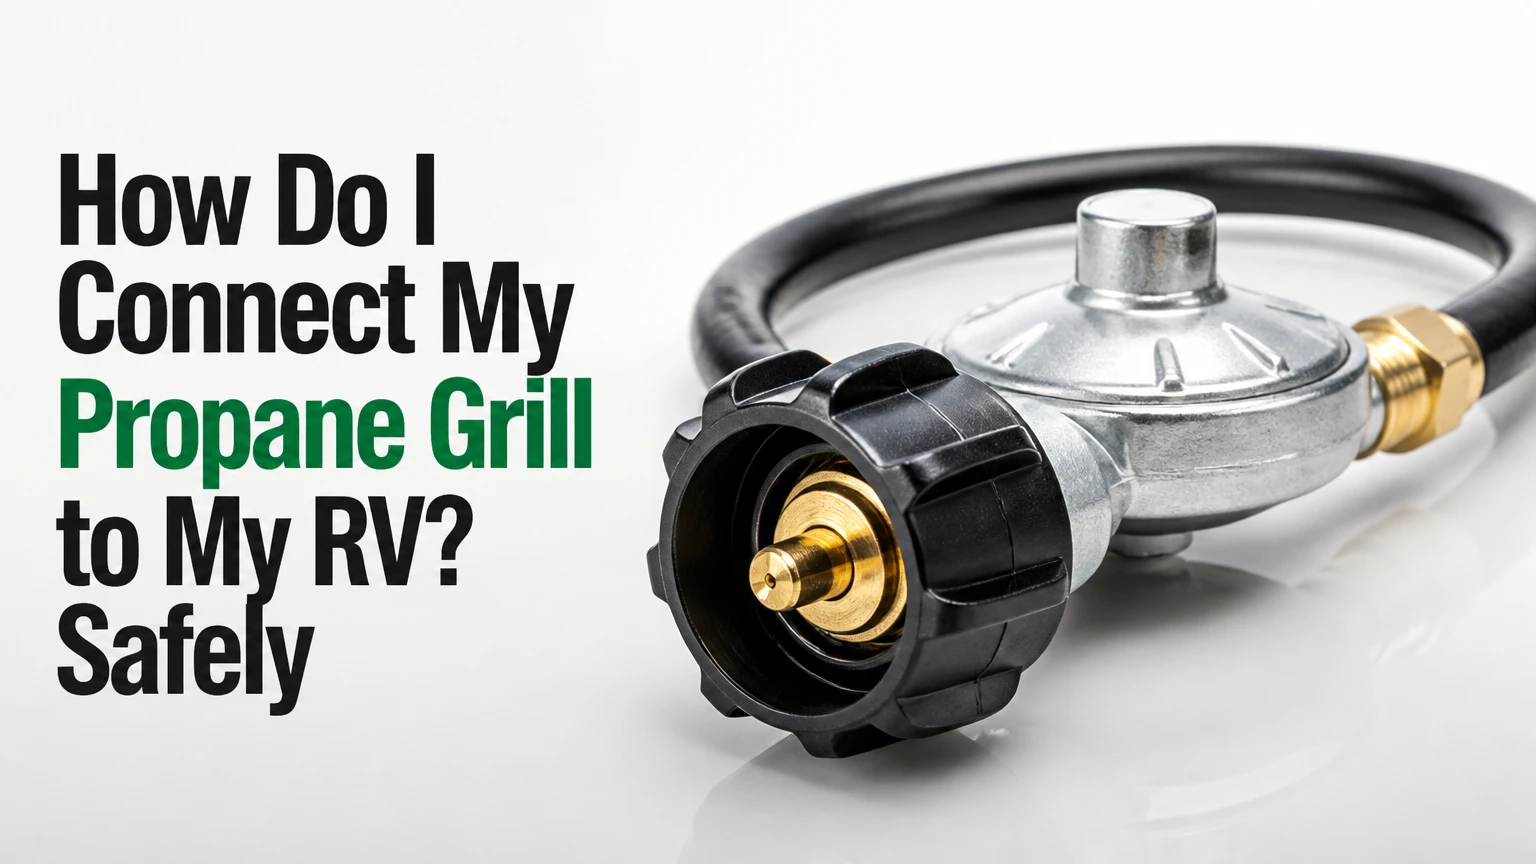
To connect a propane grill to an RV, first identify whether the RV outlet supplies regulated low-pressure gas or whether you need a separate cylinder. A low-pressure RV quick-connect requires a grill conversion that removes or bypasses the grill’s original regulator; a stock grill can connect directly to an external propane cylinder. Never connect a grill regulator to an already-regulated RV outlet.
Key Facts at a Glance
Most RV propane appliances operate at approximately 11 inches of water column, or about 0.4 psi.
A standard portable grill regulator is designed for unregulated propane from a 1-pound cylinder or larger tank.
Connecting that stock regulator to an RV low-pressure outlet creates double regulation and usually causes a weak flame.
The simplest no-modification option is a dedicated 5-pound, 11-pound, or 20-pound propane cylinder.
A low-pressure conversion must match the grill model, inlet thread, connector type, and BTU demand.
Any leak, damaged hose, incorrect fitting, or uncertain pressure condition requires stopping the installation and using a licensed propane technician.
Which RV Propane Connection Should You Use?
The correct connection depends on the fuel pressure available at the connection point and whether you want to modify the grill. For most campers, a separate cylinder is the lowest-risk choice, while a model-specific low-pressure conversion is the cleanest permanent setup when the RV already has a quick-connect outlet.
| Connection method | Fuel pressure at grill | Grill modification | Typical cost | Typical setup time |
|---|---|---|---|---|
| RV low-pressure quick-connect | 11 inches WC | Required | $30-$60 | 20-30 minutes |
| Tank-side tee system | Unregulated tank pressure | None | $70-$120 | 30-45 minutes |
| Separate 5-20 lb cylinder | Regulator-controlled by grill | None | $50-$100 plus tank | 5-10 minutes |
| New professional gas installation | Determined by technician | Model-specific | $150-$400 or more | 1-3 hours |
The scraped AI summary lists costs in taka, but the linked products and North American RV fittings indicate that dollar ranges are the relevant typical figures for the United States and Canada. Prices vary with hose length, brass fittings, grill brand, and whether a regulator or valve assembly must be replaced.
| User situation | Best starting method | Why | Main limitation |
|---|---|---|---|
| Occasional weekend camping | Separate cylinder | No RV plumbing or grill conversion | Requires carrying and securing a tank |
| RV with factory quick-connect | Low-pressure conversion | Fast hookup and no extra fuel cylinder | Grill regulator must be removed or bypassed |
| Stock grill with no modification desired | Separate cylinder | Preserves factory grill configuration | Adds weight and storage needs |
| Multiple high-pressure appliances | Tank-side tee | Provides fuel before the RV regulator | High-pressure hose and fitting risks |
| Uncertain fittings or older RV | Professional inspection | Confirms pressure and thread standards | Installation cost and appointment time |
What Does 11 Inches of Water Column Mean?
An RV low-pressure system normally supplies about 11 inches of water column, commonly written as 11 in. WC or 11 in. w.c. That pressure is roughly 0.4 psi, although exact appliance specifications and regulator performance determine the usable value.
Propane stored in an RV cylinder is liquid under substantially higher pressure. The RV regulator reduces that tank pressure before gas reaches the furnace, water heater, refrigerator, cooktop, or exterior quick-connect. NFPA 1192, the standard addressing recreational vehicles, treats the RV gas system as a regulated appliance installation rather than a general-purpose high-pressure hose network.
The practical rule is simple: pressure must be reduced once, at the correct point, using components rated for that system. A grill’s original regulator is not automatically compatible with an RV outlet.
What Should You Check Before Connecting the Grill?
Before connecting an RV propane grill, confirm the RV outlet pressure, grill inlet design, fuel demand, hose rating, and local installation requirements. Do not rely on the connector’s physical shape alone, because two fittings can appear compatible while supplying different pressures or using different sealing methods.
Before You Start
| Item to verify | Typical value or requirement | How to verify |
|---|---|---|
| RV outlet pressure | Approximately 11 inches WC | RV manual, regulator label, or technician |
| Grill fuel input | Model-specific BTU rating | Grill manual or data plate |
| Low-pressure hose | Rated for LP gas and 11 inches WC | Hose label and manufacturer listing |
| Quick-connect type | RV LP quick-connect, often 1/4-inch | Compare plug and socket profile |
| Grill inlet thread | Model-specific flare, NPT, or appliance thread | Grill manual, not visual estimation |
| Leak-test solution | Commercial LP leak detector or soap solution | Use before lighting |
| Clearance | Manufacturer-specified, often at least 3 feet from combustibles | Grill manual and campsite rules |
You also need an adjustable wrench, two wrenches for opposing fittings where appropriate, a model-specific conversion kit, and a flashlight. Do not disassemble a regulator, alter an orifice, drill a burner, or substitute a plumbing fitting because the threads happen to engage.
RVIA guidance and propane appliance manufacturers consistently place the responsibility on the installer to use listed components and follow the appliance manual. The connector is only one part of the system. The regulator, hose, shutoff valve, fitting seal, and grill burner pressure must work together.
How Do You Connect a Grill to an RV Low-Pressure Port?
To use an RV low-pressure quick-connect, shut off the propane, remove the grill’s factory regulator only if the conversion kit specifically requires it, install the correct model-specific low-pressure adapter, and connect an LP-rated quick-connect hose. The RV port must supply the pressure specified by the grill conversion manufacturer.
Step 1: Identify the RV Quick-Connect
Find the exterior quick-connect, which is commonly located beneath the RV body, near the propane compartment, or beside an outdoor cooking station. Confirm that the outlet is downstream of the RV’s main regulator and that its shutoff valve closes fully.
A quick-connect intended for an accessory is not necessarily available on every RV. Some ports are capped, some are connected to an appliance branch, and some older installations use a different connector or pressure arrangement.
You’ll know the step is complete when: the RV manual or a qualified technician confirms the port’s pressure and fuel source.
Common mistake: assuming every RV quick-connect is low pressure because it is mounted outside.
Step 2: Match the Conversion Kit to the Grill
Buy a conversion hose or fitting listed for the exact grill family, such as a Weber Q model, Blackstone griddle, Camp Chef appliance, or Coleman portable grill. Check whether the kit replaces the grill’s regulator-control assembly or connects to a designated low-pressure inlet.
Many portable grills use proprietary valve assemblies. A generic 1/4-inch fitting may not control the burner correctly, and a fitting that reaches the burner manifold can defeat the grill’s intended safety controls.
You’ll know the step is complete when: the kit instructions identify your grill model and specify low-pressure RV use.
Common mistake: choosing a hose because its male plug fits the RV socket while ignoring the grill-side valve and pressure requirement.
Step 3: Shut Off and Depressurize the System
Close the RV propane cylinder valve or tank service valve. Turn the grill control off, disconnect any cylinder, and wait until the line is no longer pressurized before removing a fitting.
Work outdoors, away from cigarettes, pilot lights, vehicle exhaust, electrical sparks, and other ignition sources. Propane is heavier than air, so leaked gas can collect beneath an RV, deck, or storage compartment.
You’ll know the step is complete when: no fuel source is open and the grill has cooled completely.
Common mistake: loosening a fitting while the tank valve remains open.
Step 4: Remove or Bypass the Grill Regulator
Use the conversion instructions to remove the factory regulator and valve assembly from the grill inlet. Some kits replace the regulator with a low-pressure valve; others use a dedicated adapter that preserves a correctly specified control valve.
Do not remove the grill regulator unless the conversion kit is designed for that exact change. The goal is not to leave the burner unregulated. The goal is to use one correctly matched regulator in the RV system and a compatible grill control valve.
You’ll know the step is complete when: the conversion instructions show a low-pressure inlet and the original disposable-cylinder regulator is no longer in the fuel path.
Common mistake: leaving the stock regulator attached. The resulting double regulation often produces a tiny yellow flame or prevents ignition.
Step 5: Install the Correct Fitting
Thread the adapter into the grill only as the manufacturer directs. Use yellow gas-rated PTFE tape or an approved pipe-thread sealant on tapered pipe threads when the instructions require it.
Do not apply tape to flare seats, compression surfaces, or quick-connect sealing noses. Those connections seal against a metal seat or internal O-ring, and tape can prevent proper seating or shed material into the valve.
Tighten fittings with wrenches, but do not over-torque brass. Hold the stationary fitting with one wrench while tightening the mating fitting with another when the kit requires opposing force.
You’ll know the step is complete when: the fitting is aligned, supported, and fully seated without forcing mismatched threads.
Common mistake: treating every propane fitting as an NPT thread that needs tape.
Step 6: Connect the Low-Pressure Hose
Attach the hose to the converted grill inlet and RV quick-connect. Keep the hose outside the RV, away from tires, sharp edges, hot exhaust components, cooking surfaces, and walking paths.
Avoid routing the hose through a metal baggage-door opening unless the opening has a proper protected pass-through. A crushed or abraded LP hose must be replaced, not patched.
You’ll know the step is complete when: the quick-connect locks, the hose has slack, and no part touches a hot or moving component.
Common mistake: using a high-pressure hose or disposable-cylinder adapter on a low-pressure outlet.
Step 7: Leak-Test Before Lighting
Open the RV shutoff valve slowly, then apply commercial LP leak detector or a mild soap-and-water solution to every newly assembled joint. Expanding bubbles indicate a leak.
If bubbles appear, close the propane source, release pressure, correct the fitting according to the instructions, and test again. Never test a propane connection with a flame.
You’ll know the step is complete when: no bubbles form during a sustained test at each joint.
Common mistake: checking only the grill-side connection while ignoring the RV socket, shutoff valve, and hose crimp ends.
Step 8: Light and Shut Down the Grill
Follow the grill manual’s lighting procedure. Open the control valve only as directed, use the igniter, and allow extra time for air to leave a long hose. Never hold a control open indefinitely if ignition does not occur.
When finished, turn off the grill controls, close the RV accessory valve, and close the cylinder valve when the RV manufacturer recommends doing so. Disconnect only after the line has depressurized.
You’ll know the step is complete when: the flame is mostly blue, stable across the burner, and reaches the normal operating pattern specified by the grill manual.
Common mistake: judging fuel flow by sound. A quiet line can still have a dangerous leak.
Is a Tank-Side Tee Better Than an RV Quick-Connect?
A tank-side tee preserves the grill’s original regulator by supplying propane before the RV regulator, but it places an unregulated or high-pressure hose outside the RV. The method can work for compatible appliances, yet it is less forgiving than a low-pressure conversion and is best installed or checked by a qualified propane technician.
An Extend-A-Stay-style tee typically mounts at the RV cylinder valve, with the original RV pigtail connected to one outlet and a separate hose connected to the accessory outlet. The grill’s stock regulator remains in place because the grill receives tank pressure and regulates it itself.
| Factor | Low-pressure conversion | Tank-side tee |
|---|---|---|
| Grill regulator | Removed or bypassed as specified | Retained |
| Gas pressure in accessory hose | Approximately 11 inches WC | Tank pressure, temperature-dependent |
| Typical hose length | 6-12 feet | 5-12 feet |
| Installation risk | Lower after correct conversion | Higher because of tank-side connection |
| Best use | Standard RV-compatible grill | Stock high-pressure appliance |
| Professional inspection | Recommended | Strongly recommended |
Do not connect a high-pressure tank-side hose to a grill inlet intended for low-pressure gas. Do not install a tee between the tank and regulator without confirming valve type, pigtail compatibility, excess-flow protection, and local code requirements.
What Is the Simplest Alternative to RV Plumbing?
A separate propane cylinder is the simplest alternative because the grill remains in its factory configuration. Place a compatible 5-pound, 11-pound, or 20-pound cylinder upright on stable ground, connect the correct appliance hose, leak-test the connection, and keep the cylinder outside the RV.
Most full-size portable grills use a QCC1 connection for a 20-pound cylinder through the grill’s own regulator. Some compact grills use a 1-inch-20 disposable-cylinder connection for 1-pound bottles. The adapter must match the grill inlet and preserve the original regulator.
| Cylinder option | Typical usable fuel | Typical filled weight | Typical use |
|---|---|---|---|
| 1-pound disposable bottle | About 0.45 lb propane | About 1 lb total | Short single meals |
| 5-pound refillable cylinder | About 4 lb propane | About 14 lb total | Compact camping |
| 11-pound refillable cylinder | About 9 lb propane | About 26 lb total | Repeated grilling |
| 20-pound cylinder | About 17 lb propane | About 37 lb total | Long trips or frequent cooking |
The cylinder must remain upright and secured against tipping. Keep it away from the grill’s radiant heat, vehicle doors, drains, and ignition sources. Never store a propane cylinder inside the passenger compartment or an unventilated RV storage area.
This option is not ideal when cargo capacity is extremely limited or when campsite rules prohibit external cylinders. It is often the right answer for a first-time setup because it avoids modifying a listed appliance.
How Much Propane Does an RV Grill Use?
A portable grill commonly consumes approximately 0.5-1.5 pounds of propane per hour at high output, depending on burner BTU rating, wind, ambient temperature, and cooking habits. A 20-pound cylinder therefore provides a typical 11-35 hours of high-fire cooking, although real-world use is often longer because burners cycle and are not continuously set to maximum.
| Grill rating | Approximate maximum propane use | Approximate 20-pound cylinder runtime |
|---|---|---|
| 8,000 BTU/hour | 0.37 lb/hour | 54 hours |
| 12,000 BTU/hour | 0.56 lb/hour | 36 hours |
| 20,000 BTU/hour | 0.93 lb/hour | 21 hours |
| 30,000 BTU/hour | 1.40 lb/hour | 14 hours |
These figures use the commonly applied estimate that propane supplies about 21,500 BTU per pound. The RV’s furnace, water heater, refrigerator, and interior cooktop may consume fuel from the same onboard tanks, so a grill can shorten the interval between RV refills even when its individual consumption seems modest.
A low flame is not proof that the grill is using less propane efficiently. It may indicate double regulation, a tripped excess-flow device, a blocked burner, a damaged hose, or a failing regulator.
Why Is the Grill Flame Too Low?
A low grill flame usually results from double regulation, an excess-flow device restricting the hose, an empty cylinder, an incorrect conversion, or a regulator problem. Reset the fuel system before changing fittings, and stop immediately if the flame is yellow, unstable, or accompanied by an odor.
Use this diagnostic sequence:
- Turn every grill control off.
- Close the RV valve or cylinder valve.
- Wait at least 60 seconds.
- Confirm that the hose and fittings match the intended pressure.
- Open the fuel source slowly.
- Light the grill according to its manual.
- Check whether the flame becomes stable and predominantly blue.
If a stock grill regulator remains connected to an RV low-pressure outlet, disconnect the setup. A reset cannot correct a pressure mismatch. If the grill is correctly converted but still weak, check the burner ports, insect screens, hose kinks, quick-connect valve, and RV regulator output.
Cold weather can also reduce vapor production from a nearly empty cylinder. A tank that feels heavy but delivers little gas may have a restricted valve or a regulator issue. Do not heat a cylinder with a torch, heater, hot water, or vehicle exhaust.
What Should You Do If You Smell Propane?
If you smell propane, hear hissing, or see bubbles during a leak test, stop the connection procedure, extinguish flames, avoid electrical switches, move people away, and close the propane supply from a safe location. Do not relight the grill until the leak has been repaired and the system has been retested.
Propane odor is commonly described as rotten eggs because odorant is added to otherwise odorless fuel. The U.S. Consumer Product Safety Commission advises leaving the area and contacting the propane supplier or emergency services when a leak is suspected; that response is safer than trying to locate a leak while gas accumulates.
A soap solution can help locate a minor connection leak only after the area is safe and the supply is controlled. Never use a match or lighter for leak detection. Replace hoses with cracked covers, melted sections, exposed reinforcement, damaged crimps, or connectors that fail to lock.
Which Connection Mistakes Cause the Most Problems?
The most damaging mistakes involve pressure mismatch, incorrect sealing, poor hose routing, and unverified fittings. Correcting those errors requires replacing the unsuitable component, not merely tightening the connection.
| Mistake | Result | Correct response |
|---|---|---|
| Stock regulator on low-pressure port | Tiny flame or no ignition | Use the specified low-pressure conversion |
| White plumbing tape on gas threads | Possible seal failure or material contamination | Use approved gas sealant on applicable threads |
| Tape on flare or O-ring fitting | Poor seating and leakage | Clean the sealing surface and assemble dry |
| Valve opened abruptly | Excess-flow restriction | Close valves, wait 60 seconds, reopen slowly |
| Hose through sharp door edge | Abrasion and eventual leak | Reroute through protected clearance |
| High-pressure hose on low-pressure circuit | Incorrect appliance input | Replace with pressure-rated hose |
| Unsecured external cylinder | Tipping or valve damage | Strap cylinder upright on stable ground |
| Improvised tee or adapter | Uncontrolled gas path | Use a listed, model-compatible assembly |
Expert Insight: Connector Fit Does Not Prove Pressure Fit
A male quick-connect can physically enter a female socket while the appliance still receives the wrong pressure. Experienced RV technicians verify the regulator location and appliance specification before choosing an adapter, because connector geometry identifies mechanical fit, not safe gas operation.
Expert Insight: Low Pressure Is Safer, Not Automatically Better
An RV low-pressure outlet reduces the energy in the exposed hose, but it cannot compensate for an incorrectly converted grill. The conversion must retain an appropriate control valve and burner input. Removing a regulator without a listed replacement can create an unsafe appliance.
Expert Insight: More Hose Length Adds Purge Time
A long hose contains more air before first ignition. That may delay lighting, but repeated attempts can release unburned propane. Turn the gas off after a failed attempt, wait for dissipation, and follow the grill manufacturer’s relighting interval instead of holding the valve open continuously.
Can You Connect Any Propane Grill to an RV?
You cannot safely connect every propane grill to every RV outlet. A compatible setup requires agreement among the grill’s inlet pressure, regulator arrangement, BTU demand, fitting type, hose rating, and the RV outlet’s actual fuel source.
A simple single-burner grill with a published low-pressure conversion is usually easier to adapt than a multi-burner grill with an integrated manifold, electronic controls, or proprietary regulator. Blackstone griddles, Weber Q models, Coleman appliances, and Camp Chef products can use different valves and conversion parts even when their fuel sources appear similar.
Do not use a low-pressure RV outlet for an appliance that requires high-pressure input unless the manufacturer specifically lists that configuration. Do not use a tank-side tee for a grill that has already been converted to low pressure.
What Changes for Motorhomes, Travel Trailers, and Fifth Wheels?
The connection principle is the same across RV types, but the physical layout and regulator arrangement differ. Motorhomes often route accessory ports through chassis compartments, while travel trailers and fifth wheels commonly place the regulator near front-mounted cylinders or dual-cylinder changeover assemblies.
| RV type | Common propane layout | Connection concern |
|---|---|---|
| Class A motorhome | Enclosed ASME tank with regulator | Accessory port may be far from tank |
| Class B or C motorhome | Cylinder or ASME tank with branch plumbing | Hose must avoid chassis heat and movement |
| Travel trailer | 20- or 30-pound cylinders with regulator | Dual-cylinder changeover complicates tee placement |
| Fifth wheel | Front cylinder compartment and long frame | Protect hose from landing gear and pin box |
| Pop-up trailer | Small cylinders or compact regulator | Limited accessory-port availability |
Before travel, disconnect external hoses unless the manufacturer and campsite rules allow them to remain attached. Secure cylinders, close valves, cap unused connections, and inspect the hose after driving because vibration can damage fittings.
When Should a Propane Technician Install the Connection?
Use a qualified propane technician when the work involves a tank-side tee, regulator replacement, hard piping, a hidden leak, an older RV, dual-cylinder changeover equipment, or uncertainty about pressure. A professional should also inspect any setup that repeatedly trips excess-flow protection or produces abnormal flame color.
A homeowner can usually connect a listed external-cylinder hose by following the grill manual and performing a leak test. Low-pressure grill conversions remain model-specific, so professional help is appropriate when instructions do not clearly identify the correct valve and pressure.
Local rules vary by jurisdiction. NFPA 58 covers LP-gas storage and handling, NFPA 1192 addresses recreational-vehicle systems, and the RV manufacturer’s manual controls the particular vehicle installation. Those standards do not make an improvised fitting acceptable.
How Do You Disconnect and Store the System?
Turn off the grill controls and propane source, allow the line to depressurize, disconnect the hose outdoors, and cap or cover the unused RV quick-connect. Store the hose clean, dry, loosely coiled, and away from sunlight, oil, chemicals, and sharp objects.
Store refillable cylinders upright with the valve protected and the cylinder secured. Never leave a cylinder in a hot enclosed vehicle. Inspect the hose before every trip and replace it according to the manufacturer’s service interval or immediately after visible damage.
The safest shutdown is source-first for a suspected leak and appliance-first during ordinary use. If gas odor occurs, prioritize evacuation and emergency response over preserving equipment.
FAQ
Can I leave the RV quick-connect hose attached while traveling?
No, unless the RV and hose manufacturer explicitly approve that arrangement and local rules permit it. Disconnect the hose, close the accessory valve, cap the connection, and secure the loose hose before moving the RV. Road vibration can pull on the quick-connect and expose fittings to abrasion.
Do I need a regulator between the RV and grill?
A low-pressure RV outlet normally already supplies regulated gas, so a second grill regulator is usually incompatible. The grill still needs the manufacturer-specified control valve and conversion hardware. An external cylinder normally requires the grill’s original regulator unless the grill manual specifies another arrangement.
Can I use a 20-pound tank hose with a Weber Q or Blackstone griddle?
Only if the hose end matches the appliance inlet and the original regulator remains in the fuel path. A hose designed for a low-pressure RV quick-connect is different from a hose that connects a 20-pound cylinder to a stock regulator. Verify the exact model and manual before ordering.
Why does the RV furnace work but the grill does not?
The furnace can work while the grill fails because the grill may have double regulation, a blocked burner, a kinked accessory hose, or an unsuitable conversion. The furnace’s normal operation proves only that some propane reaches the RV appliances; it does not prove that the exterior outlet or grill receives correct pressure.
Is a 5-pound propane tank enough for camping?
A 5-pound refillable cylinder contains approximately 4 pounds of propane and may provide about 3-8 hours for a grill rated from 12,000 to 30,000 BTU per hour at maximum output. Actual cooking time is often longer because meals rarely use maximum burner output continuously.
Can I connect the grill to the RV propane line with a T-fitting?
Do not add an improvised T-fitting to the RV propane line. A listed tank-side tee or manufacturer-approved accessory port must match the system pressure, valve, hose, and appliance requirements. Hidden or hard-piped modifications should be completed and tested by a qualified propane technician.
The Bottom Line
To answer “how do I connect my propane grill to my RV,” use the RV’s low-pressure quick-connect only with a model-specific low-pressure conversion that removes or bypasses the grill’s original regulator. If you want no grill modification, use a separate secured propane cylinder. Reserve tank-side tee systems for compatible high-pressure appliances and professional installation, then leak-test every connection before lighting.