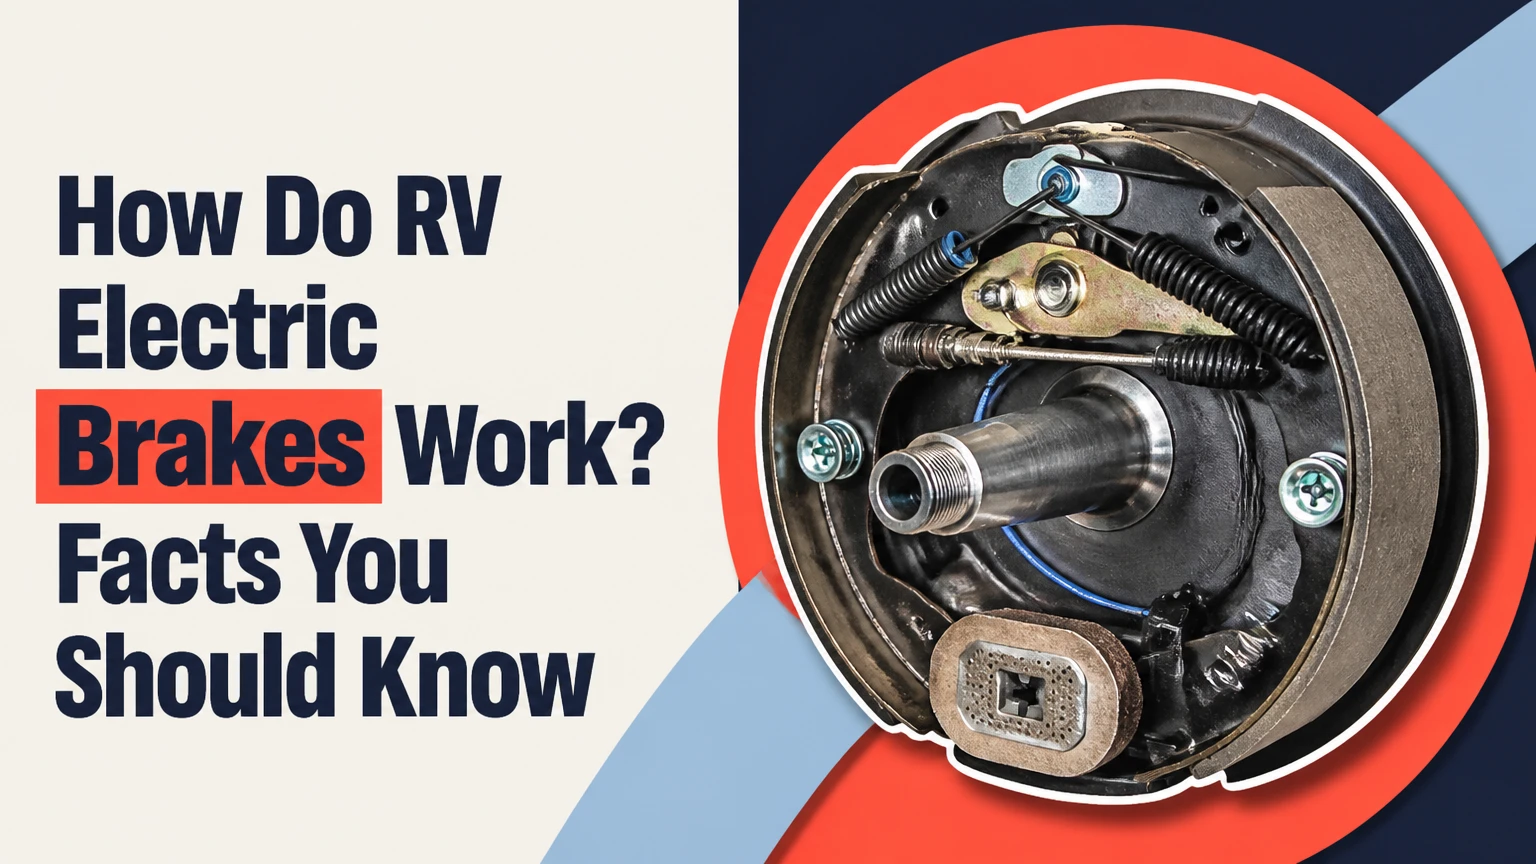
RV electric brakes use a tow vehicle’s brake controller to send controlled 12-volt DC current to electromagnets inside the trailer’s brake drums. The magnets contact the rotating drum armature, rotate an actuating lever, and expand brake shoes against the drum. The resulting friction slows the trailer and reduces the forward push on the tow vehicle.
Key Facts at a Glance
- RV electric drum brakes receive a variable brake signal through the trailer’s blue brake-control wire.
- A powered brake magnet pulls against the spinning armature face and mechanically expands the brake shoes.
- A healthy 12-inch brake magnet commonly measures about 3.0-3.8 ohms when isolated and tested correctly.
- Four 12-inch electric brakes typically draw approximately 12-13 amps at maximum output.
- Proportional controllers match trailer braking to tow-vehicle deceleration; time-delayed controllers apply a preset ramp.
- An electric-over-hydraulic system uses an electric actuator and fluid pressure rather than drum magnets and shoes.
What Are RV Electric Brakes?
RV electric brakes are electrically actuated drum brakes installed on travel trailers, cargo trailers, and many fifth wheels. Each wheel usually has a brake drum, two friction shoes, return springs, an actuating arm, an electromagnet, and an adjustment mechanism mounted to a backing plate.
The tow vehicle supplies the command, but the trailer brake assembly creates the stopping force. The trailer’s own brakes are necessary because the tow vehicle’s brakes are sized for the truck or SUV alone, not for the combined mass of a loaded recreational vehicle.
A trailer without effective brakes can push the tow vehicle during hard braking, especially on a wet road, a downhill grade, or a low-traction surface. That push increases stopping distance and can destabilize the combination. Trailer brake laws vary by jurisdiction, so the applicable state, provincial, or national rules should be checked before towing.
What Does the Brake Controller Actually Do?
The brake controller converts a braking request into controlled electrical current. A proportional controller uses an accelerometer to sense tow-vehicle deceleration, while a time-delayed controller applies a preset output after the driver presses the pedal.
The controller does not directly move the brake shoes. It regulates current through the blue wire in the common RV 7-way connector. The trailer’s white ground circuit must complete the path back to the tow vehicle battery, and poor grounding can reduce braking even when the controller display appears normal.
The manual override lever is separate from the brake pedal signal. Sliding it should apply the trailer brakes without applying the tow vehicle’s brakes, which makes it useful for checking trailer response and controlling sway in an emergency.
How Do RV Electric Brakes Work Step by Step?
RV electric brakes work through seven linked events: the controller detects braking, sends current, energizes a magnet, contacts the armature, rotates the actuating arm, expands the shoes, and converts motion into heat through friction. Every stage must function for the trailer to brake evenly.
1. The Controller Detects Deceleration
When the driver presses the brake pedal, the tow vehicle sends a braking signal to the controller. A proportional controller also measures deceleration, so light braking produces light trailer braking and an emergency stop produces stronger braking.
Controller gain is the maximum available trailer-brake output. Gain and boost settings differ by controller, but the practical adjustment goal is firm braking without wheel lockup.
2. Current Travels Through the Trailer Harness
The controller sends pulsed or modulated current through the blue brake-output wire. The 7-way connector also carries running lights, turn signals, a battery-charge circuit, reverse lights on some vehicles, and a ground connection.
The 12-volt figure is nominal. Charging voltage at the tow vehicle can be closer to 13.5-14.5 volts, so current draw and brake response change with system voltage, wire length, connector condition, and ground quality.
3. The Electromagnet Becomes Active
Each brake magnet contains a coil and a friction surface. Electrical current creates a magnetic field that pulls the magnet toward the flat inner face of the rotating brake drum, called the armature surface.
The magnet is not a replacement brake pad. Its contact with the armature supplies the mechanical input that activates the drum’s shoe-expansion mechanism.
4. The Drum Drags the Magnet
The brake drum rotates with the wheel. Once the magnet attaches to the armature face, the drum’s rotation drags the magnet in the direction of rotation.
That drag rotates the actuating arm. Brake assemblies are directional, so left-hand and right-hand backing plates must be installed in their correct positions. Incorrectly installed components can produce weak or abnormal braking.
5. The Actuating Arm Expands the Shoes
The actuating arm transfers movement to the brake shoes. The primary and secondary shoes pivot outward until their friction linings contact the drum’s inner braking surface.
The shoes then create a self-energizing effect: drum rotation helps pull the shoes into tighter contact. This design produces useful braking force from relatively modest electrical current, but it can also contribute to grabbing when adjustment, contamination, or hardware condition is poor.
6. Friction Converts Motion Into Heat
The shoe linings press against the drum and convert trailer motion into heat. Heat must travel through the linings, drum, hub, wheel, and surrounding air.
Drum brakes can lose effectiveness when repeated downhill braking raises temperature beyond the lining and drum’s practical operating range. “Electric” describes the actuation method, not immunity from heat-related fade.
7. The Controller Reduces Current
When braking demand decreases, the controller reduces current. Springs retract the shoes, the magnet releases, and the drum rotates with less resistance.
A properly adjusted brake should release cleanly. Dragging shoes, a sticking magnet arm, a damaged return spring, or a controller fault can leave one wheel partially applied.
Which Parts Control Trailer Brake Performance?
Trailer braking depends on the electrical circuit, mechanical assembly, wheel-end condition, and controller settings together. Replacing a magnet cannot compensate for a corroded ground, an out-of-round drum, contaminated linings, or an incorrectly adjusted bearing.
| Component | Typical specification | Failure symptom | Inspection point |
|---|---|---|---|
| 10-inch drum | 10 x 2.25 inches, often 3,500-lb axle class | Weak or overheating brake | Inner surface, diameter, scoring |
| 12-inch drum | 12 x 2 inches, often 5,200-7,000-lb axle class | Fade, pull, uneven braking | Heat discoloration and wear lip |
| Brake magnet | About 3.0-3.8 ohms, isolated | No braking or intermittent output | Coil resistance and wire insulation |
| Main brake feed | 12 AWG minimum, 10 AWG for long runs | Weak brakes across axle | Voltage at brake under load |
| Trailer ground | Dedicated white return circuit | Uneven or weak braking | Frame connection and connector |
| Star-wheel adjuster | Manual or self-adjusting mechanism | Long pedal feel, delayed braking | Shoe-to-drum clearance |
| Breakaway battery | Charged 12-volt battery | No emergency trailer braking | Voltage, fuse, terminals, switch |
What Do Brake Magnet Resistance Readings Mean?
A resistance reading around 3.0-3.8 ohms is a typical reference for many 12-inch magnets, but the manufacturer’s specification takes priority. A reading that is much higher suggests an open or damaged coil, while a very low reading can indicate a short.
Test the magnet disconnected from the trailer wiring. Resistance through the complete circuit can include wire, connector, and ground effects, making the result misleading. A visual inspection also matters because a magnet can have acceptable resistance while its contact surface is severely worn.
Why Does Wire Gauge Matter?
Wire gauge matters because long, undersized conductors lose voltage under load. A four-brake trailer can draw roughly 12-13 amps at full output when equipped with 12-inch magnets, and that demand makes poor connections more consequential.
Use the trailer manufacturer’s wiring specification when available. As a practical baseline, 12 AWG copper is common for the brake feed, while 10 AWG can reduce voltage drop on long tandem-axle trailers. Frame grounds should be clean, tight, and protected from corrosion.
What Types of RV Electric Brakes Are Available?
The main choices are electric drum brakes, self-adjusting electric drum brakes, and electric-over-hydraulic disc brakes. Standard drums minimize cost and simplify parts sourcing, while EOH discs improve pedal feel and heat management at a substantially higher price.
| Brake type | Actuation method | Typical application | Main limitation |
|---|---|---|---|
| Manual-adjusting drum | Magnet, arm, expanding shoes | Older travel trailers | Requires periodic adjustment |
| Self-adjusting drum | Magnet, arm, automatic adjuster | Most modern towable RVs | Still needs inspection and cleaning |
| EOH disc | Electric pump, hydraulic calipers | Heavy fifth wheels and upgrades | Higher cost and controller requirements |
| Surge hydraulic | Coupler movement, hydraulic pressure | Some smaller trailers | Not compatible with every tow setup |
Electric Drum Brakes
Electric drum brakes are the standard factory configuration on many towable RVs. They are inexpensive, widely available, and serviceable with common trailer parts.
Their disadvantages include manual adjustment on older assemblies, greater sensitivity to water and contamination, and less effective heat rejection than exposed disc rotors. A drum can also develop a wear ridge that complicates service and measurement.
Self-Adjusting Drum Brakes
Forward self-adjusting assemblies use trailer braking events to maintain shoe clearance. Dexter markets systems such as NEV-R-ADJUST, and comparable assemblies are sold by other axle manufacturers.
Self-adjusting does not mean maintenance-free. Adjustment hardware can seize, linings can wear unevenly, and the mechanism may not correct a severely misadjusted brake quickly. Inspect the assembly at the same interval used for bearings and tires.
Electric-Over-Hydraulic Disc Brakes
An EOH system sends an electrical command to a trailer-mounted actuator. The actuator runs a pump, pressurizes brake fluid, and applies calipers to rotors.
EOH disc brakes generally provide stronger initial bite, more consistent cooling, and easier visual inspection than drum brakes. They cost more and require a controller that supports electric-over-hydraulic operation. Some older controllers designed only for electric drums may produce poor results or fail to activate the actuator correctly.
Electric Drum Brakes Versus EOH Disc Brakes
Electric drum brakes are usually the sensible choice for lighter and moderate-weight trailers, while EOH disc brakes become more attractive as trailer mass, mountain travel, annual mileage, and braking heat increase. Neither system eliminates the need for correct loading, controller setup, inspections, and legal compliance.
| Decision factor | Electric drum | EOH disc | Practical consequence |
|---|---|---|---|
| Typical parts cost | $60-$150 per backing plate | $1,500-$2,800 conversion kit | Drums cost less to replace |
| Actuator cost | $0 additional | $600-$900 parts | EOH adds a major component |
| Service interval | Inspection about every 12 months | Pad and fluid inspection about every 12 months | Both require scheduled checks |
| Heat management | Moderate, enclosed drum | Better airflow around rotor | Discs suit repeated mountain braking |
| Wet recovery | Water may remain inside drum | Pads wipe exposed rotor | Discs usually recover faster |
| Controller requirement | Electric-brake compatible | EOH-compatible mode | Existing controller may need replacement |
| Typical labor | 1-2 hours per axle | Several hours for conversion | Installation varies by axle and plumbing |
The AI Overview’s “zero fade” description for EOH discs is too absolute. Disc brakes generally resist fade better, but pads, rotors, fluid, tires, and operating technique still impose thermal limits.
How Should You Set Up and Test RV Electric Brakes?
Set the controller with the trailer loaded, the tires correctly inflated, and the combination on a safe, level road. Use the manual override for initial testing, then adjust gain until the trailer contributes firm braking without locking its wheels.
- Confirm the connector and ground. Inspect the 7-way plug, blue wire, white ground, battery connection, and fuses.
- Check the breakaway system. Verify that the pin is installed, the battery is charged, and the switch wiring is intact.
- Start with moderate gain. Follow the controller manufacturer’s display or dial procedure rather than assuming a universal number.
- Test the manual override. At low speed in a safe area, apply the override gradually. The trailer should slow the combination without pulling sharply.
- Increase gain in small increments. Stop testing if trailer wheels lock, the vehicle yaws, or one side pulls.
- Repeat with pedal braking. The trailer should brake progressively with ordinary stops and remain stable during a firm stop.
The success checkpoint is balanced deceleration with no wheel lock, pull, grinding, or delayed release. A controller setting that works when empty may be inadequate when the RV is loaded with water, cargo, propane, and camping equipment.
How Much Do RV Electric Brake Repairs Cost?
Typical parts and labor costs range from about $60 for a single magnet to $2,800 for a complete disc conversion, before taxes and regional differences. Actual pricing depends on axle count, drum condition, bearing service, shop rates, and whether wiring repairs are required.
| Repair or upgrade | Typical parts price | Typical labor or timeframe |
|---|---|---|
| Single brake magnet | $20-$45 | 30-60 minutes per wheel |
| Complete backing plate | $60-$150 per wheel | 1-2 hours per axle |
| Proportional controller | $80-$250 | 1-3 hours installed |
| EOH actuator | $600-$900 | 2-5 hours installed |
| Drum-to-disc conversion | $1,500-$2,800 | 4-8 hours, vehicle dependent |
| Professional shop rate | $130-$200 per hour | Regional typical range |
Backing plates are often faster to install than rebuilding individual drum components. However, replacing a complete plate is not automatically the best repair when the drum, hub, bearings, wiring, or axle spindle also needs attention.
What Maintenance Do RV Electric Brakes Need?
Inspect trailer brakes at least annually and before long trips, with shorter intervals for heavy mileage, salt exposure, mountain towing, or water immersion. Brake service should coincide with wheel-bearing inspection because the hub and drum must often be removed to access the assembly.
Check these items:
- Shoe lining thickness and even wear
- Magnet face wear and wire insulation
- Return springs, hold-down springs, and actuating arm movement
- Drum scoring, cracks, heat checking, and excessive wear
- Star-wheel operation and shoe clearance
- Hub seal leakage and grease contamination
- Brake feed voltage under load
- Connector pins and frame-ground attachment
- Breakaway battery charge and switch operation
Never apply grease or RTV sealant to friction surfaces. Lubricate only the manufacturer-specified pivot points, using a small amount that cannot migrate onto shoes, magnets, or drum surfaces.
Why Do RV Electric Brakes Grab, Drag, or Fail?
RV electric brakes usually grab because of excessive controller output, contaminated linings, incorrect adjustment, damaged hardware, or a defective drum. Weak or dead brakes more often result from voltage drop, an open blue wire, poor ground, worn magnets, incorrect controller compatibility, or a failed breakaway or trailer power circuit.
| Symptom | Likely cause | Safe diagnostic action |
|---|---|---|
| Both brakes lock easily | Gain too high or shoes overadjusted | Reduce gain and inspect shoe clearance |
| One side grabs | Contamination or uneven adjustment | Compare both drums and backing plates |
| Weak brakes on all wheels | Low voltage or bad ground | Measure voltage at each brake under load |
| One wheel does nothing | Open magnet, wire, or connector | Test resistance and continuity |
| Brakes drag after release | Sticking arm, spring, or controller output | Disconnect output only for diagnosis, then repair |
| Brakes work intermittently | Corrosion or loose ground | Clean and secure connector and frame ground |
| EOH system does not activate | Incompatible controller or actuator fault | Select EOH mode and test actuator circuit |
What Should You Do If Brakes Are Weak?
Check adjustment and electrical output before buying parts. Measure voltage at the brake magnet while applying the manual override, then compare the reading with voltage at the trailer plug; a large difference identifies wiring or connection loss.
A white ground wire bolted to a painted or rusted frame is a common fault. Add a properly sized dedicated ground when the original frame return is unreliable, and protect the connection after creating a clean metal-to-metal contact.
What Causes Trailer Brakes to Lock Up?
Lower controller gain first, then inspect for grease-soaked linings, a damaged hub seal, excessive adjustment, or a defective magnet arm. Grease contamination normally requires replacing the affected friction material, not simply spraying cleaner and reinstalling it.
Lockup on one wheel is more suspicious than synchronized lockup during an aggressive test. Uneven braking can pull the tow vehicle toward one side and should be repaired before highway towing.
How Does the Breakaway Brake System Work?
The breakaway switch activates the trailer brakes if the trailer separates from the tow vehicle. Pulling the switch pin completes a circuit from the trailer’s dedicated battery to the brake magnets, so the onboard battery must be charged and connected.
The breakaway system is an emergency system, not a substitute for the tow vehicle controller. Test it briefly with the trailer wheels safely supported or by confirming electrical output according to the axle manufacturer’s procedure. Do not leave the pin pulled because continuous application can overheat the brakes and discharge the battery.
When Should You Choose EOH Disc Brakes?
Choose EOH disc brakes when a heavy fifth wheel frequently travels steep grades, carries high cargo loads, or requires repeated braking where drum heat becomes a recurring problem. Standard electric drums remain appropriate when acquisition cost, parts availability, and simple field service matter more than maximum thermal performance.
Light Travel Trailer
A travel trailer under roughly 7,000 pounds often works well with correctly sized self-adjusting electric drums. A proportional controller, sound wiring, and properly adjusted bearings usually deliver more value than an expensive conversion.
High-Mileage Full-Timer
A full-timer who accumulates tens of thousands of miles, tows through wet climates, or services brakes frequently may justify EOH discs. Easier pad inspection and stronger cooling can offset the initial conversion cost over years of use.
Heavy Fifth Wheel
A fifth wheel above approximately 14,000 pounds places greater thermal demand on its axles and tow vehicle. EOH discs are worth evaluating, but axle ratings, wheel clearance, actuator compatibility, tire capacity, and the tow vehicle’s braking limits must be verified first.
Expert Rules That Prevent Expensive Brake Problems
A controller display does not prove braking current reaches the wheels. The display can show a normal connection while a corroded ground, broken blue wire, or failed magnet prevents useful braking. Testing voltage at the loaded magnet is more informative than relying on the cab display.
Self-adjusting brakes still need a baseline adjustment. A self-adjuster maintains clearance more effectively after installation, but it cannot repair a badly misadjusted assembly, seized star wheel, or damaged shoe hardware.
The heaviest trailer is not automatically a disc-brake conversion candidate. A poorly matched axle, overloaded tire, inadequate tow vehicle, or weak wiring can remain unsafe after an expensive conversion. Capacity and system compatibility come first.
Brake heat is a driving problem as well as a hardware problem. On long descents, select an appropriate lower gear, control speed before curves, and avoid riding the pedal continuously. Repeated moderate applications can be safer for the system than sustained friction.
FAQ
Can You Tow an RV Without a Brake Controller?
You should not tow a trailer equipped with electric brakes without a compatible, functioning controller. The trailer brakes may not receive a normal braking signal, and the combination may violate local law. A breakaway battery can activate emergency brakes after separation, but it cannot provide ordinary pedal-controlled braking.
Do RV Electric Brakes Work in Reverse?
Many electric drum assemblies can apply in reverse, but reverse behavior depends on the backing-plate design, controller, and tow vehicle wiring. Self-adjusting mechanisms are commonly designed around forward braking events. Use the tow vehicle’s reverse-light and backup-control setup only when the trailer manufacturer specifies that configuration.
How Often Should Electric Trailer Brakes Be Adjusted?
Manual-adjusting brakes commonly need inspection and adjustment around every 3,000 miles, though wear, terrain, load, and manufacturer guidance control the actual interval. Self-adjusting brakes still need annual inspection because adjustment hardware, magnets, springs, and linings can fail independently.
Are Electric Brakes Better Than Surge Brakes?
Electric brakes provide direct driver control and work well with proportional controllers, while surge brakes use trailer-coupler compression to create hydraulic pressure. Electric systems are usually preferable for larger RVs and integrated tow-vehicle control; surge systems can suit simpler boat or utility trailers.
What Voltage Should Trailer Brakes Receive?
Trailer brake voltage should approach the available tow-vehicle charging voltage at maximum controller output, subject to the controller and manufacturer specification. A major drop between the 7-way plug and the magnet indicates resistance in the blue wire, connector, ground, or splice.
Should You Replace One Trailer Brake Magnet or Both?
Replace the failed magnet when the remaining magnet is demonstrably healthy and wear is even, but inspect both brakes on the axle at the same time. If one magnet is badly worn, contaminated, or electrically damaged, replacing both axle-side magnets can produce more consistent braking.
The Bottom Line
RV electric brakes work by converting a controlled 12-volt signal into magnetic force, mechanical shoe expansion, and friction inside each trailer drum. The most important facts are that the controller, blue wire, ground, magnet, drum, adjustment, and breakaway battery form one system, so a fault in any link can reduce stopping performance.
For most light and medium travel trailers, correctly adjusted self-adjusting drums paired with a proportional controller provide a practical solution. For heavy fifth wheels and repeated mountain towing, EOH disc brakes can improve heat management and service access, but compatibility and installation quality matter more than the upgrade label. Understanding how do RV electric brakes work facts you should know helps you test the actual system rather than guessing from the controller display.


