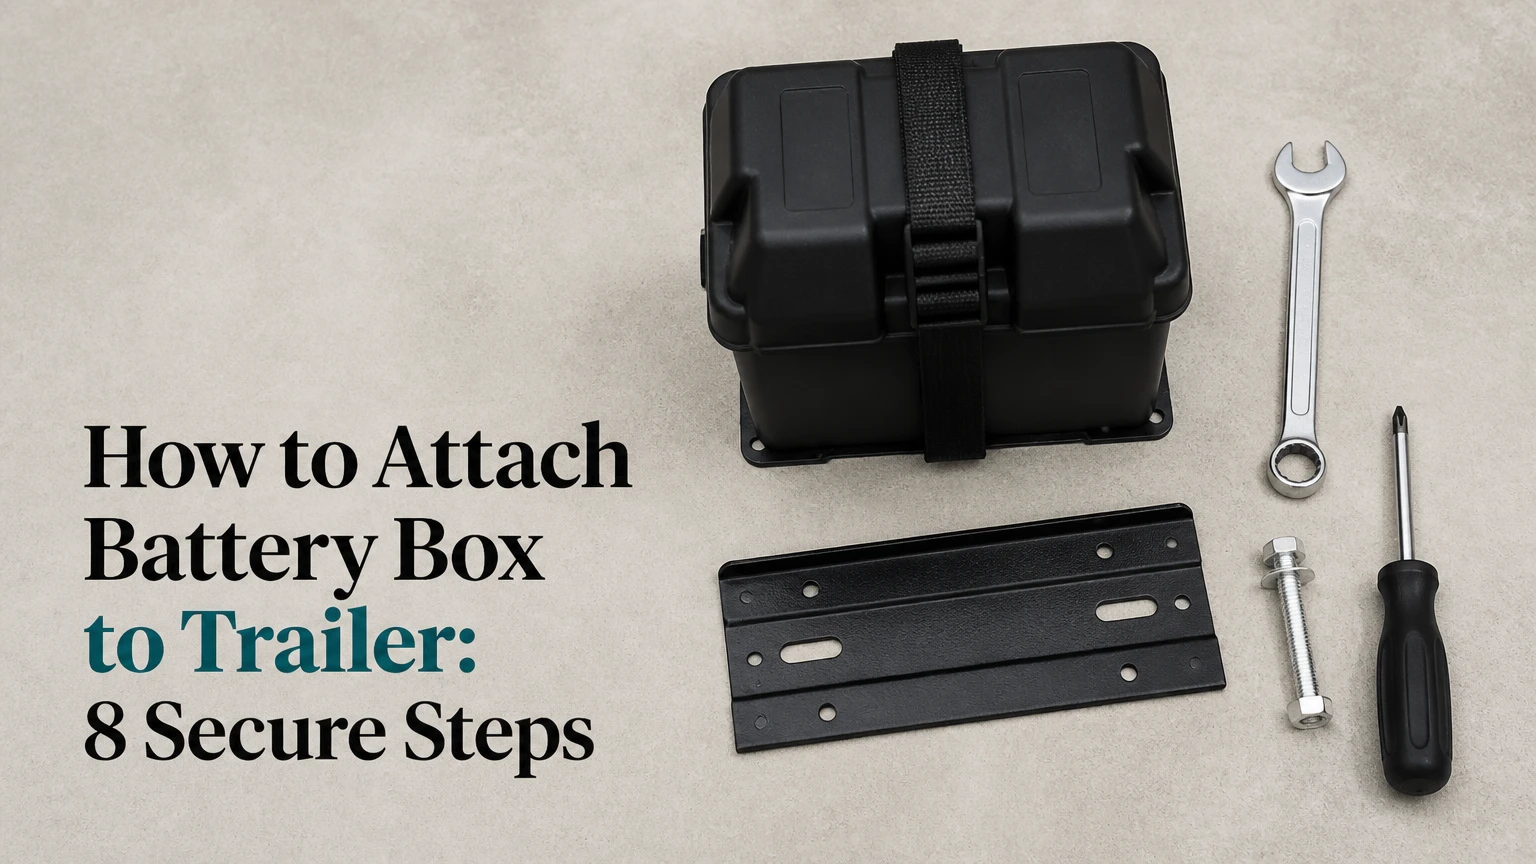
To attach a battery box to a trailer, position the empty box on a suitable frame member, drill through-bolt holes, protect the bare steel, and fasten the box with correctly sized bolts, large washers, and lock nuts. Secure the battery inside its box, route fused cables through protected grommets, and verify clearance, ventilation, polarity, and tongue weight before towing.
Key facts at a glance
A through-bolted battery box is more reliable than one held by self-tapping screws.
Typical installation takes 1-2 hours and costs about $35-$250 in materials, excluding a new battery.
A Group 24, Group 27, or Group 31 box must match the battery’s length, width, height, terminal position, and hold-down system.
Battery-box bolts should pass through a sound structural member or approved mounting bracket, not an unsupported thin panel.
A fuse belongs close to the positive battery terminal, while a breakaway battery circuit must remain wired according to the trailer-brake system instructions.
Flooded lead-acid batteries need ventilation and spill protection; LiFePO4 batteries need compatible charging equipment and temperature limits.
Before You Start
The installation usually requires 1-2 hours, moderate mechanical skill, and approximately $35-$250 in hardware and mounting materials. The most important success factor is choosing a frame location that supports the load without interfering with the trailer jack, safety chains, coupler, brakes, suspension, wiring, or turning clearance.
Disconnect shore power, the tow vehicle, solar charging, and any auxiliary charger before working. Remove the battery from the area while drilling, and cover nearby wiring so metal chips cannot create a short circuit.
Tools and materials checklist
| Item | Typical specification or quantity | Purpose |
|---|---|---|
| Electric drill | 12-18 V cordless model | Drilling trailer steel |
| Drill bits | 1/8-inch pilot, then 5/16- or 3/8-inch final | Creating controlled mounting holes |
| Through-bolts | Four 5/16- or 3/8-inch bolts, Grade 5 or Grade 8 | Mechanical attachment |
| Washers and nuts | Eight large flat washers, four nylon-lock nuts | Spreading load and resisting loosening |
| Rust protection | Zinc-rich primer or chassis paint | Sealing drilled steel |
| Cable protection | Rubber grommets, split loom, or abrasion sleeve | Preventing cable damage |
| Electrical protection | Fuse or breaker sized to the cable and circuit | Limiting short-circuit energy |
| Safety equipment | Eye protection, gloves, insulated tools | Protecting hands and eyes |
Use stainless or zinc-plated hardware appropriate for the trailer environment. Stainless fasteners resist corrosion but can gall during tightening and may not provide the same strength designation as a properly selected high-strength steel bolt.
Choose the box before drilling
Measure the battery, rather than relying only on its group number. Group 24, Group 27, and Group 31 describe common battery envelope sizes, but manufacturers vary in terminal location, case height, handle shape, and required clearance.
Allow enough room for the battery hold-down, cable bend radius, lid removal, and terminal covers. A box that technically fits the case may fail in practice if the lid presses on a terminal or the cable exits at a sharp angle.
Where Should the Box Go?
The best location is a rigid, accessible trailer structure that keeps the battery protected, maintains safe wiring lengths, and preserves the trailer’s handling characteristics. The A-frame tongue is usually convenient for short cable runs, while a frame rail or enclosed toolbox can improve protection and free space around the coupler.
Place the empty box in each candidate position before marking anything. Turn the trailer jack through its full operating range, check the breakaway cable and safety-chain paths, and confirm that the tow vehicle can make the tightest expected turn without contacting the box.
Compare mounting locations
| Location | Typical advantages | Main clearance risk | Suitable use |
|---|---|---|---|
| A-frame tongue | Cable runs of 1-4 feet, easy inspection, uses open space | Jack handle, coupler, chains, tight turns | RV, boat, small utility trailer |
| Side frame rail | Lower visual profile, tongue remains open, protected by rail | Side impact, difficult underside access | Utility or equipment trailers |
| Enclosed tongue box | Lockable, weather-resistant, improved theft resistance | Heat buildup, ventilation, limited lid access | RV and overland trailers |
| Existing toolbox | No separate enclosure, convenient electrical center | Toolbox may lack battery restraint or venting | Service trailers with suitable compartments |
| Rear frame area | Separates battery from coupler, sometimes balanced | Long cables, rear impact, poor weight distribution | Long utility trailers with engineered brackets |
A tongue-mounted battery changes tongue weight. The approximate added tongue load equals the battery, box, bracket, and hardware weight multiplied by their distance from the axle relative to the coupler-to-axle distance. Keep the assembly close to the existing tongue structure, and verify the trailer’s rated tongue weight after installation.
Which structure can be drilled?
Drill through a substantial vertical web, boxed frame wall, or manufacturer-provided mounting tab. Do not drill through the top or bottom flange of an I-beam unless the trailer manufacturer or a qualified fabricator approves the location, because flange holes can reduce bending strength.
Avoid brake lines, fuel containers, wiring bundles, suspension mounts, and galvanized surfaces that may release hazardous fumes when heated. If the frame is too thin to support a bolt head and washer, install an engineered backing plate or a fabricated bracket instead of simply using a larger washer.
What Battery Box Should You Choose?
A polypropylene or ABS box is usually the practical choice for a conventional RV or boat battery, while a lockable aluminum or steel enclosure suits theft-prone, off-road, or commercial trailers. The box must provide a positive battery hold-down, cable exits with abrasion protection, and ventilation appropriate to the battery chemistry.
A plastic battery box is not automatically safe because it is acid-resistant. The box still needs a rigid trailer attachment, a restrained battery, an intact lid, and a vent path when required by the battery manufacturer.
| Box type | Typical material and size | Typical US price | Strengths | Limitations |
|---|---|---|---|---|
| Heavy-duty plastic | Polypropylene or ABS, 3-5 mm wall, Group 24-31 | $25-$70 | Light, acid-resistant, rust-proof | Lower theft resistance, UV aging |
| Aluminum diamond plate | 1/8-inch, lockable lid, weather seal | $120-$300 | Strong, lockable, corrosion-resistant | Conductive shell, higher cost |
| Powder-coated steel | 14-16 gauge, lockable enclosure | $100-$250 | High impact and theft resistance | Heavy, coating damage can rust |
| Fabricated tongue box | Aluminum or steel, custom dimensions | $200-$600 | Exact fit, integrated cable routes | Fabrication cost, heat and vent design |
| Existing toolbox compartment | Steel or aluminum compartment | $0-$150 adaptation cost | Uses existing structure | May lack vents, restraints, or drainage |
For flooded batteries, retain the manufacturer’s vent openings and use a box designed to contain leakage. AGM and gel batteries release less gas during normal operation but still require charging and ventilation practices specified by the manufacturer. LiFePO4 batteries generally do not vent hydrogen during normal charging, but their battery-management system, charger, and low-temperature charging limits must be compatible.
How Do You Attach a Battery Box to a Trailer?
Attach a trailer battery box in eight stages: inspect the structure, test-fit the box, mark the holes, drill the frame, seal the steel, bolt the enclosure, route the cables, and install and test the battery. A successful installation has no box movement, no cable abrasion, no terminal contact with metal, and no interference with towing hardware.
Step 1: Inspect and clean the mounting area
Park the trailer on level ground, chock the wheels, and disconnect every charging or tow-vehicle connection. Remove dirt, loose paint, grease, and rust from the proposed mounting surface so the box and washers sit flat.
Check the frame from both sides. Look for cracks, previous drilled holes, thin wall sections, corrosion scale, and welds that could interfere with the box base. A box should not bridge a flexible panel while its bolts pull against a rigid frame.
You will know it worked when: the mounting surface is solid, flat, and free of hidden wiring or lines.
Common mistake: drilling through surface rust without checking whether the frame has lost thickness underneath.
Step 2: Test-fit the empty box
Set the empty battery box in its final position with the lid installed. Confirm that the lid opens fully, the battery can be lifted out, and the hold-down strap or clamp can be tightened without contacting the terminals.
Measure clearances around the coupler, jack, chains, weight-distribution hardware, fenders, suspension, and tow vehicle. Leave practical access for a wrench and enough space to inspect the fuse and cable connections.
You will know it worked when: every operating component moves through its full range without touching the enclosure.
Common mistake: checking clearance only while the trailer is stationary and straight behind the tow vehicle.
Step 3: Mark four mounting holes
Use the box’s molded mounting holes whenever possible. If the box has no holes, mark four points near the reinforced base areas, keeping each hole away from unsupported plastic edges and internal battery space.
A typical 3/8-inch bolt requires a hole slightly larger than 3/8 inch, often 13/32 inch, but follow the box manufacturer’s instructions. Mark the trailer through the box, then remove the box before drilling.
You will know it worked when: the marks align with reinforced box sections and leave room for washers inside and underneath.
Common mistake: placing a bolt through a thin unsupported box floor, where tightening can crack the enclosure.
Step 4: Drill the trailer frame
Center-punch each mark, drill a 1/8-inch pilot hole, and enlarge it gradually to the required final diameter. Use cutting fluid on bare steel, keep the drill square to the surface, and stop immediately if the bit encounters a hidden obstruction.
Do not use the battery as a drilling template or leave the battery inside the enclosure. Collect chips, deburr both sides, and inspect the hole for distortion.
You will know it worked when: each bolt passes through the box and frame without forcing the plastic or bending the metal.
Common mistake: drilling directly at full diameter, which can make the bit wander and produce misaligned holes.
Step 5: Prime and seal the drilled steel
Clean the holes with a solvent approved for the trailer coating, then apply rust-inhibiting primer to every exposed steel edge. After the primer cures, apply compatible chassis paint or a thin bead of exterior sealant under the box base if the design permits.
Do not seal over a required drain or vent. A sealed box base can trap water against the frame, especially on a boat trailer that receives repeated splash exposure.
You will know it worked when: no bright bare steel remains around the holes and the box sits level.
Common mistake: using silicone as the primary structural attachment. Sealant blocks water, but it cannot replace bolts and load-spreading washers.
Step 6: Through-bolt the box
Place the box over the holes and install four through-bolts with large flat washers. The bolt direction depends on access, but the assembly must clamp the box base and frame without leaving exposed threads where they can catch cables.
Use a washer inside the box if the box manufacturer permits it, and use an oversized washer beneath the frame when the structure can accept one. Install nylon-lock nuts or prevailing-torque nuts, then tighten evenly in a diagonal pattern.
No universal 25 ft-lb torque value applies to every battery-box installation. A typical 3/8-inch Grade 5 or Grade 8 bolt may require a different torque depending on thread condition, lubrication, washer type, and the trailer manufacturer’s specification. Use the fastener or bracket maker’s torque value, and never crush a plastic base by chasing a higher number.
You will know it worked when: the box cannot shift by hand and the base is not bowed or cracked.
Common mistake: using a large torque value without considering that plastic enclosure bases can fail before the bolt reaches its nominal fastener torque.
Step 7: Route and protect the cables
Plan cable paths before installing the battery. Positive and negative cables should exit through molded grommets or properly fitted rubber cable glands, remain clear of sharp steel, and be supported so vibration does not pull on the battery terminals.
Leave approximately 6-12 inches of service slack inside the box only where the box design permits it. Route the positive cable through a fuse or circuit breaker as close to the battery terminal as practical, with the protection rating matched to the cable ampacity and connected equipment.
Use split loom, abrasion sleeve, rubber edging, or additional grommets at every frame pass-through. Keep the breakaway switch circuit separate and follow the trailer brake manufacturer’s wiring diagram, because the breakaway battery must activate the brakes if the trailer separates from the tow vehicle.
You will know it worked when: moving the cable by hand produces no contact with sharp edges and the fuse is accessible for inspection.
Common mistake: routing an unfused positive cable along the frame, where one crushed section can energize the entire trailer structure.
Step 8: Install, restrain, and test the battery
Place the battery in the correct orientation and tighten the box’s internal strap, clamp, or hold-down. The lid latch is not a substitute for battery restraint, because the lid retains the enclosure while the internal restraint controls battery movement.
For lead-acid batteries, inspect vent openings, terminal covers, and any spill tray. For LiFePO4 batteries, verify that the battery manufacturer allows the chosen orientation and that the charger supports the battery’s chemistry and voltage.
Connect the positive cable first, then the negative cable, using insulated tools and terminal protection. Check voltage and polarity with a multimeter, test the trailer lights and breakaway system according to its instructions, and inspect the box again after a short unloaded road test.
You will know it worked when: the battery remains stationary, the lid closes without pressure, the cables stay cool, and no fuse opens during normal operation.
Common mistake: applying dielectric grease between mating terminal surfaces. Put terminal protectant around the finished connection, not between conductive contact faces.
Which Mounting Method Fits Your Trailer?
Through-bolting a plastic box to a sound A-frame is the lowest-cost method, while a fabricated or lockable metal enclosure is better for theft exposure and severe off-road vibration. A no-drill clamp system is acceptable only when its manufacturer rates it for the battery-box mass and the trailer frame geometry.
| Trailer situation | Preferred mounting method | Typical material cost | Reasonable battery type | Main qualification |
|---|---|---|---|---|
| Weekend boat trailer | Plastic box on A-frame | $35-$100 | AGM or marine flooded | Protect terminals from splash and spray |
| RV travel trailer | Plastic or aluminum tongue box | $60-$300 | AGM, gel, or LiFePO4 | Check tongue weight and charging system |
| Daily utility trailer | Bolted steel or aluminum rail box | $120-$350 | AGM or LiFePO4 | Inspect after frequent vibration |
| Off-road overland trailer | Lockable aluminum or steel enclosure | $180-$600 | LiFePO4 or AGM | Add abrasion protection and theft control |
| Dump or equipment trailer | Fabricated reinforced bracket | $200-$700 | AGM or LiFePO4 | Keep clear of hydraulics and payload debris |
No-drill and enclosed alternatives
A tongue box can be welded to a properly designed bracket, but welding directly beside a battery is unsafe and can damage coated or galvanized steel. Remove the battery, control sparks, and have a qualified fabricator confirm that the bracket can carry repeated dynamic loads.
Existing toolboxes can house a battery if they provide a hold-down, suitable ventilation, drainage or spill control, cable glands, and enough clearance for service. A toolbox lid latch alone does not restrain the battery.
Clamp-on frame brackets avoid drilling, but they can slip or crush thin tube walls. Recheck clamp torque after the first trip and reject any design that leaves the battery box cantilevered far from the frame.
Battery Chemistry Variations
Battery chemistry changes the enclosure and wiring requirements, although every battery still needs physical restraint and short-circuit protection. Flooded lead-acid batteries need gas and spill precautions, AGM batteries need correct charging voltage, and LiFePO4 batteries need a compatible charger and low-temperature protection.
Flooded lead-acid
Keep the battery upright unless the manufacturer explicitly approves another orientation. Use a vented box with a spill tray, protect steel from acid residue, and inspect for electrolyte leakage after charging.
Hydrogen accumulation is the key enclosure hazard. Do not block factory vents or improvise an airtight container around a battery that requires ventilation.
AGM and gel
AGM and gel batteries are sealed valve-regulated designs, but “sealed” does not mean suitable for any unventilated compartment or charging setup. Follow the battery maker’s charging profile and leave terminal and cable clearance under the lid.
These batteries are often a good fit for tongue boxes because they tolerate vibration better than many flooded designs, but the box still needs a strong hold-down.
LiFePO4
LiFePO4 batteries are lighter, so they reduce tongue load, but their electrical fault current can still be very high. Install the manufacturer-specified fuse, use a charger with a lithium profile, and confirm whether charging below 32°F, or 0°C, is prohibited by the battery-management system.
Do not use foam as the sole restraint for a lithium battery in an off-road trailer. Closed-cell foam can fill minor side gaps, but a mechanical strap or clamp must carry the battery during a severe bounce.
Common Mistakes and How to Fix Them
A loose enclosure, damaged cable, blocked vent, or cracked plastic base can turn a simple mounting job into a roadside electrical failure. Inspect the installation after the first trip, after severe vibration, and whenever the trailer receives an impact.
| Failure mode | Likely cause | Corrective action | Replace or repair? |
|---|---|---|---|
| Box shifts on the frame | Loose nuts, thin frame, undersized washers | Retorque to specification and add a backing plate or bracket | Repair if the box is undamaged |
| Battery rattles inside | Missing hold-down or excess internal clearance | Install the supplied strap or approved closed-cell foam blocks | Replace a damaged restraint |
| Plastic cracks near bolts | Over-tightening, UV aging, cold brittleness | Remove load and inspect the base and frame | Replace cracked plastic |
| Cable insulation wears | Sharp frame edge or unsupported cable | Add grommets, loom, clamps, and a new cable if copper is exposed | Replace damaged cable |
| Terminals corrode | Acid vapor, water entry, poor terminal cover | Clean externally, dry, improve venting, and install covers | Replace cable ends if damaged |
| Fuse opens repeatedly | Short circuit, incorrect cable size, overload | Disconnect loads and troubleshoot before installing a larger fuse | Never upsize blindly |
| Lid will not close | Battery too tall or cable routed under lid | Refit the correct box or reroute cables | Replace the box if clearance is impossible |
White powder around a lead-acid terminal usually indicates corrosion from moisture or electrolyte vapor. Disconnect power, neutralize external residue with a mild baking-soda solution where appropriate, rinse without flooding the battery, dry the area, and investigate why moisture or vapor entered the enclosure.
A hairline crack beside a mounting hole is a replacement warning, not a cosmetic defect. Adhesive, tape, or plastic cement may close the crack temporarily, but road vibration continues to load the weakened base.
Situational Variations
Boat trailers need more corrosion control, RV trailers need tongue-weight and charging checks, and utility trailers need greater abrasion and impact protection. The same bolt pattern cannot be assumed safe across all three applications because frame thickness, spray exposure, and electrical loads differ.
Boat trailers
Use corrosion-resistant hardware, sealed cable glands, adhesive-lined heat-shrink terminals, and marine-rated cable where practical. Keep the battery box away from direct wheel spray, and inspect the underside after launching and retrieval.
Do not place ordinary unsealed electrical connectors inside a splash-prone tongue box. Water can bridge positive and negative terminals even when the lid appears closed.
RV and travel trailers
Confirm how the battery connects to the converter, solar controller, tow-vehicle charge line, and breakaway switch. A new box location may require longer cables, a larger conductor, or a new fuse arrangement to control voltage drop.
Check that the weight-distribution hitch can articulate without contacting the enclosure. Tongue-mounted storage can also affect the measured hitch load when water tanks, propane cylinders, or cargo change position.
Utility and equipment trailers
Mount the box above likely impact and debris paths, protect the enclosure from hydraulic fluid and loose aggregate, and use a lockable metal design when the trailer is left unattended. Inspect brackets, fasteners, and cable clamps more often when the trailer travels over rough worksites.
Do not mount the box where a raised dump body, ramp, winch cable, or loading machine can crush it. Test every moving component before connecting the battery.
Cost and Time
A basic plastic-box installation typically costs $35-$100 and takes 1-2 hours, while a lockable metal enclosure with fabricated brackets commonly costs $180-$700 and may require half a day. The largest cost differences come from the enclosure, cable length, bracket fabrication, and whether the trailer requires corrosion-resistant hardware.
| Installation level | Box and hardware cost | Typical labor time | Typical contents |
|---|---|---|---|
| Basic plastic tongue mount | $35-$100 | 1-2 hours | Plastic box, bolts, washers, primer, grommets |
| Reinforced frame-rail mount | $80-$250 | 2-3 hours | Bracket, backing plate, longer cables, fuse |
| Lockable aluminum box | $180-$400 | 2-4 hours | Diamond-plate box, seals, lock, cable glands |
| Fabricated commercial mount | $350-$700 | 4-8 hours | Custom bracket, welding, coating, wiring changes |
Add the battery, charger, disconnect switch, and solar equipment separately. Do not reduce cost by deleting the fuse, internal hold-down, cable protection, or structural backing hardware.
Final Inspection Checklist
Complete the following checks before the trailer’s first loaded trip:
- Confirm all four mounting fasteners are tight and marked for movement.
- Verify that the box cannot slide, twist, or lift from the frame.
- Check that the internal strap or clamp holds the battery firmly.
- Confirm that positive and negative terminals have covers where required.
- Inspect every cable pass-through for a rubber grommet or gland.
- Verify fuse placement, rating, polarity, and cable size.
- Test the trailer lighting and breakaway system according to the manufacturer’s procedure.
- Turn the jack, hitch, weight-distribution hardware, and suspension through their operating ranges.
- Check that the box lid opens without removing unrelated hardware.
- Reinspect the bolts, cables, and battery after the first 10-25 miles.
Frequently Asked Questions
Can I attach a trailer battery box with self-tapping screws?
Self-tapping screws are generally unsuitable for carrying a battery box through repeated road vibration, particularly when the battery and enclosure weigh 50-80 pounds together. Use through-bolts with load-spreading washers and lock nuts, or use a manufacturer-rated bracket that transfers the load into the trailer frame.
Should a trailer battery box be grounded to the frame?
A trailer battery box does not need a separate ground connection when the electrical system uses a properly sized negative cable. The trailer frame may serve as a conductor in some systems, but a dedicated negative return is usually easier to inspect and less dependent on rusty or painted frame joints.
How much clearance should a battery have inside the box?
The battery needs enough clearance for the manufacturer’s hold-down, terminal covers, cable bends, and lid movement. A practical installation often leaves approximately 1/4-1/2 inch around rigid sides, but the correct value depends on the box design and whether approved foam blocks fill larger gaps.
Can a battery box be mounted inside a trailer toolbox?
A toolbox can contain a trailer battery only when the compartment provides battery restraint, adequate ventilation for the chemistry, protected cable exits, spill control where needed, and service access. A lockable lid improves theft resistance, but it does not replace an internal battery strap or clamp.
Does a lithium battery need a vented trailer battery box?
A LiFePO4 battery usually does not require the hydrogen venting used for flooded lead-acid batteries during normal operation, but the battery manufacturer’s enclosure and thermal instructions control. The compartment still needs protection from heat, water, impact, and electrical shorts, plus a charger compatible with LiFePO4 chemistry.
How often should the battery-box mounting be inspected?
Inspect the enclosure before every long trip and after the first 10-25 miles following installation. Check fastener movement, cracks, corrosion, cable abrasion, lid security, battery restraint, and terminal condition at least every three months, or more often on off-road and commercial trailers.
The Bottom Line
To complete how to attach battery box to trailer correctly, through-bolt the enclosure to a sound frame member, protect every drilled edge, restrain the battery independently of the lid, and route fused cables through abrasion-resistant grommets. Select the box and mounting position for the battery chemistry, trailer structure, tongue weight, weather exposure, and service access, then perform a short-road-test inspection before regular towing.


