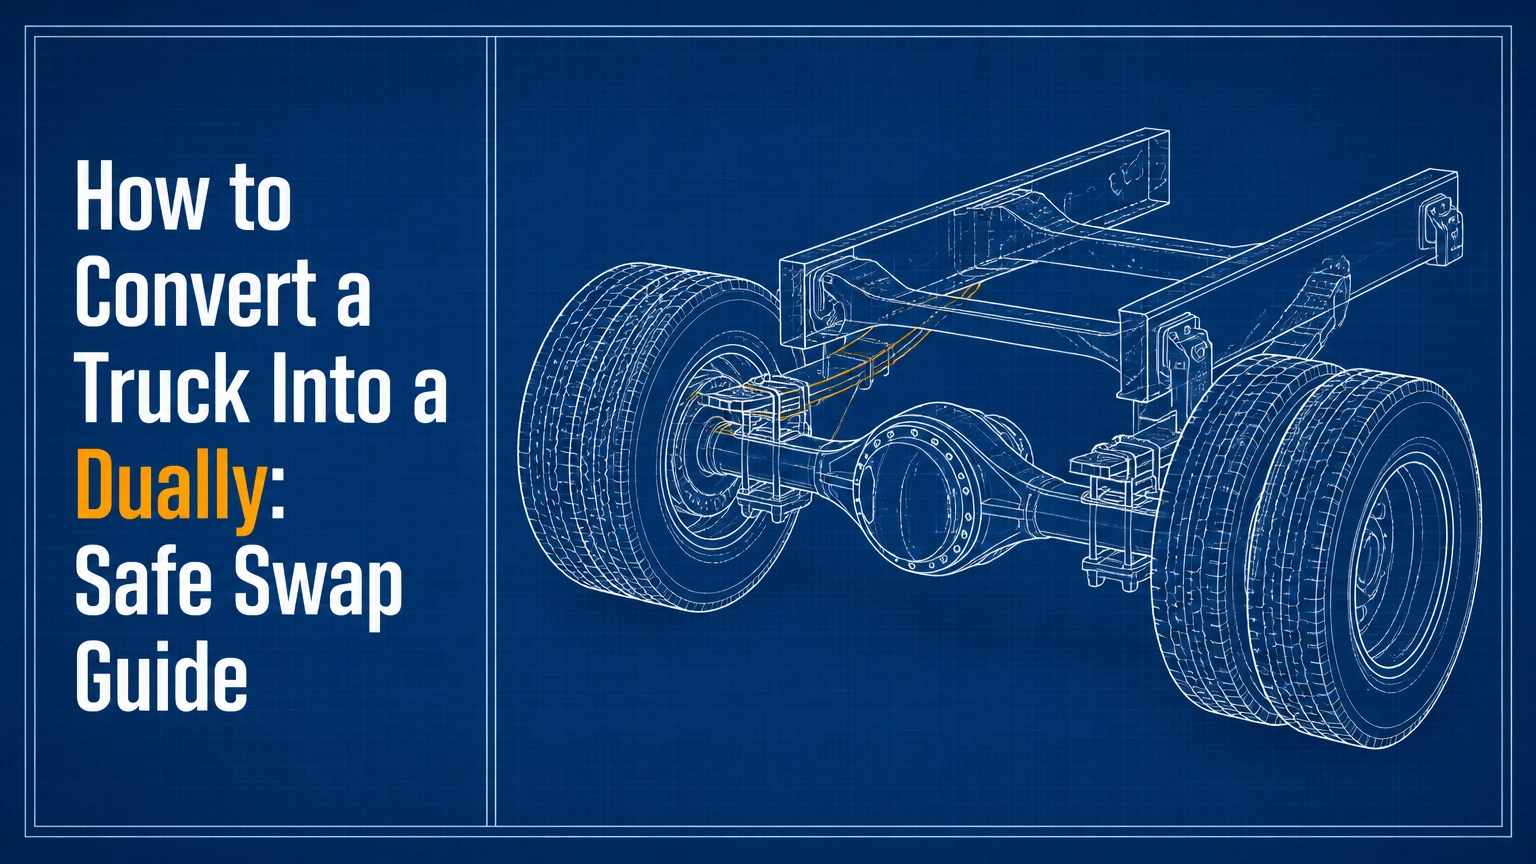
To convert a truck into a dually, replace or adapt the rear wheel system, install compatible dual-rated wheels and tires, modify the bed for clearance, and validate the brakes, axle, suspension, and drivetrain. The conversion can improve rear stability, but it does not automatically increase the manufacturer’s GVWR, payload rating, or legal carrying capacity.
Key Facts at a Glance
A dually conversion changes an SRW truck from two rear tires to four rear tires.
A bolt-on adapter is less expensive, but it increases wheel-bearing leverage and does not create a factory DRW axle.
An OEM axle swap requires matching gear ratios, spring geometry, brakes, ABS components, and wheel offset.
The original door-jamb GVWR remains the governing manufacturer rating unless a qualified authority legally re-certifies the vehicle.
Dual tires need measured sidewall clearance under load; visual clearance in an empty truck is not enough.
Typical total project cost ranges from about $2,500 for a simple adapter installation to more than $10,000 for a professionally engineered axle conversion.
What Does Converting an SRW Truck to a Dually Change?
Converting a single-rear-wheel truck to a dual-rear-wheel truck adds two rear wheel positions and widens the rear tire footprint. The extra tires can reduce rear sway and improve lateral control when a heavy fifth-wheel pin load or truck camper shifts the truck’s center of gravity.
The conversion does not change every part that determines capacity. GVWR comes from the manufacturer’s certification, and axle ratings depend on the housing, differential, shafts, bearings, brakes, springs, wheels, tires, frame, and suspension attachments. Four tires may have a greater combined load rating, while the frame or front axle remains the limiting component.
A dually also changes steering feel, track width, turning clearance, tire replacement cost, and road spray. The outer tires may contact curbs, and the added unsprung weight can affect ride quality. Treat the modification as a systems-engineering project rather than a wheel upgrade.
Why does a dually feel more stable?
A dual-rear-wheel arrangement places the tire contact patches farther apart across the rear axle, increasing resistance to side-to-side body roll. The second tire also provides redundancy after a puncture, although it cannot make an overloaded or poorly maintained truck safe.
The benefit is greatest with high center-of-gravity loads. A dually can control trailer-induced sway more calmly than an SRW truck, but a weight-distribution hitch, correct fifth-wheel pin weight, functioning brakes, and proper tire inflation still matter.
Can a Single-Rear-Wheel Truck Legally and Safely Become a Dually?
A single-rear-wheel truck can sometimes be physically converted, but legal acceptance and safe capacity depend on the vehicle, parts, and jurisdiction. The original certification label remains important because adding tires does not automatically authorize a higher GVWR or payload rating.
In the United States, Federal Motor Vehicle Safety Standard 120 addresses tire and rim selection for vehicles over 10,000 pounds GVWR, while 49 CFR Part 567 governs certification labeling. State inspection, registration, lighting, fender-coverage, width, and commercial-vehicle rules can add requirements. Check the authority where the truck is registered before buying parts.
A qualified conversion shop should document the axle rating, tire and wheel ratings, brake performance, track width, lighting, and attachment strength. Contact your insurer before modification, because some policies require disclosure or exclude altered suspension and wheel systems.
What does a conversion not fix?
A dually conversion does not repair a weak frame, worn springs, inadequate brakes, incorrect hitch placement, overloaded front axle, or an under-rated transmission. It also does not transform a light-duty half-ton chassis into a one-ton commercial truck.
The safest capacity calculation uses the lowest relevant limit:
Usable loaded capacity = the lowest of GVWR, front or rear axle rating, tire capacity, wheel capacity, hitch rating, suspension rating, and legal limit, minus actual vehicle weight.
Weigh the truck on a certified public scale with passengers, fuel, tools, hitch equipment, camper, and trailer connected. Record front axle, rear axle, and combined weights.
Which Conversion Method Should You Choose?
An OEM dually axle swap is the stronger mechanical route, while a high-quality adapter can suit moderate, occasional use when the truck and kit are specifically compatible. A factory-built dually is usually the better answer for frequent maximum-load work because conversion cost can approach the price difference between used SRW and DRW trucks.
| Decision factor | Bolt-on adapter | OEM DRW axle swap | Buy factory dually |
|---|---|---|---|
| Typical parts cost | $1,200-$4,000 | $3,500-$9,000 | $8,000-$30,000 used |
| Professional labor | $800-$2,500 | $3,000-$8,000 | $0 conversion labor |
| Typical project time | 1-2 days | 3-7 days | 1-3 days for inspection |
| Wheel-bearing stress | Higher leverage | Factory-type geometry | Factory design |
| Fabrication requirement | Low to moderate | Moderate to high | None |
| Reversibility | Usually possible | Difficult and expensive | Not applicable |
| Best use | Occasional RV towing | Engineered heavy-duty project | Daily heavy loads |
| Certification confidence | Product and jurisdiction dependent | Parts and engineering dependent | Highest OEM baseline |
How do adapters differ from a factory dually axle?
A dual-wheel adapter spaces the outer wheel away from the original hub, so the stock axle, bearings, studs, and flange may carry greater bending loads. An OEM DRW axle normally uses a wider housing, different hub and bearing geometry, dual-wheel brake and wheel mounting, and factory-compatible track width.
The distinction matters under sustained load. An adapter that feels stable on a short empty drive may impose damaging leverage during thousands of highway miles with a heavy trailer.
When is an axle swap the better choice?
Choose an axle swap when the truck will carry a high pin weight frequently, operate commercially, or travel long distances at near-capacity loads. Use a complete donor assembly with known service history, matching brakes, compatible ABS hardware, correct spring perch spacing, and a documented axle rating.
A donor axle from the same generation is not automatically interchangeable. Cab configuration, wheelbase, 2WD or 4WD layout, brake controller integration, spring width, and electronic differential controls can differ.
Before You Start: Parts, Measurements, and Tools
Plan 1-2 days for an adapter installation and 3-7 days for a complete axle swap, excluding parts delays and bodywork. Typical total costs are $2,500-$6,500 for adapters or $6,500-$15,000 for a professionally completed OEM-style conversion.
| Item | Adapter conversion | Axle-swap conversion | Verification required |
|---|---|---|---|
| Dually wheels | 4 rear wheels plus 2 front wheels, or 6 matched wheels | 4 rear wheels plus 2 front wheels, or 6 matched wheels | Offset, bolt pattern, load rating |
| Tires | 6 LT tires, typically $1,200-$3,000 | 6 LT tires, typically $1,200-$3,000 | Load range, size, dual spacing |
| Adapter or axle | $500-$1,500 adapter set | $2,000-$6,000 used axle | Hub, studs, ratio, brakes |
| Fenders and lighting | $600-$1,800 | $600-$2,500 | Width, clearance, marker lamps |
| Hardware | $150-$500 | $300-$1,000 | U-bolts, lines, seals, fasteners |
| Labor | $800-$2,500 | $3,000-$8,000 | Certified shop estimate |
Measure before ordering:
- Bolt pattern and stud diameter.
- Hub pilot diameter and adapter hub centering.
- Wheel offset and backspacing.
- Inner-to-outer sidewall clearance.
- Bedside and inner-wheelhouse clearance.
- Rear axle tube diameter and spring perch spacing.
- Driveshaft flange or yoke type.
- Brake-line, ABS, and parking-brake connection points.
Use a service manual, factory body-builder information, and the conversion manufacturer’s installation instructions. A hydraulic floor jack, rated jack stands, torque wrench, impact-safe sockets, brake bleeding equipment, wire brush, measuring tools, and a wheel balancer are typical requirements. Never support a truck by a differential cover or rely on a hydraulic jack alone.
How to Convert a Truck Into a Dually
The conversion has seven major stages: identify limits, select compatible parts, install the rear wheel system, install tires, modify the body, validate brakes and electronics, and perform loaded testing. The axle and wheel specifications determine success more than the fender appearance.
Step 1: Identify the truck’s limits
Record the VIN, door-jamb GVWR, front and rear GAWR, axle code, tire size, wheel rating, engine, transmission, drivetrain, and wheelbase. Weigh the empty truck in its normal operating configuration.
Calculate expected rear axle load with the camper or trailer attached. For a fifth-wheel, pin weight commonly reaches 15%-25% of loaded trailer weight, but the trailer manufacturer’s loading guidance and actual scale readings take precedence.
Success checkpoint: you have documented axle, tire, wheel, hitch, and manufacturer ratings.
Common mistake: assuming a 3500 SRW badge means the truck has the same chassis capacity as a 3500 DRW.
Step 2: Select a compatible conversion route
Choose an adapter only if its manufacturer lists the exact axle, hub, stud, wheel, and tire combination. Select an axle swap only after confirming ratio, spring geometry, brakes, ABS, parking brake, driveshaft, and electronic compatibility.
For 4WD, verify the rear axle ratio against the front differential ratio. Common ratios include 3.73, 4.10, and 4.30, but the axle tag and service documentation are the authority. A mismatch can bind the drivetrain and damage the transfer case when four-wheel drive engages.
Success checkpoint: every interface has a documented part number or measurement.
Common mistake: buying a cheap universal spacer based only on the eight-lug pattern.
Step 3: Install the rear axle or adapters
For an adapter, remove the rear wheels, clean the hub face, inspect studs, seat the adapter fully, and torque its fasteners in the manufacturer’s sequence. Use the specified thread treatment only. Red thread locker is not a universal substitute for the kit instructions, especially where future service or prevailing-torque nuts are required.
For an axle swap, disconnect the driveshaft, brake lines, ABS wiring, and parking-brake cables. Support the axle, remove the U-bolts, position the donor axle on correctly aligned spring pads, and install new U-bolts. Do not reuse stretched or corroded U-bolts.
Success checkpoint: the axle is square to the chassis, spring center pins are seated, and all fasteners have recorded torque values.
Common mistake: welding spring perches by eye, which can create thrust-angle, driveshaft, or tire-wear problems.
Step 4: Fit the wheels and tires
Install wheels in the correct inner and outer orientation. Dually wheels often use different offsets or mounting faces for the inner and outer positions, so a visually similar wheel may produce unsafe spacing.
Use tires approved for dual application. A common factory-style size is LT235/85R16 or LT245/75R17, but the correct size depends on the truck, rim, load rating, fender clearance, and speedometer calibration.
Measure the gap between adjacent tire sidewalls at the closest point, then repeat with the suspension loaded. The conversion supplier’s minimum spacing overrides generic targets; a 1.5-2 inch gap is a common practical target, not a universal rule.
Success checkpoint: no tire touches another tire, adapter, leaf spring, brake line, fender, or frame through full suspension travel.
Common mistake: using wide aftermarket tires that look suitable but leave inadequate dual spacing.
Step 5: Modify the bed and fenders
Test-fit the dually fenders with the wheels installed before cutting metal. Mark the outer bedside, inner wheelhouse, suspension travel path, fuel filler area, and marker-light positions.
Use the fender maker’s template, protect exposed steel with primer and seam sealer, and route wiring away from tire spray. Fiberglass bolt-on fenders may need reinforcement plates; thin bedside sheet metal alone can crack around fasteners.
Factory replacement bedsides usually produce a more durable result than universal fiberglass panels, but they can require tailgate, bumper, fuel-filler, and bed-mount changes.
Success checkpoint: the loaded truck has clearance at compression, steering lock, articulation, and underbody movement.
Common mistake: checking clearance only while the truck sits empty on level pavement.
Step 6: Finish brakes, ABS, and driveline systems
Install compatible brake lines, hoses, calipers, rotors, wheel-speed sensors, and parking-brake hardware. Bleed the system using the vehicle manufacturer’s sequence and scan for ABS faults after sensor installation.
Check driveshaft length, flange pattern, slip-yoke travel, pinion angle, and differential vent routing. A swapped axle may require a different flange or a professionally balanced shaft.
Success checkpoint: the brake pedal is firm, ABS performs its self-test without a warning lamp, and the driveshaft has no vibration under acceleration or coast.
Common mistake: treating a soft brake pedal as normal after an axle swap. Air remains in the system until properly removed.
Step 7: Torque, retorque, and test gradually
Use the wheel, adapter, and axle manufacturer’s torque values, not a generic internet number. Typical heavy-duty wheel fasteners may fall near 130-165 lb-ft, but stud size, wheel material, nut style, and thread condition change the correct value.
Recheck adapter and wheel fasteners after the first short drive, then at the intervals specified by the kit maker. Many manufacturers call for checks around 50, 100, and 500 miles. Inspect for shiny movement marks, loose nuts, wheel-seat damage, and changing vibration.
Test empty at low speed, then loaded on a local route, then at highway speed. Stop immediately for rubbing, heat, steering pull, brake odor, vibration, or tire sidewall damage.
How Do You Choose Wheels, Tires, and Adapters?
Choose wheels and tires by verified load rating, dual-use approval, offset, center bore, stud engagement, and manufacturer compatibility. Bolt pattern alone identifies only the hole arrangement; it does not prove that the wheel centers correctly or clears the brake assembly.
| Component | Required specification | Typical example | Failure if mismatched |
|---|---|---|---|
| Bolt pattern | Exact diameter and lug count | Ford 8×170 mm | Wheel will not seat correctly |
| Hub pilot | Hub-centric center bore | Vehicle-specific millimeter size | Vibration or poor centering |
| Tire size | Approved dual-service dimension | LT235/85R16 | Rubbing or insufficient load rating |
| Load range | Tire capacity at stated pressure | Load Range E or F | Heat buildup and overload |
| Wheel rating | Capacity per wheel position | 3,000-4,000 pounds | Wheel cracking or distortion |
| Offset | Inner and outer position geometry | Manufacturer-specific DRW offset | Sidewall contact or bearing stress |
The Tire and Rim Association publishes dimensional and load-inflation standards used by tire manufacturers, but the truck manufacturer and conversion supplier determine the applicable fitment. Inflate dual tires according to the load, axle, and tire maker’s chart, checking pressures when cold.
Do not mix tire sizes or constructions across one dual pair. Replace a damaged tire when casing integrity is uncertain, and inspect the inner tire because it is harder to see and often runs hotter.
What Are the Main Failure Modes?
The most serious failures involve wheel separation, tire contact, brake incompatibility, incorrect axle geometry, and hidden overloading. Each can develop after an apparently successful installation.
| Symptom | Likely cause | Immediate action | Corrective measure |
|---|---|---|---|
| Highway vibration | Poor centering or balance | Reduce speed and inspect | Hub-center, balance, and verify runout |
| Tires touch | Wrong width or offset | Stop carrying the load | Fit approved dual-size wheels and tires |
| Soft brake pedal | Air or incompatible hydraulics | Do not tow | Pressure-test and bleed correctly |
| Uneven rear wear | Axle misalignment | Measure thrust angle | Re-align spring pads or axle |
| Hot inner tire | Low pressure or overload | Stop and cool safely | Weigh axle and set pressure correctly |
| Loose adapter nuts | Improper seating or torque | Park and recheck | Clean surfaces and follow kit procedure |
Practitioner insight: the inner dual often becomes the diagnostic tire. Its pressure, tread wear, and temperature can reveal overload or clearance problems before the outer tire shows damage.
Practitioner insight: a wider rear track can increase body stability while making the rear axle more vulnerable to curb strikes. Stability and durability are related, but they are not the same measurement.
Practitioner insight: wheel-bearing leverage rises as the wheel center moves outward. The increase is governed by the moment created by offset and load, so a heavier tire or larger spacer can impose more stress than its static weight suggests.
How Much Does a Dually Conversion Cost?
A basic adapter-based conversion typically costs $2,500-$6,500, while a complete OEM-style axle swap commonly costs $6,500-$15,000. Fabrication, rust, electronic integration, custom driveshaft work, and new body panels can push a project above $15,000.
| Project level | Parts estimate | Labor estimate | Typical total | Time |
|---|---|---|---|---|
| Adapter and used steel wheels | $1,500-$3,000 | $800-$1,800 | $2,300-$4,800 | 1-2 days |
| Adapter and new aluminum wheels | $3,000-$5,500 | $1,000-$2,500 | $4,000-$8,000 | 1-3 days |
| Used OEM axle swap | $3,500-$7,000 | $3,000-$6,000 | $6,500-$13,000 | 3-7 days |
| Rebuilt axle and body conversion | $6,000-$10,000 | $5,000-$9,000 | $11,000-$19,000 | 1-3 weeks |
| Factory DRW replacement truck | Vehicle-dependent | Inspection and setup | $8,000-$30,000 used | 1-3 days |
Include six tires, wheels, valve stems, TPMS components where applicable, fenders, marker lamps, brake parts, seals, U-bolts, alignment, balancing, and inspection. A low adapter price rarely represents the complete conversion.
Is Buying a Factory Dually Better Than Converting?
Buying a factory dually is usually better for daily heavy hauling, commercial work, or a truck that already needs major drivetrain and body repairs. Converting can make financial sense when the existing truck has a valuable engine, low mileage, documented maintenance, and a chassis that matches a factory DRW configuration.
A factory DRW truck supplies an integrated starting point: axle, brakes, wheels, fenders, springs, frame options, tire placard, and electronic calibration were selected together. The original vehicle still requires a pre-purchase inspection, because an abused factory dually is worse than a sound engineered conversion.
Which option suits an occasional RV hauler?
An occasional RV hauler should first compare actual rear axle weight with the SRW truck’s certified limits. If the truck remains within every rating and sway is the only concern, correct tire pressure, suspension maintenance, hitch setup, and trailer loading may solve the problem without dual wheels.
An adapter may suit moderate use only when the kit is engineered for that exact truck. It is not a safe shortcut for a fifth-wheel that already exceeds the rear axle or payload rating.
Which option suits a commercial operator?
A commercial or agricultural operator should favor a factory DRW truck or a professionally engineered OEM axle conversion. Daily exposure to high loads, rough surfaces, curb impacts, and long operating hours makes bearing geometry, brakes, heat management, and parts availability more important than reversibility.
What Should You Inspect After Conversion?
Inspect wheel torque, tire pressure, sidewall clearance, adapter seating, brake leaks, ABS operation, axle alignment, driveshaft vibration, and fender fasteners before every loaded trip. Check the inner tires with a gauge and flashlight because exterior inspection can miss pressure loss.
After the first 50-100 miles, inspect for metal dust around wheel seats, shifted adapters, loose fender fasteners, fresh tire scuffing, and brake-hose contact. Repeat the inspection after the first loaded trip and whenever the wheel or tire is removed.
Have a truck alignment shop measure rear thrust angle and front alignment after an axle swap. A straight steering wheel does not prove that the rear axle is square.
FAQ
Can I put dually wheels on any truck?
No. Dually wheels require a compatible axle, hub, stud pattern, center bore, offset, wheel rating, tire size, and body clearance. A universal spacer cannot correct an under-rated axle, weak studs, unsuitable brakes, or insufficient space between the tires.
Does converting to a dually increase payload?
No, not automatically. The manufacturer’s GVWR, axle ratings, certification label, frame limits, suspension ratings, wheel ratings, and tire ratings still govern capacity. Four tires can improve stability and add tire load reserve, but they do not legally rewrite the truck’s original ratings.
Can I convert a 2WD truck more easily than a 4WD truck?
Usually, yes. A 2WD conversion avoids front-to-rear gear-ratio matching in the transfer case, but it still requires compatible axle width, brakes, spring perches, wheels, body clearance, and legal inspection. The rear axle must also match the transmission and driveshaft interfaces.
Are bolt-on dually adapters safe for towing?
A properly engineered, vehicle-specific adapter can be safe within its published load and installation limits. Adapter quality, hub centering, stud engagement, torque procedure, wheel spacing, bearing condition, and actual axle load determine risk. Cheap cast spacers or generic products should not carry heavy trailer loads.
What tire size is common on converted trucks?
LT235/85R16 and LT245/75R17 are common factory-style dual-tire sizes, but neither is universally correct. Confirm load range, rim width, diameter, dual spacing, fender clearance, speedometer effect, and the conversion manufacturer’s approved fitment before purchasing.
Should all six tires be replaced together?
Replace all six when tire age, tread depth, construction, or wear differs significantly. Each inner and outer dual pair should match closely in size and construction, because unequal rolling circumference makes one tire carry more load and generate additional heat.
The Bottom Line
To convert a truck into a dually, begin with ratings and measured axle loads, then choose a vehicle-specific adapter or a complete OEM DRW axle system. Install compatible wheels and tires, preserve dual-tire clearance, complete the brake and electronic work, and obtain the required inspection. For frequent near-limit hauling, a factory dually remains the lower-risk choice because the conversion does not increase the truck’s certified GVWR.


