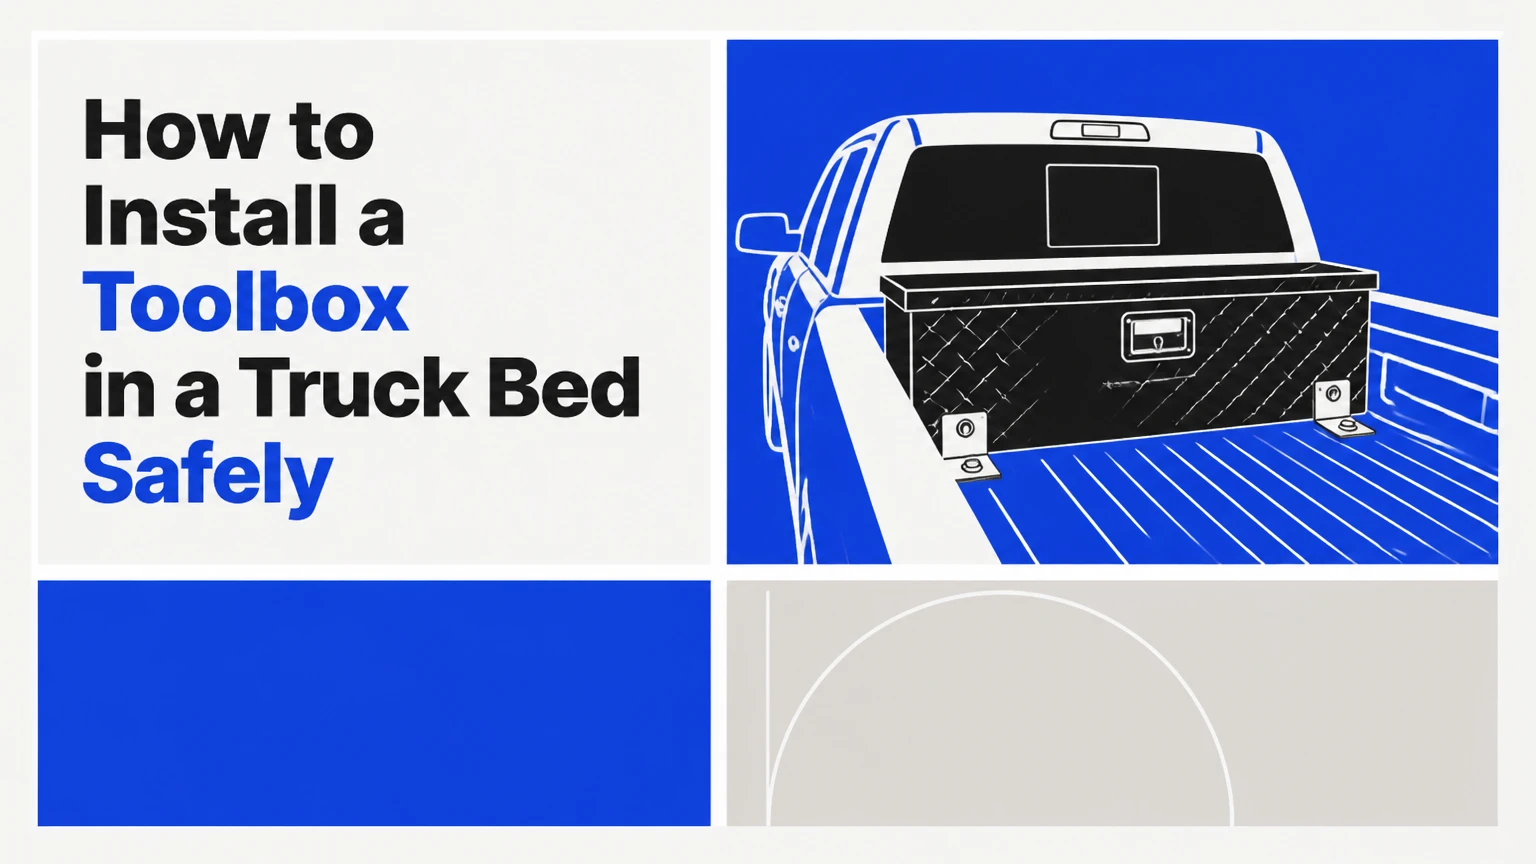
To install a toolbox in a truck bed, place the box squarely across or beside the bed rails, protect the contact surfaces, and secure it with J-hooks or drilled bolts specified by the manufacturer. A typical crossover installation takes 30-60 minutes. The most important factors are rail compatibility, cab clearance, even tightening, and a final latch and visibility check.
Key Facts at a Glance
- A crossover truck bed toolbox normally mounts across the bed rails behind the cab and leaves the floor available for long cargo.
- A no-drill J-hook installation usually takes 30-45 minutes and avoids permanent holes in the truck bed.
- A drilled installation usually takes 45-90 minutes because the installer must inspect the underside and protect every new hole against corrosion.
- Leave approximately 1/4-1/2 inch between the toolbox and the cab unless the toolbox manufacturer specifies a different clearance.
- Tighten J-hook nuts by hand with a socket, because excessive force can bend an aluminum toolbox flange or deform a thin bed rail.
- A toolbox must not obstruct the center high-mounted stop lamp, rearward visibility, tonneau cover, or bed-rack hardware.
What a Truck Bed Toolbox Does
A truck bed toolbox is a lockable storage container mounted in a pickup bed to protect hand tools, recovery equipment, tie-downs, and small job-site supplies. A crossover box spans the bed behind the cab, while a chest rests inside the bed and a side-mount box occupies one rail.
Most aluminum and steel boxes use a hinged lid, perimeter weather stripping, a lockable paddle handle or push-button latch, and gas struts that assist lid opening. These features improve access and weather resistance, but they do not make every box waterproof in every storm. Water can still enter through damaged seals, poorly protected mounting slots, or a lid that twists because the truck is parked on uneven ground.
A truck bed toolbox is storage, not a substitute for a certified cargo restraint system. Heavy equipment inside the box can shift, damage the lid, or raise the truck’s payload above its rating. Check the door-jamb payload label and the toolbox manufacturer’s load limit before filling a large steel box with dense tools.
Which Toolbox Style Fits Your Truck?
The correct toolbox style depends on bed length, rail shape, lid height, access preference, and whether a tonneau cover or bed rack will remain installed. Measure the usable bed width at the rail level and compare it with the manufacturer’s mounting dimensions, rather than relying only on a nominal 69-inch or 72-inch label.
| Toolbox style | Typical dimensions | Typical price | Best fit | Main limitation |
|---|---|---|---|---|
| Crossover or saddle | 69-72 in. wide, 12-18 in. deep | $200-$800 | General tools and preserved floor space | May interfere with a cover or rear window |
| Side-mount | 48-60 in. long, 10-16 in. deep | $150-$500 | Frequent roadside access | Uses one rail and reduces side access |
| Chest or low-profile | 48-72 in. wide, 10-18 in. deep | $250-$700 | Tonneau-compatible storage | Occupies bed-floor space |
| Wheel-well box | 18-36 in. long, model-specific depth | $100-$250 | Recovery gear and small equipment | Lower capacity and vehicle-specific fit |
A crossover box is usually the simplest first installation because its flanges rest on both rails and its supplied J-hooks can clamp under compatible rail lips. A side-mount box is easier to reach from outside the truck, but its brackets may require model-specific positioning.
A low-profile chest is the better choice when a roll-up or folding tonneau must close over the toolbox. Confirm the cover’s actual vertical clearance, because bed rails, clamp brackets, and the box lid can occupy different heights.
Which Material Should You Choose?
Aluminum is the usual compromise for a general-purpose toolbox because it weighs less than steel and does not develop red rust when its surface is scratched. Steel offers better resistance to denting and often supports heavier commercial use, but a chipped coating can expose bare metal to moisture and road salt.
Polyethylene boxes resist corrosion and impact, although their walls and latches may offer less resistance to forced entry than a heavy steel box. Material choice should include the empty box weight, because a large box full of tools can consume a substantial portion of a pickup’s available payload.
| Material | Typical empty weight for crossover box | Corrosion behavior | Security and durability | Best use |
|---|---|---|---|---|
| Diamond-plate aluminum | 35-70 lb | Will not rust like steel; galvanic contact still matters | Moderate dent resistance, common locking hardware | Daily tools and mixed weather |
| Powder-coated steel | 60-120 lb | Coating chips can rust; inspect winter damage | High dent resistance and strong walls | Contractors and heavy equipment |
| High-density polyethylene | 25-60 lb | Rust-proof and salt-resistant | Impact-resistant, typically lower forced-entry resistance | Outdoor gear and wet environments |
| Stainless steel | 70-130 lb | High corrosion resistance | High durability, expensive and heavy | Marine or severe-corrosion areas |
Calculate Payload Before Loading Tools
Add the toolbox weight, mounting hardware, tools, fuel containers, passengers, and other cargo before using the storage compartment. For example, a 75-pound steel box containing 180 pounds of tools adds at least 255 pounds to the truck before any other bed cargo is counted.
Do not confuse a toolbox’s mounting capacity with the truck bed’s payload rating. The truck manufacturer controls the vehicle limit, while the toolbox manufacturer controls the box and hardware limits. If the box is mounted to thin composite or specially shaped rails, follow the vehicle-specific installation instructions instead of assuming a universal J-hook will fit.
Which Mounting Method Should You Use?
Use the no-drill J-hook method when the toolbox has compatible mounting slots and the truck provides a strong rail lip below those slots. Use drilled bolts or manufacturer-supplied brackets when the box lacks a usable hook path, the bed has unusual rail construction, or the installation instructions specifically require drilling.
| Method | Typical time | Permanent holes | Holding behavior | Suitable boxes |
|---|---|---|---|---|
| J-hooks | 30-45 minutes | No | Clamp force under rail lip | Many crossover boxes |
| Rail brackets | 45-75 minutes | Usually no | Distributed load through brackets | Side-mount and model-specific boxes |
| Drilled bolts | 60-90 minutes | Yes | Direct mechanical attachment | Chests and heavy-duty installations |
| Sheet-metal screws | 30-60 minutes | Yes | Lower serviceability and pull-out resistance | Light boxes only when specified |
No-drill does not mean risk-free. A loose hook can allow the toolbox to slide, scratch paint, or strike the cab. Drilling is not automatically stronger if the installer places holes too close to a rail edge, omits backing washers, or penetrates wiring and fuel-system components.
Before You Start
Time: 30-45 minutes for a compatible J-hook installation, or 60-90 minutes for a drilled installation.
Difficulty: Moderate, mainly because the box is bulky and alignment affects latch operation.
Typical cost: $0-$30 if supplied hardware fits; $15-$60 for replacement fasteners, rubber padding, primer, and sealant.
People: Two adults for lifting a crossover box safely.
Tools and materials: 1/2-inch or 13 mm socket where compatible, ratchet, tape measure, soft cloth, degreaser, masking tape, adhesive-backed rubber or closed-cell foam, marker, center punch, drill, metal bits, rust-inhibiting primer, silicone sealant, and replacement washers.
Read the toolbox instructions before opening holes or substituting hardware. Measure the bed width, inspect the rail profile, and check whether a bed liner, rail cap, tonneau clamp, spray-in coating, or bed rack occupies the mounting area.
Park on level ground, set the parking brake, switch off the engine, and remove loose cargo. A level surface reduces box twist while you align the lid and latches.
How to Install a Toolbox in a Truck Bed
The procedure below covers a typical crossover box first, followed by the drilled method for boxes that cannot use J-hooks. Follow the supplied instructions whenever their hole positions, fasteners, or clearances differ from these general steps.
Step 1: Inspect and Protect the Rails
Clean the truck bed rails and the underside of the toolbox flanges with a non-aggressive automotive cleaner. Remove grit, metal chips, and oil because trapped debris can wear through paint during vibration.
Apply narrow strips of closed-cell foam or rubber to the toolbox contact points, keeping adhesive away from drainage paths and mounting slots. Do not use thick soft foam that compresses unevenly, because it can make the box twist and prevent the lid from latching.
You will know it worked when the rails feel clean and the protective strips sit flat without covering the hook openings. The common mistake is placing padding over the entire flange, which can trap water and raise the box enough to interfere with a tonneau cover.
Step 2: Position the Toolbox Behind the Cab
Lift the toolbox into the bed with a second person and place its flanges evenly on the rails. Center the box from side to side, then slide it toward the cab while maintaining approximately 1/4-1/2 inch of clearance.
Check the gap at both corners, not just the center. The cab and bed can move relative to each other over uneven roads, and a box pressed against the cab can rub paint or create a metallic rattle.
Open and close the lid before tightening anything. The lid should travel fully without contacting the cab, rear window, bed rack, or third brake light.
You will know the position is correct when the side gaps match and the box sits square to the bed. The common mistake is aligning the box with the cab window instead of the rails, which can leave one mounting flange unsupported.
Step 3: Install the J-Hooks
Open the toolbox lid and insert each supplied J-hook through the correct internal slot or mounting hole. Rotate each hook so its curved end passes under the lower lip of the truck bed rail without contacting wiring, liner material, or a hollow rail cavity.
Use every mounting point specified by the manufacturer. A typical crossover box uses two or four hooks, but the count and spacing vary by box width and design.
If a bed liner blocks the hook path, do not force the hook against the liner. Trim only the amount permitted by the liner and toolbox instructions, or use a compatible bracket.
You will know the hooks are seated when each curved end lies fully beneath the rail lip and the bolt remains vertical. The common mistake is catching only the rail cap, which can release under vibration.
Step 4: Add Washers and Locking Nuts
Place the supplied flat washer and nylon-insert locking nut on each J-hook from inside the toolbox. Keep the washer flat against the box’s mounting flange or internal reinforcement, depending on the manufacturer’s design.
Start every nut by hand for several turns. Cross-threaded aluminum hardware can feel tight before it has properly engaged, and replacing a damaged J-hook is easier than repairing a stripped mounting slot.
If the supplied washer is too small to spread the load across a thin flange, use the larger washer size recommended by the toolbox manufacturer. Do not improvise a fastener grade or length that could contact the lid mechanism.
You will know the hardware is correctly started when each nut turns smoothly by hand. The common mistake is using an impact wrench at this stage, which can spin a J-hook and damage the box.
Step 5: Tighten the Box Evenly
Tighten the nuts in alternating diagonal or side-to-side order, using a hand ratchet. Draw the toolbox down gradually so the flanges remain level and the cab gap does not change.
Stop when the hooks are firmly clamped and the box cannot shift under moderate hand pressure. Manufacturer torque specifications take priority; if no specification is supplied, use firm hand tightening rather than maximum force.
Never crush the rail lip to eliminate movement. Thin aluminum boxes and stamped steel rails can deform before the joint becomes meaningfully stronger.
You will know the clamp is adequate when the box stays fixed during a firm push at each corner and the flange remains straight. The common mistake is tightening one corner fully before the others, which twists the box and misaligns the latch.
Step 6: Test the Lid, Lock, and Clearance
Close the lid slowly and inspect the perimeter seal for uniform contact. Test both latch operation and the key or push-button lock while the truck remains on level ground.
Check that the gas struts hold the lid open without forcing it against the cab or rear window. Confirm that the center high-mounted stop lamp remains visible from behind and that the toolbox does not block the driver’s rearward view.
Place a bright strip of masking tape on the cab-side gap if you need a quick visual reference during the first drive. Remove the tape after verification.
You will know the installation is ready when the lid latches without lifting or pushing, the lock operates smoothly, and the toolbox does not contact adjacent bodywork. The common mistake is testing only the lock while ignoring seal compression and lid clearance.
How Do You Install a Toolbox by Drilling?
A drilled installation uses marked holes, corrosion protection, and bolts with washers and accessible locking nuts. Drilling is appropriate only when the toolbox instructions require it or when the truck and box provide no reliable J-hook or bracket attachment.
Step 7: Inspect the Underside Before Marking
Position the box and mark each hole through the toolbox mounting openings. Move the box away, then inspect below every mark with a light and mirror if necessary.
Look for fuel lines, brake lines, wiring, the fuel-filler neck, crossmembers, airbags, and double-wall sections. The truck’s service manual is more reliable than guessing from the bed surface.
A hole should pass through a structurally suitable flange or bed section, not an unsupported edge. If access for a nut is impossible, use the manufacturer’s rivet-nut, backing plate, or bracket solution rather than a weaker substitute.
Step 8: Drill and Treat the Holes
Center-punch the marks so the drill bit does not wander. Drill a small pilot hole first, then enlarge it to the bolt diameter recommended by the hardware instructions.
Remove burrs from both sides and vacuum metal filings from the bed. Apply rust-inhibiting primer to exposed steel, allow it to dry according to the product label, then seal the hole perimeter with automotive silicone.
Do not seal a drain path or fill a bed cavity with expanding foam. Water trapped between a toolbox flange and a rail can accelerate corrosion even when the visible hole is sealed.
Step 9: Bolt the Toolbox Down
Set the box back into position and insert the specified bolts with flat washers. Use a rubber washer or a thin sealant layer where the instructions permit it, then secure the underside with locking nuts or the supplied backing hardware.
Tighten progressively from side to side. The box should clamp firmly without buckling its flange or compressing the bed panel into a permanent crease.
You will know the drilled attachment is sound when the box remains square, the fasteners have full thread engagement, and no raw metal remains exposed. The common mistake is using short bolts that engage only a few threads after passing through the flange and washer.
Step 10: Recheck the Truck
Inspect the underside for pinched wiring, displaced fuel lines, and sharp bolt ends. Close the lid, test the seal, verify the third brake light, and check the tonneau or rack before loading tools.
Apply a small witness mark across each nut and bolt head with paint marker. If the marks separate after the first drive, the fastener has moved and needs inspection.
What Should You Check Before Driving?
A post-installation inspection should confirm attachment, clearance, weather sealing, visibility, and cargo restraint. Complete the inspection immediately after installation and again after the first 25-50 miles, because padding can compress and fasteners can settle.
| Inspection point | Acceptance check | Typical failure sign | Corrective action |
|---|---|---|---|
| Mounting hardware | Every nut tight, washer flat | Shiny movement marks or loose nut | Re-align and retighten |
| Cab clearance | 1/4-1/2 in. or manufacturer value | Paint scuff or metal contact | Slide box forward or rearward |
| Lid and latches | Latches close without force | One corner stays raised | Loosen, square, and retighten |
| Brake lamp | Center stop lamp fully visible | Box blocks lamp from rear | Use lower box or relocate |
| Weather seal | Continuous, even compression | Pinched seal or wet interior | Replace seal or correct lid alignment |
| Tonneau or rack | Full travel and no contact | Cover stops or rubs box | Change box height or hardware |
How Do You Fit a Toolbox With a Tonneau Cover?
A toolbox can work with a tonneau cover when the box height, lid travel, and cover clamps are mutually compatible. Low-profile chests usually offer the best fit, while tall crossover lids commonly interfere with folding, rolling, or hinged covers.
Measure from the bed floor to the lowest part of the closed cover, then compare that measurement with the toolbox’s installed height, including rail caps and padding. Also measure the lid’s open travel because a cover may clear the box when closed but prevent access when the lid is raised.
For a roll-up cover, inspect the canister and rearward travel. For a folding cover, inspect panel hinges and clamp locations. A bed rack can create a separate conflict at the rail, where a J-hook, rack foot, and cover clamp compete for the same space.
When Is Another Storage System Better?
A truck bed toolbox is not ideal when you need full bed width, unobstructed cover operation, or rapid access to bulky equipment. A bed slide, underbody box, drawer system, or cab-mounted organizer may provide better access without consuming rail space.
| Storage alternative | Typical cost | Access location | Floor-space effect | Best situation |
|---|---|---|---|---|
| Bed slide | $700-$2,000 | Pulls cargo toward tailgate | Uses bed floor | Heavy items needing ergonomic access |
| Underbody box | $300-$1,200 | Outside bed, below frame | Preserves bed floor | Service tools and roadside equipment |
| Bed drawers | $1,000-$3,000 | Tailgate-level drawers | Reduces vertical bed volume | Organized daily work gear |
| Cab organizer | $50-$400 | Behind seats or under seat | Preserves bed floor | Small tools and weather-sensitive items |
A crossover box is poor for sheet goods that must slide against the cab because its suspended body reduces the available opening height. A chest is poor for dirty, bulky cargo when the lid must remain accessible under a cover. Match the storage architecture to the cargo, not only to the box’s advertised capacity.
Common Mistakes and How to Fix Them
Why does the toolbox move or rattle?
A moving toolbox usually has loose J-hooks, inadequate washer contact, incorrect hook orientation, or compressible padding that has settled. Empty the box, loosen the hardware, re-center the box, replace crushed padding with thin closed-cell rubber, and tighten each fastener evenly.
Test movement by pushing at all four corners. Do not diagnose a rattle by adding more torque, because a distorted aluminum flange can reduce clamping contact.
Why is the toolbox leaking?
Water usually enters through a torn perimeter seal, a lid twisted by uneven mounting, unsealed drilled holes, or mounting slots that face direct spray. Clean the seal, inspect for gaps, and use a controlled hose test rather than a pressure washer.
If the seal is damaged, replace it with the profile specified by the box manufacturer or compatible automotive weather stripping. Seal fastener penetrations with automotive silicone, but do not block intentional drainage channels.
Why will the lid not latch?
A lid that will not latch usually indicates box twist, uneven rail height, a displaced strike pin, or excessive seal compression. Park on level ground, loosen the mounting nuts slightly, square the box, and retighten in alternating stages.
Adjust strike pins only after alignment is correct. A latch adjustment cannot compensate for a toolbox that is clamped diagonally.
What if the bed rails are covered by a liner?
A thick drop-in liner can alter the rail lip and prevent J-hooks from seating. Use the liner manufacturer’s approved trim points or a toolbox bracket designed for that liner; never clamp onto a loose liner edge.
Spray-in liners usually require no trimming, but added coating thickness can reduce hook engagement. Confirm that the hook reaches solid metal below the rail lip.
What if the truck has a composite or unusual bed?
Some composite beds, aluminum beds, utility bodies, and factory rail systems require dedicated brackets. A universal J-hook may concentrate force in the wrong location and damage the rail.
Use the truck and toolbox fitment chart, then follow the vehicle manufacturer’s instructions. If the box blocks factory tie-downs or a rail channel, relocate it only if the new mounting position remains structurally supported.
How Much Time and Money Does Installation Require?
A compatible no-drill installation typically costs $0-$30 beyond the box and takes 30-45 minutes with two adults. Drilling, special brackets, liner modification, or replacement hardware commonly raises the project to $15-$100 and 60-90 minutes.
| Installation scenario | Labor time | Extra materials | Likely difficulty | Main variable |
|---|---|---|---|---|
| New aluminum crossover, J-hooks fit | 30-45 min | $0-$20 | Moderate | Lifting and alignment |
| Drop-in liner with hook interference | 45-75 min | $10-$40 | Moderate | Correct liner clearance |
| Side-mount with supplied brackets | 45-75 min | $0-$30 | Moderate | Bracket position |
| Drilled steel or chest box | 60-90 min | $15-$60 | High | Underside access |
| Tonneau and rack combination | 60-120 min | $20-$100 | High | Competing clamp locations |
A professional installation commonly adds roughly $75-$250, depending on drilling, bracket fabrication, and local labor rates. That cost can be reasonable when the truck has hidden wiring, a composite bed, or expensive paint that would be costly to repair.
Expert Installation Rules
Protect the rail before protecting the box. Padding placed only under the toolbox does not prevent a J-hook from cutting through paint underneath the rail. Inspect both contact surfaces and keep grit out of the clamp joint.
A square box is more weather-resistant than an over-tightened box. Seal compression depends on lid geometry. Excessive force can bend the flange, create a permanent corner gap, and make leakage worse.
Recheck after the first loaded trip. Tools change the box’s inertia during braking and cornering. A fastener that feels secure with an empty compartment can settle after the toolbox carries 100-200 pounds of equipment.
Use the manufacturer’s hardware hierarchy. Supplied bolts, brackets, hole locations, and torque instructions take precedence over generic advice because bed rails and toolbox reinforcements differ substantially between models.
FAQ
Can one person install a truck bed toolbox?
One person can install a small chest or side-mount box, but a crossover box should normally be lifted by two adults. A typical aluminum crossover weighs 35-70 pounds, has awkward leverage, and can scratch the cab or rail if it tilts during placement.
Should a truck toolbox touch the cab?
A truck toolbox should not touch the cab unless the vehicle and toolbox instructions explicitly allow contact. Leave about 1/4-1/2 inch of clearance as a practical starting point, then account for bed movement, cab trim, and any rear-window protrusion.
Can you install a toolbox without drilling?
You can install many crossover toolboxes without drilling when the box includes compatible J-hook slots and the truck has a usable rail lip. Side-mount and chest boxes may require brackets or drilled bolts, so inspect the supplied hardware before choosing the installation method.
How do you stop a toolbox from scratching the bed?
Clean the rails, remove trapped grit, and apply thin closed-cell foam or rubber strips to the toolbox contact points. Use correctly sized washers so the fasteners do not cut into the flange, and inspect the padding after the first loaded trip for compression or movement.
Does a toolbox reduce truck payload?
A toolbox reduces available payload by its empty weight plus its contents. A 75-pound steel box and 180 pounds of tools consume at least 255 pounds of payload, before passengers, fuel, tie-downs, and other cargo are included.
How do you test whether a toolbox is waterproof?
Close and latch the empty toolbox, then spray it with a gentle hose for several minutes from above and behind. Open it and inspect the seal, corners, mounting slots, and drain areas. Do not use a pressure washer, which can force water past a seal that would resist normal rain.
The Bottom Line
To install a toolbox in a truck bed, choose a box that matches the rail profile and cargo needs, protect the contact surfaces, maintain cab and brake-light clearance, and secure the box with compatible J-hooks, brackets, or bolts. A careful no-drill installation usually takes 30-45 minutes, while drilling takes 60-90 minutes and requires underside inspection and corrosion protection. Recheck every fastener after the first loaded drive.


