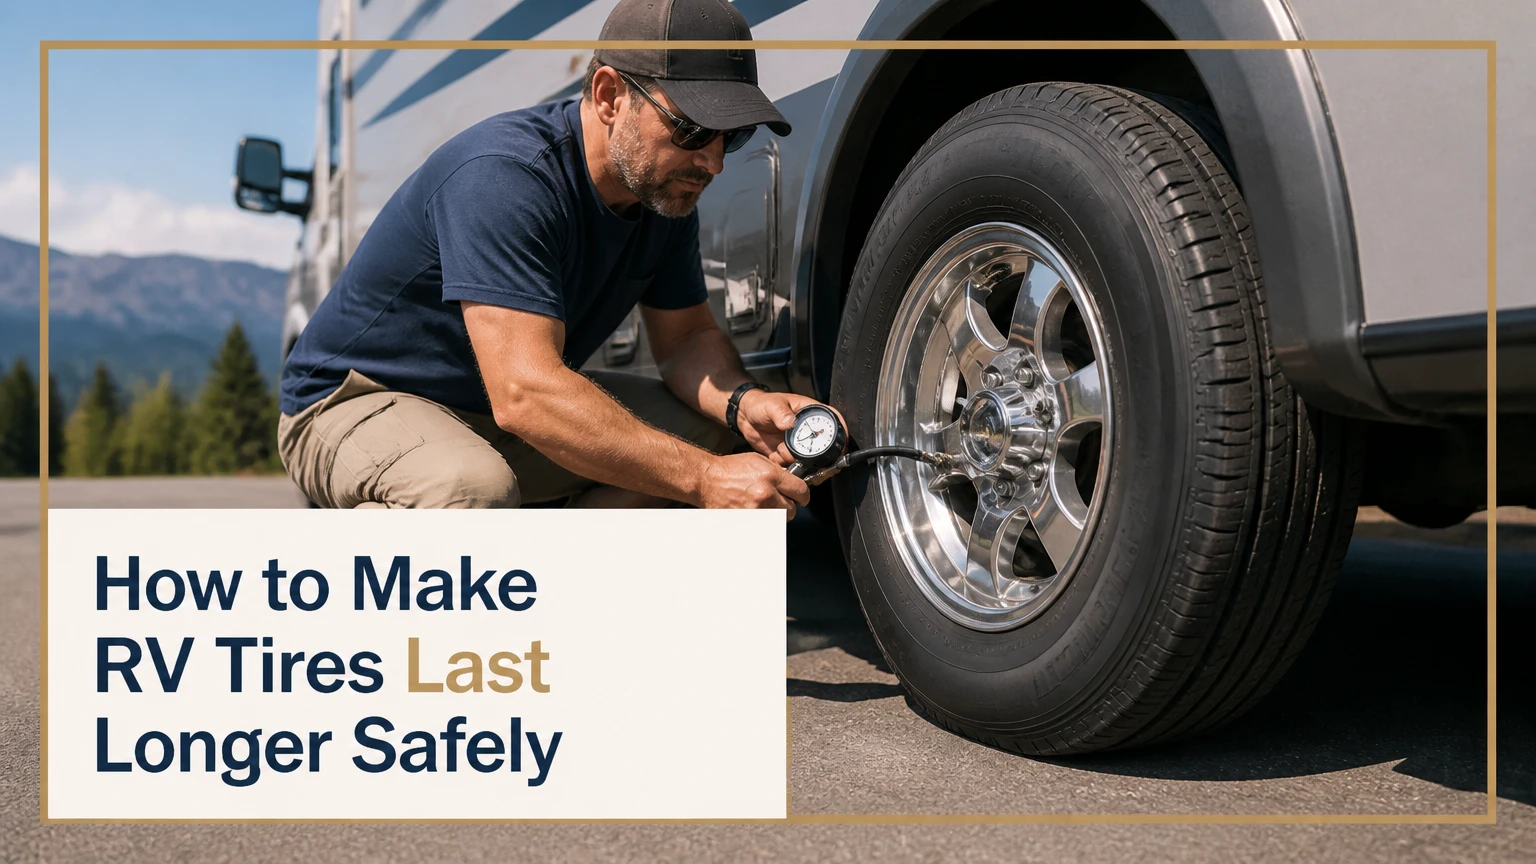
To make RV tires last longer, maintain the correct cold inflation pressure for the actual load, protect sidewalls from sunlight, control storage moisture, drive within the tire’s rating, and inspect for age-related damage. RV tires often reach their safe replacement age before their tread is worn out, so mileage alone cannot determine serviceability.
Key Facts at a Glance
Set RV tire pressure when the tires are cold, using the tire manufacturer’s load and inflation table.
Weigh the loaded RV, ideally at every wheel position, because axle totals can hide side-to-side overloads.
A tire’s DOT date identifies its manufacturing week and year; inspect age-sensitive tires even when tread looks usable.
Tire covers reduce UV exposure during outdoor parking, but they do not repair cracking, bulges, or internal damage.
A TPMS detects pressure loss and abnormal heat while driving; it does not replace a pressure gauge or visual inspection.
Follow the tire and vehicle manufacturer’s storage instructions instead of automatically adding 25% inflation.
What Determines RV Tire Life?
RV tire life depends on inflation, load, heat, speed, storage conditions, alignment, impact damage, and calendar age. A motorhome that travels 12,000 miles annually may wear its tread, while a travel trailer that moves 1,000 miles annually may experience severe sidewall aging from years of sun and static loading.
Tires age because oxygen, ozone, ultraviolet radiation, temperature cycles, and mechanical flexing alter rubber and bonding materials. Internal belts, cords, and liner materials can deteriorate without producing an obvious tread symptom. Static parking does not “use up” a tire in the same way as highway mileage, but long periods under load can promote flat spotting and expose one sidewall to the same environmental stress.
Anti-ozonant compounds help protect tire rubber as they migrate toward the surface during normal flexing. That chemistry is useful, but occasional driving cannot reverse an aged casing or restore damaged belt adhesion. Treat movement as one maintenance input, not a cure for dry rot.
The National Highway Traffic Safety Administration says, “Some vehicle and tire manufacturers recommend replacing tires six years from the date of manufacture,” while other manufacturers specify different limits. The statement matters because no single replacement age applies to every RV tire.
How Often Should You Inspect RV Tires?
Inspect RV tires before every trip, after any significant impact, and at least monthly while the vehicle is stored. A practical inspection takes 10-15 minutes and covers pressure, tread, sidewalls, valve stems, wheel nuts, and anything lodged between paired tires.
Use a flashlight and inspect the inner sidewalls of dual tires, which are easy to miss on Class A motorhomes. Look for bulges, cuts, exposed cords, tread separations, punctures, uneven wear, valve-stem cracking, and objects trapped in the tread.
Record the DOT date, measured pressure, tread depth, and visible defects in a simple tire log. A dated photograph of each sidewall can reveal worsening weather checking more reliably than memory.
| Inspection item | Typical frequency | Replace or repair trigger |
|---|---|---|
| Cold inflation pressure | Before every travel day | Pressure below the manufacturer’s table value or repeated loss |
| Sidewall and tread inspection | Before every trip, monthly in storage | Bulge, exposed cord, deep cut, separation, or penetrating object |
| Tread-depth measurement | Monthly during use | Wear bars reached, irregular wear, or less than 4/32 inch for wet-road reserve |
| Wheel and valve inspection | Before every trip | Loose hardware, cracked stem, damaged extension, or corrosion |
| DOT date review | At purchase and annually | Manufacturer’s age limit, severe weathering, or professional rejection |
| Alignment and suspension check | After impact or abnormal wear | One-sided wear, cupping, bent component, or loose bushing |
How to Make RV Tires Last Longer: Six Steps
Before You Start
| Requirement | Typical value |
|---|---|
| Inspection time | 15-30 minutes |
| Four-corner weighing | 30-90 minutes |
| Digital pressure gauge | $15-$60 |
| Compressor capacity | 120-150 PSI for many heavy RV applications |
| TPMS kit | $100-$400 typical |
| Tire covers | $30-$100 per set |
| Water, mild soap, soft brush | $10-$25 |
| Prerequisite | Tire load range, size, DOT date, and manufacturer table |
Step 1: Weigh the Fully Loaded RV
Weigh the RV in its normal travel condition, including passengers, fuel, propane, water, food, tools, clothing, and hitch load. The most useful result is a wheel-position weight for each tire, because an axle total can appear legal while one side exceeds its tire capacity.
A certified individual-wheel service, such as an RV weighing provider using segmented scales, gives the best data. CAT Scale readings provide axle-group weights and are useful, but they usually do not measure every wheel position independently.
Compare each wheel position with the tire’s rated capacity at the planned pressure. If one side is substantially heavier, redistribute cargo before changing tire pressure. Never raise the pressure beyond the wheel, tire, or vehicle limits to compensate for an overloaded axle.
You’ll know it worked when: every tire has a documented load, the heaviest position is identified, and total axle and gross vehicle ratings remain within limits.
Common mistake: weighing an empty RV and assuming the result represents a camping departure.
Step 2: Set Cold Pressure From the Tire Table
Set RV tire pressure before driving, after the vehicle has been parked for at least three hours or has traveled less than one mile at low speed. Use the tire manufacturer’s load and inflation table, selecting pressure for the heaviest wheel position on that axle while respecting the vehicle placard and maximum rated pressure.
For a dual-wheel axle, use the manufacturer’s dual-application table. Do not use a passenger-car rule such as “add 2 PSI,” and do not select pressure from the maximum sidewall number unless the tire maker’s table and vehicle requirements call for it.
Measure with a calibrated gauge and check all tires, including the spare. Pressure rises as tires heat, so do not bleed a hot tire to reach its cold target. Temperature changes also affect pressure, but the correct response is to measure cold pressure and adjust for the current conditions, not chase a hot reading.
You’ll know it worked when: the gauge reading matches the cold target, valve caps are installed, and no tire is below the load-table requirement.
Common mistake: relying on appearance. Radial RV tires can look normal while substantially underinflated.
Step 3: Add a TPMS and Configure Its Alarms
Install a TPMS that monitors every tire, including the inside tire of a dual assembly when the system supports that sensor position. A TPMS provides early warning for punctures, leaking valve stems, underinflation, and unusual temperature increases while driving.
Program the low-pressure alarm from the manufacturer’s cold-pressure target, not from a random percentage. Set high-temperature alerts according to the TPMS maker’s instructions and understand that temperature varies with ambient heat, sun exposure, brake drag, load, and pressure.
Use metal valve stems or tire-maker-approved extensions where required. External sensors can add weight and may leak if fitted poorly, while internal sensors require tire removal but reduce exposure to theft and weather. Check sensor batteries before a long trip.
A TPMS is not a pressure-setting device. Confirm its displayed reading against a handheld gauge, especially after installation or battery replacement.
You’ll know it worked when: each sensor reports, the monitor identifies the correct tire location, and alarm thresholds are documented.
Common mistake: ignoring a slow alarm because the tire still looks inflated. Stop safely and verify the tire with a gauge.
Step 4: Control Speed, Heat, and Impact Loads
Drive below the tire’s marked speed rating and observe the RV, trailer, and tire manufacturer’s limits. The often-repeated 65-mph rule applies to many ST trailer tires, but it is not a universal speed limit; some newer ST tires have higher ratings, and the lowest applicable rating controls.
Heat is generated by flexing, underinflation, overloading, high ambient temperature, and sustained speed. Slow down on hot days, after a TPMS temperature rise, or when towing near the maximum gross trailer weight.
Avoid curbing sidewalls, sharp potholes, railroad crossings taken at speed, and tight turns that scrub trailer tires across pavement. Trailer tires can experience severe lateral forces during low-speed maneuvering even when the tow vehicle is moving slowly.
You’ll know it worked when: travel speed remains within the lowest tire and vehicle rating, and pressure and temperature remain stable after stops.
Common mistake: treating a higher pressure as permission to exceed the speed rating. Inflation does not change the tire’s marked speed capability.
Step 5: Protect Parked Tires From UV and Moisture
Cover RV tires whenever the vehicle sits outdoors for more than a few days in direct sun. Use covers that fit the tire diameter, protect both sidewalls, resist wind, and allow the tire to remain dry; inspect behind the cover periodically for trapped moisture.
A roof, RV building, or shaded parking position reduces UV exposure more effectively than a dressing. Covers do not prevent aging from heat, overload, ozone, or internal damage, and they must be removed before driving.
Wash road salt, fuel, grease, and brake dust from the tire with water and mild soap, then dry the sidewalls. Do not use petroleum distillates, solvents, brake cleaner, or aggressive tire-shine products. Many tire manufacturers recommend avoiding dressings altogether because chemical compatibility varies and a glossy appearance can hide cracking.
You’ll know it worked when: the sidewall is clean, dry, shaded, and free of residue that can soften or discolor rubber.
Common mistake: applying a silicone or petroleum dressing because it makes old rubber look darker. Cosmetic improvement does not improve casing strength.
Step 6: Prepare the RV for Long-Term Storage
For storage lasting several weeks or longer, remove unnecessary cargo, correct the cold pressure, clean and dry the tires, and use a firm, level parking surface. Emptying water tanks reduces vehicle weight, but it does not authorize exceeding the manufacturer’s axle, tire, or suspension instructions.
Use clean composite pads, treated wood, or another stable barrier under the tires when the surface is wet soil or grass. The pad’s main value is reducing moisture and sinking, not chemically “detoxifying” asphalt. A sound, dry concrete pad is generally preferable to damp ground.
Some manufacturers recommend periodic repositioning, while others provide specific jacking or support procedures. If the RV is lifted, place stands only at approved frame points and never work beneath an unsupported vehicle. Do not use leveling jacks in a way that can overload them or twist the chassis.
Storage inflation varies by manufacturer. A blanket 25% increase is not a universal rule. Follow the RV maker’s storage instructions, stay below the tire and wheel limits, and check pressure before travel because cold weather lowers the gauge reading.
You’ll know it worked when: the RV is supported as specified, tires are clean and shaded, moisture is controlled, and the storage pressure is written down.
Common mistake: lifting the vehicle by an axle or placing a jack under an unsafe suspension component.
Which Tire Type Fits the RV?
ST tires are designed for special trailer service, while LT tires are designed for light-truck applications and are commonly used on driven motorhome axles when the vehicle manufacturer permits them. The correct choice depends on the placard, load range, dimensions, wheel rating, speed rating, and intended axle position.
Do not substitute an LT tire for an ST tire, or vice versa, solely because one has a higher advertised load number. Confirm load capacity at the intended pressure, rim compatibility, clearance, dual spacing, and whether the tire has the required service designation.
| Attribute | ST trailer tire | LT light-truck tire | Motorhome implication |
|---|---|---|---|
| Primary application | Travel trailers and fifth wheels | Class B, C, pickups, and light trucks | Use only the approved service type |
| Sidewall design | Trailer-specific lateral control | Light-truck steering and traction demands | Match axle duty and manufacturer approval |
| Speed rating | Often 65 mph, some higher | Commonly marked by letter rating | Lowest applicable rating controls |
| Load measurement | Single or dual table as marked | Single or dual table as marked | Never mix table types |
| Main stress | Sway, scrub, static storage | Steering, braking, drive torque | Inspect according to axle position |
| Replacement decision | Age plus weathering and trailer exposure | Age plus mileage, heat, and weathering | DOT date matters for both |
An ST tire is not automatically safer on every RV, and an LT tire is not automatically more durable. The vehicle manufacturer’s certification label and the tire maker’s fitment guidance take priority over internet recommendations.
When Should You Replace an RV Tire?
Replace an RV tire when it has structural damage, exposed cords, a bulge, tread separation, unrepairable puncture, severe weather checking, inadequate load capacity, or an age that reaches the tire manufacturer’s limit. Tread depth by itself cannot establish safety.
Find the DOT Tire Identification Number on the sidewall. The final four digits show the manufacturing week and year, so “3521” means the 35th week of 2021. If the full code appears on only one sidewall, inspect the inner side to document it.
NHTSA advises checking manufacturer guidance because replacement recommendations differ. Many RV service professionals use approximately 5-7 years as a conservative planning window, especially for trailer tires stored outdoors, but that range is a maintenance convention rather than a government expiration rule.
| Condition | Action | Reason |
|---|---|---|
| DOT age under 5 years, no defects | Inspect and monitor | Age alone may not require removal |
| DOT age 5-7 years | Obtain a professional inspection and check manufacturer limit | Risk increases with storage and heat history |
| Manufacturer age limit reached | Replace the tire | Calendar aging continues without mileage |
| Bulge, belt separation, or exposed cord | Do not drive; replace | Internal structure may fail suddenly |
| Tread at wear bars | Replace | Wet traction and legal margin are reduced |
| Surface-only weather checking | Professional evaluation | Cosmetic cracks can conceal deeper damage |
Replace tires as an axle-matched set when practical. On a dual-wheel axle, mismatched diameters can create unequal loading and heat, so replacement should follow the tire maker’s matching requirements.
Are Tire Covers or Tire Dressings Better?
Tire covers are the safer routine choice for outdoor UV protection; tire dressings are optional and can create chemical compatibility problems. Covers block sunlight without changing the tire’s rubber compound, while dressings mainly alter appearance and may leave residue that attracts dirt.
| Protection method | Typical cost | Best use | Main limitation |
|---|---|---|---|
| Vinyl sidewall covers | $30-$100 per set | Outdoor parking in direct sun | Wind, trapped moisture, installation time |
| RV building or roofed storage | $100-$500+ monthly, location-dependent | Long-term outdoor climate protection | Higher recurring cost |
| Water and mild soap | $10-$25 in supplies | Removing salt and road film | Does not block UV |
| Tire dressing | $8-$25 per bottle | Cosmetic finish only, if approved | Chemical compatibility and hidden defects |
| Composite or wood pads | $20-$100 | Wet grass or soil storage | Requires level, stable placement |
A cover is not useful if it blows against the sidewall, holds water, or remains installed during travel. Secure it, ventilate the lower edge where appropriate, and remove it before moving the RV.
What Do Common Wear Patterns Mean?
Uneven RV tire wear usually indicates a loading, alignment, suspension, or inflation problem rather than a need for immediate rotation alone. Measure the tread at several points across the tire and compare the pattern with the vehicle’s service history.
- Center tread wear: Often indicates pressure that is high for the actual load, although an incorrect tire size or measurement error can also contribute.
- Both shoulder wear: Often indicates underinflation or sustained overload.
- One-edge wear: Suggests alignment, axle position, camber, bent components, or suspension wear.
- Cupping or scalloping: Can indicate imbalance, loose suspension parts, worn shocks, or tire runout.
- Diagonal or feathered wear: Often points to toe alignment or lateral scrubbing.
- Localized flat spot: May follow emergency braking, a locked brake, or long static storage.
Rotation cannot correct a bent axle or overloaded corner. Have a heavy-vehicle tire shop inspect alignment, brakes, bearings, bushings, and wheel runout when wear repeats after rotation.
How Much Does RV Tire Maintenance Cost?
Routine RV tire maintenance typically costs $50-$500 before replacement, depending on whether the owner buys equipment or pays for weighing and inspection. A complete tire replacement commonly ranges from $150-$600 or more per tire, with larger motorhome sizes, mounting, balancing, disposal, and roadside service increasing the total.
| Service or equipment | Typical price | Useful interval |
|---|---|---|
| Digital heavy-duty gauge | $15-$60 | Replace if inaccurate or damaged |
| Portable compressor | $100-$400 | Use before every trip as needed |
| Four-corner weighing | $50-$150 | Initial setup and after major loading changes |
| TPMS | $100-$400 | Active during every drive |
| Professional tire inspection | $25-$100 | Annually or after impact |
| RV tire covers | $30-$100 per set | Use during outdoor parking |
| Tire replacement labor | $20-$80 per tire | At replacement |
| RV tire | $150-$600+ each | Age, damage, or wear dependent |
The least expensive prevention is accurate pressure measurement. A $30 gauge cannot offset an overloaded tire, but it can prevent the heat buildup caused by chronic underinflation.
What Should Different RV Owners Do?
Weekend and Occasional Campers
Weekend users should prioritize age tracking, UV covers, cold-pressure checks, and a full inspection before each trip. A short drive every few weeks can keep brakes and wheel components exercised, but it does not reset the tire’s manufacturing age or repair weather checking.
Do not take an occasional drive solely to “activate” anti-ozonants if the tires already show cracking. Inspect first, and replace questionable tires before highway travel.
Full-Time RVers
Full-time RVers should weigh the vehicle annually or after major cargo changes, use TPMS continuously while driving, and inspect for mileage-related wear, brake heat, alignment defects, and punctures. Their tires may age more slowly from inactivity but experience greater cumulative heat and load cycles.
Check inner dual tires at every service stop. A temperature difference between paired tires can signal pressure loss, brake drag, bearing trouble, or uneven loading.
Seasonal and Winter Storage
Seasonal users should clean and dry tires before storage, reduce unnecessary weight, block moisture-prone surfaces, shade the sidewalls, and follow the manufacturer’s pressure and support directions. Recheck pressure after temperature changes and before the first departure.
Never assume winter storage pressure remains correct in spring. A 30-degree Fahrenheit temperature change can produce a noticeable gauge difference, so measure cold pressure at the current ambient temperature.
Common Mistakes and How to Fix Them
Using the Maximum Sidewall PSI Automatically
The maximum sidewall pressure is not always the correct operating pressure for the actual load. Reweigh the RV and use the tire manufacturer’s table, while observing the vehicle placard and wheel rating.
Inflating a Hot Tire Down to Target PSI
Hot pressure includes heat generated by operation. Record the reading, allow the tire to cool, and set the cold pressure later. Bleeding a hot tire can leave it dangerously underinflated.
Trusting Tread Depth Alone
A tire with 8/32 inch tread can still have severe sidewall aging or internal separation. Inspect the DOT date, sidewalls, tread base, and service history before approving it for travel.
Leaving Covers on During Travel
Covers are parking equipment, not driving equipment. Remove every cover, strap, pad, and storage block before departure and walk around the RV before entering the road.
Replacing Only the Visibly Damaged Tire
A new tire beside an aged or mismatched tire can create unequal circumference, load, and handling. Follow the manufacturer’s axle and dual-matching guidance, and replace tires in pairs or sets when required.
RV Tire FAQ
Can RV tires last 10 years?
Some tire manufacturers publish a 10-year maximum service recommendation with regular inspection, while others recommend earlier replacement, often around 5-7 years for RV use. Outdoor storage, high heat, chronic overload, ozone exposure, and visible cracking justify earlier replacement than the maximum stated age.
Should RV tires be inflated to the maximum PSI?
No. RV tires should be inflated to the cold pressure required for their actual load according to the tire manufacturer’s table, subject to the vehicle placard and wheel limits. Maximum sidewall PSI is a limit, not an automatic target.
Is it safe to park an RV on asphalt?
Yes, a sound asphalt surface is generally suitable for RV parking. Use a level site, avoid standing water, control sun exposure with shade or covers, and follow the tire maker’s storage instructions. Claims that ordinary asphalt automatically destroys tire rubber are overstated.
Do RV tires need to be rotated?
Some motorhomes benefit from rotation when the vehicle manufacturer specifies it and wear patterns are even. Trailer tire rotation is less universal because axle position, direction, and uneven loading differ. Rotation cannot correct alignment, suspension, overload, or brake problems.
How deep can sidewall cracks be before replacement?
There is no reliable universal crack-depth measurement that an owner can use as a safety clearance. Replace the tire or obtain an immediate professional evaluation when cracks expose cords, extend into grooves, form around the bead, accompany bulges, or appear extensive and branching.
Can a TPMS prevent an RV tire blowout?
A TPMS can reduce blowout risk by warning about pressure loss and abnormal temperature before damage becomes catastrophic. It cannot prevent failures caused by age, impact, manufacturing defects, overload, or a rapid separation that occurs between monitoring intervals.
The Bottom Line
To make RV tires last longer, weigh the loaded RV, set cold pressure from the correct load table, monitor every tire with a TPMS, control speed and heat, protect parked sidewalls from UV, and inspect calendar age as carefully as tread. Replace damaged or age-limited tires before a trip, because accurate maintenance improves service life but cannot make an expired casing safe.


