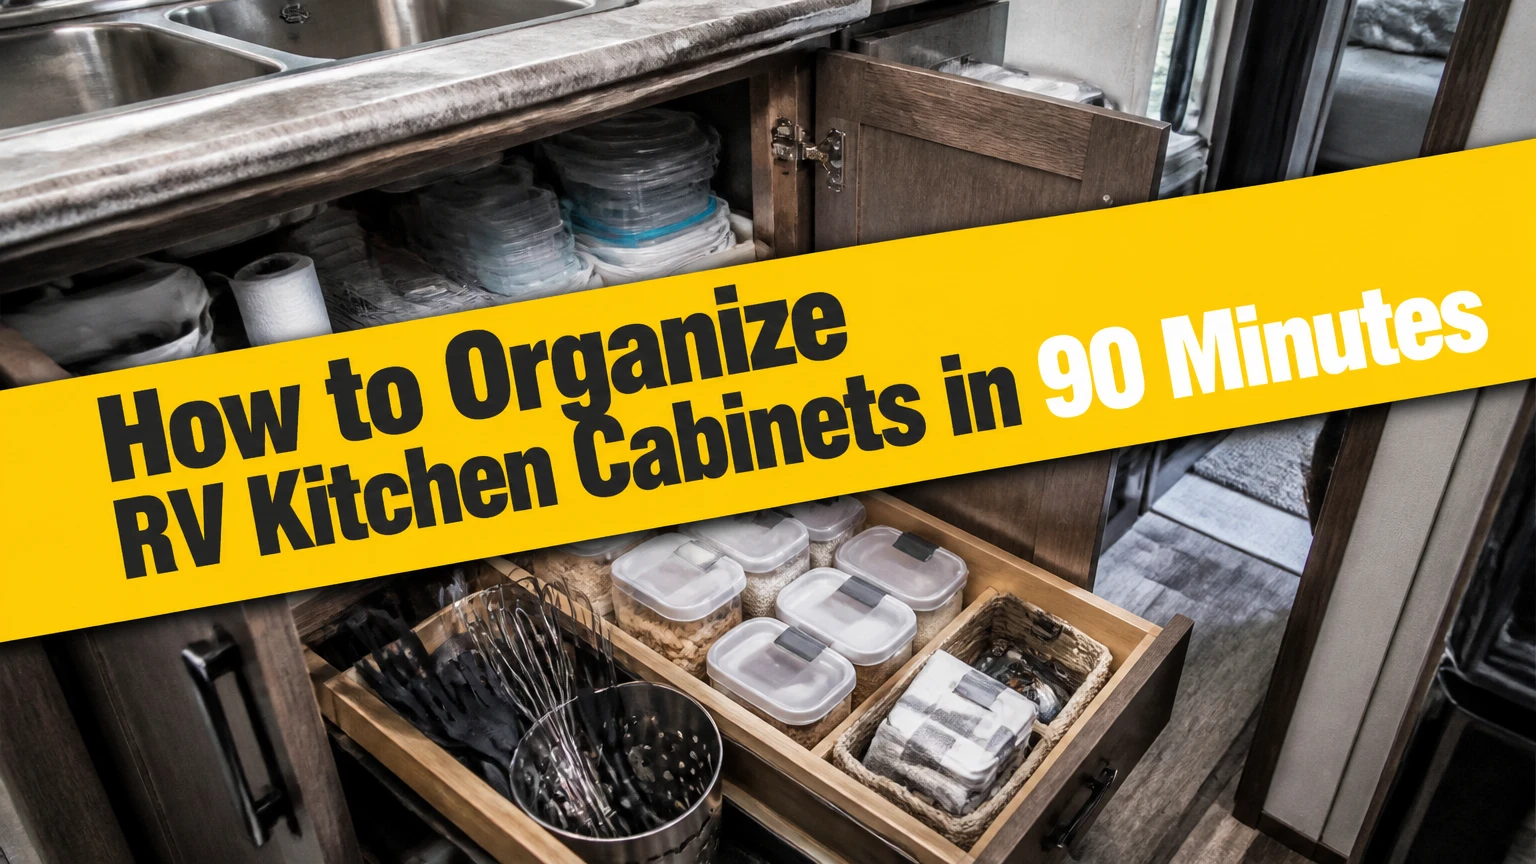
Organizing RV kitchen cabinets requires four actions: remove unnecessary items, assign storage zones, fit measured containers, and secure every object for travel. The best layout keeps frequently used items accessible, heavy cookware low and near the RV’s center, and lightweight breakables contained so vibration cannot create sliding, rattling, or impact damage.
Key Facts at a Glance
- A typical RV cabinet project takes 90 minutes to 4 hours, depending on retrofits.
- Measure usable interior width, depth, and height after accounting for hinges, lips, pipes, and curved walls.
- Non-slip liner reduces sliding, but a liner alone does not stop tall items from tipping.
- Heavy cookware belongs in low cabinets; upper cabinets should hold lighter items.
- Every container must fit with the cabinet door fully latched before travel.
- Follow the RV manufacturer’s GVWR, GAWR, and cargo-loading instructions; cabinet organization cannot correct an overloaded axle.
Before You Start
RV kitchen cabinet organization works best when the planning decisions happen before any container purchase. Set aside 90 minutes for a basic setup, or 2-4 hours if you will install pull-out trays, door racks, or drawer dividers. A drill-free project typically costs $30-$60, while a retrofit with two sliding trays can exceed $250.
Materials and tools
| Item | Typical quantity | Typical cost | Purpose |
|---|---|---|---|
| Measuring tape | 1 | $5-$15 | Cabinet dimensions |
| Removable painter’s tape | 1 roll | $4-$8 | Temporary zone labels |
| Non-slip shelf liner | 2-4 rolls | $10-$25 | Sliding and abrasion control |
| Clear bins with handles | 4-10 | $20-$80 | Grouped pantry storage |
| Spring tension rods | 2-6 | $10-$30 | Door-side containment |
| Soft dividers or plate cradles | 1-2 sets | $12-$45 | Dish and cookware protection |
Empty the sink and stovetop first. Never measure around stored objects, because food packages and cookware hide the cabinet’s usable shape. Photograph plumbing, electrical outlets, and shelf supports before removing fixed components.
A cabinet that looks deep may have only 8-10 inches of usable depth once the opening, back wall, and door hardware are considered. The usable opening, not the outside cabinet dimension, determines whether a bin can enter and leave without tilting.
How Do You Organize RV Kitchen Cabinets?
Organize RV kitchen cabinets in six stages: purge, zone, measure, contain, protect, and test. The most important success factor is not the number of organizers; it is whether each item has a defined location with enough restraint to survive braking, turning, vibration, and cabinet-door movement.
The workflow below separates access from storage density. Daily equipment should not be buried behind seasonal supplies, and a deep cabinet should not become a permanent pile simply because it holds more volume. The final arrangement must work both while parked and while the RV is moving.
Step 1: Empty and Purge Every Cabinet
Remove every item from every kitchen cabinet, drawer, pantry compartment, and counter basket. Place food, cookware, dishes, appliances, cleaning products, and duplicates in separate groups so you can see the actual inventory before assigning storage.
Discard expired food, cracked plastic, chipped dishes, rusty tools, and duplicate utensils that perform the same job. Keep a specialty item only when it supports a planned activity, such as canning, baking, or outdoor cooking. RV storage rewards tools with multiple functions, but a multifunction tool is not useful if nobody uses it.
Use this replacement test: if an item broke today, would you buy it again for this RV? If the answer is no, remove it unless it has a specific safety or accessibility purpose. Store rarely used equipment outside the kitchen only when that alternative location is dry, secured, and easy to identify.
Weigh the heaviest groups
A household scale can identify unusually heavy cargo groups, but it cannot replace a certified RV weight check. Cast-iron cookware, bottled drinks, ceramic dishes, countertop appliances, and canned food can add weight quickly.
Keep heavy groups low and close to the RV’s longitudinal center when possible. Do not treat this as permission to exceed GVWR or GAWR. The vehicle placard, owner’s manual, and axle-scale readings control safe loading.
Checkpoint: You will know the purge worked when every retained item fits a named category and no cabinet contains unassigned objects.
Common mistake: Purging only the visible cabinets leaves duplicate inventory in drawers and exterior compartments.
Step 2: Create Zones by Function and Frequency
Assign cabinets to tasks rather than scattering similar objects across available gaps. Useful zones include coffee, breakfast, cooking, baking, snacks, dishes, drinks, and cleaning supplies.
Place daily items between waist and shoulder height, where they can be reached without unloading another container. Put heavy pots, pans, and canned goods in low cabinets below the counter line. Reserve upper cabinets for lightweight plates, cups, packaged food, and soft goods.
A practical zone map looks like this:
| Zone | Typical contents | Preferred location | Access target |
|---|---|---|---|
| Cooking | Pots, pans, utensils | Low cabinet near stove | One-hand reach |
| Coffee | Mugs, filters, coffee, kettle | Cabinet near prep area | Daily |
| Dishes | Plates, bowls, cups | Low or mid-level cabinet | Daily |
| Baking | Flour, pans, measuring tools | Deep lower cabinet | Weekly |
| Snacks | Bars, crackers, fruit | Shallow bin near entry | Several times daily |
| Cleaning | Towels, soap, gloves | Cabinet below sink | Daily |
Keep liquids upright and separate from dry food. Do not store cleaning chemicals above food, even inside a sealed bin. Keep heat-sensitive items away from the oven wall and allow manufacturer-required ventilation around appliances.
Checkpoint: You will know the zones work when one meal can be prepared without opening more than three storage areas.
Common mistake: Creating attractive categories that ignore frequency, forcing daily users to reach into the deepest cabinet.
Step 3: Measure the Usable Cabinet Space
Measure each cabinet opening and interior in three dimensions: width, depth, and height. Record the smallest measurement, not the largest, because cabinet walls may taper and plumbing or hinges may reduce the usable footprint.
Measure from the shelf surface to the lowest obstruction. Check the door frame, latch, hinge arc, shelf lip, water lines, drain traps, electrical wiring, and curved corners. For a bin, measure the opening width and the interior width separately; a container must pass through the opening before it can use the wider interior.
Use this worksheet:
| Measurement | Where to measure | Buying rule |
|---|---|---|
| Opening width | Narrowest door opening | Bin width must be smaller |
| Interior width | Between side walls | Allows side-by-side planning |
| Usable depth | Front edge to obstruction | Subtract 1 inch for retrieval |
| Usable height | Shelf to lowest obstruction | Leave door-latch clearance |
| Door swing | Hinge arc and frame | Avoid protruding organizers |
| Load surface | Shelf or drawer base | Stay within hardware rating |
Typical RV overhead cabinets are shallower than residential base cabinets, but dimensions vary substantially by manufacturer and floor plan. Do not buy a “standard RV” organizer without checking the model-specific opening.
For efficient packing, leave approximately 1 inch of retrieval clearance in front of a bin and at least 1/2 inch above a removable container. Tighter packing can increase capacity but makes inspection and cleaning harder.
Checkpoint: You will know the measurements are reliable when every proposed container fits through the opening and the door closes without contact.
Common mistake: Measuring cabinet depth to the back wall, then buying a bin that blocks the door because hinges or a front lip were ignored.
Step 4: Choose Bins, Drawers, or Vertical Storage
Choose clear bins for small pantry items, narrow handled containers for deep cabinets, shelf risers for unused vertical space, and pull-out trays for heavy contents that otherwise disappear. No single organizer is best for every RV cabinet.
Clear polypropylene bins make inventory visible and let you remove a whole category at once. Collapsible silicone containers save space after use, but soft walls provide less support for fragile packages. Washable plastic baskets suit produce and towels, while open wire baskets can allow small packets to fall through.
Organizer comparison
| Solution | Typical cost | Best cabinet condition | Main limitation |
|---|---|---|---|
| Clear handled bin | $4-$15 each | Pantry items, snacks, packets | Slides without a liner or stop |
| Wire shelf riser | $8-$25 | Tall cabinet with 4-8 inches of air | Adds height, not road restraint |
| Undershelf basket | $10-$30 | Shelves with 4 inches of clearance | Reduces access below |
| Pull-out tray | $60-$180 each | Deep lower cabinet | Loses 1-2 inches of interior width |
| Plate cradle | $12-$45 | Vertical dish storage | Requires suitable cabinet depth |
| Adhesive door rack | $10-$35 | Lightweight wraps and spices | Adhesive can fail on textured surfaces |
Use pull-out hardware only after checking cabinet framing, screw length, plumbing, and tray load rating. A drawer that holds 40 pounds while parked may stress a lightweight RV cabinet floor during braking.
Wire shelf risers are useful for stacking lightweight cups or bowls, but they are poor substitutes for a restraint system. A tall stack gains a higher center of mass and can tip when the RV turns. Add a front lip, bin wall, or tension barrier.
Checkpoint: You will know the organizer choice is correct when the heaviest daily items can be removed without lifting three other objects.
Common mistake: Filling every vertical gap with risers, then creating unstable towers that hit the cabinet door.
Step 5: Protect Dishes, Glass, and Cookware
Protect dishes by placing a non-slip liner under them, separating hard surfaces with soft dividers, and storing plates vertically when the cabinet allows it. Nesting without a barrier can turn road vibration into chips, scratches, and persistent rattling.
Corelle or other lightweight tempered-glass dishware reduces bulk compared with thick ceramic, but it is not unbreakable. Melamine is lighter and resistant to shattering, although it should not be used in a microwave. Plastic dishware removes much of the breakage risk but can retain odors or stain from tomato-based foods.
Store pans inside one another with silicone trivets or felt separators. Place lids vertically in a narrow divider rather than stacking them flat under heavy cookware. Keep knives in a protected block, sheath, or drawer insert, never loose beside utensils.
Do not use adhesive putty or museum gel on surfaces where residue, heat, or food contact creates a sanitation problem. Gel can stabilize a small decorative object, but it is not a substitute for a mechanical latch or barrier.
Expert rule: Protect the contact points, not merely the objects. A plate can survive vibration while parked, yet chip when its edge repeatedly strikes a bare cabinet wall.
Checkpoint: You will know the packing is protective when no hard item can touch another hard item during a controlled cabinet shake.
Common mistake: Using paper plates as permanent padding around hot cookware, where moisture and heat can weaken them.
Step 6: Secure Everything for Transit
Secure RV kitchen cabinets by eliminating large empty gaps, adding a restraint near the opening, and checking every latch after packing. A non-slip mat stops horizontal sliding, while a tension rod, bin wall, or divider controls forward movement during braking.
Use spring-loaded tension rods only when the rod fits firmly between structurally sound side walls. Position the rod behind the cabinet frame, not against a fragile door panel, and test it with the cabinet loaded. A loose rod can become another projectile.
Pack the heaviest objects at the bottom and keep breakables away from the front edge. Store liquids in leak-resistant containers with upright orientation. Close every lid, latch every cabinet, and remove countertop appliances before departure unless they are specifically restrained.
Perform a transit simulation:
- Close and latch the cabinet.
- Push the cabinet door inward and upward with moderate hand pressure.
- Rock each bin forward and sideways.
- Listen for hard contact between dishes, lids, and walls.
- Open the cabinet and inspect whether contents changed position.
- Repeat after the first short drive.
Checkpoint: You will know the cabinet is travel-ready when the door remains latched, bins do not migrate, and no hard object rattles during the test.
Common mistake: Packing empty space tightly with loose towels, which compresses during travel and leaves objects free to move.
Which RV Cabinet Storage Method Fits Your Layout?
Clear bins are the best starting point for most RV owners because they are inexpensive, removable, and easy to reconfigure. Pull-out trays win in deep lower cabinets, while tension rods and plate cradles solve different motion problems and should not be treated as interchangeable products.
| Method | Access depth | Transit control | Installation | Best use |
|---|---|---|---|---|
| Loose bins | 8-16 inches | Medium with liner | None | Dry goods and snacks |
| Tension rod | Cabinet-wide | High when correctly fitted | None | Tall bottles and open stacks |
| Pull-out drawer | 16-24 inches | Medium, latch-dependent | Screws required | Heavy deep storage |
| Plate cradle | 8-14 inches | High for plates | None or adhesive | Vertical dish storage |
| Door organizer | 2-4 inches | Medium | Adhesive or screws | Wraps and small spices |
Bins are not ideal for very heavy canned goods unless their handles and base are load-rated. Door organizers are not ideal for bottles, cast iron, or anything that can overload the door hinges. Pull-outs are not ideal for rental RVs or thin cabinet floors when drilling is prohibited.
What works for different RV owners?
| User situation | Recommended setup | Avoid | Typical budget |
|---|---|---|---|
| Weekend traveler | Bins, liner, two rods | Permanent modifications | $30-$60 |
| Full-time RVer | Pull-outs, mounted racks, dividers | Cheap brittle hardware | $150-$600 |
| Rental user | Removable bins and silicone mats | Screws and aggressive adhesive | $25-$75 |
| Solo minimalist | One bin per zone, nesting cookware | Duplicate specialty tools | $20-$50 |
| Family of four | Color-coded bins, larger dish zone | Unlabeled shared piles | $60-$150 |
Color coding works when each color has a fixed meaning, such as blue for breakfast and green for snacks. Labels remain necessary because colors are difficult to distinguish in dim cabinet interiors.
Common Problems and How to Fix Them
RV kitchen cabinet failures usually come from wrong dimensions, insufficient restraint, concentrated weight, or incompatible materials. Diagnose the movement first, then change the control method rather than adding more random containers.
Items fall out when the door opens
Install a correctly sized tension rod or rigid front lip several inches behind the cabinet opening. Move tall bottles and loose packets into a handled bin, and verify that the latch engages fully.
Bins slide from side to side
Place a thick, non-slip liner under each bin and reduce unused lateral space with a divider or fitted spacer. Museum gel can stabilize a small stationary container, but it is unsuitable for heavy loads and may leave residue.
Cabinets rattle while driving
Separate hard surfaces with silicone liners, felt dividers, or purpose-made dish protectors. Identify the specific contact point by removing items one category at a time, because adding padding everywhere wastes capacity.
Deep cabinets swallow supplies
Use two narrow bins with handles instead of one wide box, or install a rated pull-out tray. Keep the front bin for daily products and the rear bin for backstock, then rotate older food forward.
Doors will not latch
Remove the tallest item first and check whether a riser, undershelf basket, or door rack projects into the latch path. Never force a cabinet door closed, because repeated pressure can loosen the latch or damage the frame.
Weight accumulates in the wrong area
Move canned goods, cast iron, bottled drinks, and countertop appliances into lower storage near the RV’s center. Confirm the final vehicle weight and axle loads at a certified scale when the cargo change is substantial.
How Much Time and Money Should You Plan?
A basic RV kitchen organization project costs $30-$60 and takes 90 minutes to 2 hours. A mixed setup with clear bins, liners, dividers, and rods typically costs $80-$160, while two or more pull-out trays can bring a permanent retrofit to $250-$600 or more.
| Project level | Materials | Time | Typical total |
|---|---|---|---|
| Basic drill-free | Liner, bins, rods | 1-2 hours | $30-$60 |
| Mid-range | Clear bins, risers, cradles | 2-3 hours | $80-$160 |
| Deep-cabinet retrofit | Pull-outs, dividers, hardware | 3-6 hours | $250-$600 |
| Full-time custom setup | Multiple trays, door racks | 1-2 days | $500-$1,200 |
Prices vary by cabinet count, hardware rating, and whether custom woodwork is required. Installation time increases when cabinets have hidden plumbing, unusual curves, or weak mounting surfaces.
The least expensive setup is not always the lightest. A thick wooden drawer retrofit adds permanent weight, while a removable polypropylene bin can provide adequate containment with less structural stress.
Expert Rules That Prevent Repeat Reorganization
Use one container for one retrieval action. A bin should come out as a complete category, such as tea supplies or baking tools. If a container requires unpacking several unrelated items, it has become a second junk drawer.
Leave a maintenance margin. Fill bins to approximately 80-90 percent of their usable volume. Food packages change shape, and a completely full bin becomes difficult to remove without spilling.
Inspect after the first trip. Stop after 10-20 miles, check cabinet migration, and tighten or reposition restraints before a long journey. Early movement reveals a design problem more cheaply than broken dishes do.
Do not confuse quiet with secure. Towels can silence rattling while allowing heavy cookware to slide. Test movement directly by pushing each item toward the cabinet opening.
Prioritize the opening. The last 2 inches near the cabinet door experience the greatest consequence during braking. Put a rigid barrier or snug container at that boundary, especially in overhead storage.
Variations for Difficult RV Kitchens
Small camper van galley
Use shallow bins no deeper than the cabinet opening and limit each zone to the equipment needed for one meal pattern. Choose nesting cookware, collapsible colanders, and soft-sided produce bags, but keep a rigid restraint around metal tools that can become noisy projectiles.
Large motorhome kitchen
Separate daily use from backstock across multiple cabinets. Reserve the lowest central storage for heavy provisions, use slide-out trays in deep bases, and keep upper cabinets limited to lightweight dishes and dry food.
Older RV with weak cabinetry
Avoid heavy retrofit drawers unless the cabinet floor and framing can support the hardware. Prefer removable bins, low-profile liners, and lightweight dishware, then inspect screws, hinges, and latches for looseness before every trip.
RV kitchen with accessibility limits
Place daily dishes, cookware, and food between seated reach height and shoulder height. Pull-out trays can reduce bending, but the tray must have a positive latch or front stop so it cannot extend during vehicle motion.
FAQ
Should plates go vertically or horizontally in an RV?
Vertical plate storage is usually safer when a cradle or divider prevents side-to-side impact. Horizontal stacking works in a low drawer with a fitted peg system, but tall stacks in upper cabinets gain instability and can shift toward the door during braking.
Can I use regular kitchen organizers in an RV?
Regular organizers can work if their dimensions, load capacity, and restraint match the RV cabinet. Residential drawer inserts often waste space in shallow overhead cabinets, and open countertop racks usually lack the latching or front containment needed for travel.
How do I organize an RV kitchen without drilling?
Use measured clear bins, removable non-slip liners, silicone dividers, correctly fitted spring tension rods, and lightweight baskets. Avoid relying on adhesive for heavy objects because heat, textured laminate, dust, and vibration can reduce bond strength.
Where should canned food go in an RV?
Store canned food in a low cabinet near the RV’s center, inside a handled bin with a non-slip base. Keep the total cargo within the vehicle’s weight limits, and distribute cans rather than concentrating them on one side or one axle.
Are glass containers safe in RV cabinets?
Glass containers are acceptable when they are lightweight, tightly closed, individually separated, and held inside a fitted bin. For frequent travel, plastic or silicone containers reduce breakage risk, but plastic must still be secured because an unbroken container can become a heavy projectile.
How often should RV cabinet organization be checked?
Check cabinet contents after the first 10-20 miles of a trip, after adding new equipment, and whenever rattling or door movement appears. Reassess monthly for full-time use because food rotation, seasonal gear, and changing supplies alter the original layout.
The Bottom Line
To organize RV kitchen cabinets successfully, purge first, create function-based zones, measure every usable opening, choose organizers that match the cabinet depth, and secure the contents before driving. Keep heavy items low and central, lightweight dishes contained above, and every door fully latched. The best RV kitchen system is the one that remains accessible while parked and motion-stable on the road.


