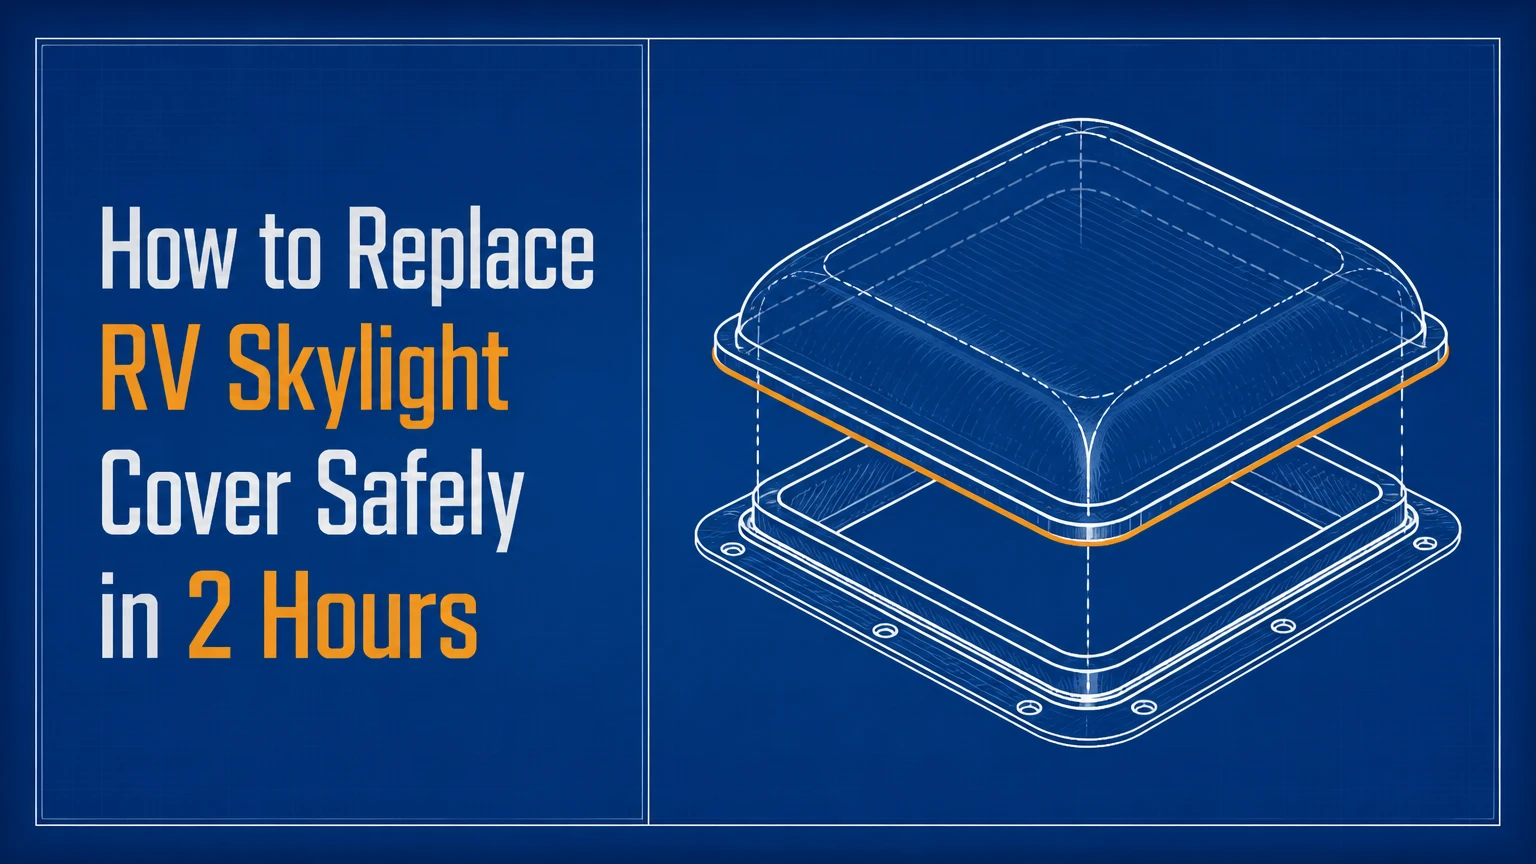
To replace an RV skylight cover, identify the correct dome by measuring the roof opening and existing flange, remove the old fasteners and sealant, clean the roof without damaging its membrane, then bed and seal the new cover. Most replacements take 2-4 hours and succeed or fail on accurate fit, compatible sealant, and gentle screw pressure.
Key Facts at a Glance
- An RV skylight cover is the exterior dome, while the interior trim is usually called the garnish.
- A replacement must match the rough opening, flange shape, screw pattern, dome height, and roof sealant requirements.
- Typical DIY material cost is $70-$170, excluding roof-deck repairs or a replacement inner garnish.
- Use a sealant approved for the RV roof membrane and the dome plastic; household silicone is not a universal substitute.
- Tighten screws only until the flange is seated and the seal compresses; excessive torque can crack acrylic.
- Keep the installation dry during preparation and curing, then perform a controlled hose test rather than relying on visual inspection.
What Is an RV Skylight Cover?
An RV skylight cover is the molded exterior dome attached over a roof opening, commonly above a shower or bathroom. The dome blocks rain, wind, debris, and ultraviolet exposure while admitting daylight into the living area.
Most RV skylights have two separate parts. The outer cover handles weather exposure, and the interior garnish hides the roof cutout and supports the finished ceiling. Some assemblies also use an inner translucent dome that creates an insulating air gap. Replacing the outer dome does not automatically replace the interior trim.
An exterior cover normally has a perimeter flange, predrilled or field-drilled screw holes, and a molded shape that may be flat, domed, tinted, or opaque. The flange sits on a roof membrane or hard roof skin over a layer of butyl tape or compatible bedding sealant. A compatible lap sealant usually covers the flange edge and screw heads.
The exterior dome is a roof component, not a removable bathroom vent lid. A powered roof vent, fan vent, and skylight may share similar dimensions, but their frames, hinge systems, and ventilation functions differ.
Before You Start
Prepare the replacement and verify the worksite before removing the old cover. A stable roof-access plan, a dry forecast, and a confirmed replacement model prevent the most expensive mistake: exposing the roof opening and discovering that the new dome does not fit.
| Requirement | Typical value | Practical checkpoint |
|---|---|---|
| DIY working time | 2-4 hours | Add 1-2 hours for thick sealant or repairs |
| Sealant cure period | 24-48 hours | Follow the product label and weather conditions |
| DIY materials | $70-$170 | Dome, butyl tape, sealant, screws, cleaners |
| Professional labor | $150-$350 | Typical shop range for accessible installations |
| Minimum dry conditions | 12-24 hours | Protect uncured sealant from rain and wash water |
| Roof access | Stable ladder and non-slip footwear | Never work on a wet, frosted, or steep roof |
Tools and Materials
Use the following equipment:
- Replacement outer dome matched to the original assembly
- Plastic scraper, nylon putty knife, and plastic razor blades
- Cordless drill with a low clutch setting
- Manual screwdriver with the correct bit
- Caulking gun
- Nitrile gloves, eye protection, and microfiber cloths
- Butyl tape sized for the flange, usually 1 inch wide
- Compatible RV lap sealant, typically one 10-ounce tube for a small dome
- 70%-91% isopropyl alcohol, if approved for the roof material
- Stainless or manufacturer-specified replacement screws
- Painter’s tape, a measuring tape, and a zippered bag for hardware
- Temporary plastic sheet and tape if rain could arrive before completion
Avoid planning to use a heat gun as the primary removal tool. High heat can soften or deform a plastic dome, blister some roof coatings, and damage adjacent sealant. A hair dryer or direct sunlight is safer when modest softening is necessary.
How Do You Measure for an RV Skylight Replacement?
Measure the structural roof opening, exterior flange, screw pattern, and dome profile before ordering. The commonly sold 14 x 14 inch, 14 x 22 inch, and 18 x 30 inch sizes are useful starting points, but a nominal size does not guarantee that two manufacturers’ covers are interchangeable.
Remove the interior garnish carefully enough to expose the inside edge of the roof cutout. Measure the opening from edge to edge in both directions. Then measure the outside flange, overall length and width, corner radius, dome height, screw-hole spacing, and distance from each hole to the flange edge.
Photograph the old cover, label, screw locations, manufacturer markings, and the roof opening. Search the RV manufacturer, skylight manufacturer, and part number before relying on dimensions alone. A replacement with the correct opening but a different flange can leave old holes exposed or place new screws too close to the roof cutout.
| Measurement | Where to measure | Why it matters |
|---|---|---|
| Rough opening | Inside edge of roof cutout | Confirms the dome covers the opening |
| Exterior flange | Outer edge of old base | Confirms roof contact area |
| Dome height | Roof surface to dome peak | Prevents interference with garnish |
| Corner radius | Inside and outside corners | Matches molded frame geometry |
| Screw pattern | Hole-to-hole spacing and count | Avoids uncovered holes and poor compression |
| Overall length and width | Outside edge of assembly | Confirms physical clearance |
Do not use the interior garnish as the only measurement reference. The garnish can be oversized, distorted, or separated from the original roof frame.
Which RV Skylight Material Should You Choose?
Polycarbonate is usually the stronger choice for hail, branches, and frequent travel, while acrylic costs less and often provides clear optical quality. Polycarbonate can scratch more easily, and acrylic can crack from impact, stress, or incompatible chemicals, so material choice should follow the travel environment rather than price alone.
| Cover type | Typical price | Impact behavior | Best application | Main limitation |
|---|---|---|---|---|
| Clear acrylic | $40-$90 | Brittle under hard impact | Low-cost replacement | Stress cracks and chemical damage |
| Tinted acrylic | $50-$110 | Moderate impact resistance | Temperate recreational use | Heat and UV aging |
| Clear polycarbonate | $70-$140 | High impact resistance | Hail and branch exposure | Surface scratching |
| Tinted polycarbonate | $80-$160 | High impact resistance | Full-time use in hot climates | Higher cost and reduced light |
| Opaque white plastic | $50-$120 | Depends on polymer | Privacy and diffuse light | Little or no sky visibility |
Acrylic is acceptable when the original assembly uses acrylic, the RV sees moderate weather, and budget is the priority. Polycarbonate is preferable for hail-prone regions, wooded campsites, highway travel, and owners who expect longer service under physical abuse.
Tint reduces glare and solar gain but also reduces daylight. Opaque white domes provide privacy and diffuse illumination, making them useful over showers. Clear domes maximize light but can increase the greenhouse effect inside a small RV during summer.
Check the manufacturer’s compatibility statement before applying sealant. A sealant that bonds well to EPDM or fiberglass may still contain solvents that attack acrylic or stress-crack polycarbonate.
How to Replace RV Skylight Cover
The replacement sequence has seven stages: protect the interior, expose the fasteners, remove the old dome, prepare the roof, apply the bedding seal, fasten the replacement, and encapsulate the perimeter. Work slowly at the roof surface because a gouged membrane can cost more to repair than the skylight.
Step 1: Protect the Interior and Document the Assembly
Close the bathroom door, place a drop cloth below the opening, and remove the interior garnish if it obstructs access. Photograph the screw pattern and mark the front of the existing dome with painter’s tape.
Support loose inner pieces before removal. If the old outer cover has shattered, cover the opening from inside with plastic, but do not tape aggressively to a fragile ceiling finish.
You will know this step worked when the roof opening, fasteners, and inner frame are visible and the replacement orientation is recorded.
A common mistake is removing the interior garnish first and allowing dust, plastic fragments, or old sealant to fall into the shower or roof cavity without protection.
Step 2: Expose and Remove the Screws
Use a plastic scraper to uncover each screw head. Remove enough lap sealant to seat the screwdriver bit fully, because a partially exposed head is easy to strip.
Back the screws out with a manual screwdriver or a drill on its lowest clutch setting. Count the screws and save one only as a size reference. Replace corroded fasteners with stainless screws of the same diameter and a length that does not penetrate wiring, cabinetry, or the inner garnish.
You will know this step worked when every fastener is removed and no screw remains hidden beneath a hard sealant mound.
A common mistake is pulling upward on the dome while screws remain installed. That action can crack the flange or tear the roof membrane around a fastener.
Step 3: Separate the Old Flange from the Roof
Cut the sealant perimeter with a plastic razor blade or a blunt plastic scraper. Work parallel to the roof rather than downward into the membrane.
Lift one flange corner only after the bedding layer has been separated. If butyl tape remains elastic, roll or stretch it away in strips. If the old material is hard, use repeated shallow passes instead of a metal chisel.
Use minimal warmth when the sealant is too stiff to cut. A hair dryer held several inches away is safer than a high-temperature heat gun, particularly around acrylic and TPO roofing.
You will know this step worked when the old dome lifts without delaminating fiberglass, gouging the membrane, or pulling up roof coating.
A common mistake is using a screwdriver as a pry bar. The narrow metal tip concentrates force and can puncture EPDM or leave a depression that prevents the new flange from seating.
Step 4: Inspect and Prepare the Roof Surface
Remove old butyl and loose lap sealant until the contact area is flat. Do not attempt to make the entire roof look new; remove material only where the replacement flange will sit.
Inspect the opening edge, screw holes, roof membrane, and roof decking. Soft wood, dark swelling, persistent dampness, or a sagging interior ceiling indicates water damage beyond a dome replacement.
Clean according to roof type. EPDM and TPO membranes can react to petroleum solvents, while fiberglass and aluminum tolerate a wider range of cleaners but still require label verification. Isopropyl alcohol is commonly used for localized cleaning, but test an inconspicuous area and follow the roof and sealant manufacturer’s instructions.
| Roof surface | Preferred preparation | Avoid |
|---|---|---|
| EPDM rubber | Plastic scraper and approved water-based or alcohol cleaner | Mineral spirits and gasoline |
| TPO membrane | Plastic scraper and manufacturer-approved cleaner | Unverified petroleum solvents |
| Fiberglass | Plastic scraper and compatible alcohol cleaner | Abrasive sanding at the flange |
| Painted aluminum | Plastic scraper and mild cleaner | Scratching through the paint layer |
| Bare aluminum | Degreasing cleaner approved for the sealant | Acidic or strongly alkaline products |
Allow the surface to dry completely. Trapped water under butyl tape can create channels, and moisture under lap sealant can produce bubbles or pinholes.
You will know this step worked when the flange area is dry, smooth, residue-free, and free of soft roof material.
A common mistake is scraping aggressively until the membrane becomes thin or shiny. The goal is a level bonding surface, not removal of the original roof skin.
Step 5: Apply the Bedding Seal
Lay continuous butyl tape around the underside of the new flange, keeping the strip inside the outer edge and overlapping the ends by approximately 1 inch. Do not leave gaps at corners or screw holes.
Butyl tape provides the compressible primary bedding seal. Some skylight manufacturers specify a compatible non-sag sealant instead, so follow the replacement part’s instructions when they differ from a generic installation method.
Do not stretch the tape during installation. Stretching reduces its thickness and can pull the seal away from a corner after the dome is tightened.
You will know this step worked when the tape forms one uninterrupted gasket with full coverage around every corner.
A common mistake is applying butyl over dirty or wet surfaces. Bedding material follows the contamination rather than bonding to the roof.
Step 6: Seat and Fasten the New Dome
Center the replacement cover over the roof opening. Align the original holes where practical, but never force a replacement flange into a position that leaves part of the opening uncovered.
Press the dome down evenly. Install screws through the flange in an alternating sequence, such as opposite corners followed by the spaces between them. Drive each screw until the flange contacts the roof and the butyl compresses consistently.
Finish tightening by hand. Plastic flanges need compression, not maximum torque. If the flange begins to whiten, warp, or crack, stop immediately and replace the damaged cover.
You will know this step worked when the flange sits flat, the dome remains centered, and a small, even amount of butyl appears at the flange edge.
A common mistake is using long replacement screws because they seem stronger. Excess length can contact hidden components or distort the frame.
Step 7: Seal the Flange and Screw Heads
Apply an RV lap sealant approved for the roof membrane and the dome material. Create a continuous bead over the exposed flange-to-roof joint, then cover every screw head with a separate mound of sealant.
Do not assume self-leveling sealant is suitable on every vertical or steep surface. Self-leveling products work well on relatively horizontal RV roofs, while non-sag sealant may be required on sloped edges or specified by the skylight manufacturer.
Tool only as much as the product instructions permit. Excessive brushing can thin the bead and introduce voids.
You will know this step worked when the flange edge is continuously encapsulated, no screw head is visible, and the bead has no breaks at corners.
A common mistake is sealing only the screw heads. Water can travel beneath an unsealed flange edge and enter the roof cavity even when every screw appears covered.
Which Sealant Should You Use?
Use a product approved for both the RV roof and the skylight plastic, with butyl tape or the manufacturer-specified bedding material beneath the flange. Dicor self-leveling lap sealant is common on horizontal RV roof applications, while products such as Surebond SB-140 may be specified for skylight assemblies, but the exact label and manufacturer instructions control.
| Sealant or bedding type | Typical location | Compatibility question | Use rule |
|---|---|---|---|
| Butyl tape | Under the flange | Does the dome maker permit butyl? | Use as a continuous compressible gasket |
| Self-leveling lap sealant | Horizontal flange edge | Is it approved for the roof membrane? | Use where leveling is appropriate |
| Non-sag lap sealant | Sloped or vertical edges | Is it plastic-safe? | Use when the bead must stay in place |
| Polyurethane sealant | Specialty assemblies | Does the plastic maker permit it? | Use only with explicit compatibility |
| Household silicone | General household joints | Does it bond to the RV roof and plastic? | Do not treat as a universal RV seal |
Standard silicone is a poor default because adhesion, contamination resistance, future serviceability, and plastic compatibility vary widely. The wrong solvent package can attack acrylic or create stress cracks around screw holes.
Do not mix incompatible sealants over old material. Remove the old bead in the working area, because new sealant may fail to bond to cured silicone or contaminated residue.
What Should You Check Before Water Testing?
Let the sealant cure for the period printed on its label, commonly 24-48 hours in moderate, dry conditions. Cool temperatures, high humidity, thick beads, and limited airflow can extend curing time.
Inspect the bead for gaps, fish-mouth corners, lifted edges, pinholes, and exposed fasteners. Check the interior garnish for displaced insulation, wet wood, staining, or a draft around the frame.
Perform a controlled hose test after curing. Use a gentle stream directed above the skylight for 5 minutes, then inspect inside. Do not use a pressure washer, spray directly beneath the flange, or test during rain before the sealant has cured.
A second inspection after the first drive is worthwhile. Vehicle vibration can reveal a loose screw, a flange that was over-compressed, or a bead that never bonded to contaminated roofing.
Common Mistakes and How to Fix Them
| Failure mode | Likely cause | Corrective action |
|---|---|---|
| Leak at one corner | Gap in butyl or lap sealant | Dry the area, remove loose sealant, and reseal the full corner |
| Cracked flange | Screw over-tightening or wrong hole alignment | Replace the dome and use lower clutch pressure |
| Dome sits high | Old sealant or butyl chunks underneath | Remove the dome, flatten the contact area, and reinstall |
| Sealant peels | Dirty, wet, or silicone-contaminated surface | Remove failed material and clean according to roof instructions |
| Stripped screw hole | Worn substrate or repeated fastener use | Move only if approved, or repair the substrate professionally |
| Interior still damp | Wet roof decking or insulation | Stop sealing and investigate the roof cavity before replacement |
A pinhole in a fresh sealant bead is not always evidence of a defective dome. Moisture, trapped air, or a contaminated substrate can create small voids, but adding a surface smear over an uncured or dirty bead rarely creates a durable repair.
If the roof deck is soft, replacement of the plastic cover alone is incomplete. A technician may need to remove wet decking, dry the cavity, repair framing, and rebuild the roof opening before installing a new dome.
When Is Repair Better Than Replacement?
A small surface scratch or a removable sealant defect may justify repair, but a crack through the dome, a broken flange, widespread crazing, or persistent yellowing usually justifies replacement. A patch can stop a short-term drip, but it cannot restore the original impact strength or flange geometry.
| Condition | Temporary repair | Replacement decision |
|---|---|---|
| One hairline surface scratch | Plastic-safe polish may help | Replace if the scratch weakens a corner |
| Small edge gap in sealant | Remove and reseal | Replace if the flange is distorted |
| Crack through dome | Tape or patch only for transport | Replace before normal travel |
| Cloudy or yellowed plastic | Cleaning may improve appearance | Replace when light transmission is poor |
| Broken screw flange | Sealant cannot restore structure | Replace the dome or full assembly |
| Wet roof decking | Drying alone may not restore wood | Repair the roof structure first |
The cover is not a substitute for roof maintenance. Inspect nearby vents, antennas, air conditioners, solar-wire entries, and roof seams because water can migrate before appearing around the skylight.
Roof-Specific and Situational Variations
EPDM and TPO Roofs
Rubber and thermoplastic polyolefin roofs require conservative cleaning and sealant selection. Petroleum-distillate cleaners may swell or damage some EPDM systems, while unapproved chemicals can affect TPO surfaces or reduce adhesion.
Use plastic tools, avoid abrasive sanding, and verify the sealant label for the specific membrane. If the roof coating is loose around the flange, a repair may require membrane work rather than another layer of caulk.
Fiberglass and Aluminum Roofs
Fiberglass roofs generally provide a hard, stable flange surface, but gelcoat can chip when metal tools are used. Aluminum roofs can develop corrosion around old fastener holes, and the new seal must cover the prepared metal without trapping loose oxidation.
Do not enlarge holes casually. A larger screw may compromise flange geometry or contact hidden wiring.
Cold or Humid Weather
Cold sealant is harder to gun and butyl tape becomes less pliable. Store materials at the temperature specified by the manufacturer, and postpone the work if condensation, frost, or rain prevents a dry bond.
In high humidity, allow additional cure time before testing. A temporary roof cover is safer than rushing an installation under a short weather window.
Hail or Branch Damage
Upgrade to polycarbonate when repeated hail or branch contact caused the original failure. Tinted polycarbonate can reduce glare and heat, but its reduced light transmission may be undesirable in a dark bathroom.
If the impact also dented the roof skin or damaged the interior frame, inspect the complete assembly rather than replacing the dome alone.
How Much Does RV Skylight Cover Replacement Cost?
A typical DIY replacement costs $70-$170 and takes 2-4 hours, while professional installation commonly costs $150-$350 in labor before extensive roof-deck repairs. The dome material, shipping, roof access, old sealant condition, and concealed water damage create the largest cost differences.
| Cost item | Typical range | What changes the price |
|---|---|---|
| Acrylic replacement dome | $40-$90 | Size, tint, manufacturer |
| Polycarbonate dome | $70-$160 | Impact rating and coating |
| Butyl tape | $8-$20 | Width, thickness, roll length |
| Compatible lap sealant | $12-$30 | Brand, chemistry, color |
| Stainless screws | $5-$15 | Quantity and size |
| Professional labor | $150-$350 | Access and preparation time |
| Roof-deck repair | $100-$1,000+ | Extent of hidden moisture |
A full replacement kit can simplify shopping when it includes the correct dome, but kit contents vary. Confirm the roof opening, flange dimensions, screw count, sealant chemistry, and manufacturer part number before assuming every included component fits.
The Bottom Line
To replace an RV skylight cover successfully, measure the complete assembly, protect the roof membrane during removal, use a continuous bedding seal, tighten screws gently, and apply a compatible lap sealant over the flange and fastener heads. The exact keyword task, how to replace RV skylight cover, is manageable for many owners, but wet decking, a damaged frame, or uncertain material compatibility warrants professional repair.
A careful two-hour installation can prevent a much larger roof restoration bill. Do not trade that protection for a rushed measurement or an unverified tube of silicone.
Frequently Asked Questions
Can I replace only the plastic RV skylight dome?
Yes, if the existing roof frame, inner garnish, screw pattern, and flange remain structurally sound. Replace the full assembly when the frame is cracked, warped, corroded, loose, or bonded to damaged roof decking. A dome-only replacement must still match the original flange footprint and dome height.
How many screws does an RV skylight usually need?
Many small skylights use approximately 20-30 perimeter screws, with spacing commonly near 2-3 inches, but the exact count depends on the manufacturer and flange size. Match the original pattern when possible, and never add random holes close to the roof opening without confirming the frame design.
Can I drive the RV immediately after replacing the skylight?
Avoid driving until the bedding material has stabilized and the exterior sealant has cured according to its label, commonly 24-48 hours. Movement can shift an uncured dome, smear a lap-sealant bead, or create a leak path at the flange.
Why is water still appearing around the inner garnish?
Water may be entering through the skylight flange, a nearby roof penetration, or a damaged roof deck, then traveling before it reaches the garnish. Check the entire surrounding roof, inspect the cured bead, and perform a controlled hose test in separate zones.
Is a cloudy RV skylight cover always leaking?
No. Cloudiness often results from ultraviolet aging, surface oxidation, condensation between layers, or chemical damage rather than an active leak. Replace the cover when cracks, crazing, brittleness, flange damage, or reduced light transmission affect function.
Can I use roof coating over the new skylight sealant?
Only use a coating that the roof and sealant manufacturers identify as compatible. Some coatings fail to bond to cured lap sealants, while others can soften plastic or obscure future inspection. Keep the skylight perimeter serviceable and avoid burying a defect under an unverified coating.


