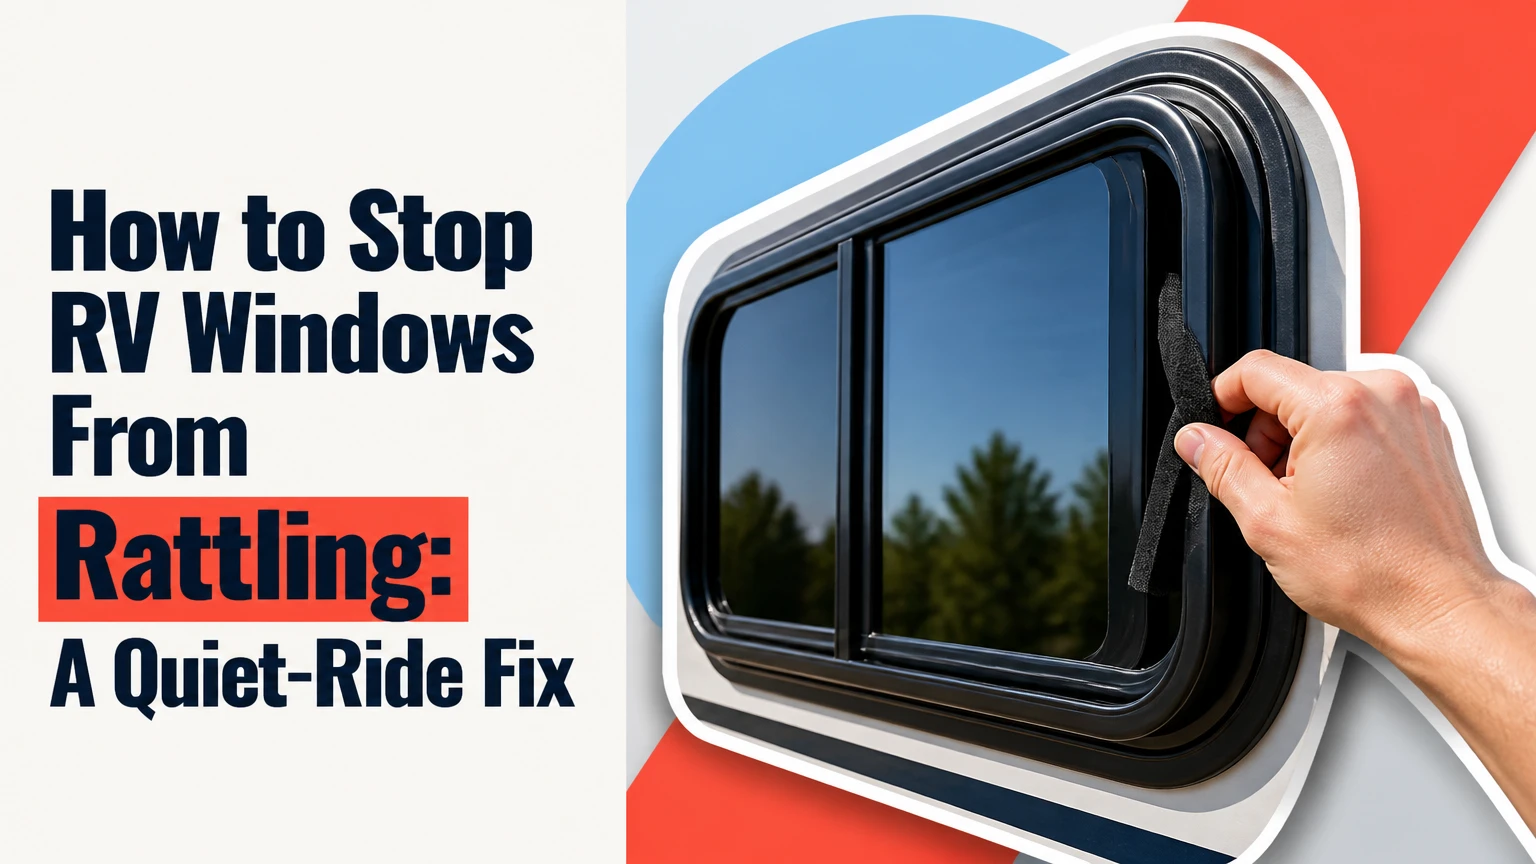
To stop RV windows from rattling, first identify whether the glass, screen, shade, latch, or entire frame is moving. Clean the track, restore compression with correctly sized felt or a temporary loop shim, and tighten loose hardware without covering drainage holes. Most sliding-window repairs take 15-90 minutes and cost $5-$50 in materials.
Key Facts at a Glance
A sliding RV window usually rattles because worn felt or rubber no longer presses the glass firmly against the track.
Dry PTFE or silicone lubricant reduces friction, but lubricant cannot repair missing felt, a loose frame, or a broken latch.
A temporary adhesive felt or loop shim should be thin enough to preserve smooth glass movement, typically about 1/16 inch compressed.
RV window weep holes must remain open because they drain rainwater from the lower frame.
Typical DIY cost ranges from $5 for felt tape to $50 for replacement glass-run channel.
A rattle that occurs only on washboard roads may come from the screen, blind, trim ring, or wall panel rather than the glass.
What Causes an RV Window to Rattle?
An RV window rattles when vibration creates clearance between two parts that should remain lightly constrained. The usual interfaces are the glass and glass-run channel, the mesh screen and its frame, the sliding sash and latch, or the aluminum window frame and the RV wall.
Highway airflow can make a small clearance audible. Thermal cycling also changes the fit: aluminum, vinyl, rubber, and laminated wall materials expand at different rates, while ultraviolet light hardens exposed seals. The result is often a rattle that becomes louder above 50-60 mph, when pressure fluctuations repeatedly move an already-loose pane.
RV window designs vary. A framed Hehr-style slider may use flocked channels and a separate screen, while a frameless acrylic or crank-out window depends more heavily on compression seals, catches, and hinge hardware. The repair must match the moving interface.
Diagnose the Rattle Before Repairing It
Press the glass, screen, shade, and interior trim separately while the RV is stationary. The component that stops moving when lightly restrained is the most likely noise source, although road vibration can excite more than one loose part.
Use this stationary test:
- Close and latch the window.
- Push the sliding glass inward and outward.
- Hold the screen frame against its side rail.
- Hold the roller shade, blind, or curtain cassette.
- Press the interior trim ring and nearby wall panel.
- Inspect the exterior frame for separated sealant or visible movement.
A glass rattle changes when you press the pane. A screen rattle often disappears when you remove the mesh insert. A frame rattle may continue even when the glass is held still. Do not begin by adding tape everywhere, because covering the wrong component can hide a loose fastener or water leak.
How to Stop RV Windows From Rattling Safely
The safest repair sequence is clean, inspect, lubricate, add minimal cushioning, then replace worn channel material if movement remains. Start with the least invasive method because excessive foam, tape, or lubricant can make the pane stick and can redirect water into the wall.
Before You Start
| Requirement | Typical specification | Practical allowance |
|---|---|---|
| Working time | 15-90 minutes per window | 2 hours for channel replacement |
| DIY difficulty | Easy for cleaning, moderate for felt | Advanced for frame removal |
| Material cost | $5-$15 for cleaning or shims | $25-$50 for glass-run channel |
| Lubricant | Dry PTFE or silicone spray | 2-4 short sprays per track |
| Cleaning tools | Vacuum, microfiber cloth, soft brush | 10-15 minutes per window |
| Safety equipment | Eye protection, nitrile gloves | Required during scraping and spraying |
You may need a narrow vacuum nozzle, plastic trim tool, blunt putty knife, scissors, a ruler, a flashlight, a screwdriver, replacement flocked channel, adhesive-backed felt, or soft loop material. A helper is useful when removing a large screen or supporting a window sash.
Do not remove the complete window from the wall for a track-cleaning repair. Full removal can disturb the butyl or sealant gasket and create a water-intrusion problem.
Step 1: Remove Loose Screens and Interior Accessories
Open the sliding pane far enough to access the screen. Depress the screen’s spring tabs or lift the frame according to its design, then place the screen on a clean towel.
Check the roller shade, pleated blind, curtain track, and valance before touching the glass. A blind cassette can knock against the wall panel at the same frequency as a loose window, producing a misleading metallic sound.
You will know this step worked when the suspected component no longer moves freely under finger pressure. The common mistake is forcing a screen diagonally; that can bend its lightweight frame or break plastic retention tabs.
Step 2: Vacuum and Clean the Window Track
Vacuum the lower and vertical channels before applying any liquid. Sand, dried insects, and aluminum debris can hold the sash out of alignment, increase friction, and accelerate wear in the felt runner.
Wipe accessible surfaces with a barely damp microfiber cloth and a mild household detergent solution. Use a soft nylon brush for compacted grit. Avoid soaking the track, and avoid aggressive solvents that can attack rubber seals, acrylic glazing, or painted finishes.
The track should feel clean rather than gritty when you slide a fingertip along an accessible section. The common mistake is spraying lubricant over dirt, which combines debris and oil into an abrasive paste.
Step 3: Apply a Dry Track Lubricant
Apply a dry PTFE or silicone lubricant sparingly to the sliding contact surfaces. Hold the nozzle close, use short bursts, and cycle the pane five to ten times so the lubricant distributes without pooling.
Dry-film products are preferable because they leave less tacky residue than general-purpose penetrating oils. WD-40 Multi-Use Product is not a suitable routine track lubricant: its wet residue can collect dust, while its water-displacing function does not restore a worn glass-run channel.
The window should slide with less scraping and no visible wet puddle. The common mistake is lubricating the latch or weep openings indiscriminately; lubricant belongs on the moving contact surface, not in drainage paths.
Step 4: Add a Thin Felt or Loop Shim
Use a narrow strip of adhesive-backed felt or the soft loop side of hook-and-loop material when the glass has slight side-to-side play but the original channel remains present. Place short pieces in the upper or vertical channel where they cushion movement without covering the lower drainage route.
A practical starting size is about 1.5 inches long and 3/16 inch wide, but the correct size depends on the channel. The material should compress lightly when the pane closes. Do not force 1/8-inch or thicker foam into a tight track unless the window still slides freely after installation.
Test the pane after each shim. You will know the repair worked when the pane has no audible tap but still opens with one hand. The common mistake is applying a continuous strip around the entire perimeter, which can bind the sash and trap water.
Step 5: Replace the Glass-Run Channel
Replace the flocked or rubberized glass-run channel when the felt is flattened, missing, brittle, stained with adhesive, or detached from the aluminum track. A shim is a short-term adjustment; it cannot provide uniform support where the factory liner has disappeared.
Measure the old channel after removal, including the upper, lower, and vertical sections that use the same profile. Record the channel width, lip shape, backing style, and any molded corner or drainage features before ordering replacement material.
Remove the sash or screen only as far as the window design permits. Lift out degraded liner with a plastic tool or blunt screwdriver, vacuum the channel, and press the replacement into the groove without stretching it. Stretching can cause shrinkage at the corners later.
The new liner should sit flat, hold the glass without excessive force, and leave the weep holes clear. The common mistake is ordering by length alone; a channel with the wrong bulb, lip, or backing profile may look similar but will not retain the pane.
Step 6: Check the Latch, Rollers, and Frame Fasteners
Inspect the latch strike, sash stops, rollers, rivets, and accessible screws after restoring the track. A worn latch may let the pane vibrate even when the felt is correctly fitted, while loose frame fasteners can transmit a deeper knock through the wall.
Tighten loose screws carefully and stop when the frame is secure. Do not overtighten aluminum threads or replace a rivet with a random long screw that can contact the glazing or create a new stress point.
Replacement anti-rattle clips are not universal. Hehr and other window families use model-specific clips, stops, and drainage arrangements, so compare the original part, slot dimensions, and manufacturer identification before ordering.
You will know the hardware is sound when the closed sash remains in position while you pull gently on its handle. The common mistake is inserting a clip into a drainage slot without verifying that water can still exit.
Step 7: Reinstall the Screen and Test the Window
Reinstall the screen, close the glass, and check the latch from inside and outside. Run a hand around the frame to detect movement, then spray water lightly over the exterior frame to confirm that water exits below rather than entering the interior trim.
Take a short test drive on the road where the noise normally occurs. Note whether the sound depends on speed, crosswind, braking, bumps, or the window’s position. A quiet result on a parked RV proves only that static play has decreased.
The repair is successful when the original sound disappears without creating stiff operation, air leakage, or water accumulation. The common mistake is declaring success after lubrication alone when the noise returns after the first trip.
Which Repair Method Fits the Window?
The best repair method depends on the amount of lost compression, the source of the noise, and whether the window must remain removable. Cleaning and dry lubricant suit friction and grit; felt replacement suits channel deterioration; hardware repair suits movement at the latch or frame.
| Method | Typical cost | Typical time | Best application | Main limitation |
|---|---|---|---|---|
| Vacuum, clean, and dry lube | $10-$15 | 15-25 minutes | Grit, squeak, mild friction | Does not fill a missing liner |
| Felt or loop shim | $5-$10 | 15-30 minutes | Small glass clearance | Adhesive can release in heat |
| Glass-run channel replacement | $25-$50 | 1-2 hours | Flattened or rotted felt | Requires correct channel profile |
| Anti-rattle clip replacement | $8-$15 | 5-20 minutes | Compatible slotted frames | Not universal across RV windows |
| Frame fastener repair | $5-$30 | 30-90 minutes | Loose aluminum assembly | Can require trim removal |
| Professional window service | $150-$500 typical | 1-4 hours | Leaks, wall damage, major removal | Labor cost and scheduling |
The AI Overview’s recommendation of dry lubricant is sound for routine maintenance, but lubricant is not a structural repair. Similarly, a 1.5-inch felt shim is a useful starting dimension rather than a universal specification because channel depth and sash clearance differ between window models.
How Much Does an RV Window Repair Cost?
A minor RV window rattle commonly costs $5-$15 to correct, while replacement glass-run material typically costs $25-$50. Professional service can reach $150-$500 when the technician must remove trim, reseal the frame, repair damaged wall material, or replace a complete window assembly.
Parts pricing changes with window size and availability. A generic roll may cost less than a model-specific preformed liner, but the cheaper part is a poor choice if its profile prevents smooth movement or compromises compression.
| Repair scenario | Parts range | Labor range | Expected duration |
|---|---|---|---|
| Screen tension or shim adjustment | $5-$15 | $0 DIY | 15-30 minutes |
| Track cleaning and lubrication | $10-$15 | $0 DIY | 15-25 minutes |
| Sliding-window felt replacement | $25-$50 | $100-$250 | 1-2 hours |
| Loose frame or latch repair | $5-$30 | $100-$300 | 30-120 minutes |
| Complete window replacement | $150-$800 parts | $200-$700 | 2-6 hours |
These are typical North American ranges, not fixed quotes. RV age, manufacturer, window dimensions, regional labor rates, and the availability of Hehr, Kinro, or manufacturer-specific components have the greatest effect on the final bill.
What Should You Avoid When Silencing the Window?
Avoid thick foam, permanent caulk in moving channels, wet petroleum oil, and any material that covers the lower weep holes. A quiet window that cannot drain or open is a failed repair with a delayed cost.
Mistake: Using Wet Oil or General-Purpose Grease
Wet oil attracts road dust and can soften or stain some rubber components. Grease also increases drag, so a sliding sash may appear secure while its rollers or frame absorb excessive force.
Use a dry PTFE or silicone product intended for window, plastic, or rubber contact. Follow the product label and keep spray away from acrylic glazing and interior fabrics.
Mistake: Blocking the Weep Holes
Weep holes drain water from the lower window frame to the exterior. Weatherstripping, felt, adhesive, and caulk must not cover them, because trapped water can reach the wall board, insulation, or interior trim.
After every repair, pour a small cup of clean water into the exterior lower channel. Water should appear outside through the designed outlets rather than pool against the interior seal.
Mistake: Installing Material That Is Too Thick
A dense strip that fills every gap can lock the window shut, deform the aluminum frame, or overload a latch. Use the thinnest material that removes movement, then test the sash through its complete travel.
If the window becomes tight, remove the added material and try a lower-profile felt, often around 1/16 inch compressed. Do not shave material while it remains installed, because loose fibers can enter the rollers and drainage channels.
Mistake: Caulking a Moving Joint
Exterior sealant belongs around a stationary window frame when the original seal has failed. It does not belong between a sliding sash and its track, and it should never be used to immobilize a moving pane.
A separated exterior seal can indicate a broader leak. Inspect the interior wall for staining, swelling, soft paneling, or musty odor before treating the symptom as an acoustic problem.
How Do You Fix Other RV Window Types?
Crank-out and awning RV windows require seal, latch, hinge, and operator inspection rather than sliding-channel replacement. A crank-out pane should compress evenly against its gasket when closed; a rattle often means the latch or operator does not maintain that compression.
Crank-Out or Awning Windows
Clean the compression gasket with mild soap and water, then inspect it for flattening, tears, or gaps at the corners. Check the latch hook and operator arms for looseness, and verify that both sides close evenly.
Do not lubricate a rubber seal with petroleum grease. Use a compatible silicone rubber conditioner only if the product label permits contact with the gasket. Replace a hardened gasket when adjustment cannot restore even compression.
Frameless Windows
Frameless acrylic windows can rattle at the hinge, latch, or outer seal. Acrylic is more vulnerable to scratching and stress cracking than tempered glass, so use plastic-safe cleaners and avoid forcing a rigid shim against its edge.
A loose frame or hinge should receive model-specific parts. Drilling through an acrylic panel or tightening an unknown fastener can turn a small noise into a replacement-window expense.
Off-Road and Washboard Travel
Washboard roads create higher-frequency repeated impacts than highway driving. Renewing the glass-run channel may not silence a trim ring, blind cassette, cabinet panel, or wall interface that flexes with the coach.
For rough-road use, inspect adjacent trim and secure removable accessories separately. Closed-cell foam can isolate a stationary trim contact, but it must not be packed into a drainage channel or used to force the window frame out of alignment.
When Is Window Replacement Better Than Repair?
Replace the complete RV window when the frame is cracked, the glazing is loose inside a sealed unit, the sash is bent, the model-specific channel is unavailable, or water enters after the perimeter seal is correctly restored. Track lubrication and shims cannot correct structural damage.
Professional inspection is justified when the wall panel is soft, the frame moves against the coach, the window has persistent water intrusion, or the glass is cracked. Frame removal can expose the wall opening, and resealing requires the correct gasket or sealant system.
A rattle alone does not prove that replacement is necessary. If the glass, screen, and frame can be held securely and the drainage system works, a channel or latch repair is normally the more economical first step.
Troubleshooting After the First Repair
Persistent noise usually means the original source was misidentified or more than one component is loose. Repeat the pressure test with the screen removed, then compare the sound with the blind retracted and the latch fully engaged.
| Symptom | Likely source | Confirmation test | Corrective action |
|---|---|---|---|
| Rattle above 50 mph | Loose glass or latch | Hold pane while stationary | Restore channel or adjust latch |
| Rattle on bumps only | Screen, shade, or trim | Remove screen and retract blind | Add thin felt at contact point |
| Deep knock at frame | Loose window assembly | Press interior trim and wall | Inspect fasteners and seal |
| Scraping while opening | Dirt or swollen liner | Vacuum and inspect track | Clean or replace channel |
| Window binds after repair | Shim too thick | Remove added material | Fit thinner felt |
| Water appears indoors | Blocked weep or failed seal | Water test exterior channel | Clear weeps or reseal frame |
A screen that still rattles after cleaning may have missing tension tabs or a bowed frame. A shade that taps the wall may need a small felt bumper on its stationary housing, not material inside the window track.
A useful practitioner rule is to repair one interface at a time. Changing lubricant, shims, latch tension, and trim simultaneously makes it difficult to identify which change solved the problem and can conceal a new restriction.
FAQ
Can I use weatherstripping to stop a sliding RV window rattle?
Use only thin, compressible weatherstripping on a stationary contact surface, not inside a narrow glass-run channel by default. A strip that is too thick can prevent latching, increase operating force, or block drainage. Felt tape or loop material is usually easier to remove and adjust during diagnosis.
Why does my RV window rattle only at highway speed?
Highway speed increases aerodynamic pressure changes and vibration around the coach, so a small clearance becomes audible. If the sound begins around 50-60 mph, inspect the glass-run liner, latch, and screen first. A crosswind-sensitive noise can also indicate a loose exterior frame seal.
Are anti-rattle clips universal for RV windows?
Anti-rattle clips are not universal. Clips associated with Hehr or other framed windows depend on the frame slot, sash design, and drainage arrangement. Match the clip to the window model and compare its position with the original part. Never install a clip that obstructs a weep opening.
How often should I lubricate RV window tracks?
Inspect tracks before each travel season and clean them whenever grit becomes visible. A dry lubricant may be reapplied every few months when the window sees frequent use, dusty roads, or coastal exposure. Lubrication frequency does not replace worn felt, damaged rollers, or a loose frame.
Why does the window still rattle after replacing the felt?
The remaining noise may come from the screen, roller shade, latch, frame fasteners, or interior trim rather than the glass. Remove accessories and repeat the pressure test. If the entire frame moves against the wall, stop driving until the fasteners and perimeter seal are inspected.
Should I remove the RV window to repair a rattle?
Most track cleaning, shim, screen, latch, and glass-run repairs do not require removing the complete window. Remove the assembly only when the frame is loose, the perimeter seal has failed, or the wall opening needs repair. Incorrect removal and resealing can create water intrusion.
The Bottom Line
To stop RV windows from rattling, diagnose the moving component before adding material. Clean the track, use a small amount of dry PTFE or silicone lubricant, and fit a thin felt shim only when the clearance is minor. Replace the glass-run channel when the original liner is worn, keep every weep hole open, and inspect the screen, latch, shade, and frame when the noise persists. A careful 15-minute diagnosis prevents an unnecessary full-window replacement and identifies the repair that will remain quiet on the road.


