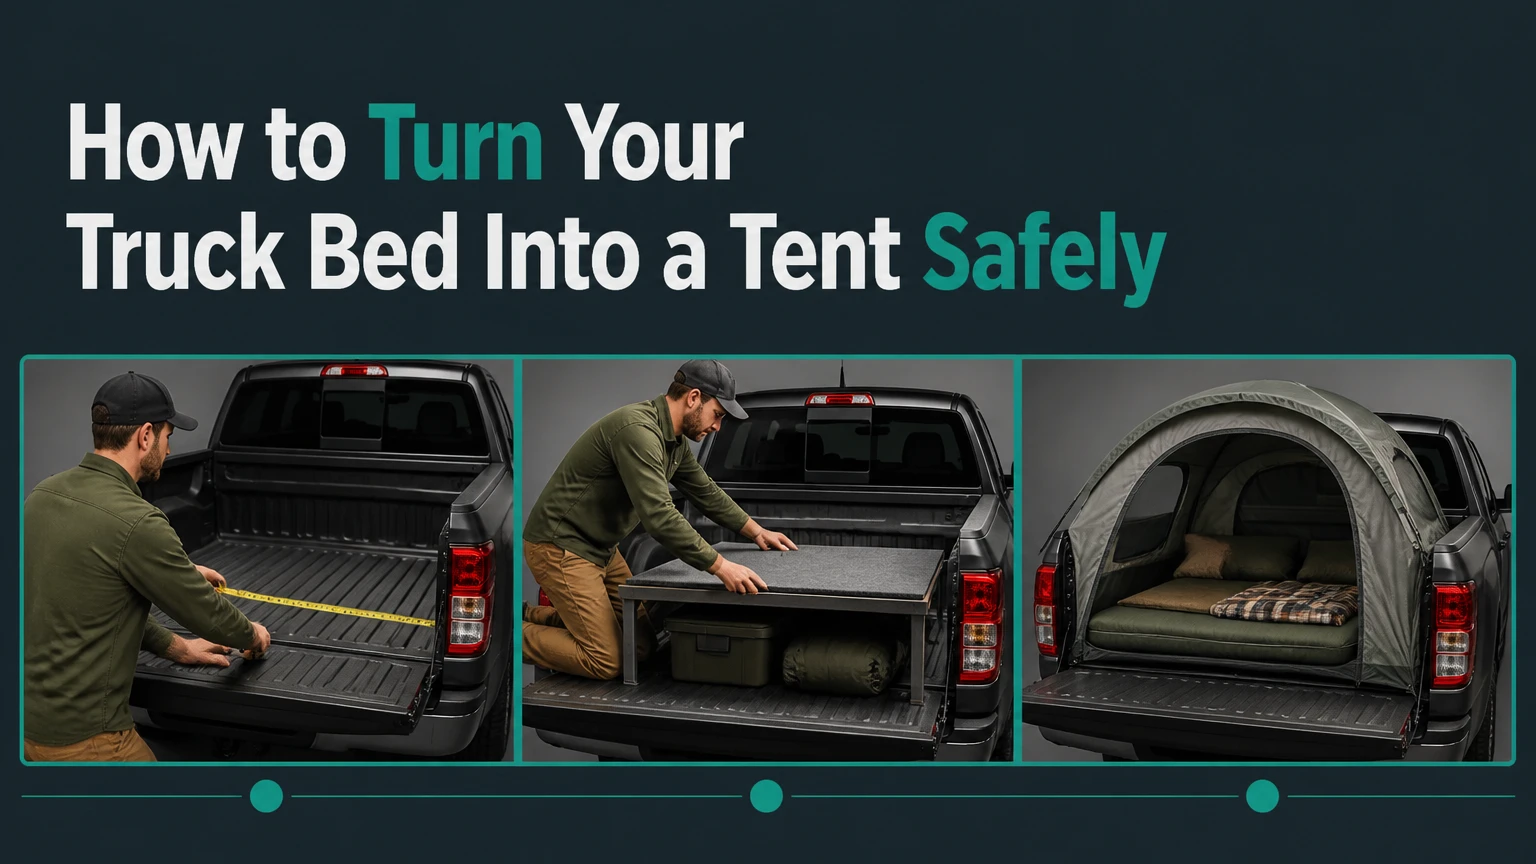
A truck bed tent converts a pickup truck’s cargo bed into an elevated sleeping shelter by using the open tailgate as floor space and tension straps to secure the tent around the bed rails. Choose a model matched to your bed length and rail width, clear and insulate the bed, assemble the frame, tighten straps evenly, and keep ventilation open. A typical first setup takes 20-30 minutes.
Key Facts at a Glance
- A truck bed tent normally costs $120-$500 before buying a mattress, insulation, or weather accessories.
- A correctly fitted truck bed tent usually installs in 15-30 minutes after a practice setup.
- The open tailgate becomes part of the sleeping platform, so the tailgate must support the tent’s design and remain securely latched or supported.
- Pickup bed length is measured with the tailgate closed, from the front bulkhead to the inside of the closed tailgate.
- A sleeping pad or truck-bed mattress is necessary because metal and plastic bed surfaces conduct cold and transmit pressure.
- A truck bed tent is not safe for cooking, running an engine, or using fuel-burning heaters inside the enclosed shelter.
What Do You Need Before Setting Up?
You need a correctly sized truck bed tent, a clean and reasonably level parking location, an insulated sleeping surface, and the manufacturer’s frame poles, straps, hooks, and rainfly. Typical setup equipment includes one tent, one mattress or sleeping pad, two to four leveling boards, a microfiber cloth, and a small repair kit.
Before You Start
| Requirement | Typical specification | Why it matters |
|---|---|---|
| Setup time | 20-30 minutes initially | Allows unloading, fitting, and adjustment |
| Experienced setup | 10-20 minutes | Assumes the poles and straps are labeled |
| Tent budget | $120-$500 | Covers polyester, floorless, and canvas models |
| Sleeping pad | 2-4 inches thick | Separates the sleeper from cold bed material |
| Leveling gear | 2-4 boards, 1-2 inches thick | Corrects uneven campsites without digging |
| Cleaning supplies | 1 cloth, 1 brush | Removes grit that can damage the tent floor |
| Weather gear | 1 rainfly, 1 ground tarp | Adds rain protection and protects packed fabric |
Check the tent manual before improvising attachment points. Rightline Gear, Napier, Kodiak Canvas, and other manufacturers use different strap paths, hook shapes, pole sockets, and cab sleeves; a procedure that fits one model can damage another.
Measure the Truck Bed Correctly
Measure the usable bed length from the inside of the front bulkhead to the inside of the closed tailgate. Then measure the inside rail-to-rail width, the bed-rail height, and the distance from the bed floor to the top of the cab.
| Measurement | How to take it | Fitment consequence |
|---|---|---|
| Bed length | Bulkhead to closed tailgate | Determines short-bed or long-bed model |
| Rail width | Inside edge to inside edge | Prevents sidewall and pole mismatch |
| Bed depth | Floor to top of rail | Affects floor tension and mattress clearance |
| Cab clearance | Bed floor to cab roof or rear window | Prevents sleeve and rainfly interference |
| Tailgate gap | Closed tailgate seam width | Reveals possible rain and draft paths |
A “5.5-foot bed” label is not a universal physical measurement. Ford F-150, Chevrolet Silverado, GMC Sierra, Ram 1500, Toyota Tacoma, and Nissan Frontier beds differ by model year, cab configuration, liner thickness, and tailgate design. Use the tent manufacturer’s fitment chart, not a generic truck class.
How Does a Truck Bed Tent Work?
A truck bed tent uses a fabric body, shock-corded poles, tension straps, and vehicle-compatible hooks to create a freestanding shelter supported by the pickup bed. The tent usually rests on or around the bed rails, while straps pull the walls outward and the tailgate extends the sleeping area behind the bed.
A floored model creates a bathtub-style barrier between the sleeper and the bed surface. A floorless model leaves the cargo floor accessible and seals around the perimeter with a skirt. The cab sleeve closes the space near the rear window, while the rainfly sheds water above the main fabric.
The vehicle does not replace every tent component. The poles still provide shape, and the straps still control wind movement. Hooks should attach only where the instructions permit, with rubberized or padded contact points kept free of grit.
What Does the Tailgate Do?
The tailgate provides additional floor area and supports the tent’s rear section, but it is not automatically a safe sleeping platform. Inspect the tailgate cables, hinges, latches, and manufacturer load rating before placing a person or mattress on it.
Never exceed the truck manufacturer’s tailgate capacity. A concentrated load from knees, a cooler, or a person sitting near the outer edge can stress the tailgate more than a distributed mattress load. Keep heavy gear on the bed floor and use a wide mattress that spreads weight.
Step 1: Park, Level, and Secure the Truck
Park the pickup on firm ground, align the bed as level as practical, switch off the engine, and engage the parking brake before opening the tailgate. A practical target is keeping the sleeping surface within about 2 degrees of level from head to foot and side to side.
Use leveling boards under the tires rather than placing loose blocks beneath the tailgate or bed. Confirm that the truck is stable, the transmission is in Park or in gear, and the campsite permits vehicle camping.
You will know Step 1 worked when the mattress does not visibly slope and the truck remains stationary while you walk around it. The common mistake is leveling only from side to side while ignoring the downhill angle from cab to tailgate.
Step 2: Empty and Inspect the Bed
Remove tools, fuel containers, coolers, sharp cargo, and loose debris before laying out the tent. Sweep the bed, inspect the liner for protruding screws, and cover abrasive accessories such as tie-down cleats if the instructions allow it.
A floored tent requires a fully clear bed because its fabric floor occupies the entire sleeping footprint. A floorless model may accommodate drawers or low-profile storage, but exposed corners can still press against the shelter or mattress.
Place cargo in sealed totes outside the sleeping area, inside the cab, or under a separate tarp. Do not store gasoline, propane cylinders, wet fuel equipment, or chemical containers inside the occupied tent.
You will know Step 2 worked when a hand swept across the bed finds no sharp metal, gravel, or loose fastener. The common mistake is leaving a toolbox under the mattress, which creates pressure points and can puncture the tent floor.
Step 3: Position the Tent and Add Insulation
Lay the tent body in the bed with the main door facing the open tailgate and the cab sleeve facing the rear window. Before raising the poles, place an insulated foam pad, truck-specific air mattress, or closed-cell underlay across the sleeping area.
Typical insulation thickness is 2-4 inches for three-season camping, while cold-weather trips benefit from a higher-R-value sleeping pad rather than simply adding a thick inflatable mattress. An anti-condensation mat can help air circulate beneath an air mattress, but it does not replace insulation.
Keep the tent floor centered over the bed and tailgate seam. Align pole sleeves, door zippers, and ventilation panels before attaching straps, because rotating the shelter after tensioning often twists the frame.
You will know Step 3 worked when the door opens centrally and the mattress lies flat without covering ventilation panels. The common mistake is inflating the mattress first, which hides misalignment and makes pole installation harder.
Step 4: Attach the Straps Loosely
Route each nylon strap according to the tent manual and attach hooks to approved body edges, bed supports, or frame locations. Place a clean cloth between any contact point and painted bodywork when the design permits, then leave every strap loose until the poles are installed.
Do not hook straps to brake lines, exhaust components, plastic trim that can deform, tailgate cables, or moving suspension parts. Rubberized hooks reduce scratching but do not protect paint from trapped dust, so clean both surfaces before tensioning.
Most tents use separate side and rear straps. Work symmetrically, attaching the left side, right side, and rear sections without tightening one area fully.
You will know Step 4 worked when the tent can still shift several centimeters for pole alignment. The common mistake is overtightening early, which pulls pole sleeves out of position and can stress fiberglass joints.
Step 5: Assemble and Seat the Poles
Join the shock-corded poles section by section, then slide each pole through its matching sleeve or clip without forcing the fabric. Raise the dome gradually and seat every pole tip into its corner pocket, grommet, or bracket.
Fiberglass poles can splinter if bent sharply against a vehicle edge. Aluminum frames tolerate repeated assembly better but usually add cost and packed weight. Keep pole joints fully engaged because a partially connected section concentrates stress at one point.
Have one person support the frame while another inserts the final pole if the tent is large or the wind is strong. Do not assemble a tall shelter during gusts that can lift fabric or pull hooks from the truck.
You will know Step 5 worked when the roof is symmetrical, pole tips are fully seated, and no sleeve has a sharp fold. The common mistake is confusing a rainfly pole with a main structural pole, leaving the body unsupported.
Step 6: Tighten the Tent Evenly
Cinch the straps in alternating pairs, moving from the front corners to the sides and then the tailgate area. Tighten until the fabric is smooth and the base remains centered, but stop before the frame bends or the hook distorts the vehicle edge.
Walk around the pickup after the first pass. Check that the cab sleeve seals around the rear window without covering an emergency exit, that the tailgate skirt does not drag on the ground, and that the sidewalls do not rub against sharp bed hardware.
A smooth surface does not require maximum strap tension. Even tension reduces flapping more effectively than one strap pulled extremely tight.
You will know Step 6 worked when the shelter has no large wrinkles, all doors zip without force, and the straps on opposite sides feel similar. The common mistake is tightening only the tailgate straps, which leaves wind gaps along the cab side.
Step 7: Install the Rainfly and Ventilate
Drape the rainfly over the frame, align its doors with the tent doors, connect internal hook-and-loop points to the poles, and buckle the outer elastic straps to the approved truck locations. Open roof vents and opposing mesh panels before going to sleep.
A rainfly should remain separated from the inner tent where the design permits, because trapped contact points can transfer rain through fabric under prolonged pressure. Close storm flaps during driving rain, but keep mesh ventilation open unless wind-driven rain enters directly.
Two people sleeping in a small shelter release substantial water vapor overnight through breathing and perspiration. Cross-ventilation reduces condensation on cold walls more reliably than wiping moisture after it forms.
You will know Step 7 worked when the rainfly has an even overhang, doors align, and air can enter on one side while exiting on another. The common mistake is sealing every window, creating a warm, wet interior that drips onto bedding by morning.
Which Truck Bed Tent Type Fits Your Use?
A floored polyester tent suits occasional summer camping, a floorless shelter suits organized gear systems, and a canvas tent suits repeated use in colder or rougher conditions. DIY pipe-and-tarp shelters cost less but require more fabrication, offer less predictable weather sealing, and may not fit safely around a tailgate.
| Tent type | Typical price | Setup time | Typical material | Best application |
|---|---|---|---|---|
| Floored polyester | $120-$280 | 15-25 minutes | 190T polyester, PU coating | Weekend camping |
| Floorless bed tent | $180-$350 | 10-20 minutes | 150D Oxford fabric | Drawer systems and gear |
| Heavy canvas | $350-$500 | 20-30 minutes | Cotton duck canvas | Repeated cold-weather use |
| DIY pipe and tarp | $50-$150 | 5-15 minutes after build | 3/4-inch pipe, tarp | Stationary custom projects |
Floor coatings rated around 1,500-2,000 millimeters are common in entry-level polyester shelters, but hydrostatic rating alone does not predict performance. Seam construction, rainfly coverage, fabric aging, and installation tension determine whether water reaches the sleeping area.
Canvas breathes differently from coated polyester and can manage interior moisture well when properly dried. It is heavier, slower to dry, and unsuitable for storage while damp because mildew can develop.
Truck Tent, Ground Tent, or Rooftop Tent?
A truck bed tent is the economical middle option: it raises the sleeper above wet ground while costing less than most rooftop tents, but the pickup cannot be driven until the shelter is packed away. A ground tent preserves truck-bed cargo space and a rooftop tent preserves bed access, so the correct choice depends on mobility and storage needs.
| Criterion | Truck bed tent | Ground tent | Rooftop tent |
|---|---|---|---|
| Typical purchase price | $120-$500 | $50-$600 | $1,000-$4,000 |
| Sleeping height | 3-4 feet | Ground level | 5-8 feet |
| Setup time | 10-30 minutes | 10-25 minutes | 5-15 minutes |
| Drive-away ability | No, must pack up | Yes, tent stays behind | No, usually must close |
| Bed cargo access | Occupied while installed | Fully available | Fully available |
| Leveling need | Level truck tires | Level campsite | Level vehicle |
| Access difficulty | Tailgate height | Low entry | Ladder access |
A truck bed tent is a poor choice when you need to leave camp set up while driving to a trailhead. A ground tent is a poor choice on rocky, flooded, or insect-heavy sites. A rooftop tent is a poor choice when vehicle height, roof-load limits, or purchase cost creates a problem.
What Are the Most Common Setup Failures?
The most common truck bed tent failures involve incorrect fitment, uneven tension, inadequate insulation, trapped moisture, and unsafe vehicle operation. Each failure has a practical correction, but preventing it during the first setup is faster than repairing fabric or hardware in camp.
| Failure | Likely cause | Immediate fix | Prevention |
|---|---|---|---|
| Rain enters at cab | Sleeve misaligned or loose | Recenter and retension | Test fit before rain |
| Pole bends | Strap overtightened | Release tension and inspect | Tighten in alternating pairs |
| Cold mattress | Bare bed contact | Add foam or insulated pad | Pack insulation every trip |
| Wet interior walls | Windows fully closed | Open opposing vents | Vent before sleeping |
| Scratched paint | Grit under hook | Clean and reposition | Inspect contact points |
| Tent will not fit | Wrong bed length | Stop installation | Verify model-year chart |
Can You Use a Tonneau Cover or Bed Drawer?
A tonneau cover usually must be removed, folded, or left open according to the tent design. A low-profile bed drawer can remain under many floorless tents, but a full bed cap, camper shell, ladder rack, or tall toolbox may block poles, straps, or the cab sleeve.
Never force a tent around fixed hardware. Contact the manufacturer if the accessory changes the usable rail width or prevents the tailgate from opening fully.
Is a Truck Bed Tent Safe in Heavy Rain or Wind?
A truck bed tent handles ordinary rain when the rainfly is correctly installed, seams are intact, and the truck is parked away from pooling water. It is not a substitute for a hard-sided camper during severe storms, exposed ridgelines, lightning, flooding, or sustained high winds.
Typical polyester tents are best treated as three-season shelters. Canvas models tolerate repeated use and colder conditions better, but no soft shelter should remain occupied when a storm creates falling-tree, flash-flood, or lightning exposure.
Can You Sleep With the Engine Running?
Never sleep with the engine running beside or beneath an enclosed truck bed tent. Carbon monoxide from the exhaust can accumulate around the tent, especially when wind is blocked by the truck or the vehicle is parked near a wall, snowbank, or other obstruction.
Keep tailpipes unobstructed, never use a camp stove inside, and do not operate propane, gasoline, charcoal, or catalytic heaters in the sleeping compartment. Carbon monoxide has no reliable smell, so ventilation is not a safe substitute for avoiding combustion.
How Much Does a Complete Setup Cost?
A practical complete truck-bed sleeping setup typically costs $220-$750, including the shelter, mattress, insulation, lighting, and weather accessories. The tent itself is only part of the budget because a bare bed surface, poor ventilation, and inadequate storage reduce comfort and safety.
| Component | Budget range | Typical specification | Buying priority |
|---|---|---|---|
| Tent | $120-$500 | Polyester, floorless, or canvas | Required |
| Mattress or pad | $40-$180 | 2-4 inches, insulated | Required |
| Anti-condensation layer | $30-$120 | Ventilated underlay | Useful in humid climates |
| Leveling boards | $20-$80 | 1-2-inch-thick boards | Useful on uneven sites |
| LED lighting | $15-$60 | Battery or USB powered | Optional |
| Storage totes | $25-$100 | Sealed, stackable plastic | Useful for gear control |
Practice installation at home before the first trip. The first attempt commonly takes 30-45 minutes, while a familiar two-person setup often takes 10-20 minutes.
Variations for Different Camping Situations
For a Short-Bed Pickup
Use a short-bed-specific tent and choose a mattress whose inflated dimensions leave access to the door and ventilation points. A six-foot mattress forced into a 5.5-foot bed can buckle the tent floor, compress the tailgate seam, and prevent the rainfly from aligning.
For Winter or Cold-Weather Camping
Prioritize an insulated sleeping pad, a properly rated sleeping bag, a dry tent, and ventilation rather than relying on the truck bed as thermal protection. Metal bed floors conduct heat away rapidly, while condensation freezes on poorly ventilated walls.
Do not seal every vent to retain heat. Moisture management and sleeping-system insulation provide more reliable comfort than reducing airflow.
For Gear-Heavy Overlanding
Choose a floorless bed tent if drawers, a compressor, or low-profile cases must remain installed. Cover sharp corners, maintain access to emergency equipment, and verify that the remaining cargo does not push against the shelter fabric.
Expert Rules That Prevent Expensive Problems
- Fitment beats brand reputation. A highly rated tent with the wrong bed length cannot seal at the tailgate or cab sleeve, while a less expensive correctly fitted model can remain dry.
- Strap tension is a balance, not a strength test. The fabric should become smooth before the frame reaches visible deflection; more tension cannot correct a misaligned pole.
- A mattress changes fitment. Measure the tent after installation with the intended mattress inflated, because thick bedding can obstruct doors and push against curved walls.
- Dry the tent before storage. Spread polyester or canvas fully until seams and floor panels are dry, especially after packing in rain.
- The tailgate is a structural component. Inspect cables and hinges before every trip, and distribute body weight across the mattress instead of sitting on the outer edge.
FAQ
Can Two Adults Sleep in a Truck Bed Tent?
Two adults can sleep in many full-size truck bed tents, but usable capacity depends on the mattress width, tailgate length, and door geometry. A typical full-size setup provides roughly 50-65 inches of sleeping width, while compact pickups may fit one adult more comfortably than two.
Can You Put a Truck Bed Tent on a Truck With a Bed Liner?
A truck bed tent can normally be installed over a factory spray-in or drop-in liner, provided the liner does not change the manufacturer’s fitment limits. A thick liner reduces usable bed dimensions slightly, so measure the actual interior rather than relying on the original truck specification.
Should the Tailgate Stay Open During Camping?
The tailgate usually stays open because the tent uses it as an extension of the sleeping platform. Follow the tent and vehicle instructions, confirm the tailgate cables and hinges are sound, and never place a load on the tailgate that exceeds the truck manufacturer’s rating.
How Do You Keep a Truck Bed Tent Dry Inside?
Keep the rainfly tensioned, seal the cab sleeve and tailgate skirt, avoid touching the inner tent wall with bedding, and open opposing mesh vents. Dry the shelter completely after use because moisture trapped in folded fabric can produce mildew even when the tent initially appears clean.
Can You Build a Truck Bed Tent Yourself?
You can build a basic shelter from pipe and a heavy-duty tarp, but the design must account for wind uplift, sharp edges, tailgate loading, rain runoff, and exhaust clearance. A DIY shelter is more suitable for stationary use than for uncertain weather or repeated remote travel.
Is a Truck Bed Tent Better Than a Camper Shell?
A truck bed tent costs less and stores compactly, while a camper shell provides better security, weather resistance, and year-round utility. Choose the tent for occasional camping and low purchase cost; choose a shell when the truck must carry a protected sleeping or cargo system regularly.
The Bottom Line
To turn your truck bed into a tent, verify bed fitment, level and secure the pickup, clear sharp cargo, add insulation, position the shelter, attach straps loosely, seat the poles, tighten evenly, and install the rainfly with cross-ventilation. The complete process usually takes 20-30 minutes the first time and 10-20 minutes after practice. A correctly sized tent, dry sleeping system, and safe weather judgment matter more than maximum strap tension or the highest fabric specification.


