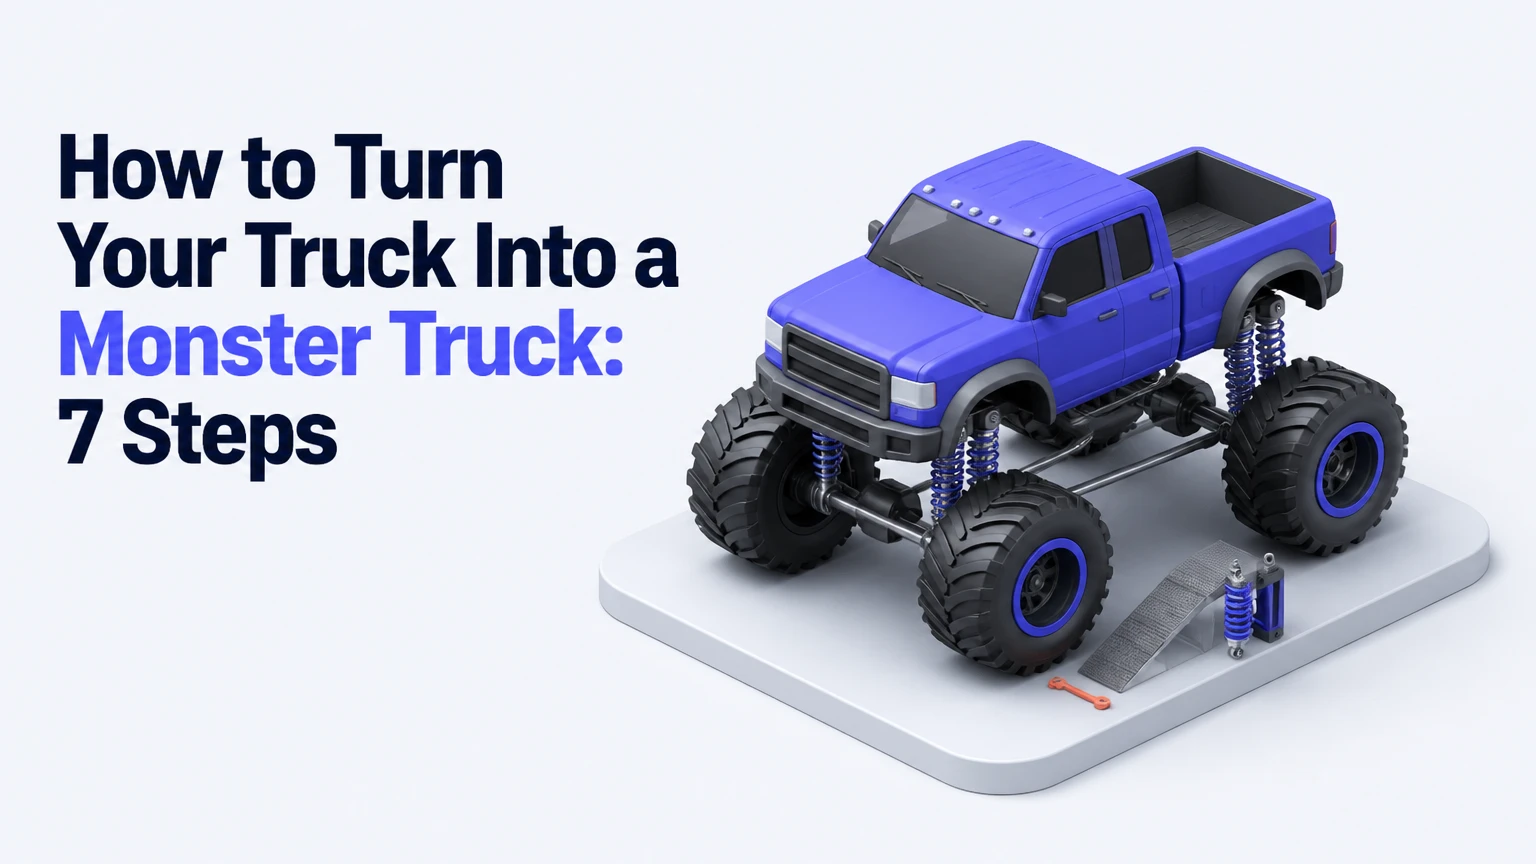
Turning a truck into a monster truck requires replacing or reinforcing the chassis, axles, suspension, steering, brakes, wheels, and often the transfer case. A practical off-road build typically takes 3-9 months and $45,000-$90,000, while a street-oriented 37-44-inch tire build may cost $15,000-$40,000; structural design quality determines success more than horsepower.
Key Facts at a Glance
Tires larger than 40 inches can multiply steering, axle, and braking loads beyond the capacity of half-ton components.
A true monster-truck suspension normally uses fabricated links, coilovers or bypass shocks, limit straps, and reinforced frame brackets.
2.5-ton Rockwell axles suit many mud and mega-truck builds, but planetary axles are more appropriate for professional exhibition vehicles.
Full hydraulic steering improves force capacity but can make a vehicle unsuitable for public-road registration.
Boxing a frame does not automatically make it safe; crossmembers, bracket bridges, weld quality, and fatigue inspection also matter.
A 66-inch exhibition truck is a purpose-built race vehicle, not a normal pickup with a large lift kit.
What Counts as a Monster Truck?
A monster truck is an ultra-high-clearance vehicle built around oversized flotation or agricultural tires, heavy axles, long-travel suspension, reinforced structure, and specialized steering and braking. A lifted pickup with 35-inch tires can resemble one, but a 44-inch mud truck and a 66-inch stadium truck have different engineering requirements.
Professional exhibition trucks commonly use 66-inch flotation tires, planetary final drives, custom tube chassis, four-wheel hydraulic steering, and purpose-built suspension systems. Historical and modern designs vary, so the 66-inch dimension is a common professional reference rather than a universal definition.
The important distinction is load path. A larger tire increases ground contact, rolling inertia, bending leverage, and torque demand at the wheel. A factory axle, steering box, frame rail, or transfer case that survives a stock tire may fail rapidly after the tire diameter doubles.
Choose the Build Tier Before Buying Parts
Your intended surface and legal status should determine the architecture. Building a mud truck with street-oriented parts wastes money, while fitting racing hardware to a display truck creates unnecessary weight and maintenance.
| Build type | Tire height | Typical axles | Suspension travel | Typical budget |
|---|---|---|---|---|
| Street/show pickup | 37-40 inches | Dana 60 or Sterling 10.5 | 8-12 inches | $15,000-$40,000 |
| Aggressive trail truck | 40-44 inches | Built Dana 60, Dana 80, or 14-bolt | 12-18 inches | $25,000-$60,000 |
| Mud or mega truck | 44-54 inches | 2.5-ton Rockwell or similar | 18-24 inches | $45,000-$90,000 |
| Exhibition replica | 66 inches | Billet planetary axles | 26-32 inches | $150,000-$300,000+ |
These figures are typical project ranges, not fixed quotes. Welding, machining, tires, transport, engine work, paint, and outsourced alignment can move the final bill substantially.
How to Turn Your Truck Into a Monster Truck Safely
A safe conversion starts with use-case selection, dimensional measurement, and a load-path design before teardown. The seven practical stages are donor inspection, frame reinforcement, suspension fabrication, axle and drivetrain installation, steering and braking integration, body clearance, and progressive testing.
Do not begin by ordering the tallest lift kit. Measure tire diameter, wheel backspacing, axle width, driveshaft paths, steering travel, suspension articulation, and planned ride height first. A suspension that looks tall at rest can lose steering clearance or driveshaft operating angle at full compression.
Before You Start
| Requirement | Typical specification |
|---|---|
| Project duration | 2-6 weeks for bolt-on work, 3-9 months for a fabricated mega truck |
| Working area | Level floor, 12-foot ceiling, 240-volt welding circuit |
| Minimum equipment | Welder, plasma cutter or saw, hydraulic press, stands rated above vehicle weight |
| Measuring tools | Digital angle finder, tape measure, plumb bob, wheelbase and track-width references |
| Materials | DOM tubing, 1/4-inch plate, crossmember steel, tabs, gussets, grade-8 or equivalent hardware |
| Prerequisites | Fabrication skill, alignment knowledge, brake-plumbing ability, legal inspection research |
A certified fabricator should design and inspect structural welds, link brackets, shock towers, steering mounts, and axle modifications. Vehicle weight and dynamic impact loads make this a poor project for learning structural welding on the finished chassis.
Step 1: Select and Inspect the Donor Truck
Choose a donor with a straight frame, serviceable powertrain, available parts, and a chassis layout that supports the intended axles. Older solid-axle 3/4-ton and 1-ton pickups are often easier to convert because their transfer cases, frame dimensions, and suspension packaging are simpler than independent-front-suspension platforms.
Inspect the frame for rust perforation, prior collision bends, stretched holes, cracked welds, and corrosion near spring or body mounts. Check the wheelbase, factory track width, engine setback, fuel-tank position, and brake-line routing before purchasing major components.
A useful donor is not necessarily the cheapest truck. A $4,000 pickup with a damaged frame can cost more than a $10,000 straight donor after stripping, jigging, and repair.
You will know the donor is suitable when the frame measures square within the tolerance required by your fabricator, major rails have no structural rust, and the axle, engine, and cabin locations leave room for the planned link and shock geometry.
Common mistake: choosing a donor by engine horsepower alone. A strong engine cannot compensate for poor frame geometry, inadequate axle width, or unavailable replacement parts.
Step 2: Reinforce the Frame and Build the Main Structure
Strip the truck to a bare frame before designing brackets. Factory C-channel rails can flex usefully in a stock application, but large tires and long links place concentrated loads at bracket mounts, so many builds use boxed rails, internal sleeves, crossmembers, and load-spreading plates.
Boxing often uses approximately 3/16-inch to 1/4-inch plate, selected by the fabricator after examining rail dimensions and expected loads. Do not weld a continuous plate without controlling heat, fit-up, and distortion. Alternating weld locations and using a chassis jig can reduce warping.
A dropped center cradle or subframe supports link brackets, transmission components, steering hardware, and sometimes the transfer-case drop box. Link tabs should connect to reinforced rails or crossmembers rather than terminate on a single thin wall.
You will know the structure is ready when the frame remains square on the jig, bracket loads have a direct path into crossmembers, suspension hardware clears the rails, and an independent inspection finds no undercut, porosity, lack of fusion, or inaccessible weld.
Common mistake: boxing the rails but leaving the crossmember and shock-tower areas unsupported. A rigid rail can transfer stress into a weaker adjoining section and create fatigue cracks.
Step 3: Design and Mock Up the Four-Link Suspension
Use a four-link system to control axle position, pinion angle, anti-squat behavior, and lateral movement. Heavy-wall DOM links with large rod ends are common in fabricated off-road vehicles, but tubing diameter and wall thickness must be engineered for compression, bending, buckling, joint misalignment, and impact loads.
Mock up the suspension at ride height, full compression, and full droop before final welding. Record link angle, axle roll, driveshaft angle, tire clearance, steering travel, shock stroke, and pinion movement at every position.
| Suspension item | Street/show build | Mud/mega build | Exhibition build |
|---|---|---|---|
| Typical travel | 8-12 inches | 18-24 inches | 26-32 inches |
| Link material | 1.5-2.0-inch DOM | 2.0-2.5-inch DOM | Engineered 4130 or equivalent |
| Joint size | 1-inch shank | 1.25-inch shank | Application-specific racing joint |
| Shock type | Coilover | Coilover or bypass | Multiple coilovers and bypass units |
| Lateral control | Panhard or triangulated links | Panhard or triangulated links | Custom chassis geometry |
The values in this table are common planning ranges, not universal safe specifications. A 1.25-inch rod-end shank does not prove that a link is adequate because tube length, unsupported span, joint quality, and load direction also control strength.
Mount nitrogen-charged shocks so their operating stroke matches usable suspension travel. Add limit straps to prevent the shocks, brake hoses, driveshafts, or joints from becoming droop stops.
You will know the geometry works when the tires clear the frame and body through full articulation, the driveshaft does not bind, the steering does not change unexpectedly, and the shock reaches neither mechanical bottom-out nor full extension before the intended limit.
Common mistake: final-welding brackets at static ride height only. The suspension can bind at one inch of compression or steer the truck violently at full droop.
Step 4: Install Axles, Gearing, and the Drivetrain
Select axles according to tire size, vehicle weight, traction, and shock loads. Dana 60 or Sterling 10.5 axles can suit moderate 37-40-inch builds when correctly prepared, while 2.5-ton Rockwell axles are common in heavy mud rigs; planetary axles are more specialized and expensive.
Large tires increase effective gearing. A simple planning ratio is:
Effective gear ratio = axle ratio x tire diameter / reference tire diameter
For example, changing from a 32-inch tire to a 48-inch tire with unchanged 4.10 gears produces an effective ratio of approximately 2.73:1 relative to the original tire load. The engine sees less mechanical advantage, so builders often use 5.13:1-6.72:1 axle gearing, deeper transfer-case gearing, or planetary reduction.
Planetary hubs place reduction near the wheel and can reduce stress through upstream shafts, but they add weight, cost, rotating mass, and maintenance requirements. A 2.5-ton axle is not automatically indestructible; housing condition, shafts, seals, steering knuckles, and wheel hardware still require inspection.
A standalone gear drop-box can replace an overloaded factory transfer case in high-load applications. Driveshafts commonly require heavy-wall tubing, 1410 or 1480-series universal joints, correct slip travel, and careful operating-angle control.
You will know the drivetrain is matched when the engine operates in its useful rpm range at planned speed, the transfer case has adequate reduction, driveshaft joints retain working angle through travel, and axle shafts show no twist or contact marks during inspection.
Common mistake: selecting gears by engine power only. Tire diameter and vehicle mass often determine torque demand more strongly than advertised horsepower.
Step 5: Add Steering and Braking Systems
A full hydraulic steering system uses a pump, orbital valve, hydraulic lines, and a double-ended ram mounted to the axle or steering linkage. The system can produce steering force that mechanical factory components cannot tolerate with very large tires, but it may fail public-road requirements because the steering wheel may not mechanically control the wheels after hydraulic pressure loss.
Hydraulic-assist steering retains a mechanical connection and adds a ram. It generally preserves better road suitability, although the steering box, linkage, axle knuckles, pump, and mounting brackets must still handle the tire load.
Mount the steering ram so the cylinder and tie-rod movement match the knuckle arc. Poor placement causes steering bind, excessive toe change, or bump steer. Use protected hoses, correct pressure ratings, heat shielding, and a relief strategy designed for the selected components.
Pinion brakes place rotors and calipers on differential input shafts rather than inside wheel hubs. They can package around agricultural wheels, but they create high thermal loads and require a properly engineered hydraulic circuit, parking brake, shielding, and inspection.
You will know steering and braking are ready when the wheels reach the intended lock without binding, brake pressure remains stable, hoses cannot stretch at full droop, and repeated controlled stops do not create fade or fluid overheating.
Common mistake: treating a hydraulic ram as a complete steering design. The mount, axle housing, knuckle, orbital valve, pump flow, pressure relief, and emergency behavior all affect safety.
Step 6: Fit Wheels, Tires, Bodywork, and Controls
Choose wheels with the correct bolt pattern, load rating, bead retention, backspacing, and brake clearance. Agricultural V-tread tires can provide flotation and mud traction, but their weight, road behavior, balance, and sidewall construction differ from automotive radial tires.
A 44-inch tire may require substantial fender cutting, while a 54-inch tire can require relocating body mounts, fuel components, bumpers, and steering hardware. A 66-inch tire normally demands a custom chassis rather than ordinary body trimming.
Set bump stops before cutting the final fender shape. Check clearance at full steering lock, full compression, full droop, axle roll, and tire deflection. Install suitable beadlocks only when their design, fasteners, and use comply with local rules and the wheel manufacturer’s instructions.
Retain safe controls, guarded pedals, a secure driver seat, harnesses compatible with the roll structure, fire protection, and a kill switch appropriate to the vehicle’s use. Exhibition vehicles need purpose-built containment and restraint systems, not merely a lifted pickup interior.
You will know the packaging works when the tire clears every fixed component under simulated articulation and the driver can operate throttle, brake, steering, and emergency shutoff without obstruction.
Common mistake: checking clearance with unloaded tires. Tire growth, sidewall flex, steering lock, and axle wrap can remove several inches of apparent space.
Step 7: Test the Truck Progressively
Test a completed conversion in stages, beginning with a stationary inspection and moving to low-speed operation on private property. Secure the vehicle on stands, cycle the suspension manually, pressurize the hydraulic systems, inspect leaks, and verify that every fastener is torqued and marked.
Use this sequence:
- Check steering lock, brake pedal firmness, hose movement, and emergency shutoff.
- Drive at walking speed on level ground while checking temperature and fluid leaks.
- Repeat braking and turning at low speed without jumps or hard impacts.
- Re-torque wheels, link hardware, driveshaft fasteners, and steering mounts.
- Increase speed only after inspecting welds, tire contact marks, axle movement, and shock mounts.
- Record faults after every test session and correct them before adding obstacles.
You will know the first test succeeded when the truck tracks straight, brakes evenly, steering remains predictable, no component contacts another, and post-test inspection finds no cracked paint around welds or fresh metal dust at joints.
Do not jump a converted pickup until its chassis, suspension, driver protection, and testing program are designed for impact loads. A vehicle can survive a slow mud hole yet fail when landing because impact force travels through different brackets and shock mounts.
Which Components Should You Choose?
Component choice depends on the use case, not on the largest available specification. The following comparison separates common architectures by the constraints they solve.
| Component decision | Street/show | Mud/mega | Exhibition |
|---|---|---|---|
| Tire example | 37×12.50R17 radial | 48-inch agricultural V-tread | 66x43x25 flotation |
| Axle example | Dana 60 or Sterling 10.5 | 2.5-ton Rockwell | Billet planetary |
| Steering | Hydraulic assist | Full hydraulic | Dual or four-wheel hydraulic |
| Transfer case | Built factory unit | Standalone drop box | Custom racing gearcase |
| Brake location | Wheel hubs | Wheel or pinion, engineered | Pinion or specialized racing system |
| Chassis | Reinforced factory frame | Boxed frame and cradle | 4130 tube chassis |
Street and Show Builds
A street-oriented build should usually stop near 37-40-inch radial tires, hydraulic-assist steering, compliant lighting, covered tires, functional brakes, and a suspension geometry compatible with inspection rules. A 10-12-inch lift bracket may provide visual height, but it does not create the axle strength or travel of a competition chassis.
This configuration is suitable for display, local cruising where legal, and mild trails. It is not suitable for car crushing, repeated jumps, or high-speed mud racing.
Mud and Mega Trucks
A mud truck can use 44-54-inch agricultural tires, 2.5-ton axles, a boxed frame, a dropped cradle, full hydraulic steering, and a built engine with strong low-rpm torque. Typical completion time is 3-9 months when fabrication, paint, machining, and wiring proceed without major redesign.
Mud tires increase flotation but can transmit severe shock loads when they hook up suddenly. Axle housings, transfer cases, driveshafts, and link brackets need inspection after hard events.
Professional Exhibition Trucks
A professional exhibition truck generally begins with a pre-engineered tube chassis, racing restraint system, purpose-built planetary axles, multiple dampers, independent hydraulic steering, and a high-output engine. A blown alcohol engine producing 1,500 horsepower or more is common in the professional category, but power output alone does not define the vehicle.
A converted factory pickup is not a cost-effective substitute for this architecture. Exhibition trucks are engineered around crash protection, controlled suspension motion, fire safety, and repeatable impact performance.
How Much Does a Monster Truck Conversion Cost?
A realistic conversion costs $15,000-$40,000 for a moderate street/show build, $45,000-$90,000 for a serious mud truck, and $150,000-$300,000 or more for a professional exhibition vehicle. The budget must include fabrication, not only visible parts.
| Cost area | Street/show | Mud/mega | Exhibition |
|---|---|---|---|
| Donor and teardown | $2,000-$8,000 | $3,000-$12,000 | $10,000-$40,000 |
| Axles and gearing | $3,000-$10,000 | $8,000-$25,000 | $30,000-$80,000 |
| Suspension and shocks | $3,000-$12,000 | $10,000-$30,000 | $30,000-$75,000 |
| Tires and wheels | $2,000-$8,000 | $6,000-$18,000 | $15,000-$40,000 |
| Fabrication and finishing | $5,000-$15,000 | $15,000-$35,000 | $50,000-$125,000 |
| Hydraulic, brake, and wiring work | $2,000-$7,000 | $5,000-$15,000 | $15,000-$40,000 |
Typical hidden expenses include replacement axle seals, custom driveshafts, machining, shipping for oversized tires, fuel-system relocation, cooling upgrades, paint, trailer capacity, and repeated redesign. Reserve 15%-25% of the parts budget for changes and failures.
Can a Monster Truck Remain Street Legal?
A monster-truck conversion can remain street legal only when the completed vehicle satisfies the rules of its registration jurisdiction. Requirements commonly address steering redundancy, brake performance, lighting, mirrors, fender coverage, tire projection, bumper height, emissions equipment, noise, seat belts, and maximum dimensions.
Full hydraulic steering, exposed tires, pinion brakes, extreme ride height, and agricultural tires can conflict with public-road rules. A vehicle may pass a local visual inspection yet remain unsuitable for highway use because insurance, lighting, tire, or steering requirements differ by state or country.
Research the relevant transport authority before fabrication. Plan for a trailer if the vehicle is intended for competition, private land, or events.
Common Failure Modes and Repairs
| Failure mode | Likely cause | Corrective action |
|---|---|---|
| Axle shaft shears | Oversized tire and insufficient axle capacity | Reduce tire size, add reduction, or install stronger axles |
| Frame cracks | Brackets welded to unsupported rail sections | Add boxing, crossmembers, gussets, and redesigned load paths |
| Violent bump steer | Drag link and suspension arcs do not match | Recalculate geometry or use properly engineered hydraulic steering |
| Shock damage | Shock used as droop or bump stop | Add limit straps and bump stops with correct stroke |
| Brake fade | Heavy tire inertia and undersized thermal capacity | Increase rotor, caliper, cooling, and circuit capacity |
| Driveshaft failure | Excessive operating angle or insufficient slip | Reposition components and build a correctly sized shaft |
A common practitioner rule is to inspect for cracked paint around weld toes after every hard session. Paint cracks are not proof of structural failure, but they identify areas that deserve dye penetrant or other qualified inspection.
Another counterintuitive rule is that more frame stiffness is not always better. If reinforcement ends abruptly, stiffness changes can concentrate fatigue at the transition, so plates and crossmembers need tapered or well-distributed load paths.
The most expensive mistake is often finishing the body before cycling the chassis. Geometry errors discovered after paint require cutting through finished work and can compromise both schedule and corrosion protection.
Alternatives to a Full Monster-Truck Build
A bracket lift with 37-inch tires costs less and preserves more factory drivability, but it cannot reproduce the axle strength or suspension travel of a mega truck. Portal axles increase ground clearance at the hubs and can reduce the need for extreme lift, although they add cost and specialized maintenance.
A prerunner or long-travel trail truck may provide better high-speed handling with lower center-of-gravity risk. A show-only body lift and wheel package can deliver the appearance without pretending to be an impact-capable competition vehicle.
Choose the alternative when the real goal is visual height, trail access, highway use, or lower maintenance rather than deep mud or jumps.
FAQ
What Is the Best Donor Truck for a Monster Truck?
A straight-frame 3/4-ton or 1-ton truck with a solid axle, common parts, and a suitable wheelbase is often the easiest donor. The best choice depends on intended tire size, axle availability, engine position, local registration rules, and whether the truck will be trail-driven or transported to events.
How Much Horsepower Does a Mud Monster Truck Need?
A typical mud build can work with roughly 400-800 horsepower when gearing, cooling, traction, and drivetrain strength are matched. Professional exhibition trucks may exceed 1,500 horsepower, but excessive power can increase breakage if the axles, shafts, transfer case, and frame were not designed for it.
Are Rockwell Axles Good for Monster Trucks?
2.5-ton Rockwell axles are common for heavy mud and mega-truck builds because they provide substantial housing and shaft capacity. They are heavy, may need steering and gearing modifications, and do not automatically solve brake, hub, seal, or wheel-clearance problems.
Do You Need Four-Wheel Steering?
Four-wheel steering is not required for every conversion. Front hydraulic steering can suit many mud trucks, while four-wheel hydraulic steering improves maneuverability in specialized exhibition vehicles but adds hydraulic complexity, packaging demands, controls, and legal concerns.
How Long Do Monster-Truck Tires Last?
Tire life varies from a few events for aggressively used agricultural tires to several years for lightly used show tires. Heat, wheel balance, road mileage, sidewall damage, ultraviolet exposure, and hard launches matter more than a universal mileage number.
Is a Lift Kit Enough to Make a Monster Truck?
A lift kit alone is not enough for a true monster truck. A lift changes ride height, while a complete conversion must address axle capacity, suspension geometry, steering force, brakes, frame loads, drivetrain reduction, tire clearance, and driver protection.
The Bottom Line
To turn your truck into a monster truck, select the use case first, then design the frame, suspension, axles, steering, brakes, and drivetrain as one load-bearing system. A 37-40-inch street/show truck can retain more factory architecture, while a 44-54-inch mud truck needs heavy axles and fabrication; a 66-inch exhibition truck requires a purpose-built chassis rather than a conventional lift.
Title tag: How to Turn Your Truck Into a Monster Truck: 7 Steps
Meta description: Plan a safe 37-54 inch truck build with axle, four-link, hydraulic steering, cost, and testing guidance. Compare options and budget accurately.


