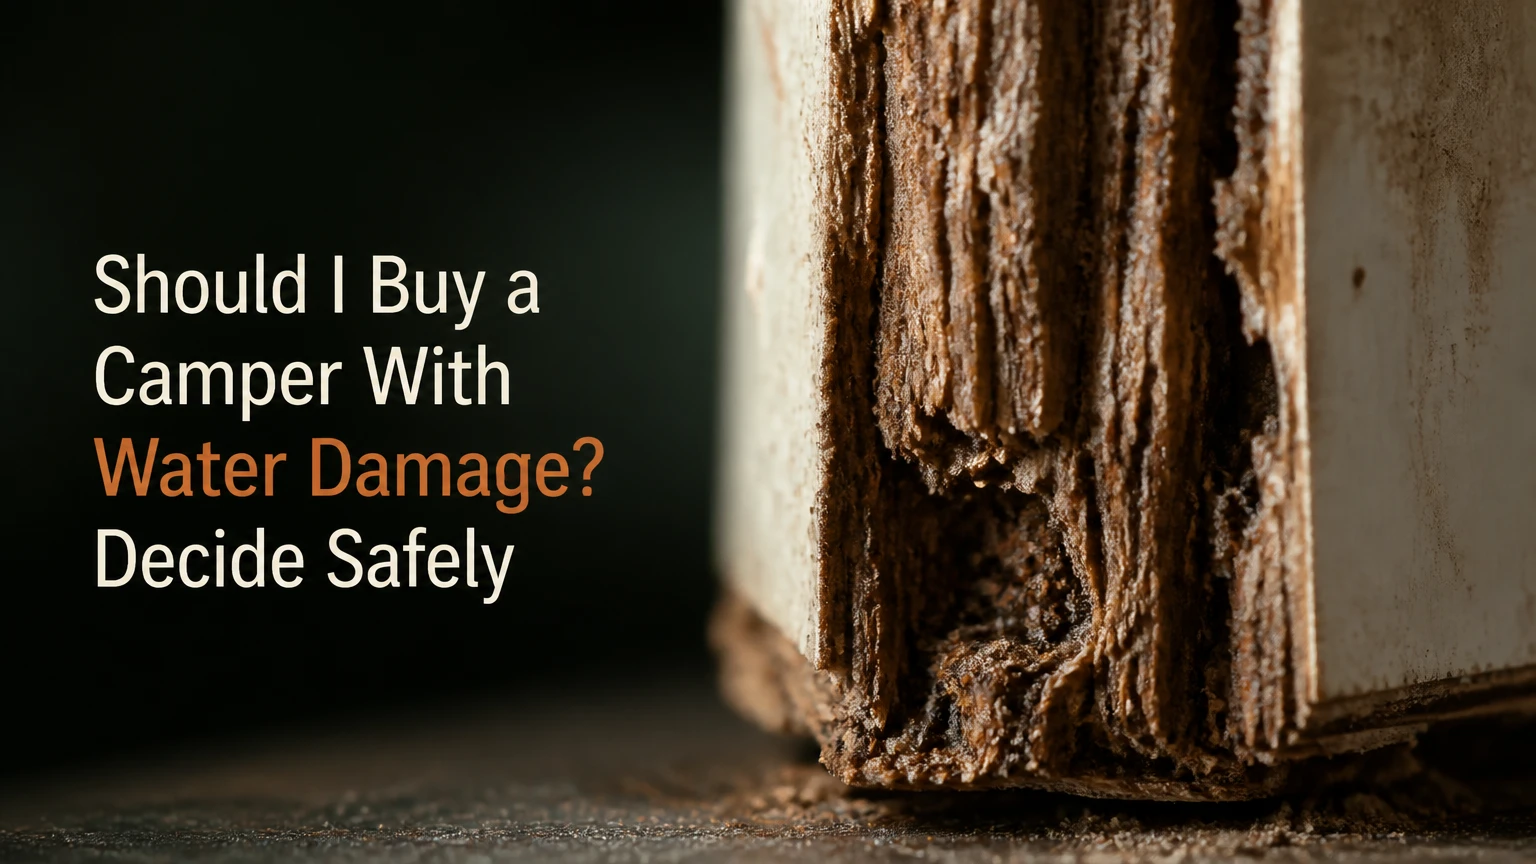
You generally should not buy a camper with water damage unless an inspection proves the intrusion is inactive, the structural damage is localized, and the purchase price leaves room for repairs and resale risk. A water-damaged camper can be a sensible project for an experienced rebuilder, but it is usually a poor choice for a first-time buyer or travel-ready family.
Key Facts at a Glance
- A soft wall, floor, or roof indicates possible structural decay, not merely a cosmetic stain.
- Visible staining cannot reliably measure hidden damage; the claim that stains represent only 10%-20% of destruction is not a validated inspection rule.
- Typical professional RV repair labor runs about $120-$200 per hour in high-cost markets, while DIY restoration commonly takes 100-300 hours.
- Stick-and-tin campers are usually more repairable than laminated fiberglass campers because individual wooden studs can be replaced.
- Mold, delamination, rotten framing, damaged wiring, and an unclear insurance history can eliminate the apparent purchase discount.
- The buyer should price the camper as a repair project, not as a usable recreational vehicle, until moisture and structure are independently verified.
Should I Buy a Camper With Water Damage?
Most buyers should walk away from a water-damaged camper when the leak is active, the floor or roof feels soft, laminated walls are delaminating, or the seller cannot document the repair. The purchase becomes defensible only when the damage is localized, the construction is repairable, the unit is priced below its completed value by a wide margin, and you can tolerate months without a usable camper.
The central mistake is comparing the damaged camper’s asking price with the price of a dry example. The correct comparison is:
Maximum purchase price = completed market value – repair cost – contingency – storage and tool costs – risk discount.
A $4,000 camper that needs $8,000 of work is not a bargain because similar dry units sell for $12,000. A typical 30% repair contingency raises the project to $14,400 before your labor, registration, towing, and financing costs.
Quick Verdict by Buyer Type
| Buyer profile | Purchase condition | Maximum practical project scope |
|---|---|---|
| First-time buyer | Do not buy a wet or soft unit | Cosmetic sealant repair under $500 |
| Family needing summer travel | Buy only after independent inspection | Inactive leak, dry structure, documented repairs |
| Budget traveler | Usually choose a dry alternative | Mechanical or cosmetic defects under $2,000 |
| Advanced DIY rebuilder | Conditional purchase | Localized stick-frame rot with covered workspace |
| Professional rebuilder | May buy salvage inventory | Documented parts access and margin above 30% |
The discount must compensate for uncertainty, not merely visible damage. If the seller refuses a moisture inspection, an invasive check, a professional evaluation, or a written purchase condition, treat the refusal as a financial risk.
Where Does Camper Water Damage Begin?
Camper water damage usually begins at roof penetrations, corner seams, windows, clearance lights, slide-out seals, plumbing fittings, or floor penetrations. Water can travel along framing, wiring, insulation, and panel joints, so the wettest visible spot may be several feet from the original entry point.
Common entry points include:
- Roof components: air conditioners, vents, skylights, antennas, solar mounts, and cracked lap sealant.
- Wall openings: windows, doors, marker lights, furnace vents, refrigerator vents, and exterior storage doors.
- Transitions: roof-to-wall radius, front cap seams, rear corners, slide rooms, and trim rails.
- Plumbing: water-heater bypasses, PEX connections, pump fittings, shower pans, toilet bases, and sink drains.
- Underbody exposure: damaged underbelly fabric, wheel-well openings, road spray, and missing sealant around tanks.
A leak can remain hidden because wall coverings and insulation slow evaporation. EPA moisture-control guidance recommends drying wet materials within 24-48 hours where possible, but an RV wall that has stayed wet for months is not equivalent to a recently spilled drink. Long-term moisture can weaken wood, corrode fasteners, damage adhesives, and support mold growth.
What Damage Can Moisture Cause?
Wood framing and luan paneling can lose strength through decay; steel fasteners can corrode; laminated walls can lose bond strength; and wet insulation can retain moisture against structural components. Electrical damage adds a separate hazard because corrosion at a 12-volt connection may create resistance, heat, intermittent faults, or a blown fuse.
The popular statement that visible stains show only 10%-20% of the real destruction should not guide a purchase. No universal percentage can convert a stain into hidden-damage volume, because the result depends on framing layout, duration, material type, climate, ventilation, and the direction of water movement.
A small stain may be superficial. A small stain over a window corner may also conceal a long decayed sill.
Which Construction Types Survive Water Damage Best?
Molded fiberglass campers generally offer the safest structural starting point after a leak because the shell itself does not rot. Stick-and-tin campers are usually the easiest conventional trailers to rebuild, while laminated fiberglass wall systems are the least forgiving when moisture has entered the bonded panel.
| Construction type | Typical structural materials | Main water-failure mode | Practical repair outlook |
|---|---|---|---|
| Stick-and-tin trailer | Wood studs, fiberglass insulation, aluminum exterior | Rotted studs, wet insulation, soft luan | Localized stud replacement is feasible |
| Laminated fiberglass trailer | Aluminum framing, foam, luan or composite backing, Filon skin | Delamination, failed adhesive bond, hidden frame damage | Panel replacement may require specialist work |
| Molded fiberglass trailer | Fiberglass shell, plywood floor, wood cabinets | Floor, cabinet, and seam damage | Shell remains rot-resistant; floor work is manageable |
| Motorhome with wood floor | Wood framing, plywood floor, steel or aluminum chassis | Floor rot near slides, wheel wells, cab transitions | Structural work can affect systems and chassis access |
| Composite or aluminum-floor trailer | Aluminum or composite panels, foam, adhesive joints | Corroded joints, failed bonds, wet flooring | Repair depends on proprietary panel design |
Stick-and-Tin Construction
Stick-and-tin campers use wood studs behind an aluminum exterior, often with fiberglass insulation and thin interior paneling. The repair advantage is access: a restorer can remove interior paneling, cut out decayed wood, install properly sized replacement members, and reseal the exterior.
The repair still requires weight control. A residential 2×4 replacement may weigh substantially more than the original lightweight member and can reduce available payload when repeated throughout the camper. Match the original dimensions and species where practical, and verify the finished weight against the vehicle’s GVWR, GAWR, axle ratings, and tongue-weight limit.
Laminated Fiberglass Walls
Laminated fiberglass walls bond exterior Filon, adhesive, foam, framing, and interior backing into a panel. Moisture can weaken the backing or adhesive, producing bubbles, ripples, or soft areas known as delamination.
Delamination is not automatically structural failure, but extensive movement, open seams, soft walls, or water entry behind the panel creates a high-cost repair. Injecting adhesive may stabilize a limited area, while a fully failed sidewall can require panel removal, replacement, jacking, bracing, and specialist equipment.
Molded Fiberglass Campers
Molded fiberglass trailers such as Scamp and Casita use a shell that does not rot like wood. Water can still damage the plywood floor, cabinetry, sealants, wiring, and appliances, but the repair usually does not require rebuilding the entire wall structure.
A molded shell does not make a wet camper automatically safe. Floor rot around the perimeter, frame attachment points, or a water heater can affect occupant safety and towing stability.
How Do You Inspect a Water-Damaged Camper?
Inspect a water-damaged camper in five stages: document the seller’s claims, examine every exterior penetration, test floors and walls, measure moisture, and verify structure and systems. Allow at least 60-90 minutes for a small trailer and 2-4 hours for a motorhome with slides, roof accessories, appliances, and underbody compartments.
Before Paying, Bring These Tools
| Tool or document | Typical cost | Use during inspection |
|---|---|---|
| Pinless moisture meter | $30-$150 | Compare wall readings with dry reference areas |
| Bright flashlight and inspection mirror | $15-$40 | Examine corners, wiring, tanks, and underbelly |
| Screwdriver or awl | $8-$20 | Probe only with seller permission and repair plan |
| 4-foot level and tape measure | $15-$35 | Check floor deflection, wall alignment, and dimensions |
| Electrical outlet tester and multimeter | $15-$60 | Check shore-power outlets and 12-volt circuits |
| Roof-safe ladder and disposable gloves | $30-$100 | Access roof edges and protect against contamination |
Step 1: Record the Story
Ask when the leak started, where water entered, who repaired it, what materials were used, and whether the camper was stored indoors. Request receipts, photographs taken during repair, insurance claims, title documents, and any professional moisture report.
A verbal statement that “the leak is fixed” proves only that the seller believes it is fixed. Compare the claimed repair location with staining, sealant age, soft materials, and moisture readings.
Step 2: Inspect the Exterior
Examine roof seams, corner molding, window frames, clearance lights, vents, slide toppers, and front and rear caps. Look for cracked sealant, unsealed screw heads, staining below openings, swollen trim, rust trails, patched Filon, and mismatched exterior color.
Do not assume new sealant means a proper repair. Sealant applied over a dirty, wet, or moving joint can fail quickly, while the underlying framing continues to decay.
Step 3: Test Floors, Walls, and Ceilings
Walk slowly around the toilet, shower, kitchen sink, refrigerator, water heater, windows, entry door, slide room, and exterior storage compartments. Press walls below windows and along floor edges with consistent force, then compare suspicious areas with an apparently dry section.
Softness, swelling, bubbling, springy flooring, loose trim, or a musty odor requires further investigation. A firm surface does not prove dry framing because thin paneling can bridge a void or conceal decay.
Step 4: Measure and Confirm Moisture
Use a pinless meter as a screening tool, not as a verdict. Readings vary with foil backing, screws, salts, wood species, temperature, and the meter’s calibration, so compare suspicious areas with matching dry materials and follow the instrument’s material setting.
The 15%-20% threshold often repeated in RV advice is not universal for every wall assembly. Wood moisture above roughly 20% is commonly treated as a condition requiring investigation, but an RV meter reading cannot by itself identify the source, depth, or age of moisture.
Confirm a concerning reading by opening an accessible inspection point, removing a small trim section, using a pin meter on exposed wood where appropriate, or hiring an RV inspector with documented methods.
Step 5: Test Systems and Structure
Operate shore power, battery circuits, lights, appliances, water pump, faucets, water heater, furnace, air conditioner, slide mechanisms, jacks, brakes, and exterior lights. Inspect wiring near wet areas for corrosion, overheated terminals, brittle insulation, and amateur splices.
Check the chassis, frame rails, outriggers, axle mounts, suspension, tires, and floor-to-frame connection. A camper can have a dry interior and still contain dangerous frame corrosion or a compromised axle.
What Does Water-Damage Repair Cost?
Typical water-damage repairs range from $500 for a localized reseal with dry materials to more than $20,000 for extensive wall, floor, framing, mold, and system restoration. Professional labor at approximately $120-$200 per hour makes hidden damage and access time more financially important than the price of lumber.
| Repair scope | Typical materials | Typical labor or DIY time | Financial warning |
|---|---|---|---|
| Roof or window reseal | $100-$600 | 4-12 hours DIY | Only viable when framing is dry |
| Localized floor or wall rot | $500-$3,000 | 20-80 hours DIY | Requires access and matching lightweight materials |
| Multiple framing sections | $1,500-$4,000 | 60-180 hours DIY | Systems and cabinets increase removal time |
| Filon or laminated wall repair | $2,000-$5,000 materials | 40-120 professional hours | Delamination may exceed resale value |
| Mold remediation and disposal | $500-$4,000 | 1-5 days | Porous materials may require removal |
| Major rebuild | $8,000-$25,000+ | 100-300+ hours DIY | Storage, tools, permits, and downtime are extra |
Use a contingency of at least 30% for a documented localized repair and 50% or more for an opened wall or floor. Include dumpsters, replacement appliances, damaged upholstery, fasteners, adhesives, sealants, PPE, storage, transportation, and a second inspection.
A Worked Purchase Calculation
Suppose a dry equivalent sells for $12,000. A contractor estimates $5,500, your tools and disposal cost $700, storage costs $600, and you assign 30% contingency to the repair. The project estimate is:
- Repair: $5,500
- Contingency: $1,650
- Tools and disposal: $700
- Storage: $600
- Total before purchase: $8,450
- Maximum purchase price before risk discount: $3,550
A rational buyer would usually offer less than $3,550 because resale, title, hidden damage, and schedule risk remain. If the camper has a branded title or no insurable repair history, the risk discount may reduce the offer to zero.
When Is Water Damage Repairable?
Water damage is usually repairable when the source is identified and stopped, framing remains sound or is accessible, the floor and wall structure is localized, and the completed weight stays within the manufacturer’s limits. Repair becomes unattractive when moisture is widespread, laminated walls have failed, mold affects porous interiors, or the camper’s market value cannot support the work.
A repairable project normally has four characteristics:
- Moisture readings match dry reference areas after a reasonable drying period.
- Softness is confined to a defined section with visible access.
- The frame, axle mounts, and floor-to-frame connections remain sound.
- Replacement materials, trim, sealants, and panels are available.
The opposite pattern indicates a likely teardown: multiple wet elevations, persistent odor, widespread delamination, soft roof areas, corroded wiring, rotten floor edges, and a seller unwilling to expose damage. Buying a disassembled shell is often harder than buying the original damaged unit because missing trim, fasteners, and appliances become new sourcing problems.
Mold, Odor, and Indoor-Air Concerns
A musty odor indicates that moisture or microbial growth may remain, but odor alone cannot identify species, concentration, or the exact source. EPA guidance treats moisture control as the primary mold-control measure; painting over contaminated or wet porous material does not remove the underlying problem.
Wear gloves, eye protection, and a properly fitted respirator appropriate to the work, and keep children and medically vulnerable occupants away from demolition. Porous insulation, carpet, ceiling board, and upholstered materials may need removal rather than surface cleaning.
What Happens to Insurance, Title, and Resale?
A water-damaged camper can be difficult to insure, finance, or resell, especially after an insurance total loss, branded title, flood designation, or undocumented structural repair. Before purchase, call an insurer with the vehicle identification number and ask whether comprehensive, collision, physical-damage, and replacement-cost coverage are available.
Check the title and vehicle history through the relevant state motor-vehicle agency and a reputable history provider. A clean title does not guarantee a dry structure, while a salvage or rebuilt title can sharply reduce the pool of future buyers.
| Ownership issue | Dry camper | Repaired water-damaged camper | Salvage or branded camper |
|---|---|---|---|
| Typical insurance availability | 3-5 coverage quotes | 1-3 coverage quotes | 0-2 coverage quotes |
| Financing term access | 48-180 months | 0-120 months | Often cash-only |
| Resale discount | 0%-10% from asking | 15%-40% if documented | 30%-70% or more |
| Buyer inspection demand | 1 general inspection | Moisture and structural inspection | Moisture, title, and repair records |
| Documentation required | Maintenance records | Photos, invoices, moisture report | Rebuild receipts and state inspection |
These are planning ranges, not guaranteed market outcomes. State law, lender policy, model age, damage history, and insurer underwriting can change the result.
Who Should Buy a Water-Damaged Camper?
An experienced DIY rebuilder with a covered workspace, towing knowledge, electrical competence, and a low purchase price may buy a water-damaged camper. A first-time buyer, traveler who needs immediate use, or buyer without storage should select a dry camper instead.
First-Time Buyer
Do not buy a structurally wet camper as your first RV. You must learn systems, construction, sealants, towing, electrical safety, and moisture diagnosis simultaneously, and a mistake in any one area can create another repair cycle.
Budget Traveler
Choose a smaller dry trailer with cosmetic or mechanical defects. A $1,500 brake, tire, appliance, or upholstery project is easier to limit than an open-ended wall reconstruction.
Advanced DIYer
Consider the project only when damage is localized to one corner, one window, or a defined floor section; the camper uses accessible stick framing or a molded fiberglass shell; and the purchase price remains below roughly $500-$1,000 for an uncertain unit.
Professional Rebuilder
A professional may buy more complex damage because shop access, labor efficiency, parts pricing, and resale channels change the calculation. The project still needs a written scope, documented title status, and a margin that survives a 30%-50% cost overrun.
What Should You Buy Instead?
Most buyers should choose a dry used camper, even if the replacement has older appliances, worn upholstery, or a less desirable layout. A dry shell preserves optionality: mechanical parts can be replaced gradually, while hidden rot can force demolition before the camper is usable.
| Alternative | Typical purchase range | Typical first-year work | Best use case |
|---|---|---|---|
| Dry older travel trailer | $4,000-$12,000 | $500-$3,000 | First-time recreational use |
| Dry molded fiberglass trailer | $8,000-$25,000 | $500-$2,500 | Long-term shell durability |
| Mechanically deficient but dry camper | $3,000-$10,000 | $1,000-$5,000 | Buyer with repair skills |
| Water-damaged stick-frame project | $500-$4,000 | $4,000-$15,000 | Covered DIY restoration |
| Professional salvage rebuild | $1,000-$8,000 | $8,000-$25,000+ | Experienced commercial rebuilder |
A dry camper with a failed refrigerator or worn tires has a more predictable budget than a damp camper with apparently working appliances. Predictability is worth paying for.
Common Mistakes That Turn a Discount Into a Loss
Trusting a Seller’s Damage Estimate
Seller descriptions often cover the visible symptom rather than the full leak path. Require independent inspection, written estimates, and access to the wall, floor, and underbelly before final payment.
Painting Over Wet Materials
Primer, paneling, and new flooring can hide evidence while moisture continues to damage wood and support microbial growth. Remove damaged material, dry the assembly, repair the leak, and verify moisture before closing the wall.
Replacing RV Materials With Heavy Lumber
Residential lumber, tile, household cabinets, and thick flooring can consume payload capacity quickly. Weigh removed and replacement materials, then compare the finished axle loads with the certification label and manufacturer specifications.
Treating Sealant as Structural Repair
Sealant stops water at a joint; it does not restore rotted framing, delaminated adhesive, corroded fasteners, or a sagging roof. A reseal is the final step after structural and moisture problems are resolved.
Ignoring the Underbelly
The underbelly can conceal wet insulation, leaking tanks, damaged plumbing, and floor rot. Inspect from multiple openings, and do not rely on a clean interior floor to clear the space below it.
Paying Before an Escape Condition
Use a written agreement that makes the purchase conditional on moisture inspection, title verification, and a satisfactory professional estimate. If the seller rejects those conditions, retain your deposit and walk away according to local law.
The Bottom Line
Should I buy a camper with water damage? Usually no, unless you are buying a clearly bounded restoration project with verified construction, documented moisture control, realistic repair costs, and a price low enough to absorb hidden damage. For ordinary camping, a dry used camper is the safer financial choice.
The best exception is a stick-and-tin or molded fiberglass camper with localized damage, accessible framing, a sound chassis, available parts, and a purchase price far below the completed value. Do not buy based on a stain, a seller’s promise, or a large percentage discount. Buy only after the structure, moisture, title, insurance, and total project budget agree.
Frequently Asked Questions
Can a camper with water damage be made safe?
Yes, a camper with water damage can be made safe when the leak is stopped, decayed materials are removed, framing and floor connections are restored, wiring is inspected, and moisture is verified at dry reference levels. Safety cannot be established by odor removal, repainting, or replacing interior paneling alone.
How long does a camper water-damage rebuild take?
A localized DIY repair may take 20-80 hours over 2-6 weekends. A multi-wall or floor rebuild commonly takes 100-300 hours and several months of calendar time because demolition, drying, parts ordering, sealing, and system testing occur in sequence.
Should I buy a camper with mold if the price is low?
Usually no, particularly when mold affects insulation, ceiling board, carpet, cabinetry, or upholstery. A low price does not remove remediation, disposal, respiratory-protection, and leak-repair costs, and the buyer cannot reliably identify the full affected area without opening the assembly.
Does a moisture meter prove that an RV is dry?
No. A moisture meter is a screening instrument whose readings can be affected by foil, fasteners, salts, temperature, and material type. Use matched dry-area comparisons, repeated readings, visual inspection, and selective access or professional testing before concluding that a camper is dry.
Is delamination worse than a soft floor?
Extensive delamination is often more expensive and less predictable than a localized soft floor because the bonded wall panel may require specialist repair or replacement. A soft floor can still be more dangerous when it affects frame attachment, axle mounts, wheel wells, or the entry step.
Can I resell a repaired water-damaged camper?
You can resell a repaired water-damaged camper, but undocumented repairs, branded titles, persistent odor, delamination, and missing invoices reduce buyer confidence and market value. Keep demolition photographs, material receipts, moisture readings, professional reports, and post-repair photographs to support the condition claim.


