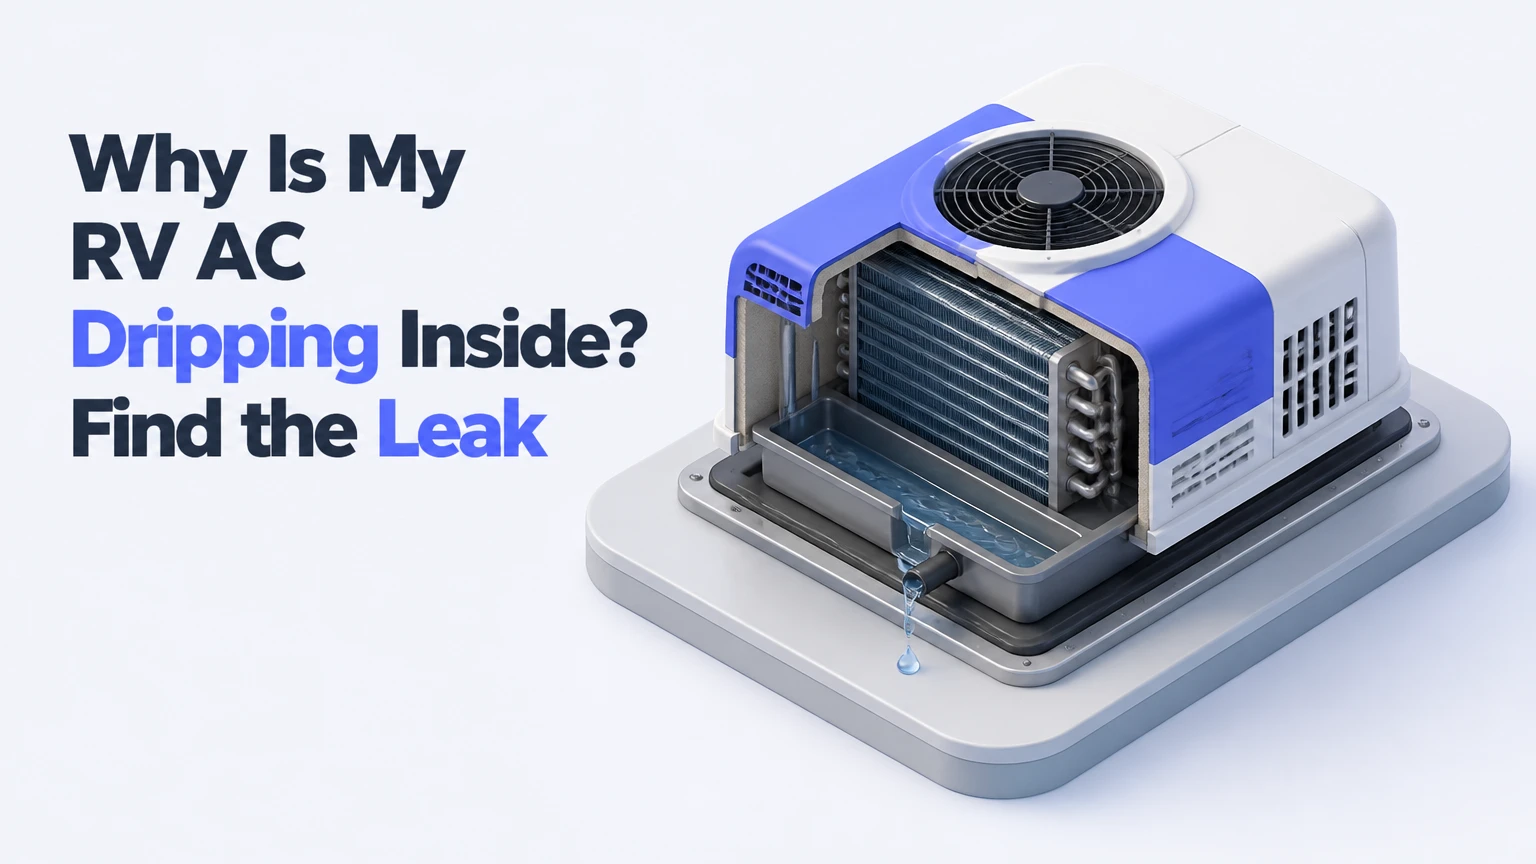
Your RV air conditioner is dripping inside because condensate formed on its cold evaporator coil is overflowing or entering the ceiling instead of draining outside. The usual causes are a blocked drain path, frozen coil, poor airflow, damaged drain pan, failed roof gasket, or rain entering around the rooftop unit.
Key Facts at a Glance
- An RV air conditioner normally removes moisture from cabin air and discharges condensate through its drain pan and exterior drainage path.
- A wet ceiling during cooling usually indicates a condensate-management problem, while dripping during rain with the air conditioner off usually indicates roof-seal intrusion.
- A dirty return-air filter can reduce airflow enough to freeze the evaporator coil, and the melting ice can overflow into the interior.
- Many rooftop RV air conditioners use a 14-by-14-inch roof opening and a compressible gasket, but gasket dimensions and drainage designs vary by model.
- Turn the air conditioner off and disconnect shore power before opening covers or touching wiring.
- Do not seal over the rooftop gasket with silicone or lap sealant; replace or correctly compress the gasket when the seal has failed.
Why Is My RV AC Dripping Inside?
RV air-conditioner leaks begin with ordinary condensation, but the water reaches the cabin when drainage or temperature control fails. Warm interior air contains water vapor; the evaporator coil cools that air below its dew point, producing droplets that should fall into a pan and leave through the rooftop unit’s drain openings.
The sequence is straightforward:
- A return fan draws cabin air through the ceiling grille and filter.
- The air passes over the evaporator coil, where refrigerant absorbs heat.
- Water vapor condenses on the cold coil surface.
- Condensate falls into a collection pan.
- The pan sends water through designed drain holes or channels toward the roof.
The water is not normally leaking from the refrigerant circuit. Refrigerant is a sealed fluid, while the visible liquid is usually ordinary condensate. A ceiling drip means the condensate volume, drainage route, coil temperature, or roof seal needs investigation.
What does the drip pattern reveal?
The timing of the leak is the fastest first test. A leak that begins after an hour of cooling points toward condensate, icing, or a blocked drain. A leak that appears only during rain, washing, or storage points toward the roof opening, shroud, pan, or nearby roof material.
| Leak pattern | Most likely area | First check | Typical urgency |
|---|---|---|---|
| Cooling, humid weather | Frozen coil or blocked drain | Filter and evaporator | Same day |
| Cooling, water pooling on roof | Drain pan or weep holes | Rooftop drainage | Same day |
| Rain with AC off | Roof gasket or roof seam | Interior wet trail | Immediate drying |
| Water from one ceiling corner | Pan, gasket, or sloped roof | Unit mounting area | 24 hours |
| Weak airflow plus ice | Filter, blower, duct, or coil | Return grille | Stop cooling |
| No cooling plus oily residue | Refrigerant or compressor fault | Professional inspection | Shut down unit |
Water can travel along the inside of the ceiling assembly before appearing at the grille. The visible drip location is therefore not always directly below the failed seal.
How Does an RV AC Normally Drain Water?
A rooftop RV air conditioner collects moisture in a pan beneath the evaporator section, then releases it through openings or channels designed by the manufacturer. Some models let condensate run onto the roof, while others use a hose or condensate pump arrangement, especially in unusual installations.
The exact path depends on the unit and installation. Dometic, Coleman-Mach, Advent Air, and other manufacturers use different pan and shroud layouts, so a generic hole location should never be assumed. The owner’s manual and model-specific service diagram take priority over a universal cleaning instruction.
A small amount of roof water during cooling is often normal. Water should not, however, pool against the interior air box, pour from the ceiling grille, or saturate insulation. A rooftop unit mounted slightly out of level may drain poorly, but there is no universal safe tilt specification. Follow the installation manual rather than applying a fixed two-degree rule.
Is roof water from the air conditioner normal?
Roof discharge during cooling is normal when the water follows the intended exterior route and the cabin remains dry. Roof water is abnormal when the pan overflows, water enters the return-air plenum, or the discharge continues in a location the manufacturer did not design.
Is the Evaporator Coil Frozen?
A frozen evaporator coil is likely when the RV air conditioner produces weak airflow, reduced cooling, frost behind the return grille, or a large amount of water after shutdown. Ice melts into more liquid than the pan can manage, so the overflow may appear as interior dripping.
Turn the cooling function off and select fan-only mode, if the manufacturer permits it, to thaw the coil. Allow at least 30-90 minutes for a substantial ice formation to melt, and place towels beneath the interior grille. Do not chip ice with a screwdriver or knife because aluminum fins and refrigerant tubing can be punctured.
| Freeze symptom | Likely cause | Safe response | Escalation point |
|---|---|---|---|
| Dirty filter, weak airflow | Restricted return air | Replace or wash filter | Ice returns |
| Clean filter, crushed duct | Supply restriction | Open duct path | Duct remains collapsed |
| Clean airflow, heavy frost | Low charge or sensor issue | Stop cooling | Technician diagnosis |
| Ice only in extreme humidity | High latent load or low fan speed | Use high fan setting | Freezing persists |
| Blower sounds abnormal | Fan motor or wheel fault | Shut down cooling | Motor service |
| Ice after low voltage | Poor motor performance | Check RV voltage | Electrical inspection |
A frozen coil is not proof that the system needs refrigerant. Restricted airflow is more common and safer to check first. Low refrigerant, a failing blower, a defective thermostat, and a displaced freeze sensor can produce similar symptoms.
How Do Airflow Problems Create Water?
Airflow problems make the evaporator coil colder because less warm cabin air passes across the coil to absorb heat. When the coil surface remains below freezing, condensate turns to ice; once cooling stops or the blockage is corrected, melting water can overwhelm the pan.
Inspect the return filter before removing rooftop components. A disposable filter should be replaced when visibly loaded with dust, while a washable filter must be fully dry before installation. Also check that furniture, storage bins, or insulation do not obstruct the return grille.
High fan speed generally improves coil airflow during heavy humidity, but the correct setting depends on the unit’s control system. “Auto” and “low” are not automatically defective settings. The useful diagnostic question is whether the evaporator is receiving adequate airflow and cycling normally.
A dirty condenser coil can also increase operating temperature and reduce cooling performance, although it is less directly responsible for an interior condensate overflow than a restricted evaporator-side airflow path. Clean both coils only with products approved for the equipment.
How Do You Clear the Drain Path?
Clear an RV AC drain path by de-energizing the unit, identifying the manufacturer’s pan outlets, removing loose debris, and flushing the route without damaging plastic components. Most basic clearing takes 30-60 minutes, but rooftop access and a hidden pan design can increase the time.
Step 1: Protect the interior
Switch off the air conditioner, turn off the relevant breaker, and unplug shore power when practical. Remove the interior filter and place an absorbent towel below the air box. Photograph wiring and connector positions before moving any component.
Step 2: Confirm the pan is wet
Use a flashlight to inspect the accessible pan area. Standing water without visible ice supports a drainage problem, but a dry pan with a wet ceiling suggests a gasket, roof seam, or water path outside the pan.
Step 3: Inspect the rooftop unit
Use a stable ladder and avoid walking on unsupported roof sections. Remove only the plastic shroud fasteners specified by the manual. Look for leaves, mud-dauber nests, pine needles, algae, and insect debris around the pan outlet or weep openings.
Step 4: Remove debris gently
Use a soft nylon trimmer line, plastic zip tie, small nylon brush, or low-pressure air where the manual allows it. A 30-35 PSI air pulse is a cautious practitioner starting point, not a universal manufacturer specification. Never force a metal wire into an unseen channel.
Step 5: Test drainage
Pour a small amount of clean water into the accessible drain pan area, avoiding electrical controls. Confirm that water exits on the roof or through the designated hose. If water disappears into the roof structure, stop and investigate rather than adding more.
You will know the clearing worked when water exits through the intended exterior route and the interior remains dry during a cooling cycle. A clear drain does not fix a cracked pan, loose mounting, frozen coil, or failed gasket.
Is the Roof Gasket Leaking?
A roof gasket is the leading suspect when water enters during rain while the air conditioner is off, especially after driving, washing, or a heavy storm. The gasket seals the rooftop unit to the RV roof opening; compression loss, aging foam, roof movement, or incorrect installation can create a rain path.
Many RV rooftop installations use a nominal 14-by-14-inch opening, but the opening size does not prove that every gasket, pan, or mounting arrangement is interchangeable. Measure the unit and confirm compatibility before ordering a replacement.
Inspect the interior mounting bolts for obvious looseness, but do not tighten them by feel until the gasket is crushed. Manufacturer instructions specify the compression method, torque, or visible mounting relationship for the particular model. Excessive tightening can distort the pan, flatten the foam, or damage the ceiling assembly.
| Repair action | Typical material cost | Typical time | Main risk |
|---|---|---|---|
| Evenly adjust mounting hardware | $0 | 20-40 minutes | Over-compression |
| Replace 14-inch gasket | $20-$60 | 2-4 hours | Lifting unit incorrectly |
| Repair adjacent roof membrane | $15-$100 | 1-3 hours | Sealing the wrong leak |
| Replace cracked condensate pan | $40-$120 | 2-5 hours | Model incompatibility |
| Reinstall rooftop unit professionally | $250-$700 labor and materials | 3-6 hours | Roof or wiring damage |
A roof gasket is not repaired by applying silicone around its perimeter. Exterior sealant may conceal the entry point, interfere with future removal, and trap water in the roof assembly. Use the specified gasket and roof sealant only where the installation manual calls for sealant.
Can a Freeze Sensor Cause the Leak?
A displaced or failed freeze sensor can cause an RV air conditioner to run long enough for the evaporator coil to ice over. The sensor is usually a thermistor or temperature probe attached to the evaporator fin area, but its position and retention method vary by model.
Do not relocate a sensor based on a generic “lower third” instruction unless the model manual specifies that location. A probe clipped to the wrong fin, hanging in the air stream, or touching an unsuitable surface can make the control board read the coil temperature incorrectly.
First correct airflow and allow all ice to melt. If the filter is clean, ducts are open, the blower operates normally, and freezing returns, a qualified technician should test the sensor, wiring, control board, refrigerant charge, and compressor operation. Sensor replacement is inexpensive on many models, but misdiagnosis can lead to unnecessary parts swapping.
Does the Leak Occur Only During Rain?
A leak that occurs only during rain is usually a roof-intrusion problem rather than an air-conditioning condensate problem. Water may enter around the gasket, mounting frame, shroud damage, a roof seam, or a nearby antenna, skylight, vent, or solar accessory.
Use a dry-paper test inside the ceiling opening while another person applies a controlled amount of water outside. Start with the AC gasket and roof perimeter, then test nearby penetrations separately. Flooding the entire roof at once makes the source harder to identify.
Rain intrusion can damage ceiling luan, insulation, wiring, and roof framing even when the drip appears small. Dry wet materials quickly, document the damage, and inspect for soft decking or staining that extends beyond the air-conditioner footprint.
What Will the Repair Cost?
Typical RV AC leak repairs cost $0-$120 for cleaning, filters, or a replacement sensor, $20-$60 for a gasket, and approximately $250-$700 for professional removal and reinstallation. A complete rooftop air-conditioner replacement commonly costs about $900-$2,500 installed, depending on capacity, labor, ducting, and campground access.
Prices vary substantially by region and whether a mobile RV technician charges travel time. Parts for a Dometic or Coleman-Mach unit may be inexpensive, while labor increases when the technician must remove sealant, lift a heavy rooftop assembly, repair water damage, or diagnose electrical faults.
| Diagnosis | DIY parts range | Mobile service range | Typical duration |
|---|---|---|---|
| Filter replacement | $10-$30 | $100-$200 | 15-30 minutes |
| Drain cleaning | $0-$20 | $150-$300 | 30-90 minutes |
| Freeze sensor | $15-$50 | $150-$350 | 30-90 minutes |
| Roof gasket | $20-$60 | $300-$700 | 2-5 hours |
| Drain pan | $40-$120 | $400-$900 | 3-6 hours |
| New rooftop unit | $700-$1,700 | $900-$2,500 installed | 3-8 hours |
These are typical North American ranges, not fixed quotes. Ask whether the estimate includes diagnostic time, travel, roof sealant, electrical testing, disposal, and ceiling or insulation repairs.
When Is Replacement More Sensible?
Replacement becomes more sensible when an RV air conditioner has a failed compressor, repeated refrigerant loss, severe pan corrosion, unavailable control parts, or repair costs approaching half the price of a compatible new unit. A clogged drain or worn gasket rarely justifies replacing the entire air conditioner.
Consider age, cooling capacity, power draw, ducted versus non-ducted design, thermostat compatibility, and generator limitations. A high-capacity replacement may cool faster but can exceed the available 120-volt circuit or generator output during startup.
An honest limitation matters here: replacing the rooftop unit will not fix a damaged roof opening, incorrect gasket compression, blocked ducts, or water damage in the ceiling. Confirm the failure mode before authorizing replacement.
How Can You Prevent Another Leak?
Prevent recurring RV AC leaks by maintaining airflow, inspecting the rooftop drainage route, checking the roof seal during seasonal service, and stopping operation when the evaporator freezes. A practical maintenance interval is filter inspection every 1-2 trips, rooftop inspection every 3-6 months during use, and coil cleaning at least annually in dusty environments.
Keep the RV reasonably level during operation, but use the manufacturer’s limits rather than assuming a precise angle guarantees drainage. Avoid operating with a blocked return grille, wet filter, collapsed duct, or visibly iced coil.
What maintenance schedule works for different RV use?
| RV use pattern | Filter check | Rooftop inspection | Coil and electrical check |
|---|---|---|---|
| Occasional weekend use | Every 1-2 trips | Before each season | Annually |
| Full-time occupancy | Weekly | Monthly | Every 6-12 months |
| Coastal or humid climate | Every trip | Every 1-2 months | Twice yearly |
| Dusty desert travel | Every trip | Monthly | Every 3-6 months |
| Winter storage | Before storage | Before storage | Before first cooling cycle |
Do not install an overly restrictive filter simply because it captures more dust. A filter that reduces airflow can increase icing risk. Match the replacement filter to the unit’s approved size and airflow requirements.
What Should You Do Immediately?
Stop cooling if water is reaching electrical components, the ceiling is sagging, the coil is visibly iced, or the breaker trips. Turn off the unit, protect the interior, photograph the leak, and identify whether the event followed cooling, rain, washing, or travel.
Use this six-check sequence:
- Note whether the AC was running.
- Inspect the return filter and airflow.
- Look for ice behind the return grille.
- Check the pan and drain route.
- Inspect the rooftop gasket and nearby penetrations.
- Test again only after the suspected cause is corrected.
Call an RV technician when the compressor, refrigerant circuit, control board, wiring, roof structure, or inaccessible pan is involved. Rooftop work also deserves professional help when the roof is wet, steep, fragile, or unsafe to access.
Frequently Asked Questions
Can I run my RV AC while water is dripping inside?
Do not continue cooling while water is entering the ceiling or electrical compartment. Shut the unit down, disconnect power when safe, and allow ice to melt or standing water to drain. Continued operation can spread moisture into insulation and create a shock, short-circuit, mold, or ceiling-material hazard.
Why does my RV AC leak after I turn it off?
An RV air conditioner may leak after shutdown because accumulated ice is melting or water remains in an overloaded drain pan. If the leak occurs after every cooling cycle, inspect airflow, coil icing, and drainage. If it happens only after rain, investigate the gasket and roof penetrations instead.
Can low refrigerant make an RV AC drip water?
Low refrigerant can make an RV air conditioner freeze because the evaporator temperature may fall abnormally, but low charge is not the first diagnosis for an interior drip. Check the filter, airflow, ice, drain path, and freeze sensor before requesting refrigerant service. Refrigerant work requires qualified equipment and leak testing.
Why does the RV AC drip only on one side?
One-sided dripping can result from a blocked outlet, sloped or displaced drain pan, uneven gasket compression, or water traveling inside the ceiling before appearing. Check the pan and roof opening rather than assuming the visible side identifies the failed component. Nearby roof penetrations can also mimic a one-sided AC leak.
Is an RV AC supposed to drain onto the roof?
Many rooftop RV air conditioners are designed to discharge condensate onto the roof, where it runs toward an edge or gutter. Other installations use a hose or pump. The correct answer depends on the unit and installation manual, but water should never discharge into the ceiling air box or roof cavity.
The Bottom Line
The answer to “why is my rv ac dripping inside” is usually a condensate drainage failure, frozen evaporator coil, or failed roof gasket. Determine whether the leak follows cooling or rain, inspect airflow and ice first, then clear the drain path and evaluate gasket compression without over-tightening. Stop operating the unit when water reaches wiring or the ceiling structure.


